この記事は Angular #2 Advent Calendar 2019 の18日目の記事です。
ダイアログボックスやモーダルウィンドウ・ツールチップ・トーストなど、Overlayを使って表現できるUIは様々ありますが、これらのUIは出たり消えたりするときにアニメーションさせたくなります。しかし、現状Overlayをそのまま使うと終了時のアニメーションが実行されません!この記事ではAnimation Callback を使って終了時のアニメーションを表現する方法を紹介します。
この記事でできるもの
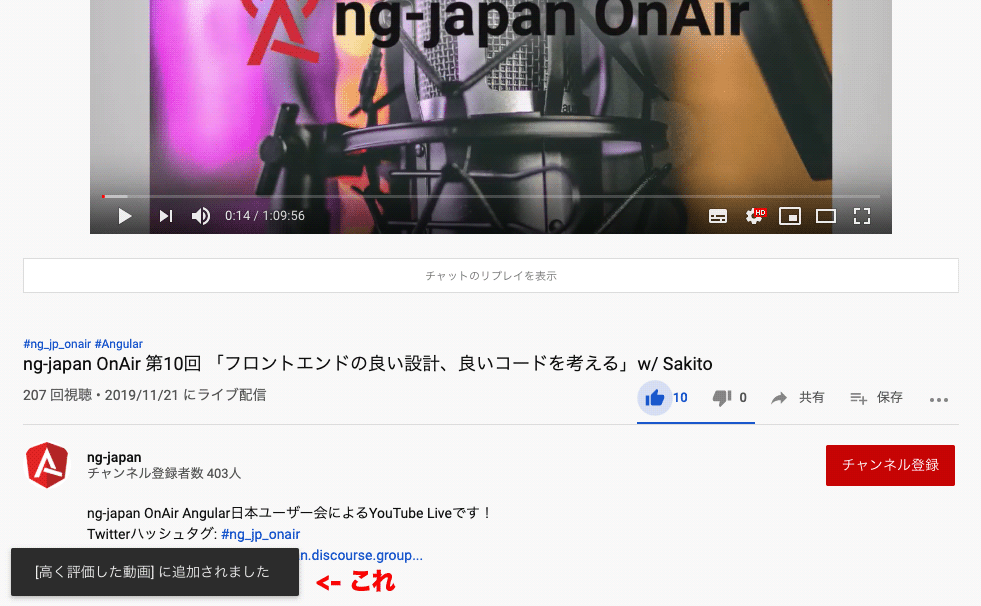
今回はYoutube の高評価を押したときのトーストを作ってみたいと思います。
(トーストとは関係ないですが、Angular日本ユーザー会にはYoutubeチャンネルがあり、ためになる動画が沢山あります!)

実際の成果物はこちらです
サクッとアニメーションなしのトーストを作る
ng new したらCDK をinstallしてmodule追加
$ npm i @angular/cdk
 ...
+ import { PortalModule } from '@angular/cdk/portal';
+ import { OverlayModule } from '@angular/cdk/overlay';

@NgModule ({
 ...
+ imports: [BrowserModule, PortalModule, OverlayModule],
 ...
})
overlay用のcssをimport
+ @import '~@angular/cdk/overlay-prebuilt.css';
overlayで表示するコンポーネントを作成してentryComponentsに追加
$ ng g c toast
@NgModule ({
 ...
+ entryComponents: [ToastComponent],
 ...
})
- <p>toast works!</p>
+ <div class="message">[高く評価した動画] に追加されました</div>
+ :host {
+   background-color: #323232;
+   height: 48px;
+   width: 280px;
+   border-radius: 2px;
+   display: flex;
+   justify-content: center;
+   align-items: center;
+ }
+ .message {
+   color: #f1f1f1;
+   font-weight: 300;
+   font-size: 14px;
+ }
toast用のservice を作成
+ import { Injectable, ComponentRef } from '@angular/core';
+ import { OverlayRef, Overlay, OverlayConfig } from '@angular/cdk/overlay';
+ import { ToastComponent } from './toast.component';
+ import { ComponentPortal } from '@angular/cdk/portal';
+
+ @Injectable({
+   providedIn: 'root',
+ })
+ export class ToastService {
+   overlayRef: OverlayRef;
+   containerRef: ComponentRef<ToastComponent>;
+   containerInstance: ToastComponent;
+
+   constructor(private overlay: Overlay) {
+     const positionStrategy = this.overlay
+       .position()
+       .global()
+       .bottom('24px')
+       .left('24px');
+
+     this.overlayRef = this.overlay.create(
+       new OverlayConfig({ positionStrategy }),
+     );
+   }
+
+   open() {
+     if (this.overlayRef.hasAttached()) {
+       return;
+     }
+
+     const toastPortal = new ComponentPortal(ToastComponent);
+     this.containerRef = this.overlayRef.attach(toastPortal);
+     setTimeout(() => {
+       this.overlayRef.detach();
+     }, 4000);
+   }
+ }
ボタンを設置して、押したらトーストがでるようにする
+ <button (click)="toastOpen()">高評価</button>
import { Component } from '@angular/core';
+ import { ToastService } from './toast/toast.service';

@Component({
  selector: 'app-root',
  templateUrl: './app.component.html',
  styleUrls: ['./app.component.scss'],
})
export class AppComponent {
+  constructor(private toastService: ToastService) {}
+  toastOpen() {
+    this.toastService.open();
+  }
}
アニメーションを実装する
サクッと実装できたところで通常通りアニメーションを追加しましょう
まずAnimation 用のModule をimport します
 ...
+ import { BrowserAnimationsModule } from '@angular/platform-browser/animations';
 ...

@NgModule({
 ...
imports: [
 ...
+ BrowserAnimationsModule,
 ...
],
 ...
Animationのstateを指定するためにtemplateを変更し、アニメーションを実装します。ちなみにスタイルとか秒数とかは勘です。
+ <div class="toast-container" [@isVisible]="'visible'">
  <div class="message">[高く評価した動画] に追加されました</div>
+ </div>
- :host {
+ .toast-container {
 ...
 ...
+ import {
+   animate,
+   state,
+   style,
+   transition,
+   trigger,
+ } from '@angular/animations';

@Component({
  selector: 'app-toast',
  templateUrl: './toast.component.html',
  styleUrls: ['./toast.component.scss'],
+   animations: [
+     trigger('isVisible', [
+       state('visible', style({ transform: 'translateY(0)' })),
+       transition(':enter', [
+         style({ transform: 'translateY(72px)' }),
+         animate(100),
+       ]),
+       transition(':leave', [
+         animate(100, style({ transform: 'translateY(72px)' })),
+       ]),
+     ]),
+   ],
})
 ...
このままトーストを表示させると、表示されるとき(attachされるとき)はアニメーションするのに、4秒後非表示になるとき(detachされるとき)は、パッと消えてしまってアニメーションしません!
detach 時のアニメーションを動かす
普通にleave アニメーションを書いただけでは、detach したときにアニメーションが動かないことがわかりました。(原因を探ってみたのですが、間に合わず…分かったら記事書きたいと思います)
でも、detach 時だってアニメーションしたい! ということでアニメーションコールバックを使い、下記の手順でアニメーションを実現します。
- アニメーションのstate に、
:leaveで書いたstyle と同じstyle のhiddenを追加する - service 側でdetachしていたところで、アニメーションのstate を
visibleからhiddenに変える - アニメーション終了時のコールバックでイベントを投げる
- service 側でイベントを受け取り、detach する
アニメーションのstate を追加
:leave で書いたstyle と同じstyle のhiddenを追加します。visible => hidden のtransition も追加しましょう。
 ...
  trigger('isVisible', [
    state('visible', style({ transform: 'translateY(0)' })),
+   state('hidden', style({ transform: 'translateY(72px)' })),
    transition(':enter', [
      style({ transform: 'translateY(72px)' }),
      animate(100),
    ]),
-   transition(':leave', [
-     animate(100, style({ transform: 'translateY(72px)' })),
-   ]),
+   transition('visible => hidden', [animate(100)]),
  ]),
 ...
service 側でアニメーションのstate を visible からhidden に変える
まずアニメーションのstate を管理する変数を用意します。
 ...
export classToastComponent {
  isVisible = true;
 ...
}
- <div class="toast-container" [@isVisible]="'visible'">
+ <div class="toast-container" [@isVisible]="isVisible ? 'visible' : 'hidden'">
    <div class="message">[高く評価した動画] に追加されました</div>
  </div>
次にservice 側でdetachしていたところを変更し、isVisible をfalse に変えることでアニメーションのstate を visible からhidden に変えます。
 ...
+ this.containerInstance = this.containerRef.instance;

setTimeout(() => {
-   this.overlayRef.detach();
+   this.containerInstance.isVisible = false;
}, 4000);
 ...
アニメーション終了時のコールバックでイベントを投げる
ここまで書くと、さっきまでパッと消えていたトーストが画面したに引っ込むようになりました! あとは detachするだけです!
Angualr のアニメーションは、開始時と終了時にアニメーションコールバックでAnimationEvent型のイベントを取ることができます。serviceで受け取れるようにevent をemit しましょう。
 <div
   class="toast-container"
   [@isVisible]="isVisible ? 'visible' : 'hidden'"
+  (@isVisible.done)="onAnimationDone($event)"
 >
    <div class="message">[高く評価した動画] に追加されました</div>
  </div>
 // 加えて上の方でEventEmitterとAnimationEventをimportしています
 ...
export classToastComponent {
  isVisible = true;
+ animationStateChanged = new EventEmitter<AnimationEvent>();
 ...
+ onAnimationDone(event: AnimationEvent) {
+   this.animationStateChanged.emit(event);
+ }

}
service 側でイベントを受け取りdetach する
component側の animationStateChanged event を subscribeします。
しかし、このanimationStateChanged event はトーストが出現するとき(:enter のとき)も発火されるので、state がhiddenへと変わるときでfilter します。
 ...
+ import { filter, take } from "rxjs/operators";
 ...
this.containerInstance = this.containerRef.instance;
+ this.containerInstance.animationStateChanged
+   .pipe(
+     filter((event) => event.toState === 'hidden'),
+     take(1),
+   )
+   .subscribe(() => {
+     this.overlayRef.detach();
+   });

setTimeout(() => {
 ...
これで正常にdetach され、ついにトーストが完成しました!
終わりに
簡単な作りではありますがoverlay を使って、detach時もアニメーションするトーストがつくれました!
Angular CDKまわりは国内外含めてこういったノウハウ的な記事をあまり見かけないのでoverlay を使う際、この記事がお役に立てば幸いです。
明日は @yoheimiyamoto さんです!
