こんにちは!Meteorで何か開発していますか?ついにMeteorもv0.9.0を超えましたね!
Meteorでルーティングしたいですか?したいですよね?僕はルーティングしたいです。
Meteorのルーティングはiron-routerというパッケージを使うのがデファクトスタンダードとなっています。
それでは早速実装してみましょう。
パッケージを追加して開発の準備をする
使うパッケージ
Meteorのパッケージはここで検索できます。
atmospherejs
- iron:router ... ルーターです。
- mizzao:bootstrap-3 ... Bootstrap3です。
今回はUIフレームワークとしてBootstrap3も一緒に使います。
Meteorプロジェクトをつくる
Meteorのバージョンはv0.9.0.1です。
% meteor --version
Meteor 0.9.0.1
Meteorプロジェクトを生成します。
% meteor create router-demo
% cd router-demo
こんな感じになってればおkです!
.meteor
router-demo.css
router-demo.html
router-demo.js
パッケージを追加する
iron-routerパッケージを追加しましょう。
% meteor add iron:router
Refreshing package metadata. This may take a moment.
  added iron:dynamic-template at version 0.3.0
  added iron:router at version 0.9.1
  added iron:layout at version 0.3.0
  added iron:core at version 0.3.2

iron:router: Routing specifically designed for Meteor
追加されました!Bootstrap3パッケージを追加しましょう。
% meteor add mizzao:bootstrap-3
Refreshing package metadata. This may take a moment.
  added mizzao:bootstrap-3 at version 3.2.0

mizzao:bootstrap-3: HTML, CSS, and JS framework for developing responsive, mobile first projects on the web.
追加されましたね!これでパッケージの追加は完了です。
動作確認してみる
ここで動作確認をしてみましょう。
meteor or meteor run でMeteorプロジェクトを実行できます。僕はmeteorコマンド派です。
% meteor
[[[[[ ~/github/meteor-demo/router-demo ]]]]]

=> Started proxy.
=> Started MongoDB.
=> Started your app.

=> App running at: http://localhost:3000/
ブラウザでみてみよう
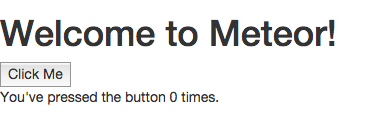
でました!やりましたね!
Routerの設定をする
それではRouterの設定をしましょう。
とりあえずシンプルにこんな感じにしてみます。
http://localhost:3000/http://localhost:3000/about
トップページとAboutページをつくってみます。何もない場合はnot foundを表示してみましょう。
router-demo.html
<head>
  <title>router-demo</title>
</head>

<template name="layout">
  <div class="container">
    {{> yield}}
  </div>
</template>

<template name="notFound">
  <h1>not found</h1>
</template>

<template name="home">
  <h1>Welcome!!</h1>
</template>

<template name="about">
  <h1>About me</h1>
</template>
router-demo.js
if (Meteor.isClient) {

    Router.configure({
        // templateの名前を設定します
        layoutTemplate: 'layout',
        notFoundTemplate: 'notFound'
    });

    // Controllerになります
    var HomeController = RouteController.extend({
        template: 'home'
    });

    var AboutController = RouteController.extend({
        template: 'about'
    });

    Router.map(function() {

        this.route('home', { // templateの名前になります
            path: '/', // URLパスになります
            controller: HomeController // Controllerを渡します
        });

        this.route('about', {
            path: '/about',
            controller: AboutController
        });

    });

}
こんな感じです。
アクセスしてみる
それでは正しくルーティングできるか確認してみましょう。
http://localhost:3000/

http://localhost:3000/about
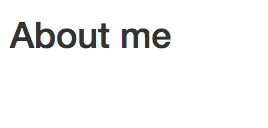
http://localhost:3000/hoge

こんな感じで表示されればおkです!
動的ページ(パラメータID)のルーティング設定
Webサービスやアプリをつくる場合は静的なページよりも動的に書き出すことが多いはずです。
パラメータIDによるルーティング設定はこんな感じになります。
router-demo.html
<head>
  <title>router-demo</title>
</head>

<template name="layout">
  <div class="container">
    {{> yield}}
  </div>
</template>

<template name="notFound">
  <h1>not found</h1>
</template>

<template name="home">
  <h1>Welcome!!</h1>
</template>

<template name="about">
  <h1>About me</h1>
</template>

<template name="show">
  <h1>{{.}}</h1>
</template>
router-demo.js
if (Meteor.isClient) {

    Router.configure({
        layoutTemplate: 'layout',
        notFoundTemplate: 'notFound'
    });

    var HomeController = RouteController.extend({
        template: 'home'
    });

    var AboutController = RouteController.extend({
        template: 'about'
    });

    var ShowController = RouteController.extend({

        template: 'show',

        data: function() {
            return this.params._id;
        }

    });

    Router.map(function() {

        this.route('home', {
            path: '/',
            controller: HomeController
        });

        this.route('about', {
            path: '/about',
            controller: AboutController
        });

        this.route('show', {
            path: '/show/:_id',
            controller: ShowController,
        });

    });

}
動的ルーティングの場合は/show/:_idみたいな感じに書きます。で、routeがparamsをもっていて、paramsの中に_idが格納されています。
dataに値を渡すとテンプレート側で{{.}}みたいな感じでデータバインディングされます。
実際はCollectionに_idを渡してデータをとってきたりするのに使います。
例えばこんな感じです。
var UsersController = RouteController.extend({

    template: 'user',

    data: function() {
        return UsersCollections.findOne(this.params._id);
    }

});
確認してみる
http://localhost:3000/show/q12w3e4r5t6y
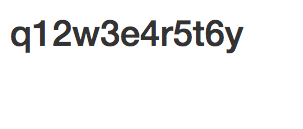
表示されたら完成です!
{{pathFor}} ヘルパーを使ってナビゲーションをつくる
せっかくここまでつくったのでナビゲーションほしいですよね!つくりましょう。
テンプレート側でナビゲーションを設置してリンクをはる場合は、{{pathFor}}ヘルパーを使います。
ナビゲーションはBootstrap3のコンポーネントを使います。
router-demo.html
<head>
  <title>router-demo</title>
</head>

<template name="layout">
  {{> navigation}}
  <div class="container">
    {{> yield}}
  </div>
</template>

<template name="navigation">
  <nav class="navbar navbar-default navbar-static-top" role="navigation">
    <div class="container">
      <ul class="nav navbar-nav">
        <li><a href="{{pathFor 'home'}}">Home</a></li>
        <li><a href="{{pathFor 'about'}}">About</a></li>
      </ul>
    </div>
  </nav>
</template>

<template name="notFound">
  <h1>not found</h1>
</template>

<template name="home">
  <h1>Welcome!!</h1>
</template>

<template name="about">
  <h1>About me</h1>
</template>

<template name="show">
  <h1>{{.}}</h1>
</template>
確認してみる
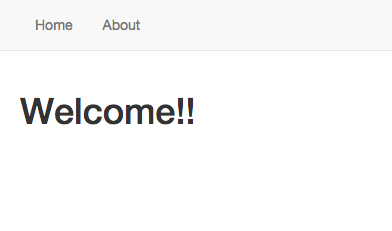
ナビゲーションがでました!ナビゲーションをクリックしてリンクがとべるかも確認しましょう。とべましたか?無事とべたら完成です!
まとめ
こんな感じでiron-routerを使うとMeteorで簡単にルーティングできます。
詳しいドキュメントはこちらをみてください。