はじめに
はじめまして!
都内で Android エンジニアとして働いています☺️
業務で動画プレイヤーを実装する機会があり、その際に Java + ExoPlayer で HLS形式の動画を表示するために実装したのですが、Kotlin では実装したことがなかったので調べたことを残すためにこの記事を書きました!
ExoPlayerとは
Androidの標準APIである、 MediaPlayer では対応していないアダプティブストリーミングなどに対応したオープンソースのライブラリです。
対応している形式は現時点(2019/09/17時点では)以下となります。
- HLS
- DASH
- SmoothStreaming
実装
実装の手順に関しては、こちらの ExoPlayer の Hello world! を参考に進めていきます!
依存関係を追加
まずは公式の手順に沿って、 Gradle に依存関係を追加していきます。
今回はHLSに対応するため、HLS用の依存関係も追加しています。
    // ExoPlayerの必須ライブラリ
    implementation 'com.google.android.exoplayer:exoplayer-core:2.10.4'
    // ExoPlayer HLS対応
    implementation 'com.google.android.exoplayer:exoplayer-hls:2.10.4'
    // ExoPlayer UIを使用する場合
    implementation 'com.google.android.exoplayer:exoplayer-ui:2.10.4'
Java8 も有効にします。
    compileOptions {
        targetCompatibility JavaVersion.VERSION_1_8
    }
パーミッションを追加
<uses-permission android:name="android.permission.INTERNET"/>
動画を表示するためのviewを作成
<androidx.constraintlayout.widget.ConstraintLayout
    xmlns:android="http://schemas.android.com/apk/res/android"
    xmlns:app="http://schemas.android.com/apk/res-auto"
    android:layout_width="match_parent"
    android:layout_height="match_parent">

    <com.google.android.exoplayer2.ui.PlayerView
        android:id="@+id/playerView"
        android:layout_width="match_parent"
        android:layout_height="match_parent"/>

</androidx.constraintlayout.widget.ConstraintLayout>
今回は ExoPlayer の UIパッケージに存在する動画プレイヤー用の View を使用しています。
そして何も指定していいないのですが、 PlayerView には app:resize_mode という属性値があり、動画を縦・横・画面いっぱいなど、どこの大きさに合わせて表示するかなどを指定できるようになっています。
デフォルト値は fit になっており、他の指定できる設定としては以下となります。
- fit
- fixed_width
- fixed_height
- fill
- zoom
どのように動作するかについては公式リファレンスの AspectRatioFrameLayout.ResizeMode のところに記載されています。
Layout XML に配置した PlayerView と ExoPlayer のインスタンスと紐付けを行う
    private lateinit var simpleExoPlayer: SimpleExoPlayer
    private lateinit var playerView: PlayerView

    override fun onCreate(savedInstanceState: Bundle?) {
        super.onCreate(savedInstanceState)
        setContentView(R.layout.activity_main)

        // (1)
        simpleExoPlayer = ExoPlayerFactory.newSimpleInstance(this)
        simpleExoPlayer.apply {
            // builMediaSource() はのち説明しますが、
            // 形式に合わせた動画のデータを作っています。
            prepare(buildMediaSource())
        }

        playerView = findViewById(R.id.playerView)
        playerView.apply {
            // (2)
            player = simpleExoPlayer
        }
    }
(1) では ExoPlayer の Factory メソッドを使用して ExoPlayer のインスタンスを作成します。
このインスタンス生成時にバッファリングの際のコントロールなどの設定を渡してカスタマイズをすることができます。
ただ、今回はシンプルに画面にHLS形式の動画を表示することが目標なので Context を渡すのみの実装となります。
(2) 先ほど XML に配置した PlayerView と(1)で生成した ExoPlayer をの紐付けを行なっています
DataSource と MediaSource を生成する
実際に動画を表示していくために表示する元となる動画のデータを作成していきます。
    private fun createDataSource(): DefaultDataSourceFactory {
        // (3)
        return DefaultDataSourceFactory(
            this,
            getUserAgent(this, "作成したプロジェクト名")
        )
    }

    // 今回表示するサンプル動画
    val appleSample =
            "http://devimages.apple.com/iphone/samples/bipbop/bipbopall.m3u8"

    private fun buildMediaSource(): HlsMediaSource {
        // (4)
        return HlsMediaSource
                .Factory(createDataSource())
                .createMediaSource(Uri.parse(appleSample))
    }
(3) ExoPlayer が動画などのメディアデータをやりとりするための DataSource を作成しています。
(4) ロードするメディアデータがどの形式なのかを ExoPlayer に伝えるために MediaSource インスタンスを作成しています。
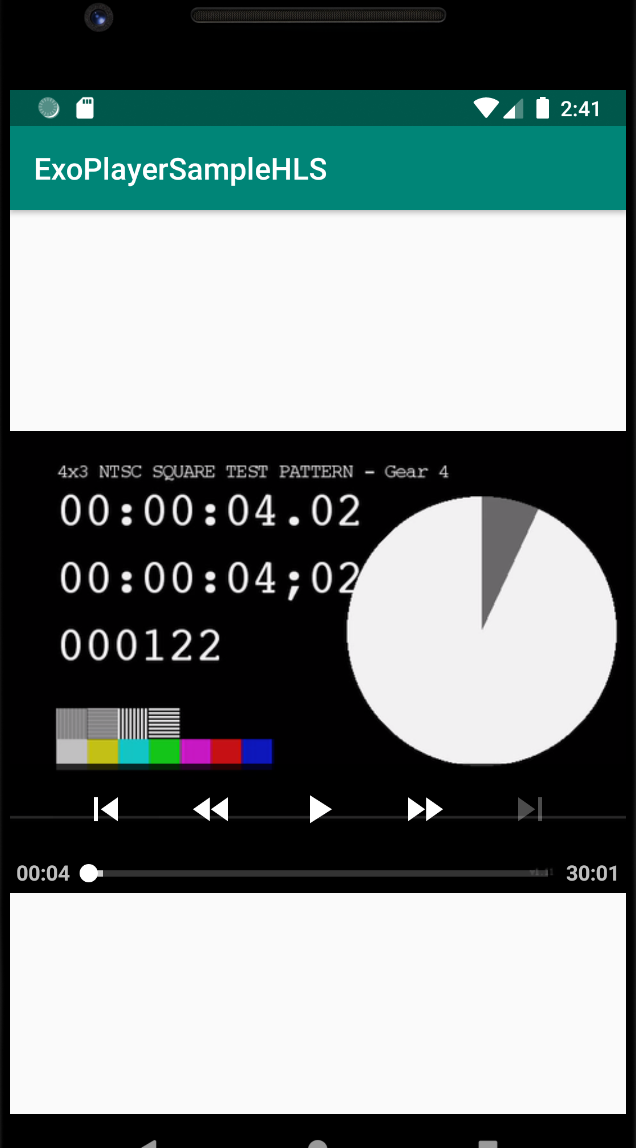
上記の手順を踏むと、とりあえず以下のようにアプリの画面に動画が表示されるようになります。👏👏

コード全体
import android.net.Uri
import android.os.Bundle
import androidx.appcompat.app.AppCompatActivity
import com.google.android.exoplayer2.ExoPlayerFactory
import com.google.android.exoplayer2.SimpleExoPlayer
import com.google.android.exoplayer2.source.hls.HlsMediaSource
import com.google.android.exoplayer2.ui.PlayerView
import com.google.android.exoplayer2.upstream.DefaultDataSourceFactory
import com.google.android.exoplayer2.util.Util.getUserAgent

class MainActivity : AppCompatActivity() {
    private val appleSample = "http://devimages.apple.com/iphone/samples/bipbop/bipbopall.m3u8"

    private lateinit var playerView: PlayerView

    private lateinit var simpleExoPlayer: SimpleExoPlayer

    override fun onCreate(savedInstanceState: Bundle?) {
        super.onCreate(savedInstanceState)
        setContentView(R.layout.activity_main)

        simpleExoPlayer = ExoPlayerFactory.newSimpleInstance(this)
        simpleExoPlayer.apply {
            prepare(buildMediaSource())
        }

        playerView = findViewById(R.id.playerView)
        playerView.apply {
            player = simpleExoPlayer
        }
    }

    private fun createDataSource(): DefaultDataSourceFactory {
        return DefaultDataSourceFactory(
            this,
            getUserAgent(this, "作成したプロジェクト名")
        )
    }

    private fun buildMediaSource(): HlsMediaSource {
        return HlsMediaSource
            .Factory(createDataSource())
            .createMediaSource(Uri.parse(appleSample))
    }
}
最後に
最初はとっつきにくく色々と苦戦した ExoPlayer でしたが、表示するだけであれば簡単に実装できるものだなぁと思いました。(ここからデザインや要件に合わせて色々とカスタマイズを行うと結構大変ですが。。。)
次は PlayerView や 今回は使用しなかった PlayerControlView などを使用してカスタマイズをどのように行なっていくかを書いていこうと思います。
見ていただきありがとうございます🙇♂️🙇♂️