通知機能を実装したので解説します。【いいね、コメント、グループ参加、グループチャット】
こんにちは!
Rails初学者の私ですが、先日通知機能を実装しましたので
その実装方法を記事にしてみました。
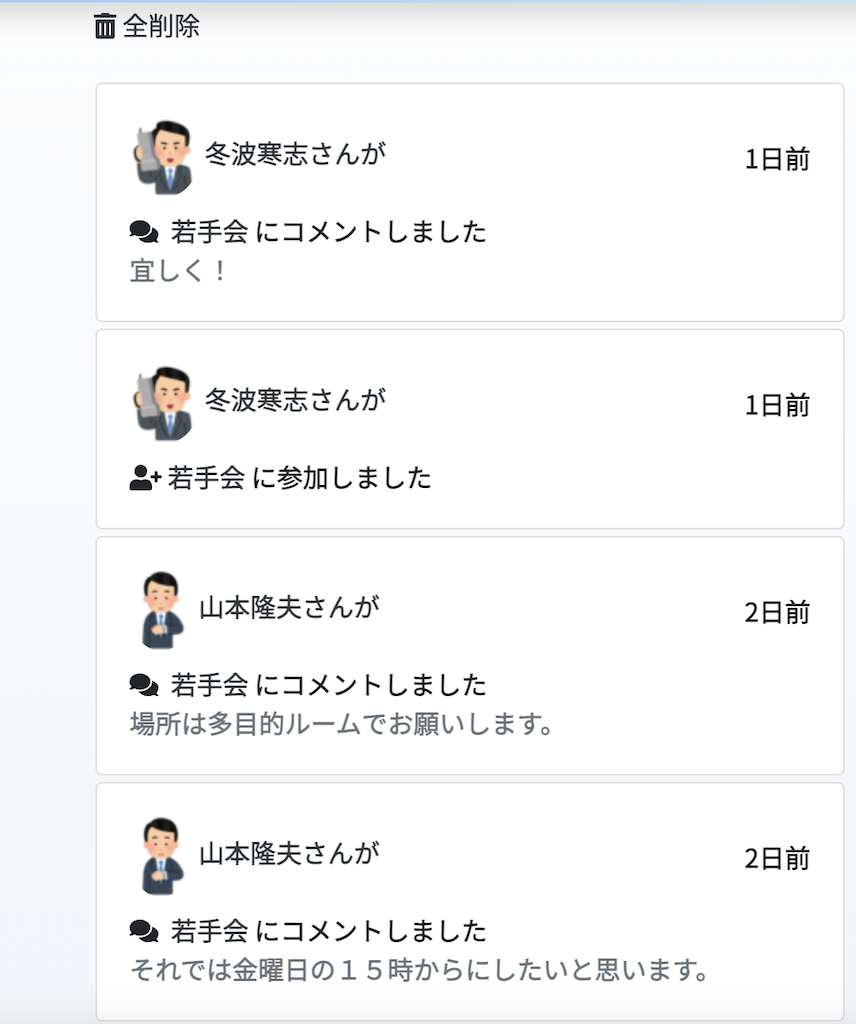
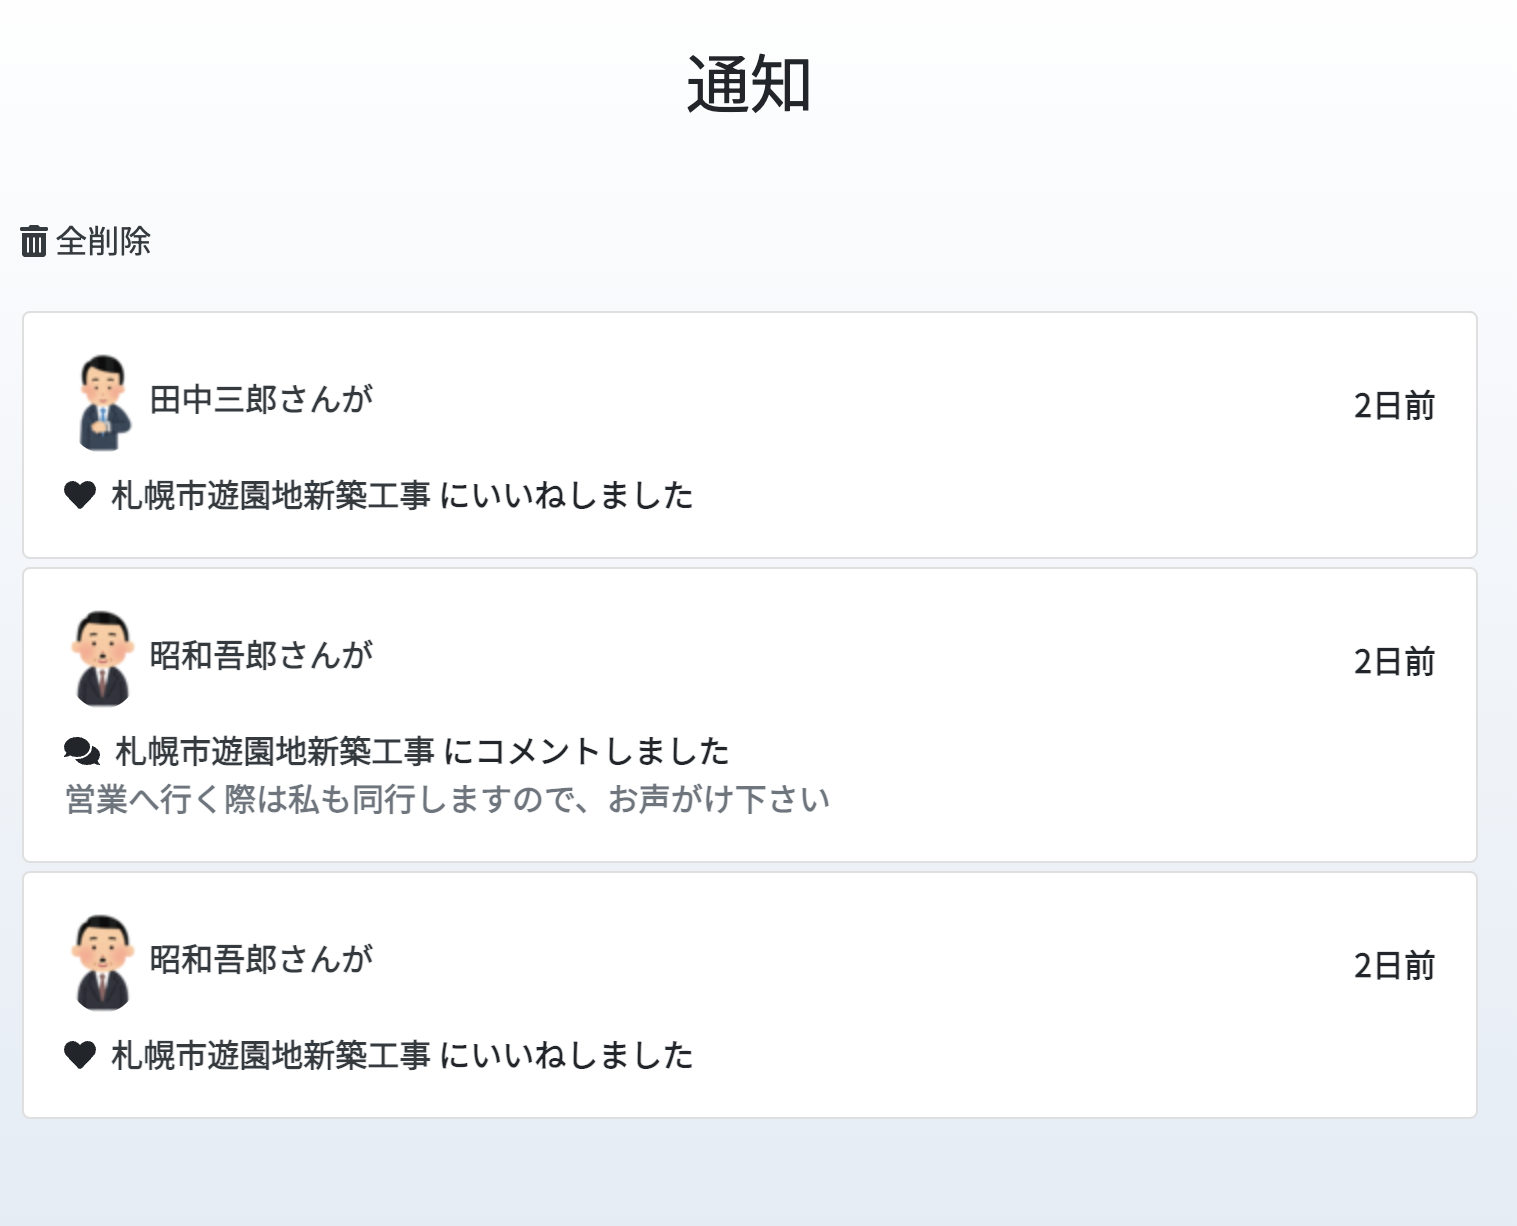
完成系のイメージ
前提
- 投稿機能実装済み(この記事ではProjectモデル)
- コメント機能を実装済み(この記事では ProjectCommentモデル)
- いいね機能を実装済み(この記事ではFavoriteモデル)
- グループ機能を実装済み(この記事ではGroupモデル)※中間テーブルここではGroupUserモデル実装済み
- グループチャット機能を実装済み(この記事ではChatモデル)
通知モデルの概要
テーブルの情報は以下のようになります。
| visitor_id | visited_id | project_id | project_comment_id | group_id | chat_id | action | checked |
|---|---|---|---|---|---|---|---|
| 1 | 2 | 1 | nil | nil | nil | favorite | false |
| 1 | 2 | 1 | 1 | nil | nil | comment | false |
| 1 | 2 | nil | nil | 1 | nil | join | false |
| 1 | 2 | nil | nil | 1 | 1 | chat | false |
- visitor_id : 通知を送ったユーザーのid
- visited_id : 通知を送られたユーザーのid
- project_id : いいねされた投稿のid
- project_comment_id : 投稿へのコメントのid
- group_id : グループ参加orチャットがあったグループのid
- chat_id : グループへのチャットid
必要な情報以外は、nilを格納するようにしています。
たとえば、いいねの場合は「コメント」「グループ」「チャット」は関係ないので、nilを格納します。
通知モデルの作成
まずは通知モデルを作成します。
$ rails g model Notification
マイグレーションファイルを下記に編集します。
class CreateNotifications < ActiveRecord::Migration[6.1]
  def change
    create_table :notifications do |t|
      t.integer :visitor_id, null: false
      t.integer :visited_id, null: false
      t.integer :project_id
      t.integer :project_comment_id
      t.integer :group_id
      t.integer :chat_id
      t.string :action, null: false
      t.boolean :checked, default: false, null: false

      t.timestamps
    end

    add_index :notifications, :visitor_id
    add_index :notifications, :visited_id
    add_index :notifications, :project_id
    add_index :notifications, :project_comment_id
    add_index :notifications, :group_id
    add_index :notifications, :chat_id
  end
end
idのところには、検索パフォーマンスを考えてインデックスを張っています。
また、必ず値が設定される列には、nilを設定できないよう制約を追加します。
通知を確認したかどうかの初期値は、false(通知未確認)にしておきましょう。
マイグレーションをして、DBにテーブルを作成します。
$ rails db:migrate
これで通知テーブルの完成です。
モデルの関連付け
作成した通知モデルを、User、Project、ProjectComment、Group、Chatと紐付けていきます。
①Userモデル
has_many :active_notifications, class_name: 'Notification', foreign_key: 'visitor_id', dependent: :destroy
has_many :passive_notifications, class_name: 'Notification', foreign_key: 'visited_id', dependent: :destroy
- active_notifications:自分からの通知
- passive_notifications:相手からの通知
紐付ける名前とクラス名が異なるため、明示的にクラス名とIDを指定して紐付けます。
また、ユーザーを削除したとき、同時に通知も削除したいので、 dependent: :destroyを追加します。
②Projectモデル
has_many :notifications, dependent: :destroy
今度は、紐付ける名前とクラス名が一致しているため、明示的に指定する必要はありません。
③ProjectCommentモデル
has_many :notifications, dependent: :destroy
Projectと同じで問題ありません。
④Groupモデル
has_many :notifications, dependent: :destroy
⑤Chatモデル
has_many :notifications, dependent: :destroy
最後は通知モデルになります。
⑤Notificationモデル
default_scope -> { order(created_at: :desc) }
belongs_to :project, optional: true
belongs_to :project_comment, optional: true
belongs_to :group, optional: true
belongs_to :chat, optional: true
belongs_to :visitor, class_name: 'User', foreign_key: 'visitor_id', optional: true
belongs_to :visited, class_name: 'User', foreign_key: 'visited_id', optional: true
default_scopeでは、デフォルトの並び順を「作成日時の降順」で指定しています。
つまり、常に新しい通知からデータを取得することができるということです。
たとえば、Notification.firstを実行すると、一番古い通知ではなく、一番新しい通知が取得できます。
optional: trueは、nilを許可するものです。
belongs_toで紐付ける場合はnilが許可されないのですが、今回はnilを設定したいので、付けています。
なぜnilを設定するのか忘れてしまった人は、記事上部の「通知モデル概要」を確認してください。
通知作成メソッドを作る
いいね通知の作成メソッド
「いいね」が押されたタイミングで、以下のようなデータを作成します。
| visitor_id | visited_id | project_id | project_comment_id | group_id | chat_id | action | checked |
|---|---|---|---|---|---|---|---|
| 1 | 2 | 1 | nil | nil | nil | favorite | false |
visitor_idについては、先ほどユーザーモデルで関連付けをしたため、ここでの紐付けは不要です。
したがって、post_id、visited_id、actionの3つを設定してあげましょう。
メソッド名に「!」を付けているのは、「メソッド内でデータ登録もやっているので、呼び出す際は気をつけてね」というのをわかりやすくするためです。(つけなくても動作します)
def create_notification_favorite!(current_user)
    # すでに「いいね」されているか検索
    temp = Notification.where(["visitor_id = ? and visited_id = ? and project_id = ? and action = ? ", current_user.id, user_id, id, 'favorite'])
    # いいねされていない場合のみ、通知レコードを作成
    if temp.blank?
      notification = current_user.active_notifications.new(
        project_id: id,
        visited_id: user_id,
        action: 'favorite'
      )
      # 自分の投稿に対するいいねの場合は、通知済みとする
      if notification.visitor_id == notification.visited_id
        notification.checked = true
      end
      notification.save if notification.valid?
    end
  end
ここでポイントとなるのが、「いいねされていない場合のみレコードを作成する」という分岐処理が入っているところです。
例えば、いいねボタンを連打した場合、押した数だけ相手に通知がいってしまいます。
これでは、悪意を持ったユーザーがひたすらいいねを連打して迷惑行為をするかもしれません。
そこで、以下の検索処理を事前に行い、レコード存在チェックをします。
# すでに「いいね」されているか検索
  temp = Notification.where(["visitor_id = ? and visited_id = ? and post_id = ? and action = ? ", current_user.id, user_id, id, 'like'])
これで、いいねを連続でした場合でも、1度しか相手に通知がいかないようになります。
ちなみに、「?」は「プレースホルダ」と言って、「?」を指定した値で置き換えることができるものです。
SQLインジェクションを防ぐためにも、必須のセキュリティ対策になります。
# すでに「いいね」されているか検索
# 自分の投稿に対するいいねの場合は、通知済みとする
  if notification.visitor_id == notification.visited_id
    notification.checked = true
  end
自分の投稿にいいねをして、「自分がいいねといっています」と通知が来ないように
自分の投稿に対するいいねは、事前に通知済みとしておきます。
コメント通知の作成メソッド
同様に、コメント投稿時にも処理を追加していきます。
 def create_notification_comment!(current_user, project_comment_id)
    # 自分と投稿者以外でコメントしている人をすべて取得し、全員に通知を送る、distinctで重複はまとめる
    temp_ids = ProjectComment.select(:user_id).where(project_id: id).where.not(user_id: current_user.id).where.not(user_id: user_id).distinct
    temp_ids.each do |temp_id|
      save_notification_comment!(current_user, project_comment_id, temp_id['user_id'])
    end
     # 投稿者には毎回通知を送る
    save_notification_comment!(current_user, project_comment_id, user_id)
  end

  def save_notification_comment!(current_user, project_comment_id, visited_id)
    # コメントは複数回することが考えられるため、1つの投稿に複数回通知する
    notification = current_user.active_notifications.new(
      project_id: id,
      project_comment_id: project_comment_id,
      visited_id: visited_id,
      action: 'comment'
    )
    # 自分の投稿に対するコメントの場合は、通知済みとする
    if notification.visitor_id == notification.visited_id
      notification.checked = true
    end
    notification.save if notification.valid?
  end
いいねの時とは少し違うことに気付きましたか?
いいねのときは、すでにいいねされているかどうかを事前にチェックして、
いいねされていれば、通知レコードを作成しないような制御を入れていました。
コメントはというと、1つの投稿に対して複数回コメントを残す場合があるため、通知レコードの存在チェックはしません。
なので、コメントの度に相手に通知がいくようになります。
また、投稿者に対してだけではなく、他にコメントをしている人がいれば、その人にも通知を届けないといけないため、最初に以下の処理を追加しています。
# 自分と投稿者以外でコメントしている人をすべて取得し、全員に通知を送る、distinctで重複はまとめる
  temp_ids = ProjectComment.select(:user_id).where(project_id: id).where.not(user_id: current_user.id).where.not(user_id: user_id).distinct
この処理を箇条書きで説明すると、以下のようになります。
- 投稿にコメントしているユーザーIDのリストを取得する
- 自分と投稿者のコメントは除外する
- 重複した場合は削除する
なぜ重複した場合に削除するのかというと、取得したユーザーIDの分だけ通知を作成するとき、同じ通知が複数回登録されてしまうことを防ぐためです。
IDが複数取得されるケースというのは、同じ人が同じ投稿に複数回コメントした場合ですね。
また、なぜ自分のコメントを除外するのかというと、「コメントを登録→通知を登録」という順番のため、たった今登録したコメントの通知レコードが、自分に対して作成されてしまうからです。
さらに、投稿者のコメントを除外したのは以下で毎回投稿者に通知を作成している為、投稿者のコメントを除外しておかないと投稿者に同じ内容の通知が2回行ってしまうのを防ぐ為です。
# 投稿者には毎回通知を送る
 save_notification_comment!(current_user, project_comment_id, user_id)
グループ参加の通知作成メソッド
  def create_notification_join!(current_user)
    # グループメンバー全員を検索
    group_users.each do |temp_id|
      save_notification_join!(current_user, temp_id['user_id'])
    end
  end

  def save_notification_join!(current_user, visited_id)
    # グループ参加は複数人が参加することが考えられるため、複数回通知する
    notification = current_user.active_notifications.new(
      group_id: id,
      visited_id: visited_id,
      action: 'join'
    )
    # 自分へのグループ参加に対しての場合は、通知済みとする
    if notification.visitor_id == notification.visited_id
      notification.checked = true
    end
    notification.save if notification.valid?
  end
グループ参加にはグループに紐づくGroupUserという中間テーブルからグループに所属しているメンバーのデータ全てを持ってきて、その全員に通知を送ります。
グループチャットの通知作成メソッド
def create_notification_chat!(current_user, chat_id)
    # グループメンバー全員を検索
    group_users.each do |temp_id|
      save_notification_chat!(current_user, chat_id, temp_id['user_id'])
    end
  end

  def save_notification_chat!(current_user, chat_id, visited_id)
    # グループチャットは複数人が何回もコメントすることが考えられるため、複数回通知する
    notification = current_user.active_notifications.new(
      group_id: id,
      chat_id: chat_id,
      visited_id: visited_id,
      action: 'chat'
    )
    # 自分へのグループチャットに対しての場合は、通知済みとする
    if notification.visitor_id == notification.visited_id
      notification.checked = true
    end
    notification.save if notification.valid?
  end
同様にグループチャットでもグループに紐づくGroupUserという中間テーブルからグループに所属しているメンバーのデータ全てを持ってきて、その全員に通知を送ります。
通知作成メソッドの呼び出し
各コントローラーで通知作成メソッドを呼び出していきます。
いいねを押したとき
def create
    @company = Company.find(params[:company_id])
    @project = Project.find(params[:project_id])
    favorite = current_user.favorites.new(project_id: @project.id)
    favorite.save
    # いいね通知も作成する
    @project.create_notification_favorite!(current_user)
end
コメントを投稿したとき
  def create
    @company = Company.find(params[:company_id])
    @project = Project.find(params[:project_id])
    @comment = current_user.project_comments.new(project_comment_params)
    @comment.project_id = @project.id
    if @comment.save
      @project.create_notification_comment!(current_user, @comment.id)
    else
      render 'error'
    end
  end
グループに参加したとき
 def create
    @group = Group.find(params[:group_id])
    @group_user = current_user.group_users.new(group_id: params[:group_id])
    @group_user.save
    @group.create_notification_join!(current_user)
    redirect_to request.referer
  end
グループチャットにメッセージしたとき
def create
    @group = Group.find(params[:group_id])
    @chat = current_user.chats.new(chat_params)
    @chat.group_id = @group.id
    if @chat.save
      @group.create_notification_chat!(current_user, @chat.id)
    else
      render 'error'
    end
  end
通知一覧画面の作成
あとは、通知一覧の画面を作っていきましょう。
まずは、通知コントローラーの作成からです。
$ rails g controller notifications
通知一覧の画面はindexで作るので、ルーティングを追加しておきましょう。
他のメソッドは不要なので、onlyを追加しています。
resources :notifications, only: [:index] do
  collection do
    delete "destroy_all"
  end
end
コントローラーを記述します!
class Public::NotificationsController < ApplicationController
  before_action :authenticate_user!

  def index
    @notifications = current_user.passive_notifications.page(params[:page])
    @notifications.where(checked: false).each do |notification|
      notification.update(checked: true)
    end
    #未確認の通知レコードだけ取り出したあと、「未確認→確認済」になるように更新をしています。
  end

  def destroy_all
    @notifications = current_user.passive_notifications.destroy_all
    redirect_to notifications_path
  end

end
ちなみに以下の処理はkaminariというgemを利用しています。
.page(params[:page])
Googleの検索結果では、以下のようにページで分かれて表示されますよね。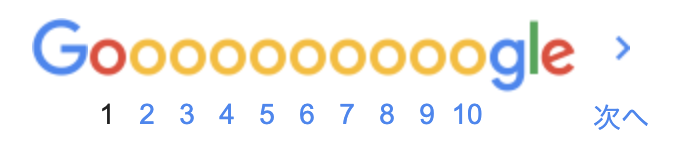
これは「ページネーション」と呼ばれていて、Rubyでも同じことができるようにしたgemがkaminariです。
使わなくても問題ありませんが、データ量が多いときは使うと便利ですよ。
通知一覧の画面を作っていきましょう!
<div class="container h-100">
  <h2 class="text-center">通知</h3>
  <div class="row mt-5">
    <div class="col-11 col-md-10 col-lg-8 mx-auto">
      <%= link_to destroy_all_notifications_path, method: :delete, class: 'text-dark' do %>
        <i class="fas fa-trash-alt"></i> 全削除
      <% end %>
    </div>
  </div>

  <div class="row mt-2 ">
    <div class="col-11 col-md-10 col-lg-8 mx-auto p-3">
      <% @notifications = @notifications.where.not(visitor_id: current_user.id) %>
      <% if @notifications.present? %>
        <div class="font-weight-bold">
          <%= render @notifications %>
        </div>
      <% else %>
          <p>通知はありません</p>
      <% end %>
    </div>
  </div>

  <div class="row mt-5">
    <div class="col-md-9 mx-auto">
      <div class="d-flex justify-content-center"><%= paginate @notifications %></div>
    </div>
  </div>

</div>
<%= paginate @notifications %>は、kaminariを使っていない人は削除してください。
まず、以下の記述についてです。
<% @notifications = @notifications.where.not(visitor_id: current_user.id) %>
自分の投稿に対する「いいね」と「コメント」は、通知済みとしてレコードを登録しました。
しかし、そのままでは通知一覧に「自分の投稿に対する通知」も表示されてしまいます。
そこで、「自分以外」という条件をここで追加しています。
<%= render @notifications %>
レンダリングするときに、単数だけでなく複数のインスタンスを渡すことができます。
この場合は、以下の動きになります。
インスタンスの数だけ、部分テンプレートnotifications/_notification.html.erbが呼び出される
個別のインスタンスを、notificationとして部分テンプレートで使用できる
<div class="mx-auto">
  <% visitor = notification.visitor %>
  <% visitor_comment = notification.project_comment_id %>
  <% project = Project.find_by(id: notification.project_id) %>
  <% if project.present? %>
    <% company = project.company %>
  <% end %>

  <% group = Group.find_by(id: notification.group_id) %>
  <% visitor_chat = notification.chat_id %>
  <div class="card mb-1">
    <div class="card-body">

      <div class="d-flex justify-content-between align-items-center">
        <div>
          <%= link_to public_user_path(visitor), class: 'text-dark' do %>
            <%= image_tag visitor.get_profile_image(50,50), class: 'rounded-circle' %>
            <%= visitor.name %>さんが
          <% end %>
        </div>
        <span><%= "#{time_ago_in_words(notification.created_at)}前" %></span>
      </div>

      <div class="mt-2">
        <% case notification.action %>
        <% when 'favorite' %>
          <i class="fas fa-heart mr-1"></i>
            <%= link_to project.name, company_project_path(company, notification.project_id), class: "font-weight-bold text-dark" %>
            にいいねしました
        <% when 'comment' %>
          <i class="fas fa-comments mr-1"></i>
            <% comment = ProjectComment.find_by(id: visitor_comment) %>
            <% comment_content =comment.comment %>
            <%= link_to project.name, company_project_path(company, notification.project_id), class: "font-weight-bold text-dark" %>
            にコメントしました
          <p class="text-muted mb-0">
            <%= comment_content %>
          </p>
        <% when 'join' %>
          <i class="fas fa-user-plus"></i>
          <%= link_to group.name, group_path(group),class: "font-weight-bold text-dark" %>
          に参加しました
        <% when 'chat' %>
          <i class="fas fa-comments mr-1"></i>
          <% chat = Chat.find_by(id: visitor_chat) %>
          <% chat_content = chat.message %>
          <%= link_to group.name,  group_path(group),class: "font-weight-bold text-dark" %>
          にコメントしました
          <p class="text-muted mb-0">
            <%= chat_content %>
          </p>
        <% end %>
      </div>

    </div>
  </div>
</div>
これでviewの記述は以上になります。
未確認の通知があるときはマークで知らせる
notifications_helperに下記を記述していきます。
def unchecked_notifications
    @notifications = current_user.passive_notifications.where(checked: false)
end
<% if unchecked_notifications.any? %>
<%= link_to notifications_path, class: 'nav-link text-dark' do %>
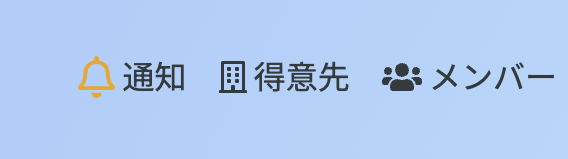
<i class="far fa-bell fa-lg" style="color: #f0a400;"></i> 通知
<% end %>
<% else %>
<%= link_to notifications_path, class: 'nav-link text-dark' do %>
<i class="far fa-bell fa-lg"></i> 通知
<% end %>
<% end %>
これで未確認の通知がある時は黄色のベルになります。
最後に
最後までご覧いただきありがとうございます。
初学者なので、間違っていることや、分かりづらい箇所もあるかと思います。
何かお気づきがあれば遠慮なくご指摘頂けると幸いです。
ここまで長くなりましたが
最後までお付き合いいただきましてありがとうございました!!