CSS(SCSS) ホバーで背景画像拡大とカラーフィルターをかける
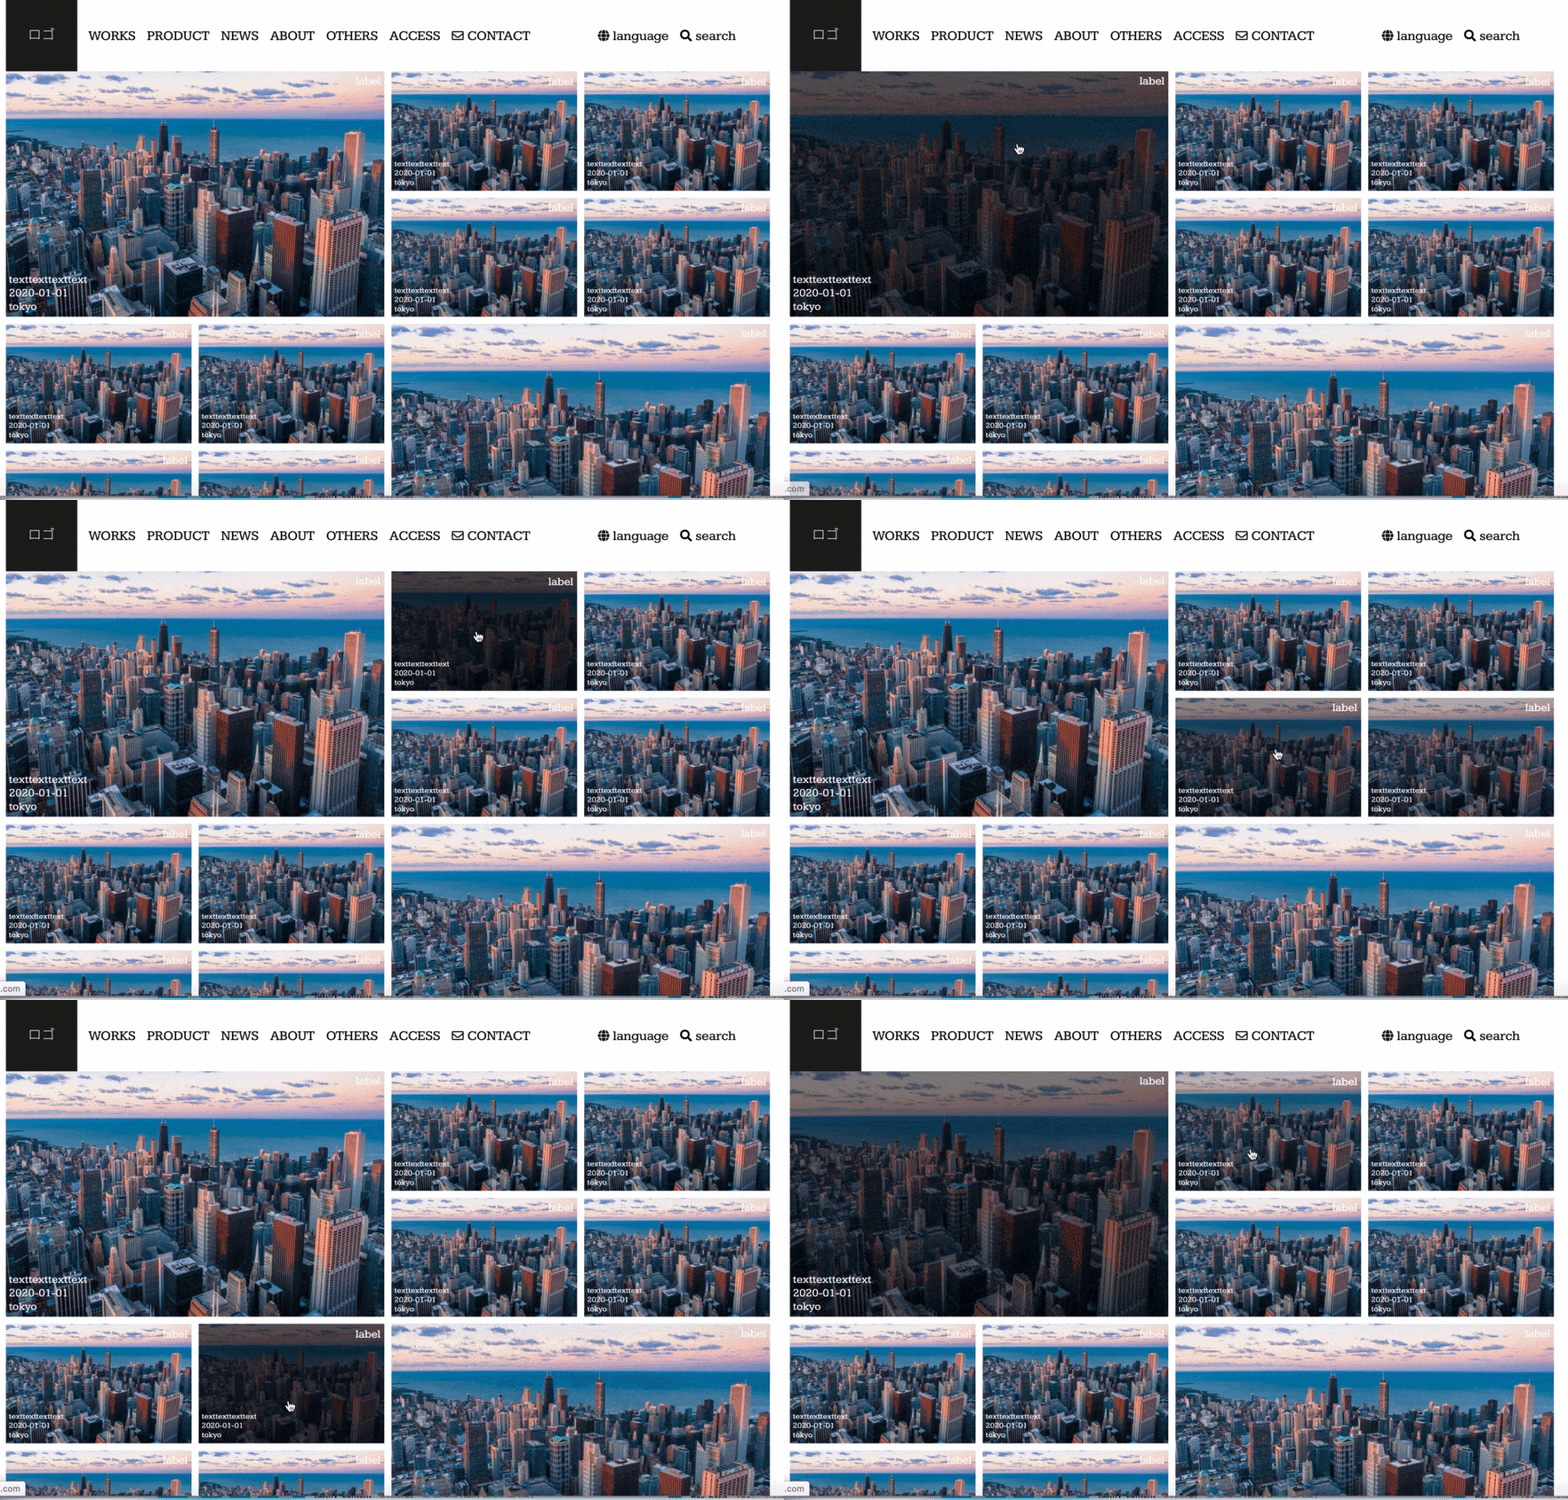
完成イメージ
今回作成するものは以下です。
使うものはCSS(SCSS)だけです。
・画像にテキストを重ねる
・ホバーすると画像が拡大する(テキストは拡大しない)
・ホバーに合わせて黒のカラーフィルターをかける
・画像全体がリンクとしてクリックできる
・画像にはbackgraoun-imageを使い画像サイズにレイアウトが影響されない
・各要素はflexboxなどで自由に配置ができる
・ホバーの動きはコンポーネント化してクラス名付与で使い回せる
個別に考えると要素の重なりで
リンクが上手く動作しなかったり
htmlがネストだらけになりそうですが
疑似要素のafterを使うことで全ての条件を満たします。
完成コード
<section class="banners">
  <a class="banner bg-zoom" href="#">
    <div class="banner-content bg-zoom-content">
      <p>text</p>
    </div>
 </a>
 <a class="banner bg-zoom" href="#">
   <div class="banner-content bg-zoom-content">
     <p>text</p>
   </div>
 </a>
 <a class="banner bg-zoom" href="#">
   <div class="banner-content bg-zoom-content">
     <p>text</p>
   </div>
 </a>
</section>
aタグで囲まれた部分が1つの要素です。
.banners {
  display: flex;  //要素を横並び
}

.banners .banner {
  width: 100%;  //要素の横幅(レスポンシブ想定で%指定)
  height: 300px; //要素の高さ
}

.banners .banner .banner-content {
  color: white; //テキスト色は白
}

.bg-zoom {
  position: relative;  //親要素を決める
  overflow: hidden;  //背景拡大時のはみ出しを非表示
  background: #000;  //カラーフィルターは黒
}

.bg-zoom:after {
  position: absolute;  //子要素を固定
  content: "";  //疑似要素の中身は空(必須)
  display: block;  //フィルターの高さと幅を指定のためブロック要素に変更
  width: 100%; //カラーフィルター幅は画像いっぱいに
  height: 100%; //カラーフィルター高さは画像いっぱいに
  top: 0; //カラーフィルターをトップに固定
  background: url(https://picsum.photos/id/237/200/300) no-repeat center center; //画像のパスを指定
  transition: all .8s ease;  //変化のスピードと動き
  background-size: cover;  //背景画像のプロパティはカバー
}

.bg-zoom:hover:after {
  opacity: .3;  //ホバー時に透過させてフィルターがかかる
  transform: scale(1.05); //画像の拡大比率(105%)
}

.bg-zoom .bg-zoom-content {
  z-index: 1;  //テキストを最上面に指定
  position: absolute; //親要素に固定
  top: 50%; //中央揃え
  left: 50%; //中央揃え
  transform: translate(-50%, -50%); //中央揃え
}
実行結果
bg-zoomというクラスにホバーアニメーションを固定することで
他の箇所にもクラス指定するだけで同じアニメーションをかけることができます。
mixinを使用して画像を切り替え
上記では全ての画像が同じになってしまうため
コンポーネント化したbg-zoomをmixinを使用して
引数で画像のパスがわたせるようにします。
<section class="banners">
  <a class="banner con1" href="#">
    <div class="banner-content bg-zoom-content">
      <p>text</p>
    </div>
 </a>
 <a class="banner con2" href="#">
   <div class="banner-content bg-zoom-content">
     <p>text</p>
   </div>
 </a>
 <a class="banner con3" href="#">
   <div class="banner-content bg-zoom-content">
     <p>text</p>
   </div>
 </a>
</section>
.banners {
  display: flex;  //要素を横並び
}

.banners .banner {
  width: 100%;  //要素の横幅(レスポンシブ想定で%指定)
  height: 300px; //要素の高さ
}

.banners .banner .banner-content {
  color: white; //テキスト色は白
}

@mixin bgZoom($bgPath) {
  position: relative;
  overflow: hidden;
  background: #000;
  &:after {
    position: absolute;
    content: "";
    display: block;
    width: 100%;
    height: 100%;
    top: 0;
    background: $bgPath no-repeat center center;
    transition: all .8s ease;
    background-size: cover;
  }
  &:hover:after {
    opacity: .3;
    transform: scale(1.05);
  }
  .bg-zoom-content {
    z-index: 1;
    position: absolute;
    top: 50%;
    left: 50%;
    transform: translate(-50%,-50%);
  }
}
.con1 {
  @include bgZoom(url(https://picsum.photos/seed/picsum/1350/900))
}
.con2 {
  @include bgZoom(url(https://picsum.photos/id/237/1350/900))
}
.con3 {
  @include bgZoom(url(https://picsum.photos/1350/900?grayscale))
}
コンパイルした実行結果


