今回はスマホのジャイロセンサとゲームのMainCameraを同期させるコードを書いていきます。
やることは主に以下になります。
・ジャイロセンサの値取得、Unity内のカメラとの同期
・ハコスコアプリの初期起動時とゲームの正面方向を合わせるキャリブレーション
・捕捉:ハコスコアプリをスリープさせない様に・・・
ジャイロセンサの値取得、Unity内のカメラとの同期
まずジャイロセンサの値を取得し、Unity内のカメラと同期させる
コードを書く
Input.gyro.enabled = true;
        if (Input.gyro.enabled)
        {
            Quaternion gyro = Input.gyro.attitude;
            this.transform.localRotation = Quaternion.Euler(90, 0, 0) * (new Quaternion(-gyro.x,-gyro.y, gyro.z, gyro.w));

        }
Input.gyro.enabled = true;はAndroidで作動させる際のお作法的なものらしい、私が古い情報をもとにしたので現在の正否のほどはわからないが・・・
以下もとにした記事↓
http://t01a.dtiblog.com/?i&no=156
Quaternionとは3次元回転を行う四元数というもので・・・オイラー角で指定したものを四元数で回したかのごとく回せるものらしい。。。
詳しい人に聞いたら「考えるな感じろ」とwww
だから気にしない
下記にMainCameraに貼り付けるスクリプトを書いておきます。
using UnityEngine;
using System.Collections;

public class CameraController : MonoBehaviour {
    private GUIStyle labelStyle;
    Quaternion start_gyro;
    Quaternion gyro;
    void Start()
    {
        this.labelStyle = new GUIStyle();
        this.labelStyle.fontSize = Screen.height / 22;
        this.labelStyle.normal.textColor = Color.white;
        //後述するがここで「Start」シーンのジャイロの値を取っている
     start_gyro = StartCameraController.ini_gyro;

    }


    void Update () {
        Input.gyro.enabled = true;
        if (Input.gyro.enabled)
        {
            gyro = Input.gyro.attitude;
            gyro = Quaternion.Euler(90, 0, 0) * (new Quaternion(-gyro.x,-gyro.y, gyro.z, gyro.w));
            this.transform.localRotation = gyro;
            //最初に見ていた向きとゲームの進行方向を合わせる
            this.transform.localRotation = Quaternion.Euler(0, -start_gyro.y, 0);
        }
    }
    //ジャイロセンサの値を表示するプログラム
    void OnGUI()
    {
        if (Input.gyro.enabled)
        {
            float x = Screen.width / 10;
            float y = 0;
            float w = Screen.width * 8 / 10;
            float h = Screen.height / 20;

            for (int i = 0; i < 3; i++)
            {
                y = Screen.height / 10 + h * i;
                string text = string.Empty;

                switch (i)
                {
                case 0://X
                    text = string.Format("gyro-X:{0}", gyro.x);
                    break;
                case 1://Y
                    text = string.Format("gyro-Y:{0}", gyro.y);
                    break;
                case 2://Z
                    text = string.Format("gyro-Z:{0}", gyro.z);
                    break;
                default:
                    throw new System.InvalidOperationException();
                }

                GUI.Label(new Rect(x, y, w, h), text, this.labelStyle);
            }
        }
    }
}
OnGUIの部分は取得したジャイロの値を表示する部分です。取得した値を見たいこともあると思うのでいちおう書いておきます。
ハコスコアプリの初期起動時とゲームの正面方向を合わせるキャリブレーション
実は今のままだとジャイロのy軸周りの値が0の向きが常にゲームの正面となってしまうそれを避け自分が前を向いている向きをゲームの正面の向きにする様にしたい
そのために、「start」シーンを作成し、ゲームで遊んでいる人が今どちらを向いているかを認識。それを「run」ゲームシーンに受け渡し補正する様にします。上記のコードだと補正の部分がいかになります。
this.transform.localRotation = Quaternion.Euler(0, -start_gyro.y, 0);
またこのスタートシーンのカメラへアタッチするスクリプトを下記に記載します
using UnityEngine;
using System.Collections;

public class StartCameraController : MonoBehaviour {
    private GUIStyle labelStyle;
    public static Quaternion ini_gyro;
    void Start()
    {
        this.labelStyle = new GUIStyle();
        this.labelStyle.fontSize = Screen.height / 22;
        this.labelStyle.normal.textColor = Color.white;

    }

    void Update () {
        Input.gyro.enabled = true;
        if (Input.gyro.enabled)
        {
            ini_gyro = Input.gyro.attitude;
            this.transform.localRotation = Quaternion.Euler(90, 0, 0) * (new Quaternion(-ini_gyro.x,-ini_gyro.y, ini_gyro.z, ini_gyro.w));
        }
    }
    //ジャイロセンサの値を表示するプログラム
    void OnGUI()
    {
        if (Input.gyro.enabled)
        {
            ini_gyro = Quaternion.Euler(90, 0, 0) * (new Quaternion(-ini_gyro.x, -ini_gyro.y, ini_gyro.z, ini_gyro.w));
            float x = Screen.width / 10;
            float y = 0;
            float w = Screen.width * 8 / 10;
            float h = Screen.height / 20;

            for (int i = 0; i < 3; i++)
            {
                y = Screen.height / 10 + h * i;
                string text = string.Empty;

                switch (i)
                {
                case 0://X
                    text = string.Format("gyro-X:{0}", ini_gyro.x);
                    break;
                case 1://Y
                    text = string.Format("gyro-Y:{0}", ini_gyro.y);
                    break;
                case 2://Z
                    text = string.Format("gyro-Z:{0}", ini_gyro.z);
                    break;
                default:
                    throw new System.InvalidOperationException();
                }
                GUI.Label(new Rect(x, y, w, h), text, this.labelStyle);
            }

        }
        //スタートからシーン遷移を行う
        if (GUI.Button(new Rect(Screen.width / 2 - Screen.width / 10, Screen.height / 2, Screen.width / 5, Screen.height / 10), "Start")) {
            Application.LoadLevel ("run");
        }
    }
}
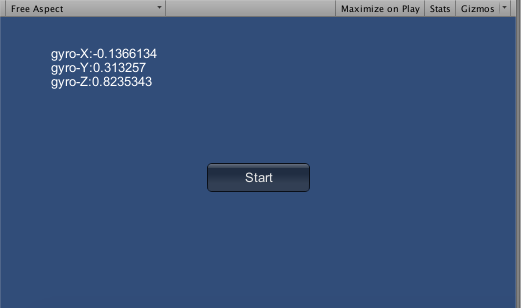
「start」シーンには遷移するためのボタンを描画します。それを、OnGUIでやっています。
最終的に「Start」シーンを起動すると以下の図のようになります。真ん中のスタート画面を押すとその時のgyroの値がつぎの「run」シーンで渡されるようになります。