はじめに
本記事はプロもくチャット Adevent Calendar2023の25日目です
リッチテキストエディタを作ったことありますか?
Qiita や note などで記事を書くときには、サービス側で提供しているリッチなテキストエディタを使ってWeb上で記事を書くことが多いと思います。
Qiita はマークダウンで記載してHTML変換しているので、ルールに基づいて変換すればいいのかと想像できます(が実際はかなり複雑かと思います)
note はフォーマットを指定して(見出しやリストなど)文字を書きながら、HTML変換後と同じ形式のまま記事を書いていくので、これをどう実装していくのかイメージができませんでした。
今回は note のようなリッチテキストエディタを作ってみたいと思います。
調べていくとリッチテキストエディタを作るためのフレームワークやライブラリは複数あったのですが Lexical というライブラリを使っていきます!
ゴール
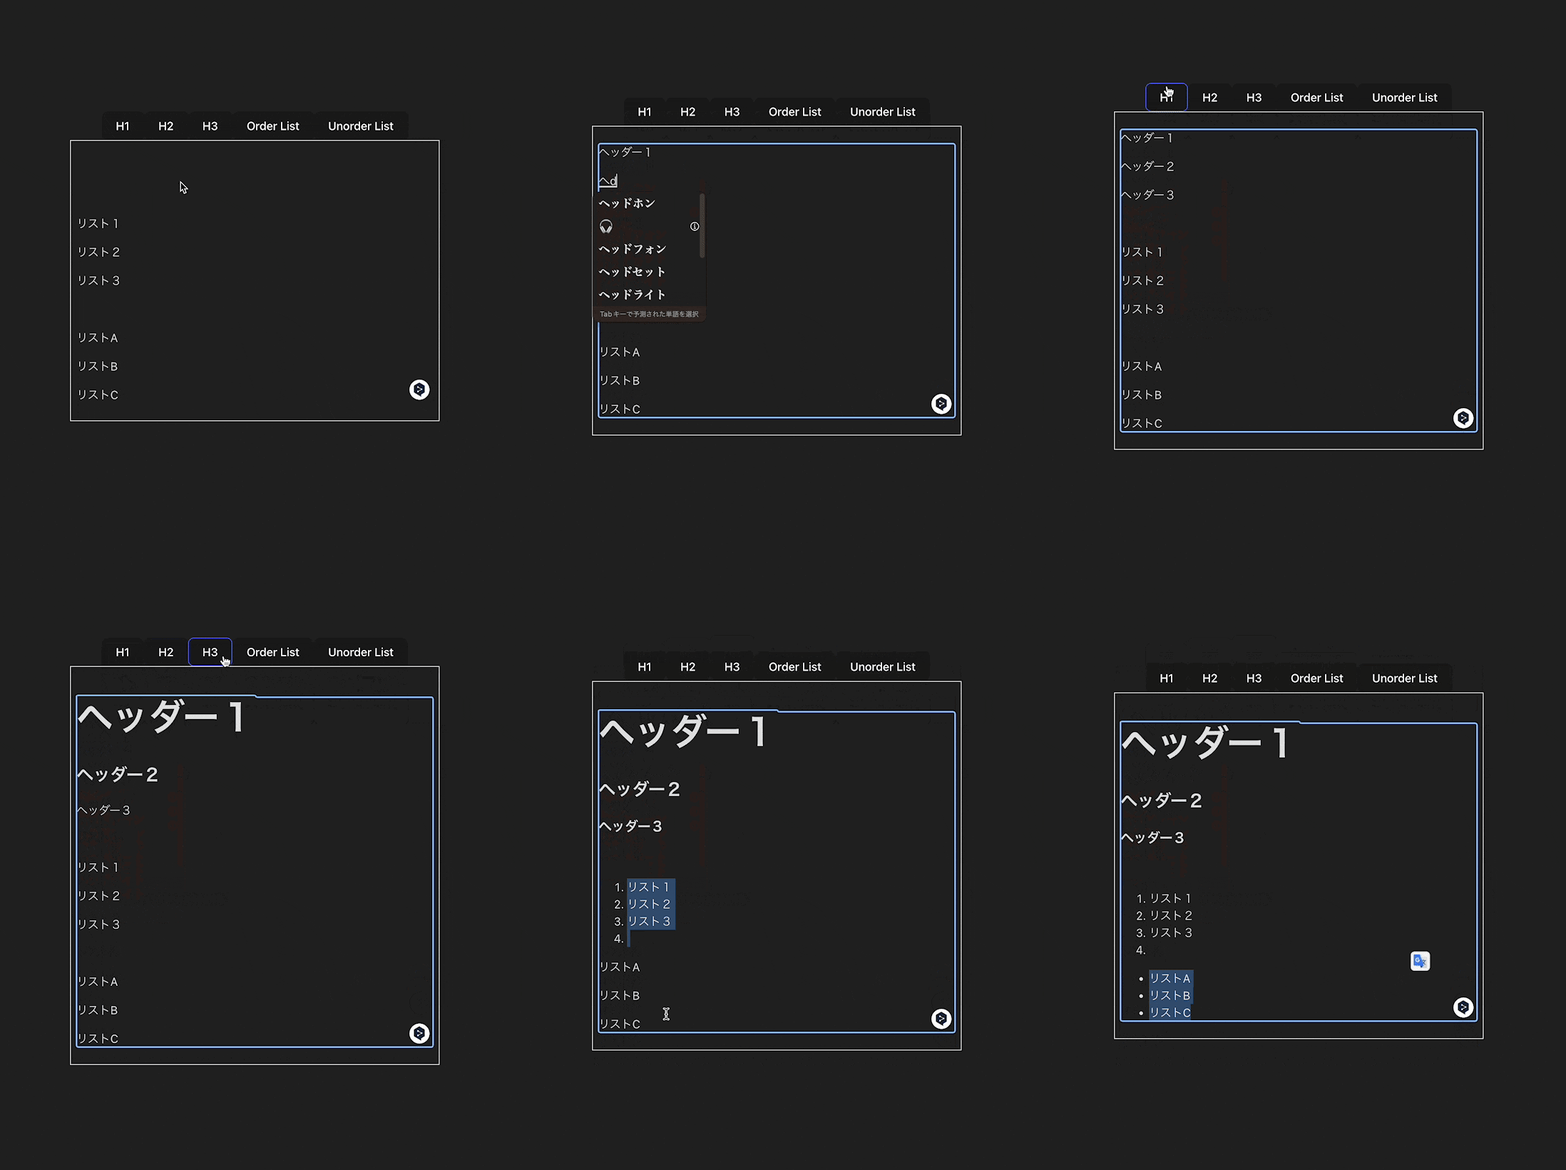
こんな感じのエディタが出来上がります!
環境
- Macbook
- npm, vite, Node
- そこまで複雑なことはしないので、ある程度最新であれば問題ないと思います
Lexical とは
Meta社が開発しているオープンソースで、拡張可能なテキストエディタを作るためのJavaScript製のフレームワークです。
Meta社のプロダクトにも導入されています。
コンセプトについては公式サイトを参照してください。Reactの設計に似ているため、Reactを知っている人にはわかりやすいかなと思います。
Lexial は Vanilla JS や Vue でも実装可能ですが、今回は React を使って実装していきたいと思います。
前提
- エディタを作ってみるという導入部分のため、極力シンプルなコードにします
- 不要なオプションは削除する
- css は書かずに最低限の style 追加と、vite デフォルトの css を活用します
作成手順
今回は vite を使ってプロジェクトを作ります
run した時に表示されるURLにアクセスして vite のデフォルト画面が表示されれば成功です。
$ npm create vite@latest my-lexical-editor -- --template react

$ cd my-lexical-editor
$ npm install
$ npm run dev
次に lexical のパッケージをインストールします
$ npm install lexical @lexical/react
最後にエディタとフォーマットを決めるためのツールバーのコンポーネントEditor.jsx、Toolbar.jsxを作成して、main.jsx で <Editor /> を呼び出せば完了です!
Editor.jsx
import { LexicalComposer } from "@lexical/react/LexicalComposer";
import { ContentEditable } from "@lexical/react/LexicalContentEditable";
import { HistoryPlugin } from "@lexical/react/LexicalHistoryPlugin";
import LexicalErrorBoundary from "@lexical/react/LexicalErrorBoundary";
import { RichTextPlugin } from "@lexical/react/LexicalRichTextPlugin";
import { HeadingNode } from "@lexical/rich-text";
import { ListPlugin } from "@lexical/react/LexicalListPlugin";
import { ListNode, ListItemNode } from "@lexical/list";
import { ToolbarPlugin } from "./Toolbar";

export default function Editor() {
  const initialConfig = {
    namespace: "MyEditor",
    nodes: [HeadingNode, ListNode, ListItemNode],
  };

  return (
    <LexicalComposer initialConfig={initialConfig}>
      <ToolbarPlugin />
      <ListPlugin />
      <div
        style={{
          width: "500px",
          border: "1px solid",
          textAlign: "left",
          padding: "8px",
        }}
      >
        <RichTextPlugin
          contentEditable={<ContentEditable className="contentEditable" />}
          ErrorBoundary={LexicalErrorBoundary}
        />
      </div>
      <HistoryPlugin />
    </LexicalComposer>
  );
}
Toolbar.jsx
import { useLexicalComposerContext } from "@lexical/react/LexicalComposerContext";
import { $setBlocksType } from "@lexical/selection";
import { $isRangeSelection, $getSelection } from "lexical";
import { $createHeadingNode } from "@lexical/rich-text";
import { INSERT_ORDERED_LIST_COMMAND, INSERT_UNORDERED_LIST_COMMAND } from "@lexical/list";

function HeadingToolbarPlugin() {
  const [editor] = useLexicalComposerContext();
  const headingTags = ["h1", "h2", "h3"];
  const onClick = (tag) => {
    editor.update(() => {
      const selection = $getSelection();
      if ($isRangeSelection(selection)) {
        $setBlocksType(selection, () => $createHeadingNode(tag));
      }
    });
  };
  return (
    <>
      {headingTags.map((tag) => (
        <button
          key={tag}
          onClick={() => {
            onClick(tag);
          }}
        >
          {tag.toUpperCase()}
        </button>
      ))}
    </>
  );
}

function ListToolbarPlugin() {
  const [editor] = useLexicalComposerContext();
  const onClick = (tag) => {
    if (tag === "ol") {
      editor.dispatchCommand(INSERT_ORDERED_LIST_COMMAND, undefined);
      return;
    }
    editor.dispatchCommand(INSERT_UNORDERED_LIST_COMMAND, undefined);
  };
  return (
    <>
      <button
        onClick={() => {
          onClick("ol");
        }}
      >
        Order List
      </button>
      <button
        onClick={() => {
          onClick("ul");
        }}
      >
        Unorder List
      </button>
    </>
  );
}

export function ToolbarPlugin() {
  return (
    <div className="toolbarRoot">
      <HeadingToolbarPlugin />
      <ListToolbarPlugin />
    </div>
  );
}
main.jsx
import React from "react";
import ReactDOM from "react-dom/client";
import App from "./App.jsx";
+ import Editor from "./Editor.jsx";
import "./index.css";

ReactDOM.createRoot(document.getElementById("root")).render(
  <React.StrictMode>
-    <App />
+    <Editor />
  </React.StrictMode>,
);
補足
Editor.jsxではエディタの基本的な設定をしています。RichTextPluginを使うとリッチテキストで使いたい機能(見出し、太文字、引用など)がパッケージングされているので便利です。
HistoryPluginは履歴管理ができるようになります。これがないと ctrl + z で元に戻るもできません。エディタを作るときには履歴管理も自作する必要があるので、この辺りのプラグインが用意されているのはありがたいですね。
また Lexical の重要な概念として Node というものがあり、今回は HeadingNode, ListNode, ListItemNode を利用しています。
Node にはエディタでどのようなフォーマットをするかという情報を持っており、HTMLへの変換、逆にHTMLからLexicalのオブジェクトに変換するための情報を持っています。
今回はライブラリが用意している Node を使いましたが、カスタム Node を作ることも可能です。
Toolbar.jsxではボタンを並べて、エディタに入力された文字をフォーマットするためのアクションを設定しています。
Node で用意されている create メソッドや command を dispatch して Node を作成することができます。
この辺りの細かな点はまた別の記事で書きたいと思います。
まとめ
今回は Lexical というライブラリを使って自作のリッチテキストエディタを作ってみました。基本機能だけであればかなりシンプルに作れそうですね。
また各フォーマットに対してスタイルを当てることができたり、カスタムでフォーマットを作ることもできて拡張性もあります。
もう少し掘り下げた Lexical の記事や、他のライブラリも触って比較してみたいと思います!

