OpenCVとPythonを使って、間違い探しをやってみる。
準備
まずは、間違い探し用の画像を作る。作るのは大変なので、今回は、脳トレ 間違い探し イラスト01(初級)というWebページの画像をお借りする。
そして、この画像はA画像とB画像が縦に繋がっているので、上下に2分割する。2分割するついでに、OpenCVで扱うために、PNG形式に変換しておく。
convert -crop 100%x50% image02.gif image02.png
これで、iamge02-0.pngとimage02-1.pngという上下に分割されたファイルが作られて、準備完了である。
上画像には「A」、下画像には「B」と、それぞれラベルが画像中に書き込まれているので、ファイル名もimage02A.pngとimage02B.pngに変更しておくことにする。
convert image02.gif image02.png しておいて、pythonで分割してもいい。
import cv2

img = cv2.imread('img/image02.png')
height, width, _ = img.shape
imageA = img[0:round(height/2), :]
imageB = img[round(height/2):, :]
cv2.imwrite('img/image02A.png', imageA)
cv2.imwrite('img/image02B.png', imageB)
間違い探し1
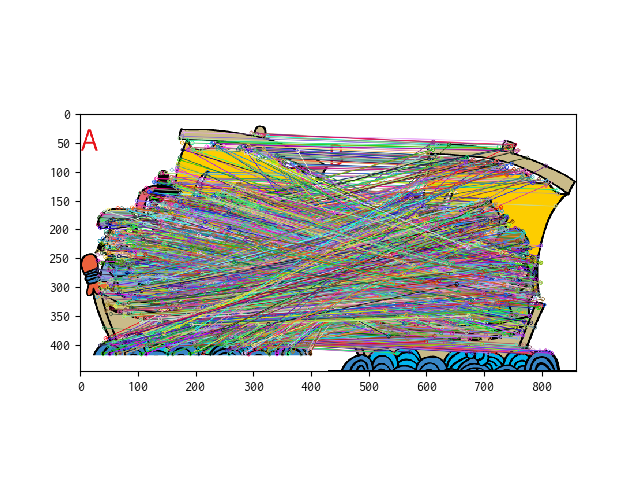
A画像とB画像を読み込み、feature detectionをしてみる。
def matchAB(fileA, fileB):
    # 画像の読み込み
    imgA = cv2.imread(fileA)
    imgB = cv2.imread(fileB)

    # グレー変換
    grayA = cv2.cvtColor(imgA, cv2.COLOR_BGR2GRAY)
    grayB = cv2.cvtColor(imgB, cv2.COLOR_BGR2GRAY)

    # AKAZE特徴量の抽出
    akaze = cv2.AKAZE_create()
    kpA, desA = akaze.detectAndCompute(grayA, None)
    kpB, desB = akaze.detectAndCompute(grayB, None)

    # BFMatcherの定義と画像化
    bf = cv2.BFMatcher(cv2.NORM_HAMMING, crossCheck=True)
    matches = bf.match(desB, desB)
    matches = sorted(matches, key=lambda x: x.distance)
    matched_image = cv2.drawMatches(imgA, kpA, imgB, kpB, matches, None, flags=2)

    # 表示
    plt.imshow(cv2.cvtColor(matched_image, cv2.COLOR_BGR2RGB))
    plt.show()
当然のことであるが、上記の方法だと「合っている場所」をマークすることになるのだけれど、間違っている場所は5箇所だけなので、これじゃ良くない。
間違い探し2
そもそも間違い探しとは、なんであるか?というと、2枚の画像を重ね合わせた時に、それぞれに描かれている絵の輪郭が微妙に違うものではないか。
画像Aと画像Bが微妙に位置がずれている可能性も考えて、画像Aを分割して作ったwindowが、画像Bに最もマッチする位置を探して、その差分画像を作ってみることにした。
def matchAB(fileA, fileB):
    # 画像の読み込み
    imgA = cv2.imread(fileA)
    imgB = cv2.imread(fileB)

    # グレー変換
    grayA = cv2.cvtColor(imgA, cv2.COLOR_BGR2GRAY)
    grayB = cv2.cvtColor(imgB, cv2.COLOR_BGR2GRAY)

    # 画像サイズの取得
    height, width = grayA.shape
    # 部分画像を作って、マッチングさせる
    result_window = np.zeros((height, width), dtype=imgA.dtype)
    for start_y in range(0, height-100, 50):
        for start_x in range(0, width-100, 50):
            window = grayA[start_y:start_y+100, start_x:start_x+100]
            match = cv2.matchTemplate(grayB, window, cv2.TM_CCOEFF_NORMED)
            _, _, _, max_loc = cv2.minMaxLoc(match)
            matched_window = grayB[max_loc[1]:max_loc[1]+100, max_loc[0]:max_loc[0]+100]
            result = cv2.absdiff(window, matched_window)
            result_window[start_y:start_y+100, start_x:start_x+100] = result

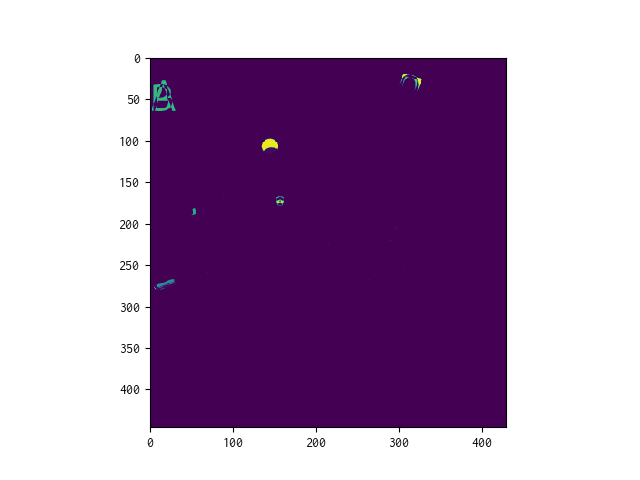
	plt.imshow(result_window)
これで、なんとなく差分の大きい位置があることが分かった。
間違い探し2の続き
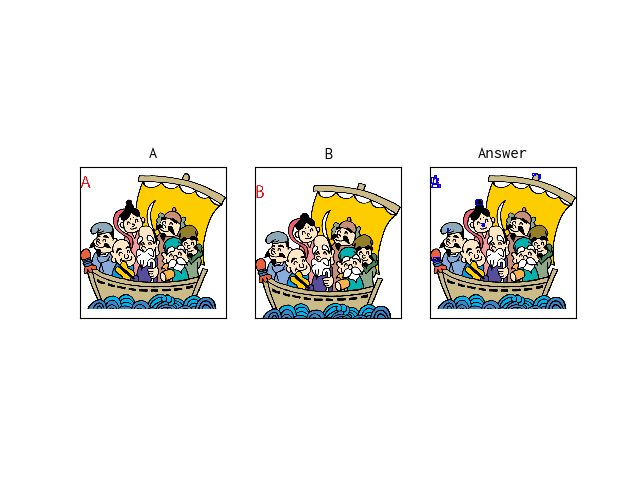
ということで、今度は差分画像の中で「差分がある位置」の座標を拾って、元画像に重畳表示するようにしてみる。
具体的には、「差分のある位置」の輪郭を抽出することで座標値を拾って、その座標に基づいてもと画像に四角を描く。
def matchAB(fileA, fileB):
    # 画像の読み込み
    imgA = cv2.imread(fileA)
    imgB = cv2.imread(fileB)

    # グレー変換
    grayA = cv2.cvtColor(imgA, cv2.COLOR_BGR2GRAY)
    grayB = cv2.cvtColor(imgB, cv2.COLOR_BGR2GRAY)

    # 画像サイズの取得
    height, width = grayA.shape
    # 部分画像を作って、マッチングさせる
    result_window = np.zeros((height, width), dtype=imgA.dtype)
    for start_y in range(0, height-100, 50):
        for start_x in range(0, width-100, 50):
            window = grayA[start_y:start_y+100, start_x:start_x+100]
            match = cv2.matchTemplate(grayB, window, cv2.TM_CCOEFF_NORMED)
            _, _, _, max_loc = cv2.minMaxLoc(match)
            matched_window = grayB[max_loc[1]:max_loc[1]+100, max_loc[0]:max_loc[0]+100]
            result = cv2.absdiff(window, matched_window)
            result_window[start_y:start_y+100, start_x:start_x+100] = result

    # マッチングした結果できた差分画像の輪郭を抽出し、四角で囲む
    _, result_window_bin = cv2.threshold(result_window, 127, 255, cv2.THRESH_BINARY)
    _, contours, _ = cv2.findContours(result_window_bin, cv2.RETR_EXTERNAL, cv2.CHAIN_APPROX_SIMPLE)
    imgC = imgA.copy()
    for contour in contours:
        min = np.nanmin(contour, 0)
        max = np.nanmax(contour, 0)
        loc1 = (min[0][0], min[0][1])
        loc2 = (max[0][0], max[0][1])
        cv2.rectangle(imgC, loc1, loc2, 255, 2)

    # 画像表示する
    plt.subplot(1, 3, 1), plt.imshow(cv2.cvtColor(imgA, cv2.COLOR_BGR2RGB)), plt.title('A'), plt.xticks([]), plt.yticks([])
    plt.subplot(1, 3, 2), plt.imshow(cv2.cvtColor(imgB, cv2.COLOR_BGR2RGB)), plt.title('B'), plt.xticks([]), plt.yticks([])
    plt.subplot(1, 3, 3), plt.imshow(cv2.cvtColor(imgC, cv2.COLOR_BGR2RGB)), plt.title('Answer'), plt.xticks([]), plt.yticks([])
    plt.show()
絵が小さくて見づらいけれど、左上のAとかBとか描いてあるラベルの部分意外では、5箇所の間違い箇所をsuggestできているようだ。
まとめ
OpenCVを使って、差分画像を作ることで、間違い探しクイズを解ける可能性がある事が分かった。


