はじめに
Intervention Imageのversion3についてYouTubeで海外のエンジニアが使い方の動画を作ってくれていたのでハンズオンで学習しました。
また、まるっきりコードをコピーするのではなく自分なりにアレンジしています。
参考元動画↓
YouTube: Laravel 11 Image Intervention Tutorial: Resize and Crop Image Like a Boss
GDの導入
公式ではImagickを推奨していますが今回はGDライブラリを使います。
phpinfo()で「GD」と検索してGD Supportがenabledになっていたら準備OKです。
私はDockerで環境構築しており、GDがなかったのでdockerHubを参考にPHPのdockerfileを修正します。
FROM php:8.2-fpm
RUN apt-get update && apt-get install -y \
		libfreetype-dev \
		libjpeg62-turbo-dev \
		libpng-dev \
	&& docker-php-ext-configure gd --with-freetype --with-jpeg \
	&& docker-php-ext-install -j$(nproc) gd
docker compose up -d --build
Intervention Imageのインストール
composer require intervention/image
composer.jsonを確認し"intervention/image": "^3.10",が記述されました。
Laravelの記述
Routeの作成
<?php

use Illuminate\Support\Facades\Route;
use App\Http\Controllers\ImageController;

Route::controller(ImageController::class)->group(function(){
    Route::get('image', 'fileUpload');
    Route::post('image', 'storeImage')->name('image.store');
});
ImageControllerの作成
php artisan make:controller ImageController
<?php

namespace App\Http\Controllers;

use Illuminate\Http\Request; // HTTPリクエストを扱うクラスをインポート
use Illuminate\Support\Facades\Storage; // ストレージ操作用のクラスをインポート
use Intervention\Image\ImageManager; // 画像操作ライブラリ(Intervention Image)のマネージャをインポート
use Intervention\Image\Drivers\Gd\Driver; // GDドライバを使用するためのクラスをインポート

class ImageController extends Controller
{
    // ファイルアップロード画面を表示するメソッド
    public function fileUpload()
    {
        // ビュー 'image-upload.blade.php' を返して表示
        return view('image-upload');
    }

    // アップロードされた画像を処理するメソッド
    public function storeImage(Request $request)
    {
        // 画像ファイルのバリデーションを行う
        $request->validate([
            // 必須、画像形式、許容する拡張子、最大サイズ
            'image' => ['required', 'image', 'mimes:jpg,jpeg,png,svg,gif', 'max:2048'],
        ]);

        // アップロードされた画像ファイルを取得
        $image = $request->file('image');

        // ランダムなユニークな名前を生成(衝突を防ぐために乱数を使用)
        $imageName = uniqid(rand() . '_') . '.' . $image->extension();

        // 画像をストレージ('public/images'ディレクトリ)に保存
        Storage::disk('public')->putFileAs('images', $image, $imageName);

        // 保存した画像ファイルの絶対パスを取得
        $storedPath = Storage::disk('public')->path('images/' . $imageName);

        // 画像操作のためのImageManagerをGDドライバで初期化
        $imgManager = new ImageManager(new Driver());

        // 保存した画像を読み込んでIntervention Imageオブジェクトを作成
        $resizedImage = $imgManager->read($storedPath);

        // 画像のサイズを640x360ピクセルにリサイズ
        $resizedImage->resize(640, 360);

        // リサイズ後の画像を同じパスに上書き保存
        $response = $resizedImage->save($storedPath);

        // 処理成功時のリダイレクト処理
        if ($response) {
            return redirect()->back()->with('success', '画像のアップロードに成功しました。'); // 成功メッセージを添えてリダイレクト
        }

        // 処理失敗時のリダイレクト処理
        return redirect()->back()->with('error', '画像のアップロードに失敗しました。'); // 失敗メッセージを添えてリダイレクト
    }
}
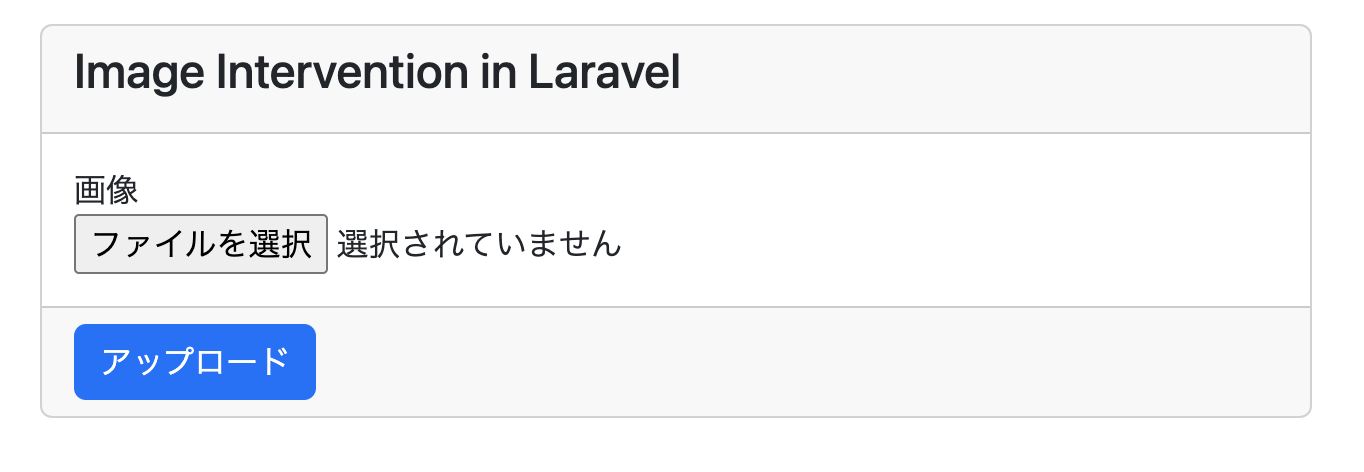
Viewの作成
<!doctype html>
<html lang="ja">
  <head>
    <meta charset="utf-8">
    <meta name="viewport" content="width=device-width, initial-scale=1">
    <title>InterventionImage demo</title>
    <link href="https://cdn.jsdelivr.net/npm/bootstrap@5.3.0/dist/css/bootstrap.min.css" rel="stylesheet" integrity="sha384-9ndCyUaIbzAi2FUVXJi0CjmCapSmO7SnpJef0486qhLnuZ2cdeRhO02iuK6FUUVM" crossorigin="anonymous">
  </head>
  <body>
    <div class="container py-4">
      <div class="row">
        <div class="col-xl-6 m-auto">

          @if (Session::has('success'))
              <div class="alert alert-success">
                {{ Session::get('success') }}
              </div>

          @elseif(Session::has('error'))
              <div class="alert alert-danger">
                {{ Session::get('error') }}
              </div>
          @endif

          <form action="{{ route('image.store') }}" method="POST" enctype="multipart/form-data">
            @csrf
            <div class="card">
              <div class="card-header">
                <h4 class="card-title">Image Intervention in Laravel</h4>
              </div>
              <div class="card-body">
                <div class="form-group">
                  <label for="image">画像</label><br>
                  <input type="file" name="image" id="image">
                  <x-input-error for="image" class="mt-2 text-danger" />
                </div>
              </div>
              <div class="card-footer">
                <button type="submit" class="btn btn-primary">アップロード</button>
              </div>
            </div>
          </form>
        </div>
      </div>
    </div>
  </body>
</html>
動作確認


元は1920×1075でしたが、アップロード後

640×360リサイズされstorageに保存されたようです。
最後に
Intervention Imageバージョン2からproviderの記述がなくなり、手軽に使えた印象です。
あとはStorageに保存するのに苦戦しました。
海外のエンジニアから学び、英語は理解できませんがコードを書くことで理解できます。
何かの助けになれば幸いです
公式URL

