Unity3DでPS4コントローラを使い,飛行動作を操作する
はじめに
タイトルどおりUnity3DでPS4コントローラを使い,空を飛ぶ動作を設定します.
飛行動作は簡易な動作です.また,本文は記録しておくためなので読みづらいと思いますが,あしからずお願いします.
設定する項目
・Unityにプレイヤーと足場を設置する
・Playerカメラの設定
・UnityのInputを設定する(PS4コントローラの設定をする)
・飛行操作のScriptを作成し,プレイヤーに反映する
Unityにプレイヤーと足場を設置する
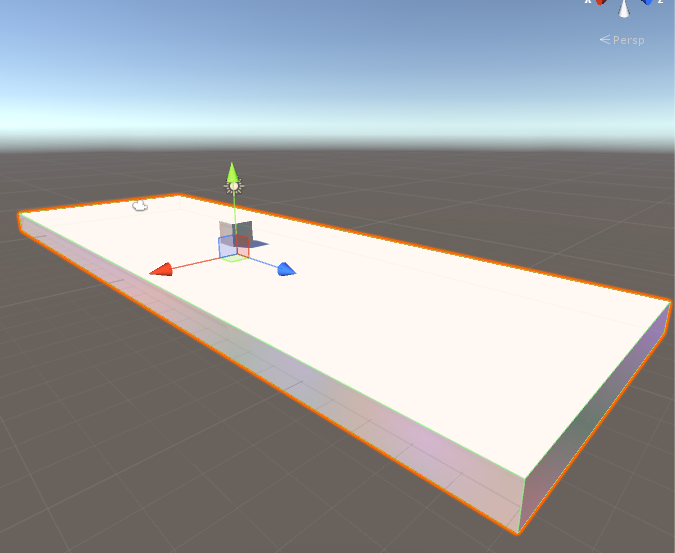
まず初めに,操作するオブジェクトと足場となるオブジェクトを配置します.
Hierarchy → Create → 3D Object → Cubeを選ぶとCubeがフィールドに配置されます.
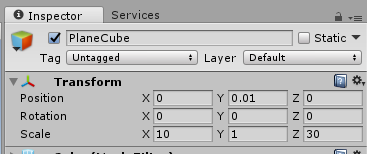
これをもう一度行い,Hierarchyには2つのCubeが作成されます.
次に,PlayerとなるCubeの設定をしていきます.
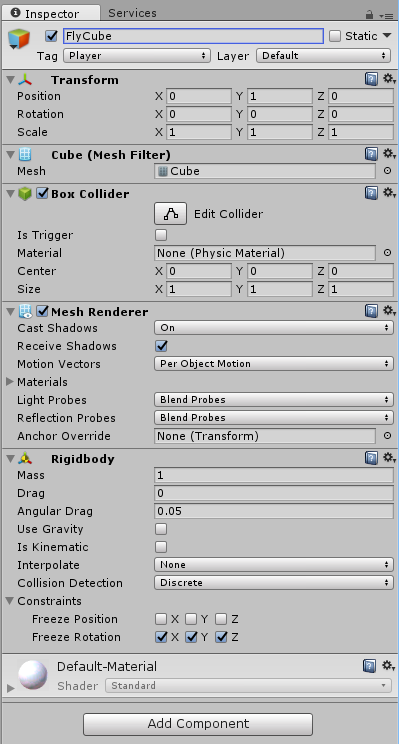
1.Inspectorに表示されているCubeの名前をFlyCubeに変更します.
2.TagをPlayerに変更
3.Add Component → Physics → Rigidbodyを選びます.
出現したRigidbodyの ① Use Gravityをはずし,② ConstraintsのFreeze RotationのX,Y,Zにチェックをつけます.
Playerカメラの設定
Hierarchy → Create → Cameraを選び,カメラを作成します.
CameraをInspectorで設定していきます.
1.名前をPlayerCameraに変更
2.Target DisplayをDisplay2に変更
3. Transformを以下の画像のように変更.
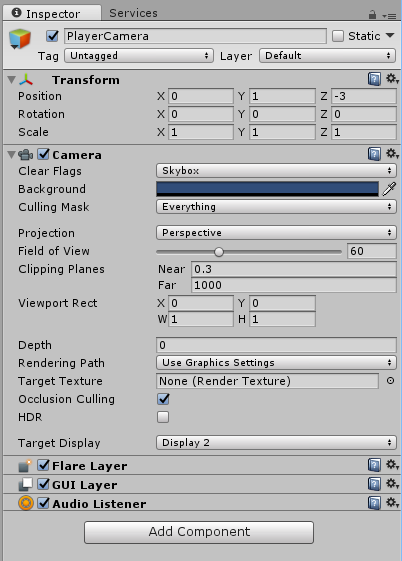
作成したPlayerCameraをドラッグ&ドロップでFlyCubeに入れます.
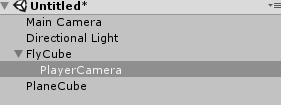
これでFlyCubeに付属したカメラの設定が出来ました.
UnityのInputを設定する(PS4コントローラの設定をする)
今回PS4コントローラで使用するのは,
Y axis:左スティック上下 :上下回転
3rd axis:右スティック左右 :左右回転
4th axis:L2 :軸左回転
5th axis:R2 :軸右回転
6th axis:右スティック上下 :前進・後進
joystick button 5:R1 :ブースト
です.
設定する場所.
Edit → Project Setting → Inputを選択するとInputManegerが出てきます.
・Mouse ScrollWheelの上にあるMouse XとMouse Y・Mouse ScrollWheelの下にあるHorizontalとVerticalを以下のように設定します
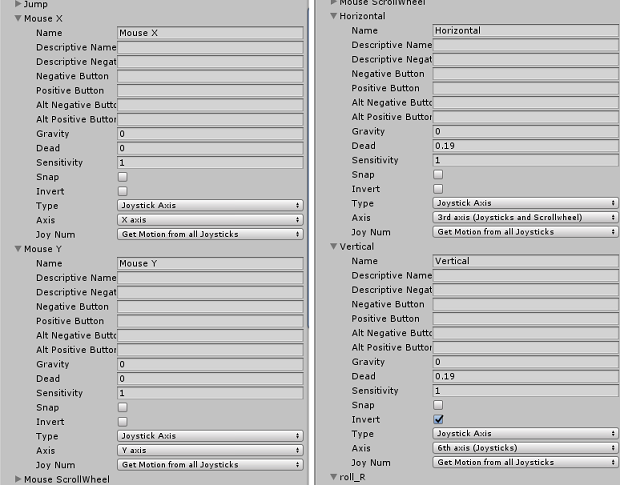
・次に,Fire1,Fire2,Fire3の名前をrool_R,roll_L,Boostに変更します.
以下のように設定します.
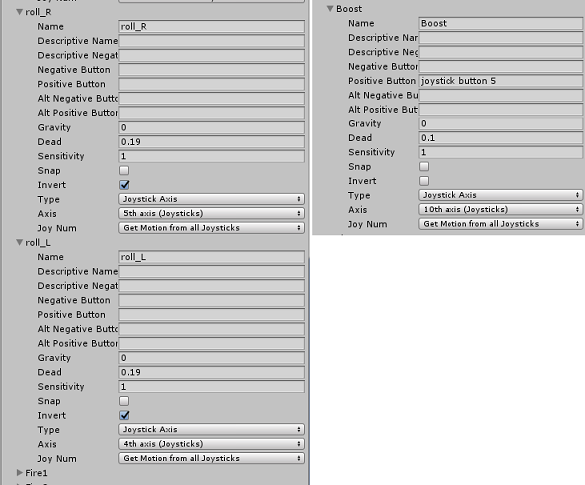
これで,必要最低限のps4コントローラの入力設定が出来ました.
飛行操作のScriptを作成し,プレイヤーに反映する
Scriptを作成する
Project → Create → C# Script
Script名はFlying
次に,Flyingを開く前にPS4コントローラのプログラミングについて少しまとめます.
1.Inspectorで設定する項目でInputの検知方法が変わります.今回は2つ.
① Axisに設定したなら,Input.GetAxisRaw("Name");
② positive Buttonで設定したなら,Input.GetButton("Name");
となります.
2.検知したときの値.
スティック,R1,R2,L2などAxisに設定したほうは0~1.00...(-1.00...~1.00...)の値を受け取っていました.
Buttonに設定したほうは未確認.
では,Flyingを開いて,プログラムを書きます.
using System.Collections;
using System.Collections.Generic;
using UnityEngine;

public class Flying : MonoBehaviour
{
    public float MovementSpeed = 100f;          // 通常時の進行速度
    public float MaxMovementSpeed = 1000f;      // ブースト時の進行速度
    public float RotationSpeed = 100f;          // 回転速度

    void Start()
    {
    }

    void Update()
    {
        UpdatePosition();
    }

    void UpdatePosition()
    {

        Quaternion AddRot = Quaternion.identity;
        float yaw = 0;
        float pitch = 0;
        float roll = 0;

        // 縦回転
        yaw = Input.GetAxisRaw("Horizontal") * (Time.fixedDeltaTime * RotationSpeed);

        // 横回転
        pitch = Input.GetAxisRaw("Vertical") * (Time.fixedDeltaTime * RotationSpeed);

        // 軸回転
        if (Input.GetAxisRaw("roll_R") < 0.8)
        {
            roll = Input.GetAxisRaw("roll_R") * (Time.fixedDeltaTime * RotationSpeed);
        }
        else if (Input.GetAxisRaw("roll_L") < 0.8)
        {
            roll = -Input.GetAxisRaw("roll_L") * (Time.fixedDeltaTime * RotationSpeed);
        }

        AddRot.eulerAngles = new Vector3(-pitch, yaw, -roll);
        GetComponent<Rigidbody>().rotation *= AddRot;

        Vector3 AddPos = Vector3.zero;

        // 前進
        if (Input.GetAxisRaw("Mouse Y") < -0.1)
        {
            AddPos = Vector3.forward;
        }
        // 後進
        else if (Input.GetAxisRaw("Mouse Y") > 0.1)
        {
            AddPos = Vector3.back;
        }

        AddPos = GetComponent<Rigidbody>().rotation * AddPos;

        // ブースト
        if (Input.GetButton("Boost"))
        {
            GetComponent<Rigidbody>().velocity = AddPos * (Time.fixedDeltaTime * MaxMovementSpeed);
        }
        else
        {
            GetComponent<Rigidbody>().velocity = AddPos * (Time.fixedDeltaTime *  MovementSpeed);
        }
    }
}
作成したScriptをドラッグ&ドロップでFlyCubeに入れて作業は終了になります.
ここまで付き合っていただきありがとうございました.
次は,滑らかな飛行動作を実装できるようにプログラミングしていきます.
