iOS16 AppIntentを自作アプリに組み込んでみました。
公開中のアプリはこれです。
https://apps.apple.com/jp/app/買い物todoリスト/id1547720019
買い物に特化した簡単なToDo管理的なものが欲しくて作成したアプリです。
リストに品物を追加するときの操作ステップをAppIntentを使って減らせないか試してみました。
現状、品物追加のためには、アプリを起動して「品物を入力」ボタンを押す必要があります。この操作が面倒です。
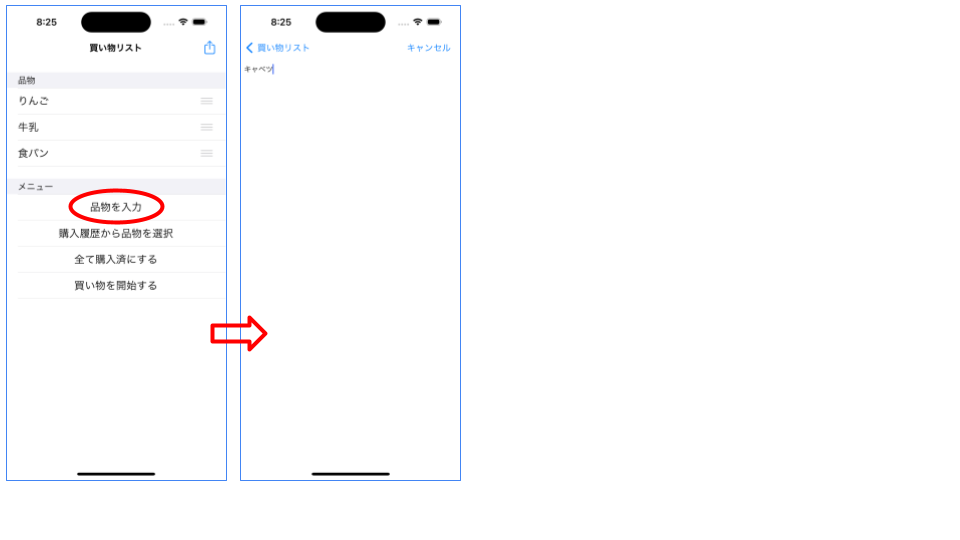
今回やりたかったことはAppIntentのダイアログから直接品物を入力することです。
しかし、実際に実装した結果は・・・
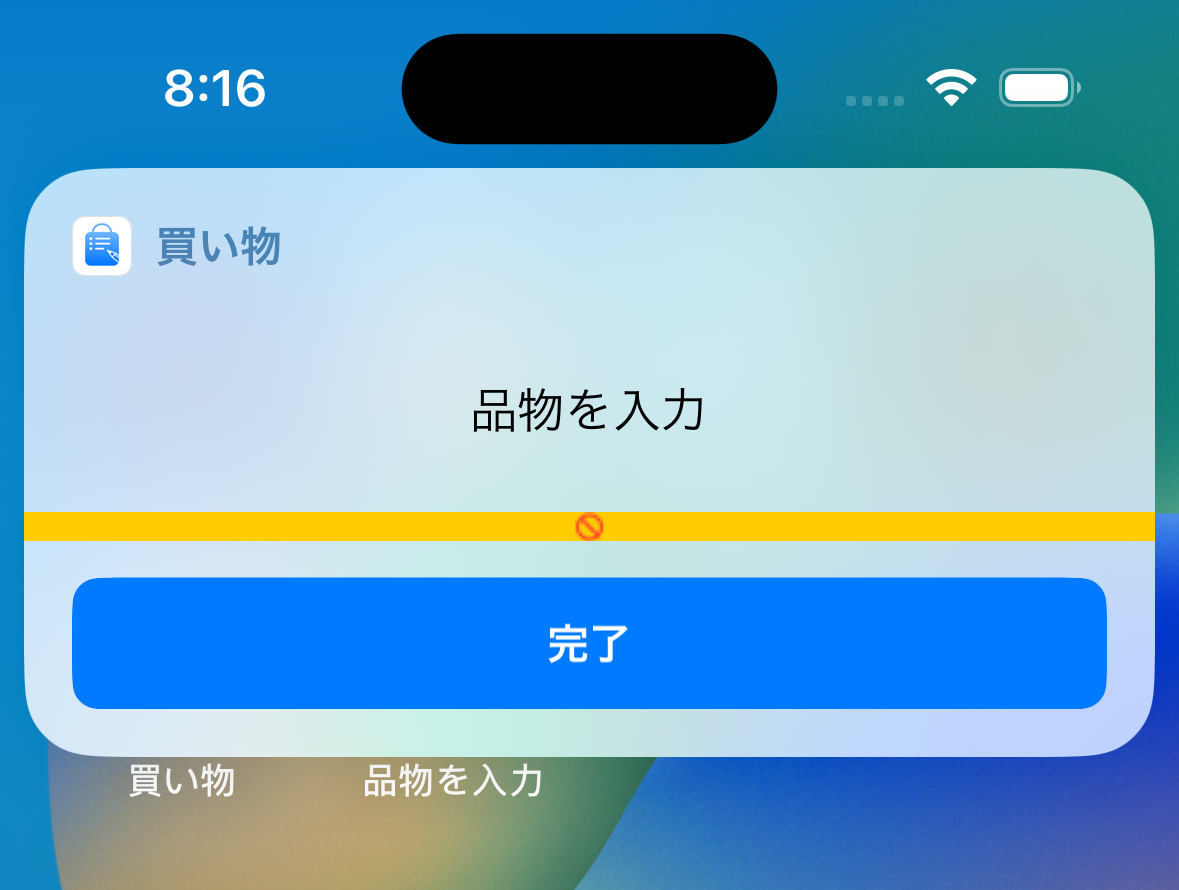
ダイアログにTextFieldは利用できないようです。残念。
この失敗例の実装は以下の通りです。
実装自体はとても簡単で良い感じです。
import SwiftUI
import AppIntents

struct ItemInputView: View {
    @State private var item = ""

    var body: some View {
        VStack {
            Spacer()
            Text("品物を入力").padding()
            Spacer()
            TextField("品物", text: $item)
        }
    }
}

struct SwiftUIView_Previews: PreviewProvider {
    static var previews: some View {
        ItemInputView()
    }
}

struct OpenItemInputIntent: AppIntent {
    static let title: LocalizedStringResource = "品物を入力"
    static var openAppWhenRun: Bool = false

    @MainActor
    func perform() async throws -> some IntentResult {
        return .result(view:ItemInputView())
    }
}
仕方ないので方針を変えます。
今回はショートカットから実行した時はアプリを起動して品物入力画面を開くようにします。
Observerパターンを利用して、AppIntent起動時に画面を開くようにします。
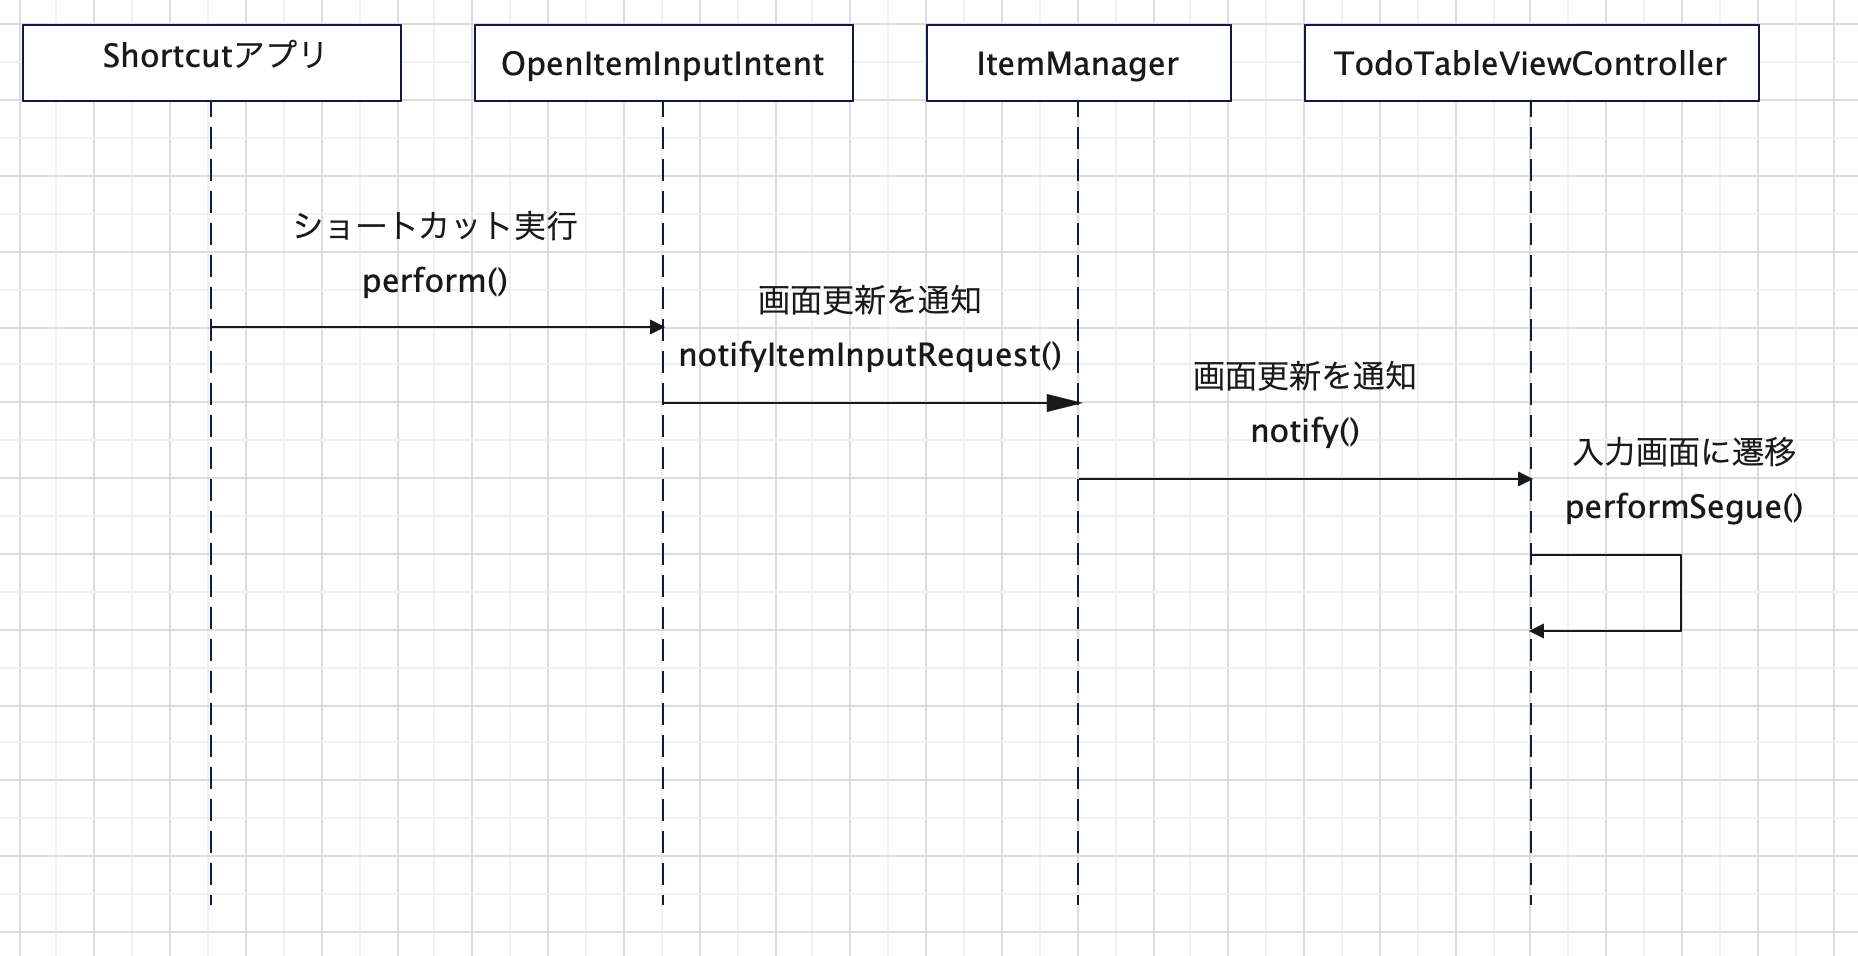
処理の流れは以下の通りです。
- ショートカットアプリからAppIntentが実行される
- AppIntentからアプリの制御クラスに画面遷移をリクエスト
- 制御クラスがObserverに画面オープンを通知
- Observer(ViewController)が通知を受け取り、入力画面に遷移する
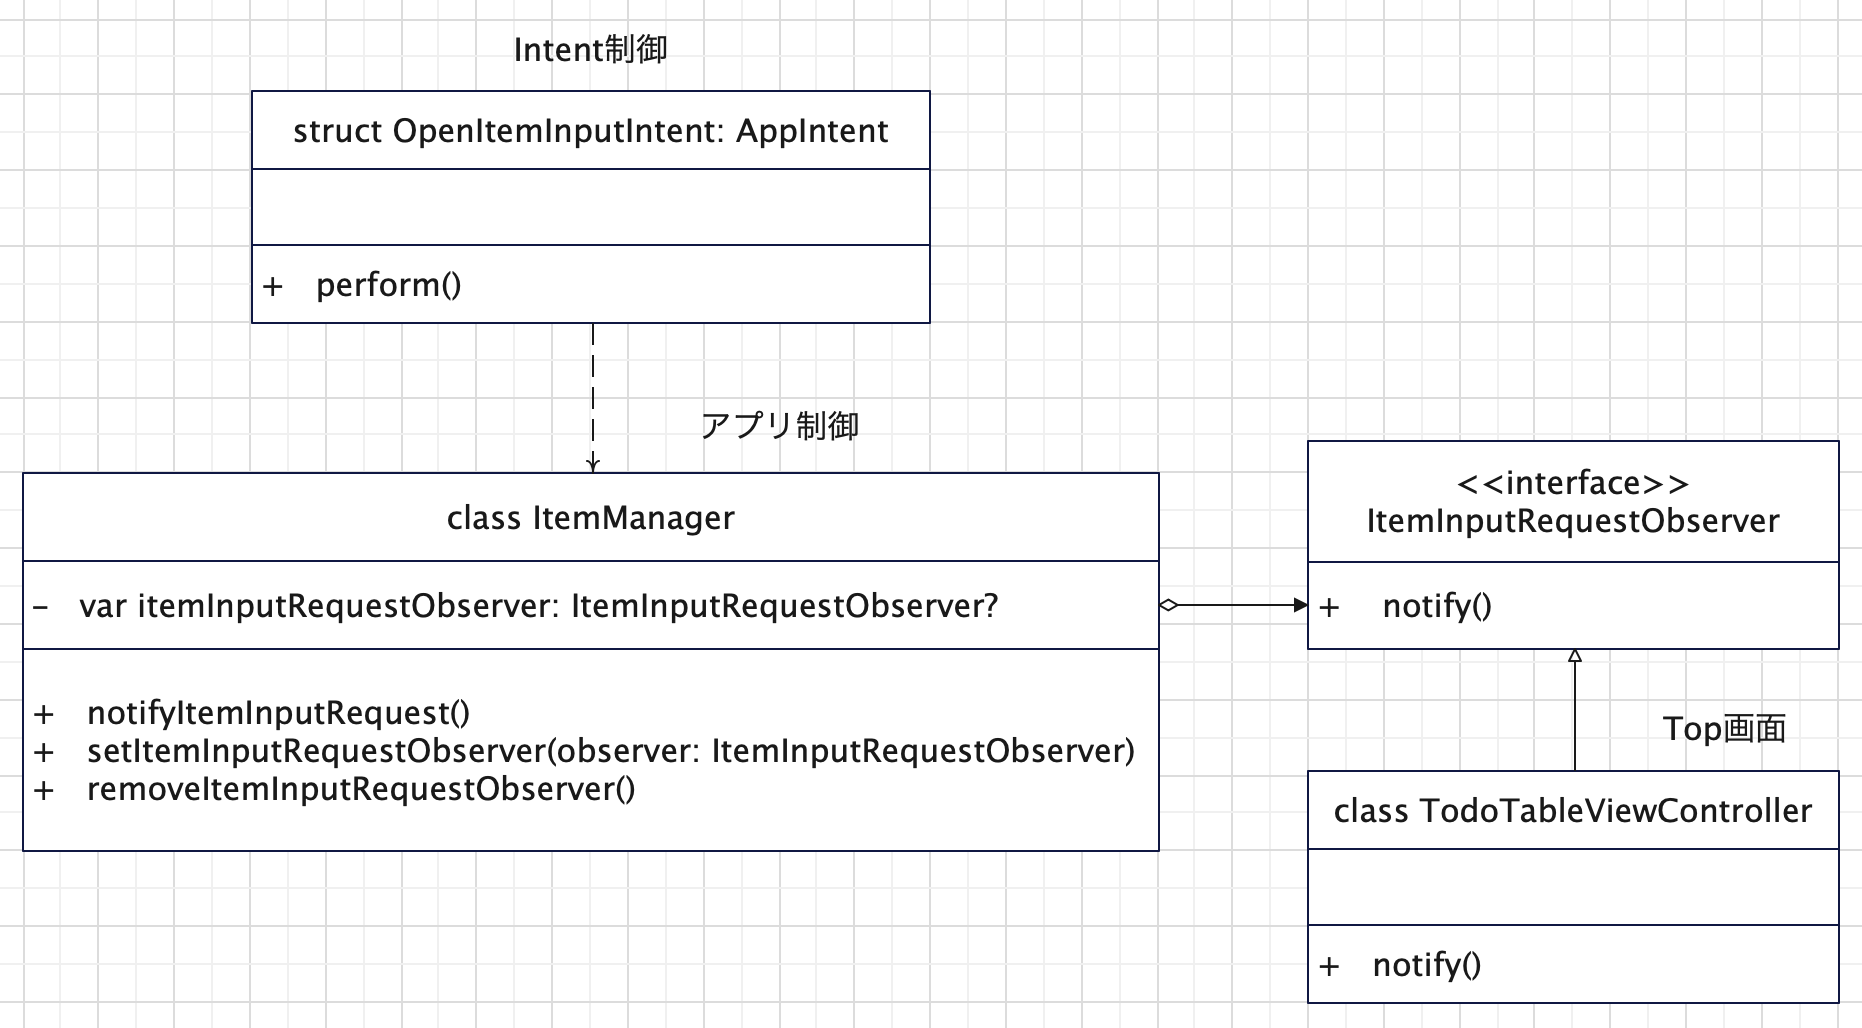
クラス図です。
図の作成にはEdrawMaxを利用しました。
https://www.edrawsoft.com/jp/edraw-max/
AppIntentの実装です。
struct OpenItemInputIntent: AppIntent {
    static let title: LocalizedStringResource = "品物を入力"
    static var openAppWhenRun: Bool = true

    @MainActor
    func perform() async throws -> some IntentResult {
        let manager = ItemManager.sharedManager
        manager.notifyItemInputRequest()
        return .result()
    }
}
Observerのインターフェースです。
protocol ItemInputRequestObserver {
    func notify()
}
制御クラスのObserver制御の実装です。
class ItemManager {
〜
    // MARK: Item input request observer Control
    func notifyItemInputRequest() {
        if let observer = self.itemInputRequestObserver {
            observer.notify()
        }
    }

    func setItemInputRequestObserver(observer: ItemInputRequestObserver) {
        self.itemInputRequestObserver = observer
    }

    func removeItemInputRequestObserver() {
        self.itemInputRequestObserver = nil
    }

〜
Observer(TodoTableViewController)側の入力画面への遷移処理です。
(一旦元の画面に戻してから入力画面に遷移するSegueをコールしています)
〜
class TodoTableViewController: UITableViewController, UNUserNotificationCenterDelegate, ItemInputRequestObserver {
〜
    override func viewDidLoad() {
        〜
        // 入力画面オープンの通知を受け取る
        self.itemManager.setItemInputRequestObserver(observer: self)
    }
〜
    func notify() {
        self.navigationController?.popToRootViewController(animated: false)
        self.performSegue(withIdentifier: "item_input", sender: nil)
    }
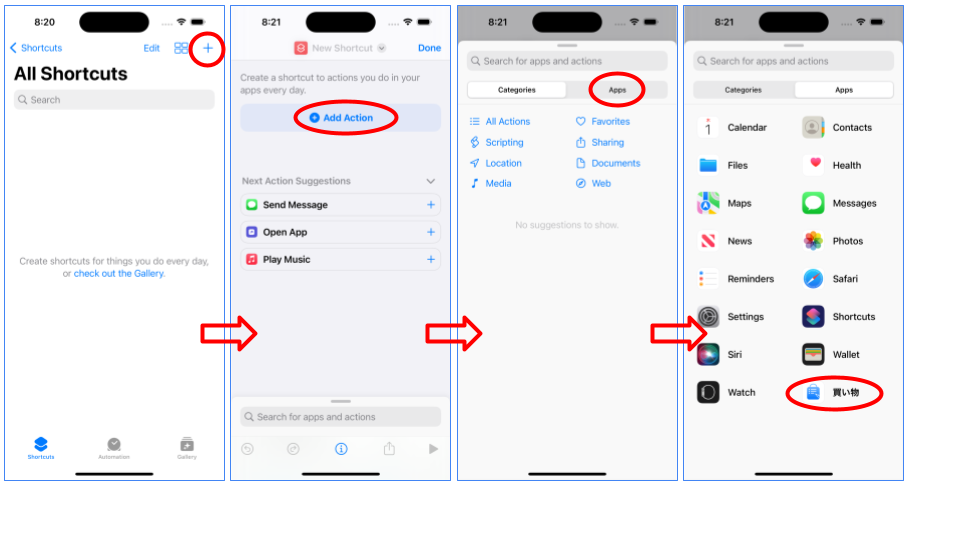
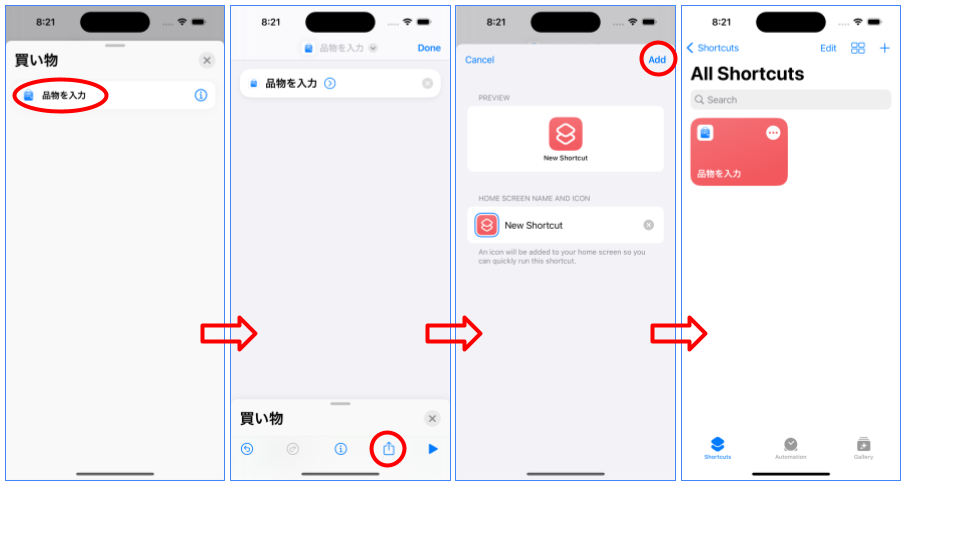
参考までにショートカット登録の流れをスクショで載せておきます。
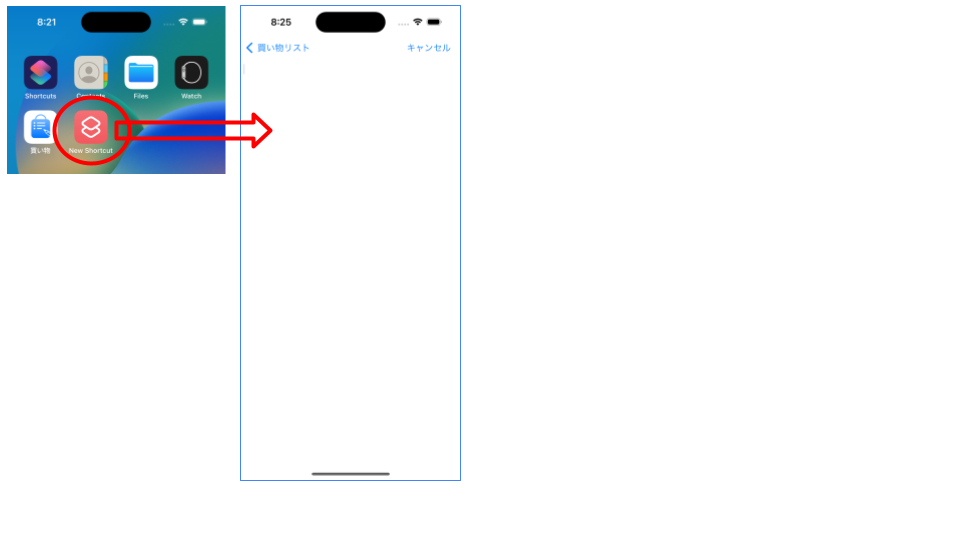
デスクトップに作成したショートカットから直接入力画面を開けるようになりました・・・が、便利になった気がしない・・・。
余談ですが、アプリをXcodeから実機にインストールした時に、アプリがショートカットに表示されず少し焦りました。実機を再起動したところ、表示される様になりました。
サンプルコード
今回のサンプルコードです。
https://github.com/fugasat/shopping_list
公開中のアプリです。
https://apps.apple.com/jp/app/買い物todoリスト/id1547720019
参考サイト
