まえがき
これまで使用してきたMDMからIntuneに切り替える際、wordやExcelなどのMicrosoft APPはGUI操作で簡単に配布できたものの、新しいTeamsに関しては配布できなかったので、その解決方法を検討したメモです。
解決した方法
Win32アプリとして個別にインストール用パッケージを作成してIntuneで展開させます。
なぜMicrosoft 365 Appsとして選択できないのか非常に疑問ですが、私が知らないだけかもなので他の方法があればコメントで教えてください。
1. 新しいTeamsのパッケージをダウンロード
こちらのダウンロードリンクから新しいTeamsのパッケージをダウンロードします。
Microsoft Teams MSIX x64
Teams オフラインインストーラ
上記リンクのパッケージはx64用なので、それ以外の場合はセットアップする対象PCのアーキテクチャに合ったファイルを使用する必要があります。
https://learn.microsoft.com/ja-jp/microsoftteams/new-teams-bulk-install-client
2. PowerShellスクリプトの準備
Win32でアプリを登録する場合、Intune側にインストール、アンインストール、検出規則のコマンドを指定する必要がありますので、次に作成するIntunewinファイルに同梱してあげるためにここで作成しておきます。
$msixFile = ".\MSTeams-x64.msix"
$destinationPath = "C:\windows\temp"
$bootstrapperPath = ".\teamsbootstrapper.exe"

Copy-Item -Path $msixFile -Destination $destinationPath -Force
if ($?) {
    Start-Process -FilePath $bootstrapperPath -ArgumentList "-p", "-o", "$destinationPath\MSTeams-x64.msix" -Wait -WindowStyle Hidden
    Write-Host "Microsoft Teams installation completed successfully."
} else {
    Write-Host "Error: Failed to copy MSTeams-x64.msix to $destinationPath."
    exit 1
}
./teamsbootstrapper -x
$teamsPath = "C:\Program Files\WindowsApps"
$teamsInstallerName = "MSTeams_*"

$teamsNew = Get-ChildItem -Path $teamsPath -Filter $teamsInstallerName
if ($teamsNew) {
    Write-Host "New Microsoft Teams client is installed."
    exit 0
} else {
    Write-Host "Microsoft Teams client not found."
    exit 1
}
3. Intunewinファイルの作成
Intuneでパッケージを展開させる場合 Microsoft Win32 コンテンツ準備ツール を使って .intunewin というパッケージファイルに変換してあげる必要があります。
今回は以下のように3つフォルダを作成しました。
C:¥IntuneContentPrepTool \# Microsoft Win32 コンテンツ準備ツールを丸々配置
C:¥NewTeams \# TeamsのMSIXファイルを配置
C:¥Output \# 空(出力用フォルダ)
このうちC:¥IntuneContentPrepToolに、ダウンロードしたファイルと作成したインストール、アンインストール用のスクリプトを入れておきます。

Powershellで.exeを叩いてやるとそれぞれパスの入力を求められるので、入力します。
PS C:\Intunewin\IntuneContentPrepTool> ./IntuneWinAppUtil.exe
Please specify the source folder: C:¥NewTeams
Please specify the setup file: Install.ps1
Please specify the output folder: C:¥Output
Do you want to specify catalog folder (Y/N)?n
完了すれば、コマンドで指定したフォルダ(今回はC:¥Output)にIntunewinファイルが出力されます。
3.Intuneにアプリ登録
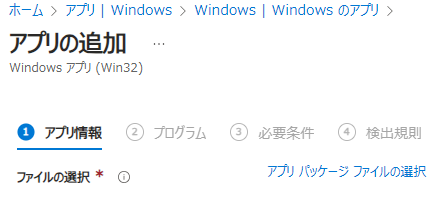
Microsoft Intune 管理センターで作成したIntunewinファイルをWindowsアプリ(Win32)で登録します。

インストールコマンド、アンインストールコマンドはそれぞれ以下のように入力します。
他の値も適宜入力していきます。
%SystemRoot%\sysnative\WindowsPowerShell\v1.0\powershell.exe -windowstyle hidden -executionpolicy bypass -command .\install.ps1
%SystemRoot%\sysnative\WindowsPowerShell\v1.0\powershell.exe -windowstyle hidden -executionpolicy bypass -command .\uninstall.ps1
今回はインストール時のエラーコードを1としているので、失敗のリターンコードも追加しておきます。

これで新しいTeamsの構成は完了しました。
あとはIntuneのポリシーでインストールされるのを待ちます。

