目次
- この記事でやりたいこと
- 環境
-
手順
- Nextjsプロジェクトの立ち上げ
- Azure Functionsの実装
- フロントの実装と現状だとデータを取得できないことを確認
- SWA CLIを使い統合
- まとめ
この記事でやりたいこと
- Azure Static Web Appsでは、フロントとバックエンド(Azure Functions)を統合した開発ができます。その場合、以下のような構成イメージとなります。
- フロントエンド (Next.js):
https://hoge - バックエンド (Functions):
https://hoge/api/todos
- フロントエンド (Next.js):
- しかし、ローカル環境上では通常以下のようにポート番号が異なります。
- フロントエンド (Next.js):
localhost:3000 - バックエンド (Functions):
localhost:7071/api/todo
- フロントエンド (Next.js):
- そのため、この記事では、Azure Static Web Apps CLIを使用して、ローカル環境で以下のように同じポート番号で動作する方法を解説します。
- フロントエンド (Next.js):
localhost:4280 - バックエンド (Functions):
localhost:4280/api/todo
- フロントエンド (Next.js):
- なお、こちらが今回実装するもののGithubリポジトリとなります
環境
"node": "v16.20.0" # node18系の場合、SWA CLIがPowerShell上でうまく動作しないため、16系で行います。(なお、WSL2では問題なく動作します)
"next": "13.2.4"
"@azure/static-web-apps-cli": "1.1.1",
"azure-functions-core-tools": "4.0.5095"
手順
1. Next.jsプロジェクトを作成
- 以下コマンドでプロジェクトの立ち上げを行います。
$ npx create-next-app --typescript # 実行するコマンド ✔ What is your project named? … swa-nextjs-functions # 名前(任意) ✔ Would you like to use ESLint with this project? … No / Yes # Yes ✔ Would you like to use `src/` directory with this project? … No / Yes # Yes ✔ Would you like to use experimental `app/` directory with this project? … No / Yes # No ✔ What import alias would you like configured? … @/* # そのまま - 今回は余計なスタイルを省きたいので、
src/styles/globals.cssの中身を空にします。また、src/pages/apiについては使用しないため、削除します。 - この状態で、一度以下実行し、
localhost:3000で立ち上がることを確認します。$ cd swa-nextjs-functions $ npm run dev - 確認後、Ctrl + Cで閉じます。
2. Azure Functionsの実装
- 今回はAzure Functions自体の実装が主要な目的ではないため、todoの一覧を返す簡単なFunciontsの作成にとどめます。
- まずは、
azure-functions-core-toolsをインストールします。azure-functions-core-toolsはAzure Functionsのローカルでの開発環境を提供するツールとなります。$ npm install -D azure-functions-core-tools - initコマンドを使用します。実行後、apiフォルダが作成されることを確認し、依存関係をインストールします。
$ func init api --typescript $ cd api $ npm i - newコマンドでFunctionsを作成します。今回はtodoを返すFunctionsを想定します。
$ func new --name todo --template "HTTP trigger" --authlevel "anonymous" -
api/todo/index.tsを修正し、todo一覧を返すFunciontsを作成します。// api/todo/index.ts import { AzureFunction, Context, HttpRequest } from "@azure/functions"; const httpTrigger: AzureFunction = async function ( context: Context, req: HttpRequest ): Promise<void> { context.res = { body: [ { id: 1, title: "Todo 1", }, { id: 2, title: "Todo 2", }, ], }; }; export default httpTrigger; - 起動し挙動を確認します。以下のコマンドを打ち、
localhost:7071/api/todoで返ってくればOKです。$ npm start
- api側はきらず、このままにしておきます。
3. フロントの実装と現状だとデータを取得できないことを確認
- Funciontsを呼び出す実装をし、そのうえで現状は統合されていないため、エラーになることを確認します。
- まず、データフェッチのライブラリにSWRを使用するため、インストールします。api起動させているので、別ターミナルで以下実行します。
$ npm i swr # ルートで実行 - フロントのコードを実装します。
src/pages/index.tsxを以下に書き換えます。// src/pages/index.tsx import { NextPage } from "next"; import useSWR from "swr"; type Todo = { id: number; title: string; }; const fetcher = async (): Promise<Todo[]> => { const res = await fetch("http://localhost:7071/api/todos"); // Functionsの呼び出し const todos: Todo[] = await res.json(); return todos; }; const Home: NextPage = () => { const { data: todos, isLoading, error, } = useSWR<Todo[]>("http://localhost:7071/api/todos", fetcher); // 第一引数はなんでも良いが、"http://localhost:7071/api/todos"に合わせておく if (isLoading) return <p>loading...</p>; if (error || !todos) return <p>error</p>; return ( <> <h1>Todo一覧</h1> <ul> {todos.map((todo) => ( <li key={todo.id}> {todo.id} - {todo.title} </li> ))} </ul> </> ); }; export default Home; - フロント側を立ち上げるために、以下を実行し、
localhost:3000を開きます。$ npm run dev - すると、当然ですが、現状フロント側が
localhost:3000、バックエンド側がlocalhost:7071のため、CORSエラーとなることが確認できます。

- ここまで確認できたら、フロント、バックエンドともにCtrl+Cで一度切ります。
4. SWA CLIを使い統合
-
では今回の本題である、SWA CLIを使用して統合し、同じポート番号で実行できるようにします。
-
まず、swa cliをインストールします(ルートフォルダで)
$ npm install -D @azure/static-web-apps-cli -
initコマンドで設定を初期化します。
$ swa init # 実行するコマンド Welcome to Azure Static Web Apps CLI (1.1.1) ✔ Choose a configuration name: … swa-nextjs-functions Detected configuration for your app: - Framework(s): React, Next.js, with API: Node.js, TypeScript # 実装内容を自動で検知してくれる - App location: . - Output location: .next - API location: api - App build command: npm run build - API build command: npm run build --if-present - App dev server command: npm run dev - App dev server URL: http://localhost:3000 - API dev server URL: # 概ね自動検知されて問題ないが、output locationだけ修正するのでnoを選択 ✔ Are these settings correct? … no ✔ What's your app location? … . ✔ What's your build output location? … out # 今回、ssrを使用せず、csrとするので修正する(なお、今回の実装上ではどちらでも動くと思いますが、現状Azure Static Web Appsでssrはプレビュー機能となっているため、修正します。) ✔ What's your API location? (optional) … api ✔ What command do you use to build your app? (optional) … npm run build ✔ What command do you use to build your API? (optional) … npm run build --if-present ✔ What command do you use to run your app for development? (optional) … npm run dev ✔ What's your app development server URL (optional) … http://localhost:3000 ✔ What's your API development server URL (optional) … -
フロントのコードを修正します。データを取得する処理の部分だけ、APIの叩く先を修正するので、
src/pages/index.tsxの該当箇所を以下に書き換えます。// src/pages/index.tsx ~ const fetcher = async (): Promise<Todo[]> => { const res = await fetch("/api/todo"); // 同じドメインのため/api/todosで取得できる const todos: Todo[] = await res.json(); return todos; }; ~ const { data: todos, isLoading, error, } = useSWR<Todo[]>("/api/todo", fetcher); // 第一引数は何でも良いが一応/api/todosにそろえる ~ -
startコマンドを使用し、立ち上げます。
$ swa start -
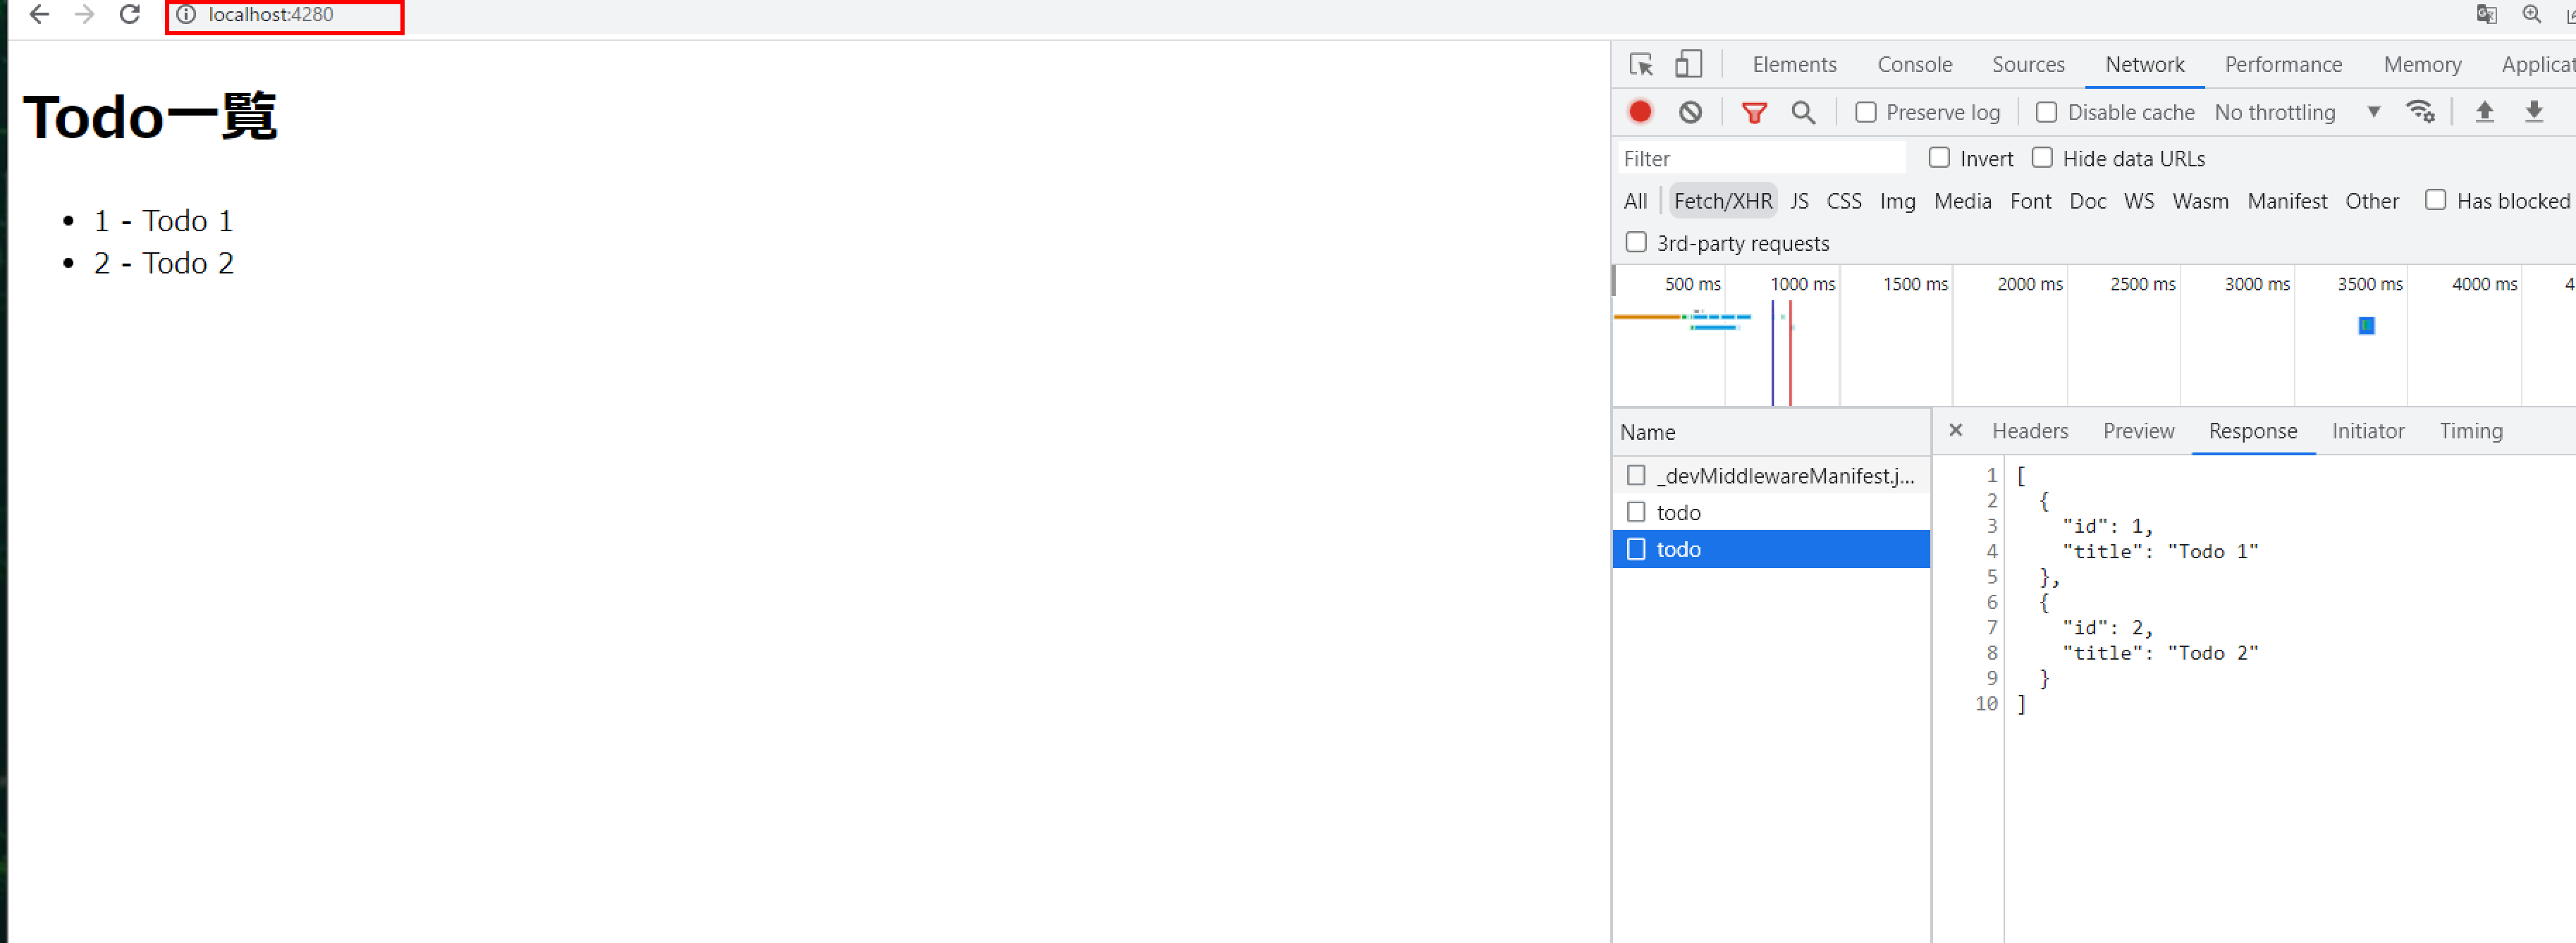
すると、
localhost:4280が立ち上がり、問題なく表示されることが確認できます。
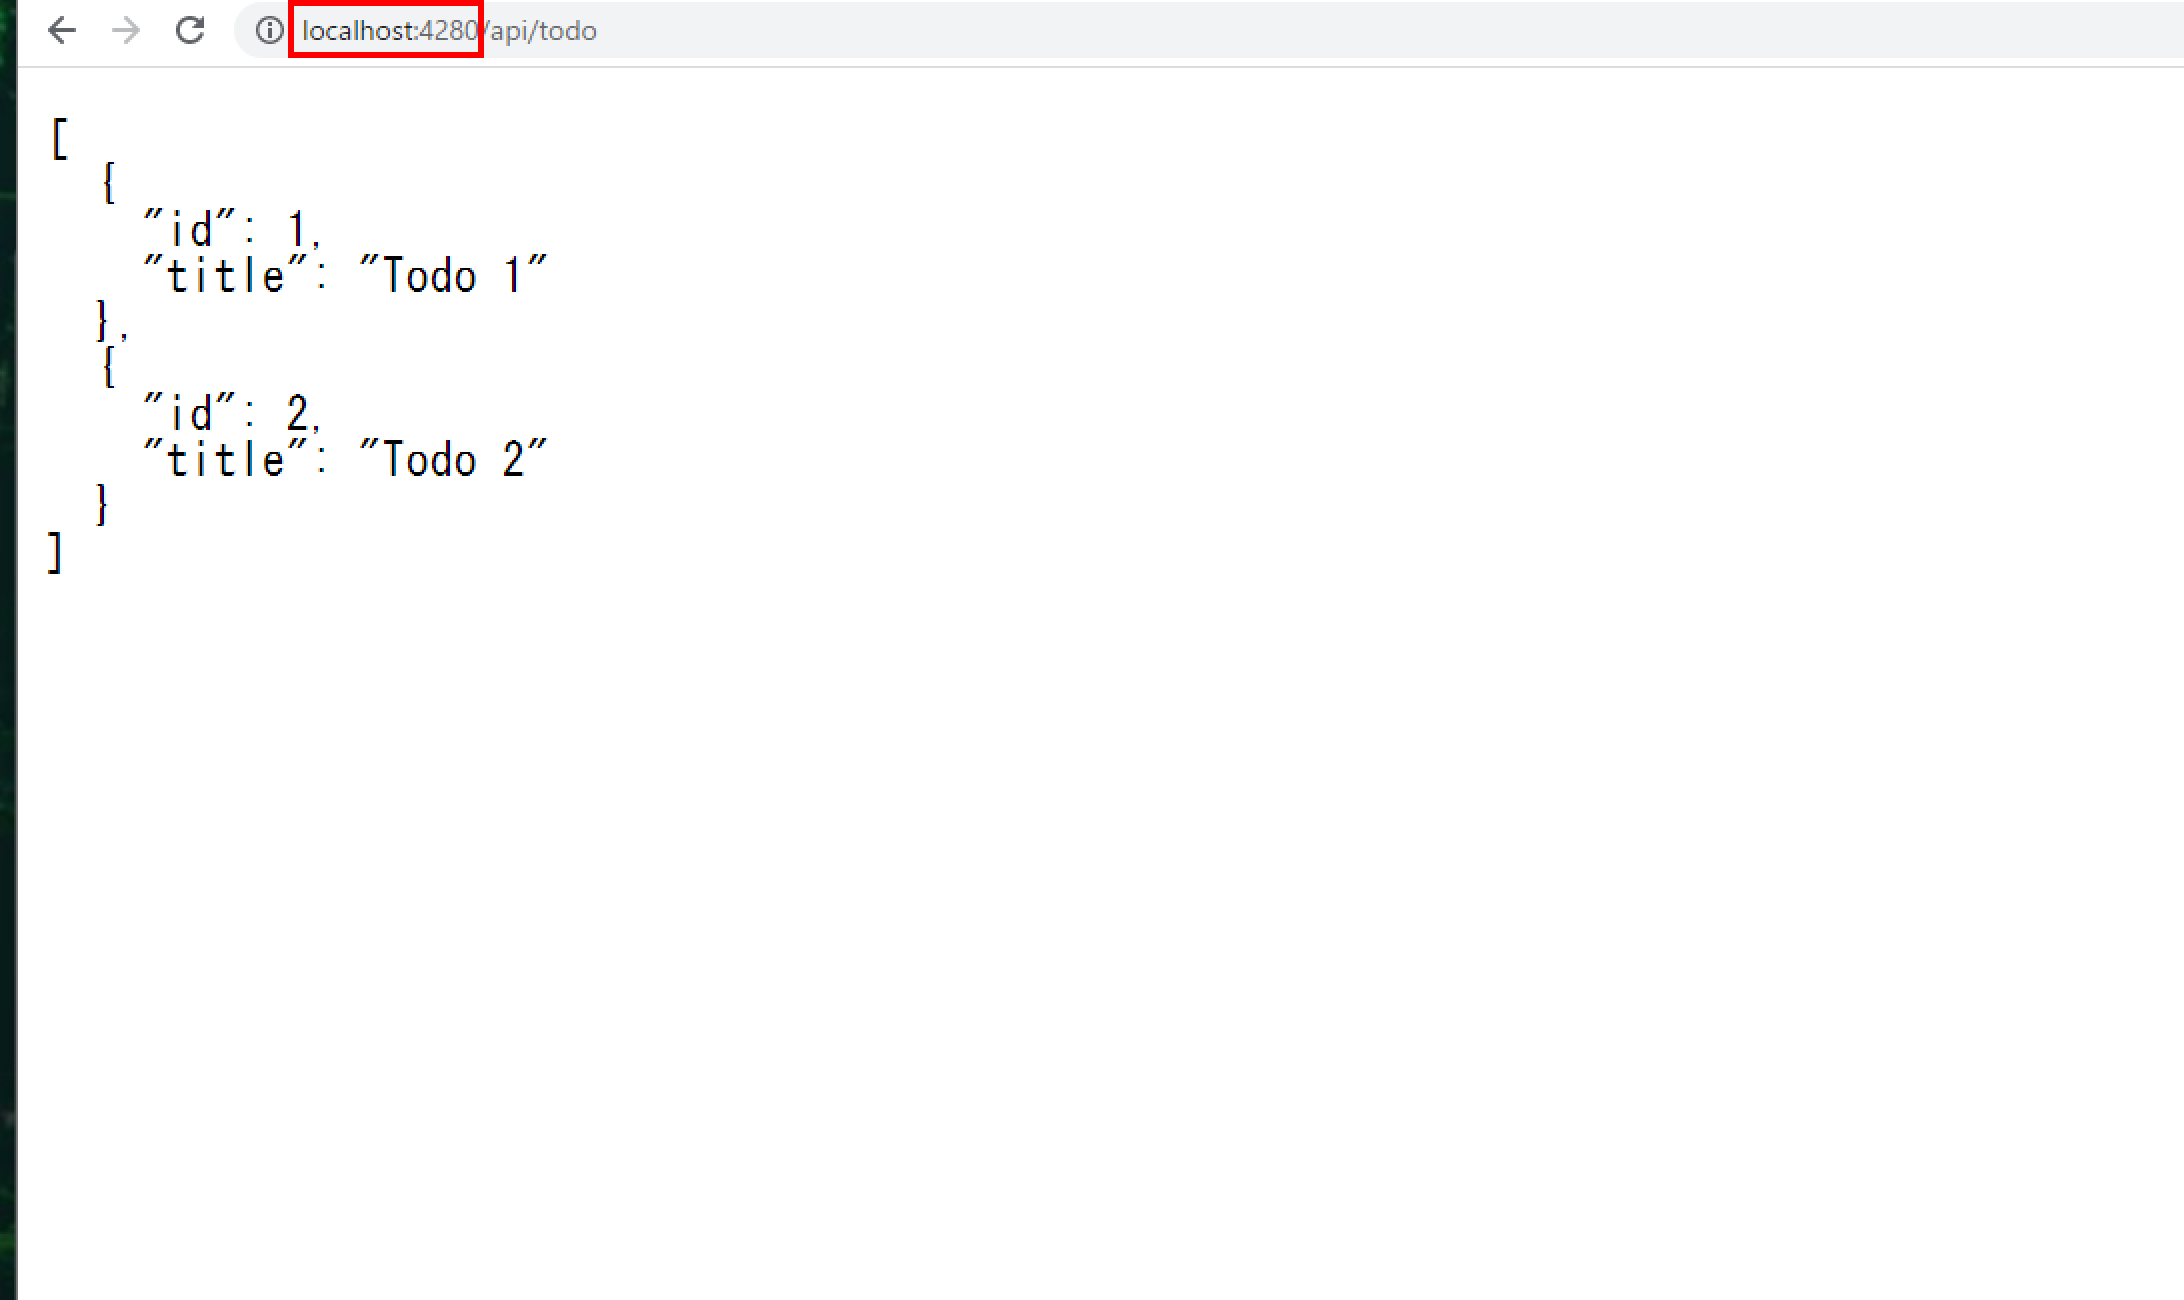
-
バックエンド側を
localhost:4280/api/todoで直接叩いても、取得されることが確認できます。
-
以上で簡単にローカル上でフロントとバックエンド(Azure Functions)を統合し、同じポートで立ち上げることができました!
まとめ
- Azure Static Web AppsではフロントとAzure Functionsを統合した開発も可能ですが、ローカル上で同様の環境をSWA CLIを使用すると簡単に構築できることを確認できました。みなさんもぜひお試しください!