概要
- 表題の通り、RemixでTODOアプリを作成するチュートリアルです。
- Remixはパフォーマンス向上や開発体験の良さなど、知名度の低さのわりにとても優れている点があるReactフレームワークだと思っています。今回は詳細な説明は行わず、とりあえずRemixの実装イメージを持っていただくことを目的としています。
今回はRemixに焦点を当てますので、shadcn/ui、Prismaの説明についてはより簡略化しております。また、デプロイはせず、ローカル開発のみとなりますので、ご了承ください。
前提
- Remixのバージョンは
2.0.1を使用します。
作成物
- 完成は以下のようなイメージです。なお、Remixのレイアウト構造(
Nested Route)を把握しやくするために、あえて背景色をつけています。
実装
Remix立ち上げ
- remixにはすでにいくつかテンプレートやスタックが用意されていますが、今回は基本テンプレートを使用します。
$ npx create-remix@latest - プロジェクト名を聞かれますので、任意のものを入れます(例:
todo-app)。 - また、
npm installをするか?も聞かれますので、yesを選択します。(今回はnpmを使用します。もし、yarnやpnpmを使用される方は適宜おきかえてください。) - 以下で立ち上げが確認できればOKです。
$ cd todo-app
$ npm run dev
shadcn/uiの設定
- 初期化のため以下を実行し、画像の通りの設定をします。
$ npx shadcn-ui@latest init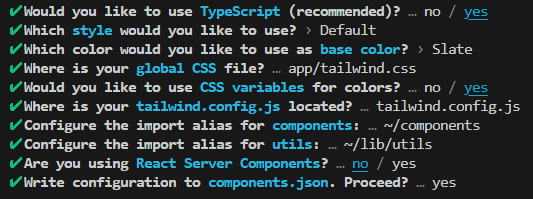
- tailwindcss導入のために以下を実行します。
$ npm add -D tailwindcss@latest autoprefixer@latest - ルートで
postcss.config.cjsファイルを作成し、以下を記載します。// postcss.config.cjs module.exports = { plugins: { tailwindcss: {}, autoprefixer: {}, }, };
shadcn/uiのドキュメントでは拡張子をjsとしていますが、cjsでないとエラーになりますのでご注意ください。
-
remix.config.jsに以下を追記します。/** @type {import('@remix-run/dev').AppConfig} */ export default { ignoredRouteFiles: ["**/.*"], tailwind: true, // 追加 postcss: true, // 追加 }; -
root.tsxでtailwind.cssを読み込み、適用させるように実装します。// app/root.tsx + import styles from "./tailwind.css" // ... - export const links: LinksFunction = () => [ - ...(cssBundleHref ? [{ rel: "stylesheet", href: cssBundleHref }] : []), - ]; - + export const links: LinksFunction = () => [ + { rel: "stylesheet", href: styles }, + ...(cssBundleHref ? [{ rel: "stylesheet", href: cssBundleHref }] : []), + ]; // ... - 以上で
shadcn/ui基本設定は終了です。
共通レイアウトの作成(全体)
- 前提として、今回は以下のURL構造を作成します。
-
/:ホーム画面(Welcomeメッセージの表示) /todos/todos/new/todos/1/edit-
/todos/1/delete(後述しますが、このパスについてはUIがなく、アクションのみとなります。) -
/users: ユーザー一覧。おまけとして外部API(今回はJSONPlaceholder)を使用する場合も簡単に実装します。
-
- すべてページで、サイドバーを共通で使用しますので、その実装を行います。Remixでは全ページの共通レイアウトを
app/root.tsxで設定することができます。 - 以下のように実装します。
<Outlet />に共通部分以外が入る形です。// app/root.tsx import stylesheet from "~/tailwind.css"; import type { LinksFunction, MetaFunction } from "@remix-run/node"; import { Link, Links, LiveReload, Meta, Outlet, Scripts, ScrollRestoration, } from "@remix-run/react"; import { Separator } from "~/components/ui/separator"; import { SideBarNav } from "~/components/side-bar-nav"; export const links: LinksFunction = () => [ { rel: "stylesheet", href: stylesheet }, ]; // meta関数をエクスポートすることで、title等を変更できます。 export const meta: MetaFunction = () => { return [ { title: "Remix Todo App" }, { name: "description", content: "Remix Todo App" }, ]; }; export default function App() { return ( <html lang="ja"> <head> <meta charSet="utf-8" /> <meta name="viewport" content="width=device-width, initial-scale=1" /> <Meta /> <Links /> </head> <body> <div className="flex h-screen overflow-hidden bg-red-200" style={{ fontFamily: "system-ui, sans-serif", lineHeight: "1.8" }} > <aside className="w-[250px] px-4 py-5"> <div className="space-y-4"> <Link to="/" className="text-xl font-bold hover:opacity-70"> TODOアプリ </Link> {/* shadcn/uiのSeparatorコンポーネントを使用。この後、追加します。 */} <Separator className="border-2 border-gray-400" /> {/* この後、コンポーネントを作成 */} <SideBarNav /> </div> </aside> <Separator orientation="vertical" className="h-screen border-2 border-gray-400" /> <main className="flex-1 overflow-y-scroll px-8 pt-12"> {/* Outletコンポーネントに共通部分以外が入る形となります。 */} <Outlet /> </main> </div> <ScrollRestoration /> <Scripts /> <LiveReload /> </body> </html> ); } - shadcn/uiの
Separatoreコンポーネントを使用します。また、Buttonコンポーネントのスタイルも使用したいため、以下を実行して追加します。$ npx shadcn-ui@latest add separator $ npx shadcn-ui@latest add button -
SideBarNavコンポーネントを自作します。app/components/side-bar-nav.tsxを作成し、以下を記載します。// app/components/side-bar-nav.tsx import { Link } from "@remix-run/react"; import { cn } from "~/lib/utils"; import { buttonVariants } from "./ui/button"; const sideBarNavItems: { title: string; href: string; }[] = [ { title: "TODO", href: "/todos", }, { title: "ユーザー", href: "/users", }, ]; export const SideBarNav = () => { return ( <nav className="flex flex-col gap-2"> {sideBarNavItems.map((item) => ( <Link key={item.href} to={item.href} className={cn( buttonVariants({ variant: "ghost", }), "flex justify-start text-lg" )} > {item.title} </Link> ))} </nav> ); }; -
app/routes/_index.tsxを以下に実装します。_index.tsxは/における、先ほどのapp/root.tsxの<Outlet>部分となります。// app/routes/_index.tsx export default function Index() { return <h1 className="bg-blue-400">Welcome to Todo App.</h1>; } - ここまでで、
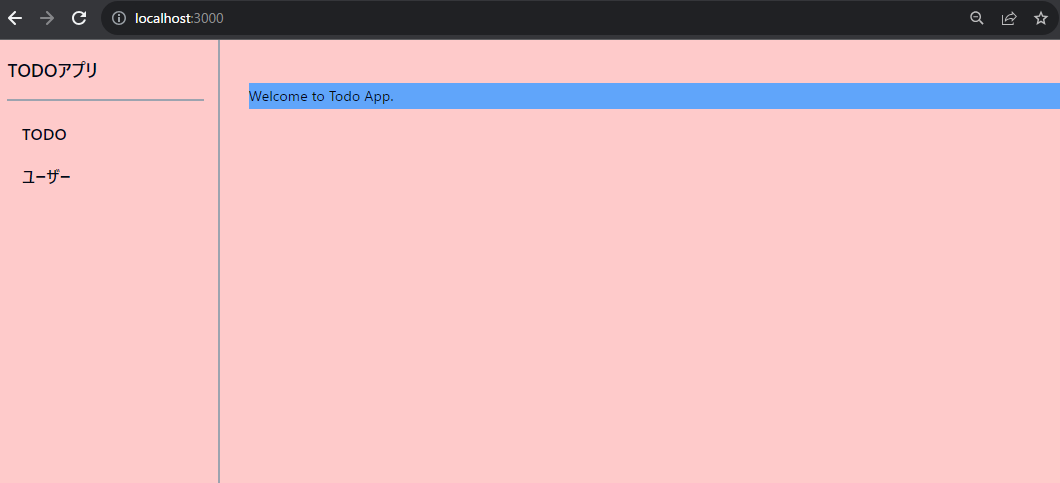
npm run devを実行し、http://localhost:3000/を開くと以下のような画面になります。
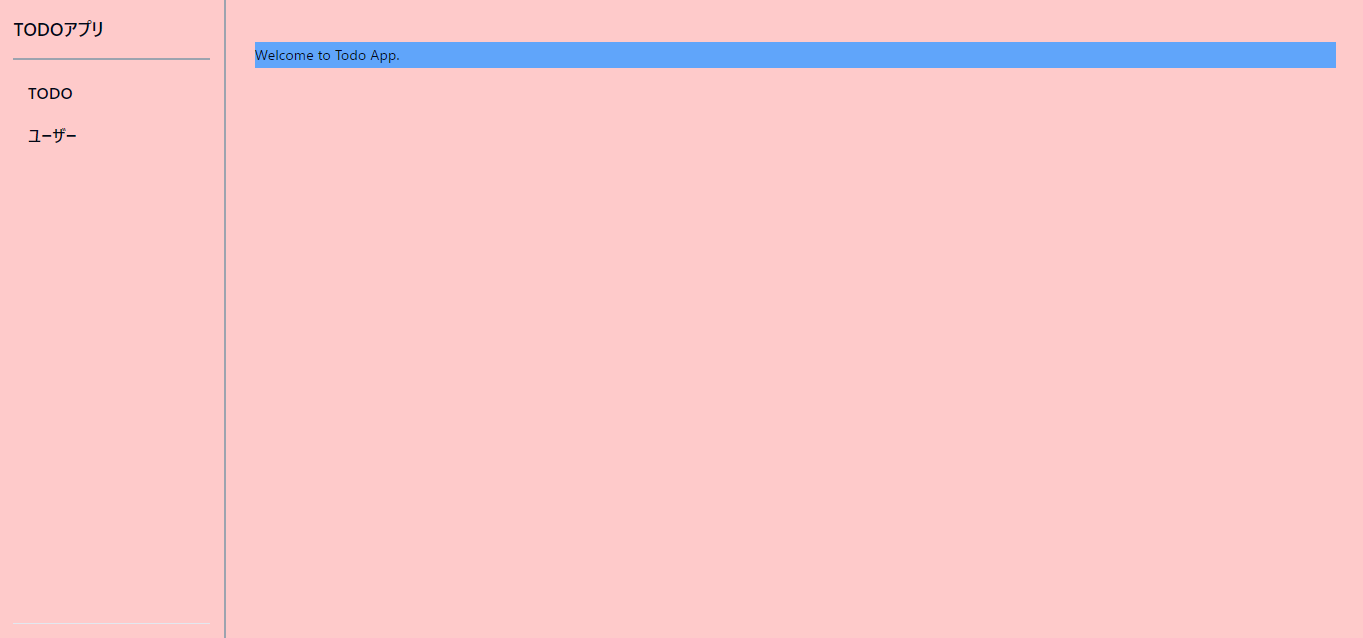
つまり、薄赤の部分がapp/root.tsxの共通レイアウト部分で、青部分が_index.tsxの部分となります。
-
ただし、このままだとサイドバーのTODOとユーザーをクリックしても、ページが存在せず、404となりますので、それぞれ簡易的なページを作成します。
-
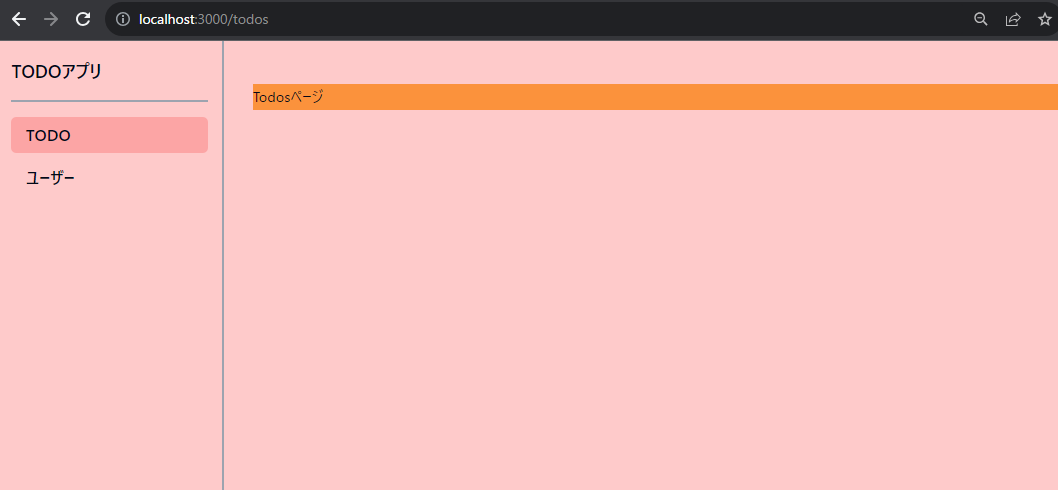
まず、
app/routes/todos.tsxを作成し、以下を実装します。// app/routes/todos.tsx export default function Todos() { return <h1 className="bg-orange-400">Todosページ</h1>; } -
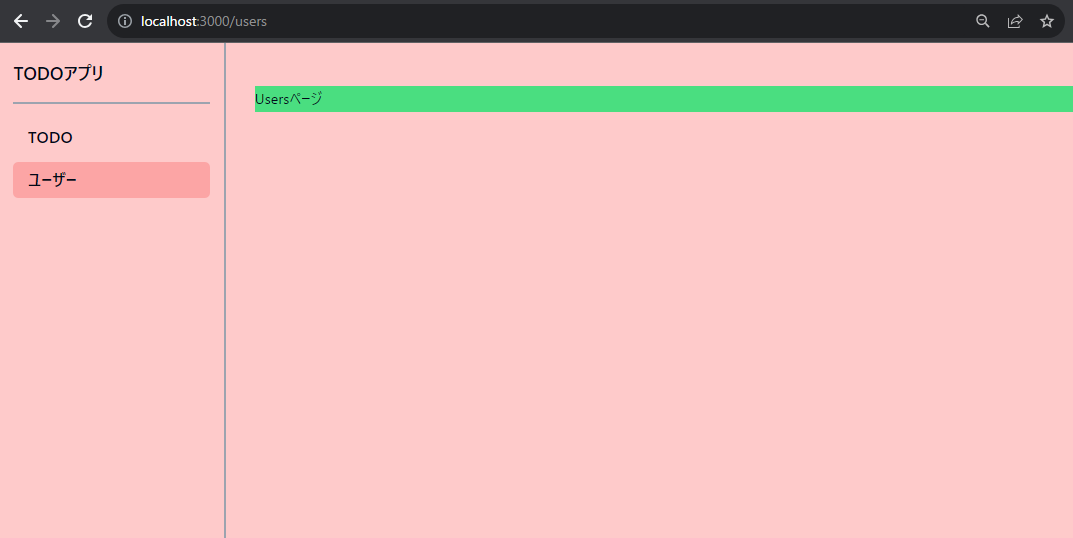
次に、
app/routes/users.tsxを作成し、以下を実装します。export default function Users() { return <h1 className="bg-green-400">Usersページ</h1>; } -
サイドバーのリンクについて、該当ページの場合はアクティブなリンクとわかるように色が変わるようにします。そのためには
NavLinkコンポーネントを使用すると簡単に実装できます。// app/components/side-bar-nav.tsx - import { Link } from "@remix-run/react"; + import { NavLink } from "@remix-run/react"; // ... - <Link - key={item.href} - to={item.href} - className={cn( - buttonVariants({ - variant: "ghost", - }), - "flex justify-start text-lg" - )} - > - {item.title} - </Link> - + <NavLink + key={item.href} + to={item.href} + className={({ isActive }) => + cn( + buttonVariants({ + variant: "ghost", + }), + // アクティブリンクの時は背景色を濃くして表示します。 + isActive && "bg-red-300", + "flex justify-start text-lg" + ) + } + > + {item.title} + </NavLink> // ... -
最後にサイドメニューのリンクをホバーした時の背景色を濃い赤にしたいので、以下のように
app/components/ui/button.tsxを修正します。// app/components/ui/button.tsx // ... - ghost: "hover:bg-accent hover:text-accent-foreground", + ghost: "hover:bg-red-300 hover:text-accent-foreground", // ...
shadcn/uiはライブラリとして使用するのではなく、shadcn/ui製のコンポーネントをコピーして取り込んいるイメージです。そのため、コンポーネント自体のカスタマイズをすることができます。
- それぞれが以下のようになっていて、薄赤の共通部分は変わらず、青、オレンジ、緑のページタイトルのみレンダリングされることを確認できればOKです。
TODO一覧の作成(データの事前準備)
- 次にtodo一覧ページを作成していきます。その前に、prismaの設定をして、todo一覧を取得する事前準備を行います。
- まず、Prismaをインストールします。
$ npm install prisma --save-dev - 次にPrisma CLIのinitコマンドでPrismaをセットアップします。今回はsqliteを使用するので、以下を実行します。
$ npx prisma init --datasource-provider sqlite -
prisma/schema.prismaフォルダ&ファイルが出来上がりますので、schema.prismaに以下を記述します。// prisma/schema.prisma generator client { provider = "prisma-client-js" } datasource db { provider = "sqlite" url = env("DATABASE_URL") } model Todo { id Int @id @default(autoincrement()) title String done Boolean } - マイグレーションを実行し、データベーステーブルを作成します。
$ npx prisma migrate dev --name init - 初期データをセットします。直接DBから入力しても良いのですが、
prisma/script.jsというファイルを作成し、その中に初期データを挿入する実装を行います。// prisma/script.js import { PrismaClient } from "@prisma/client"; const prisma = new PrismaClient(); async function main() { await prisma.todo.create({ data: { title: "todo1", done: true, }, }); } main() .then(async () => { await prisma.$disconnect(); }) .catch(async (e) => { console.error(e); await prisma.$disconnect(); process.exit(1); }); - 以下を実行したうえで、
npx prisma studioを実行し、データが挿入されていることを確認します。$ node prisma/script.js $ npx prisma studio - 最後にPrismaClientインスタンスをシングルトンとして扱うように実装します。
app/singleton.server.tsとapp/db.server.tsファイルを作成し、それぞれ以下のように実装します。// app/singleton.server.ts export const singleton = <Value>( name: string, valueFactory: () => Value ): Value => { const g = global as any; g.__singletons ??= {}; g.__singletons[name] ??= valueFactory(); return g.__singletons[name]; };// app/db.server.ts import { PrismaClient } from "@prisma/client"; import { singleton } from "~/singleton.server"; export const prisma = singleton("prisma", () => new PrismaClient());
server.tsという拡張子をつけることで、クライアントバンドルから除外され、思わぬ形でクライアントから実行されることを防ぐことができ、確実にサーバーでのみ実行させることが可能です。
TODO一覧の作成
- さて、事前準備についてはOKなので、TODOの一覧実装を行います。
- 詳細は後述しますが、先にTODO関係のパスとファイル構造を以下に示します。
-
app/routes/todos.tsx:todosの共通レイアウト。app/routes/todos.~tsxのようなファイルに共通のレイアウトとして適用されます。 -
app/routes/todos._index.tsx:todo一覧ページ。/todosに該当します。 -
app/routes/todos.new.tsx:todo作成ページ。 -
app/routes/todos.$todoId.edt.tsx:todo編集ページ。 -
app/routes/todos.$todoId.delete.tsx:todo削除処理。このパスについてはUIは存在しません。
-
-
app/routes/todos.tsxのファイルは作成済みなので、以下に書き換えて、共通部分を作成します。// app/routes/todos.tsx import { Outlet } from "@remix-run/react"; import { Separator } from "~/components/ui/separator"; export default function Todos() { return ( <div className="bg-orange-300"> <div className="flex items-center space-x-6 "> <h1 className="text-2xl font-bold">Todoページ</h1> </div> <Separator className="mb-4 mt-2 border-2 border-gray-400" /> {/* /todos~の共通箇所はroot.tsxと同様にOutletコンポーネントを使用できる。*/} <Outlet /> </div> ); } - 以下の画像のようになればOKです。
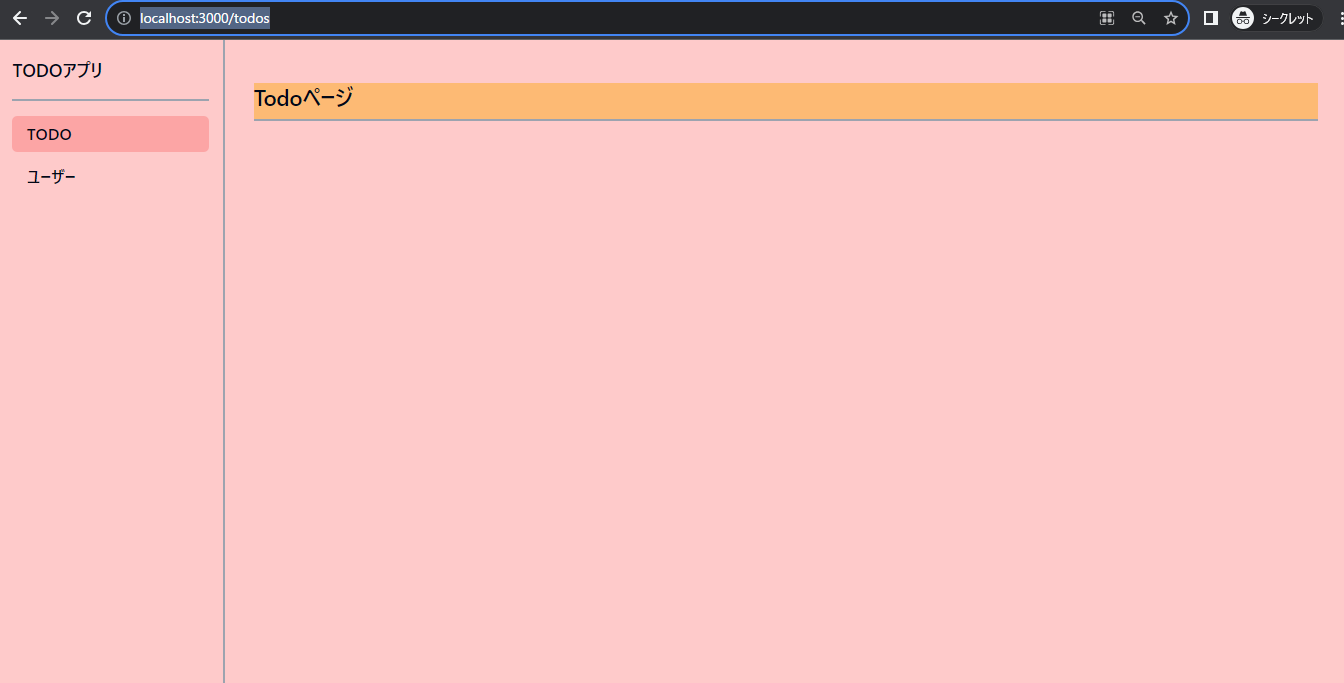
つまり、薄赤の部分はもともとのapp/root.tsxの共通レイアウトが使用され、オレンジの箇所はapp/routes/todos.tsxの共通レイアウトが使用され、/todos以降のパスは薄赤とオレンジ両方の共通レイアウトが使用されます。(なお、あえて共通レイアウトを使用したくないケースの対処法もありますが、今回は割愛します。)
- 一覧部分を実装します。
sadcn/uiのTable関連のコンポーネントを以下で追加します。$ npx shadcn-ui@latest add table -
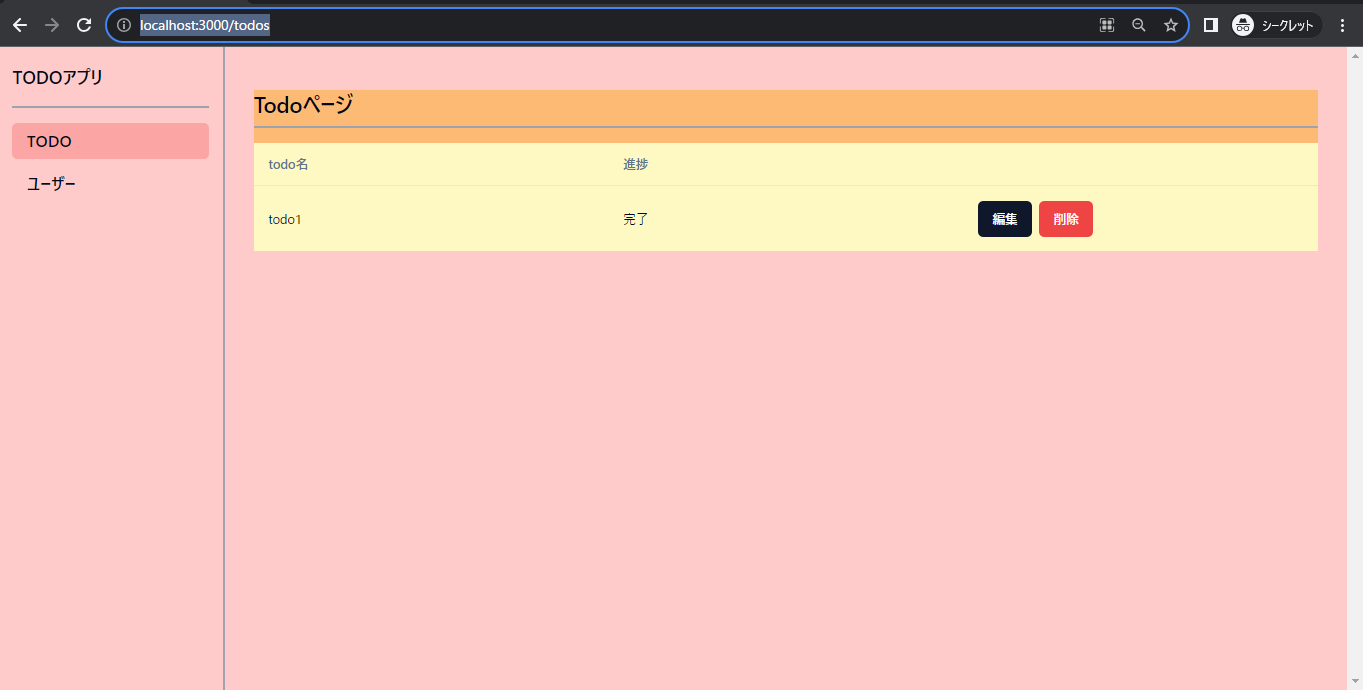
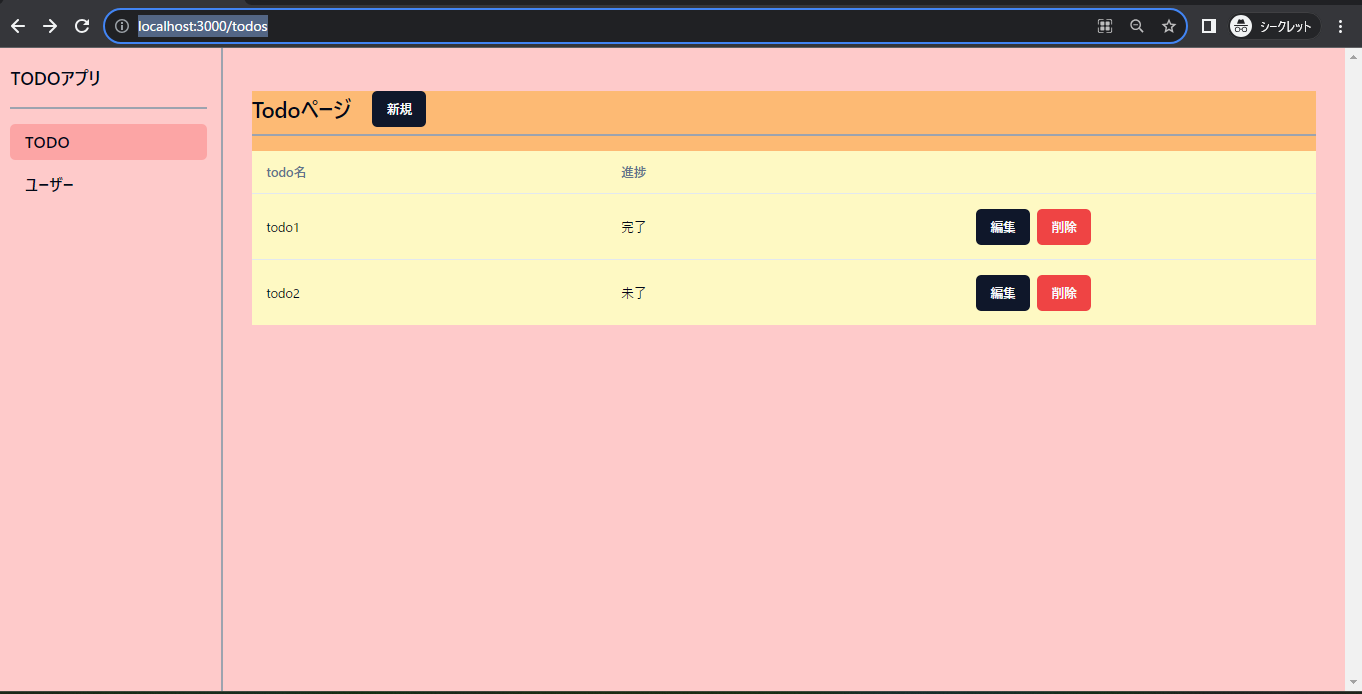
app/routes/todos._index.tsxを作成し、以下を実装します。// app/routes/todos._index.tsx import { json } from "@remix-run/node"; import { useLoaderData } from "@remix-run/react"; import { Button } from "~/components/ui/button"; import { Table, TableBody, TableCell, TableHead, TableHeader, TableRow, } from "~/components/ui/table"; import { prisma } from "~/db.server"; // Remixでは各ページファイルでloaderという名前の関数に取得処理を記載し、exportするとことで、自動でデータの取得を行いUIに渡します。 export const loader = async () => { // サーバー側で取得するので、prismaを使用し、直接データ取得できる const todos = await prisma.todo.findMany(); // jsonはRemixが用意しているヘルパー関数 return json(todos); }; export default function TodosIndex() { // loaderで取得するデータはuseLoaderData関数で取得できる。また、ジェネリクスにtypeof loaderを渡すことで型の補完も行える。 const todos = useLoaderData<typeof loader>(); return ( <Table className="bg-yellow-100"> <TableHeader> <TableRow> <TableHead>todo名</TableHead> <TableHead>進捗</TableHead> </TableRow> </TableHeader> <TableBody> {todos.map((todo) => ( <TableRow key={todo.id}> <TableCell className="w-4/12">{todo.title}</TableCell> <TableCell className="w-4/12"> {todo.done ? "完了" : "未了"} </TableCell> <TableCell className="w-4/12 space-x-2"> <Button>編集</Button> <Button variant="destructive">削除</Button> </TableCell> </TableRow> ))} </TableBody> </Table> ); } - 上記で重要なのが、
loader関数です。Remnixではページ遷移すると、まず、loader関数がデータを取得します。その後、その取得データをUIに渡し、レンダリングします。
loaderという関数名でexportすることはRemixで指定しているルールとなります。そのため、異なる関数名にすると動作しないので、ご注意ください。
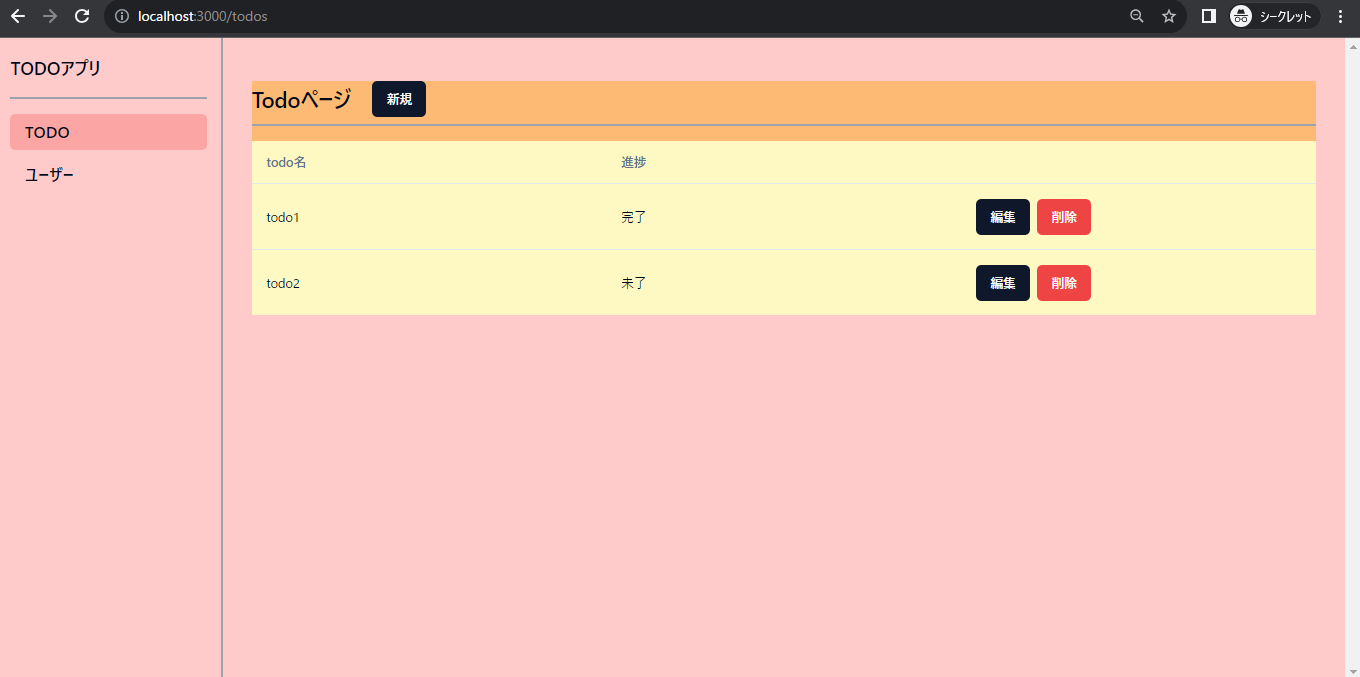
- なお、ここまでの実装で以下の画面の通りになっているとOKです(色分けについてはここまでの展開でなんとなくわかると思うので、以降説明を割愛します。)
TODOの作成機能実装
- TODO作成機能を実装します。まず、
shadcn/uiのInputとLableコンポーネントを使用しますので、それぞれを追加します。$ npx shadcn-ui@latest add input $ npx shadcn-ui@latest add label - TODO一覧ページから、作成ページに遷移するために、以下を追加します。
// app/routes/todos.tsx + import { buttonVariants } from "~/components/ui/button"; - import { Outlet } from "@remix-run/react"; + import { Link, Outlet } from "@remix-run/react"; // ... <h1 className="text-2xl font-bold">Todoページ</h1> + <Link to="new" className={buttonVariants()}> + 新規 + </Link> // ... -
app/routes/todos.new.tsxファイルを作成し、以下のように実装します。// app/routes/todos.new.tsx import { redirect, type ActionFunctionArgs } from "@remix-run/node"; import { Form } from "@remix-run/react"; import { Button } from "~/components/ui/button"; import { Input } from "~/components/ui/input"; import { Label } from "~/components/ui/label"; import { prisma } from "~/db.server"; // loader同様、Remixが指定している関数名です。Formコンポーネント内でsubmitされた際に、その内容をもとに呼び出されます。 export const action = async ({ request }: ActionFunctionArgs) => { const formData = await request.formData(); // stateの管理をしなくても、下記のようにして、name="title"の値を取得できます。 const title = formData.get("title"); // 本来バリデーション実装も必要ですが、今回は割愛し、型が違う場合のみ、エラーをスローするようにします。 if (typeof title !== "string") throw Error("invalid type"); await prisma.todo.create({ data: { title, done: false } }); return redirect("/todos"); }; export default function NewTodos() { return ( <div> <Form method="post" className="flex items-end space-x-4 bg-lime-2"> <div> <Label htmlFor="title">todo名</Label> <Input name="title" id="title" /> </div> <Button type="submit">作成</Button> </Form> </div> ); } -
loader関数と同様に、actionと命名する関数が重要となります。ファイル内において、submitが検知された場合、Remixはサーバー側でaction関数を発火し、データ作成・更新などの処理を行います。 - また、フォーム実装において、state(状態)を持たせる必要がなく、
inputなどのname属性をもとに入力値を取得できるので、非常に簡単なフォーム実装が可能となります。
フロントエンド開発においてはクライアント側でフォームのstete管理&hundleSubmitのような関数を定義し、クライアント側からAPIを呼ぶといった形をとることが多いと思います。Remixの場合はstateの管理が不要となり、aciontもサーバー側で実行され、非常に開発体験が楽になります。また、コード上も、ページコンポーネント部分とloader, actionが明確に分離していて、可読性も良くなると個人的には感じています。
もしかするとNextjs13のServer Actionsをイメージする方がいらっしゃると思いますが、2023年9月23日時点で、Nextjsでは使用する際にexperimentalでserverActions: trueにする必要があるので、採用を躊躇される場合もあるかと思います。Remixではv1の時から上記のフォーム処理が可能なので、技術選定の際の参考になるかと思います。(ちなみに筆者は別にNextjs嫌いではありませんし、Server Componentsなどのメリットもあると思ってます)
- さて、以下のように作成ページが作成されていることを確認し、実際に新規登録後、一覧ページに新しいtodoが作成されていればOKです。

Remixではactionの後、自動的にloaderが呼ばれ再検証が走ります。そのため、原則としてサーバーのデータと同期するようになります。
TODOの編集機能
- 編集機能を作成します。まず、編集ボタンをクリックした際に編集ページに遷移できるように、
app/routes/todos._index.tsxを以下のように修正します。// app/routes/todos._index.tsx - import { useLoaderData } from "@remix-run/react"; - import { Button, buttonVariants } from "~/components/ui/button"; + import { Button, buttonVariants } from "~/components/ui/button"; + import { Link, useLoaderData } from "@remix-run/react"; // ... - <Button>編集</Button> + <Link to={`${todo.id}/edit`} className={buttonVariants()}> + 編集 + </Link> // ... - 編集フォームでは
shadcn/uiのRadioGroup関連のコンポーネントを使用するので、追加します。$ npx shadcn-ui@latest add radio-group - それでは
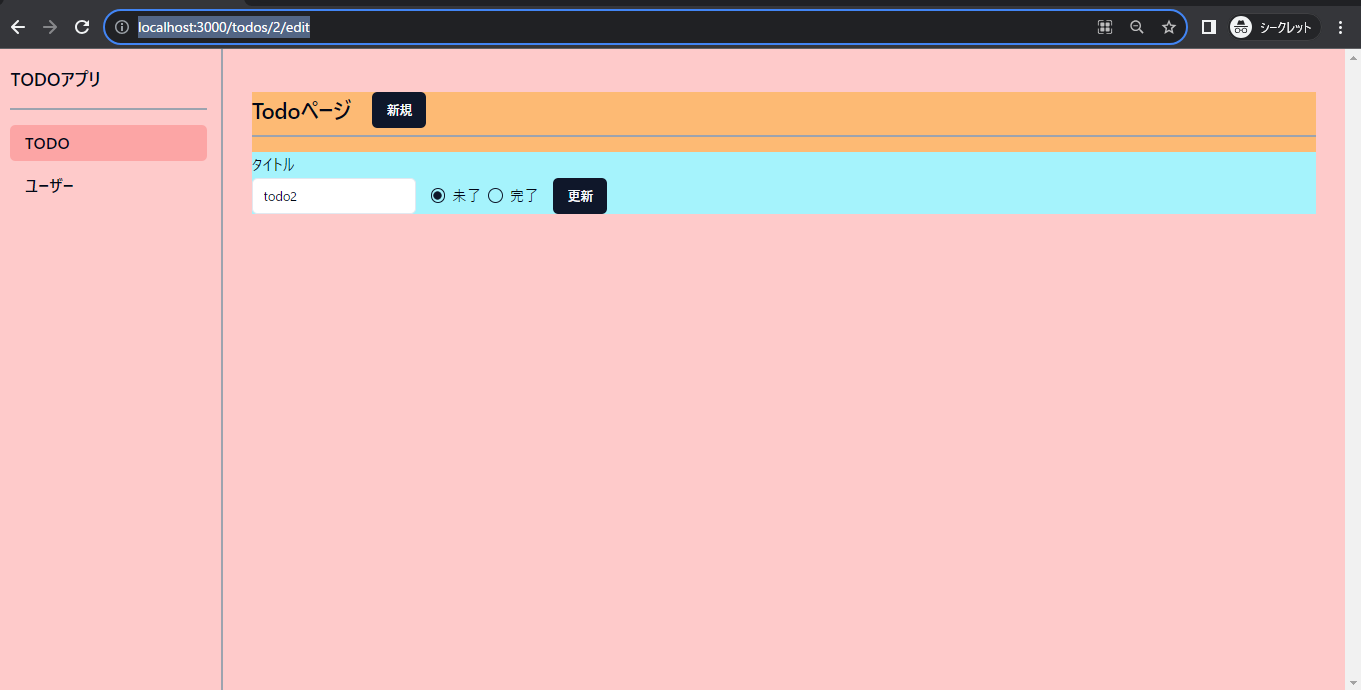
app/routes/todos.$todoId.edit.tsxを作成し、以下を実装します。なお、$todoIdは動的セグメントとなり、例えばid=2のtodoを選択した場合はtodos.2.edit.tsxパスとなります。// app/routes/todos.$todoId.edit.tsx import { Label } from "@radix-ui/react-label"; import { json, redirect } from "@remix-run/node"; import type { ActionFunctionArgs, LoaderFunctionArgs } from "@remix-run/node"; import { Form, useLoaderData } from "@remix-run/react"; import { Button } from "~/components/ui/button"; import { Input } from "~/components/ui/input"; import { RadioGroup, RadioGroupItem } from "~/components/ui/radio-group"; import { prisma } from "~/db.server"; // 引数のオブジェクトにparamsを指定することで、URLの動的セグメントを取得することができます。 export const loader = async ({ params }: LoaderFunctionArgs) => { // バリデーション実装は割愛し、エラーをスロー if (typeof params.todoId !== "string") throw Error("invalid params"); const todo = await prisma.todo.findUnique({ where: { id: Number(params.todoId) }, }); if (!todo) throw Error("not found"); return json(todo); }; // actionもloader同様にparamsから動的セグメントを取得できます。 export const action = async ({ request, params }: ActionFunctionArgs) => { if (typeof params.todoId !== "string") throw Error("invalid params"); const formData = await request.formData(); const title = formData.get("title"); const done = formData.get("done") === "完了"; if (typeof title !== "string") throw Error("invalid type"); await prisma.todo.update({ where: { id: Number(params.todoId) }, data: { title, done }, }); return await redirect("/todos"); }; export default function EditTodos() { const todo = useLoaderData<typeof loader>(); return ( <Form method="post" className="flex items-end space-x-4 bg-cyan-200"> <div> <Label htmlFor="title">タイトル</Label> <Input defaultValue={todo.title} id="title" name="title" /> </div> <RadioGroup defaultValue={todo.done ? "完了" : "未了"} className="flex h-10 " name="done" > <div className="flex items-center space-x-2"> <RadioGroupItem value="未了" id="not-done" /> <Label htmlFor="not-done">未了</Label> </div> <div className="flex shrink-0 items-center space-x-2"> <RadioGroupItem value="完了" id="done" /> <Label htmlFor="done">完了</Label> </div> </RadioGroup> <Button type="submit">更新</Button> </Form> ); } - 一覧の編集ボタンから、編集ページに遷移すると、以下のようになります。今回は
id='2'のtodoを選択したので、パスはhttp://localhost:3000/todos/2/editとなっています。 - また、
id='2'をもとにtodoを取得していますが、loaderの引数のオブジェクトでparamsプロパティを取得するようにすることで可能としています。
- さて、タイトルと完了のラジオボタンを変更して、更新ボタンを押すと、きちんと変更されることが確認できます。こちらも
action関数を呼び出していますが、作成の時とほぼ同じなため、説明は割愛します。

TODO削除機能の実装
-
TODOの削除機能を実装します。ただし、作成や編集の場合と異なり、削除用のUIは存在させず、一覧の削除ボタンを押したときに削除処理が走るようにします。
-
app/routes/todos._index.tsx内にアクションを定義してもよいのですが、Remixではファイル内にaction関数だけ定義することも可能です。そのため、app/routes/todos.$todoId.delete.tsxファイルを作成します。 -
また、
app/routes/todos._index.tsxも修正が必要なため、二つのファイルを以下のように修正&実装してください。// app/routes/todos._index.tsx - import { Link, useLoaderData } from "@remix-run/react"; + import { Form, Link, useLoaderData } from "@remix-run/react"; // ... <Link to={`${todo.id}/edit`} className={buttonVariants()}> 編集 </Link> - <Button variant="destructive">削除</Button> + {/* あくまで、`app/routes/todos.$todoId.delete.tsx`のアクションを呼ぶので、actionの相対パスを指定 */} + <Form + className="inline-block" + action={`${todo.id}/delete`} + method="post" + > + <Button variant="destructive">削除</Button> + </Form> // ...// app/routes/todos.$todoId.delete.tsx import { redirect, type ActionFunctionArgs } from "@remix-run/node"; import { prisma } from "~/db.server"; export const action = async ({ params }: ActionFunctionArgs) => { // バリデーション実装は割愛し、エラーをスロー if (typeof params.todoId !== "string") throw Error("invalid params"); await prisma.todo.delete({ where: { id: Number(params.todoId) } }); // 画面上は一緒でも、action呼び出しは`/todos/delete`というパスになるので、redirectさせる必要があります。 return await redirect("/todos"); }; -
上記でいくつか注意点があります。
app/routes/todos._index.tsxにFormコンポーネントを追加していますが、あくまで呼び出すactionについては別ファイル(app/routes/todos.$todoId.delete.tsx)のactionという点です。 -
そのため、
Formコンポーネントにactionpropsを追加することで、app/routes/todos.$todoId.delete.tsxのactionを呼び出すことができます。
逆に言うと、actionpropsを省略すると、同ファイルのactionが呼ばれます。例えば、作成の時はactionpropsを指定しませんでしたが、これはURLパスとUI、actionが「作成するもの」で一致しており、同ファイル内にactionを定義して良いと判断したからです。
- また、
app/routes/todos.$todoId.delete.tsxのactionで最後にredirect処理を記載しています。あくまで呼ばれているのは例えば/todos/2/deleteというパスになるので、最後に/todosという一覧のパスにリダイレクトする必要があるためです。 - それでは実際にTODOが削除されるか?試してみましょう。任意のTODOの削除ボタンを押し、一覧から削除されればOKです。
User一覧機能実装(APIを呼ぶケース)
- 上記までで、TODOの機能は一通り実装済みです。ただし、現実の開発ではAPIをRemix内ではなく、別に分けて開発したいというケースがあると思います(例えば、ほかのアプリでも使用される共通のAPIをたたく場合など)。
この場合、RemixはBFF(Backend For Frontend)としての機能を兼ねることとなります。
- そこで、JSONPlaceholderをAPIと見立てて、そのケースを実装します。
- といっても、基本的には変わらず、fetch関数を使用すればOKです。まず、
app/routes/users.tsxファイルは作成済みのため、以下に内容を置き換えます。// app/routes/users.tsx import { Separator } from "@radix-ui/react-separator"; import { Outlet } from "@remix-run/react"; import { Table, TableHead, TableHeader, TableRow } from "~/components/ui/table"; export default function Users() { return ( <div className="bg-green-400"> <h1 className="text-2xl font-bold">Usersページ</h1> <Separator className="mb-4 mt-2 border-2 border-gray-400" /> {/* 一覧のみのため、共通させる必要がない&データ取得に関する領域を最小限にするため、TableHeaderまでusers.tsx側に記載 */} <Table> <TableHeader> <TableRow> <TableHead>名前</TableHead> <TableHead>ユーザー名</TableHead> </TableRow> </TableHeader> <Outlet /> </Table> </div> ); } - そして、
app/routes/users._index.tsxファイルを作成し、以下のように実装します。// app/routes/users._index.tsx import { json } from "@remix-run/node"; import { useLoaderData } from "@remix-run/react"; import { TableBody, TableCell, TableRow } from "~/components/ui/table"; export const loader = async () => { // APIを呼ぶ場合はfetch関数で呼び出します。 const res = await fetch("https://jsonplaceholder.typicode.com/users"); // 型については本題ではないので、手抜きします。 const users = (await res.json()) as { id: string; name: string; username: string; }[]; return json(users); }; export default function UsersIndex() { const users = useLoaderData<typeof loader>(); return ( <TableBody className=" bg-purple-100"> {users.map((user) => ( <TableRow key={user.id}> <TableCell>{user.name}</TableCell> <TableCell>{user.username}</TableCell> </TableRow> ))} </TableBody> ); } -
/usersに遷移し、以下のようになっていれば完成です。
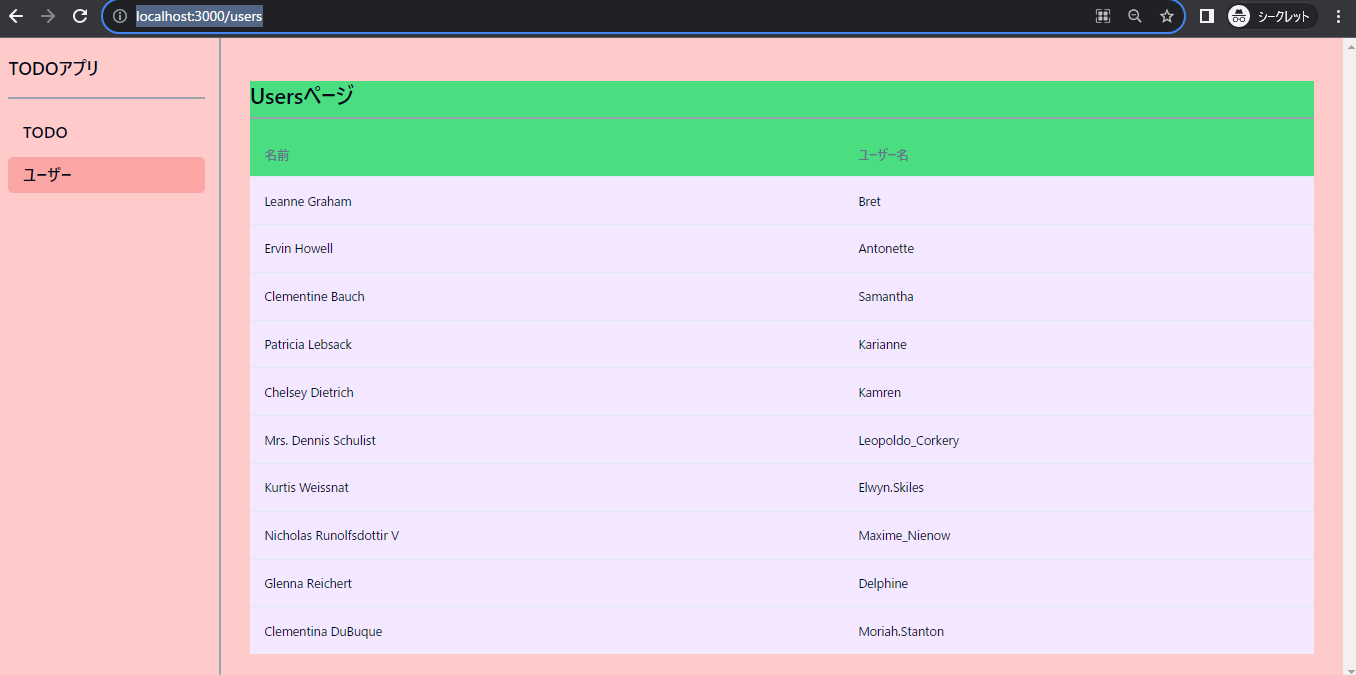
TODOの時と異なり、テーブルのヘッダーまで共通レイアウトとしています。これは他に共通箇所がなく、取得したデータはテーブルボディ内でしか使用しないためです。つまり、データ取得に関する箇所を最低限にとどめることで、パフォーマンス向上を実現しています。ただし、実際はTODOの時のように、共通箇所を考えると最小限にとどめられない場合(作成ページにテーブルヘッダーがあったらおかしい)や可読性の観点からも考慮する必要があるので、ご注意ください。
おわりに
- 以上で、一通りの実装は終了となります。なんとなく、Reactのフレームワークと言えばNextjsという風潮がありますが、Remixも負けず劣らず、素晴らしいフレームワークかと思います。
- (実はNextjs13が対応したApp Routerのような機能も、Remixが先に実現してますし、見てきたとおり、Server ActionsなどもあきらかにRemixのフォーム処理を参考にしているなぁという気がします。なんとなくNextjsが最新なんでしょ!という認識を自分ももっていましたが、実際Remixを使用すると必ずしもそんなこともないなぁ、という感じを受けます。)
- もちろん基本的な機能のみですし、細かい箇所の考慮が抜けてたりするのですが、この記事がRemixのドキュメントを見たり、使ってみるきっかけになれば幸いです。