はじめに
Twitter を眺めてたら daisyUI なるUIライブラリを激押し(?)している投稿を見かけました。
気になって調べてみたら良さそうな感じだったので SvelteKit アプリに導入して使い勝手を調べてみました。
daisyUI とは
daisyUI は、CSS フレームワークである Tailwind をベースにしており、 Tailwind よりもよりシンプルな記述でコンポーネントを構築できます。もちろん、Tailwind のクラス名を再利用することができます。
例えばこんな感じです。(※ホームページ から抜粋)

左が Tailwind、右が daisyUI です。明らかに daisyUI の方がコード量が少ないです。
JavaScript を使っていないため、(import や変数宣言が不要なので)サンプルコードをコピー&ペーストして利用しやすいのも特徴です。
daisyUI を SvelteKit アプリに導入する
基本的には各ツールのドキュメントに従って、以下の手順を実行すればOKです。
一応、全手順を掲載しておきます。
SvelteKit のスケルトンアプリを作成する
Svelteのホームページ を参考にして、スケルトンアプリを作成します。
npm create svelte@latest my-app
...
┌  Welcome to SvelteKit!
│
◇  Which Svelte app template?
│  Skeleton project
│
◇  Add type checking with TypeScript?
│  Yes, using JavaScript with JSDoc comments
│
◇  Select additional options (use arrow keys/space bar)
│  Add ESLint for code linting, Add Prettier for code formatting, Add Playwright for browser testing, Add Vitest for
unit testing
│
└  Your project is ready!
忘れちゃいけない、npm install を実行します。
cd my-app
npm install
Tailwind をセットアップする
Tailwind をインストール
こちら に SvelteKit にインストールするための手順が記載されてるので参考にしました。
npm install -D tailwindcss postcss autoprefixer
npx tailwindcss init -p
これに伴い、tailwind.config.js ファイルと postcss.config.js ファイルが作成されます。
<style>ブロック内でPostCSSを使用できるようにする
svelte.config.js で、vitePreprocess をインポートし、<style> ブロックをPostCSSとして処理できるようにします。
import adapter from '@sveltejs/adapter-auto';
+import { vitePreprocess } from '@sveltejs/kit/vite';

/** @type {import('@sveltejs/kit').Config} */
const config = {
	kit: {
		adapter: adapter()
	},
+	preprocess: vitePreprocess()
};

export default config;
テンプレートのパスを設定する
tailwind.config.js ファイルに、すべてのテンプレートファイルのパスを追加します。
/** @type {import('tailwindcss').Config} */
export default {
-  content: [],
+  content: ['./src/**/*.{html,js,svelte,ts}'],
  theme: {
    extend: {}
  },
  plugins: []
};
CSSにTailwindディレクティブを追加する
./src/app.css ファイルを作成し、Tailwind の各レイヤーの @tailwind ディレクティブを追加します。
@tailwind base;
@tailwind components;
@tailwind utilities;
CSSファイルをインポートする
./src/routes/+layout.svelte ファイルを作成し、新しく作成された app.css ファイルをインポートします。
<script>
  import "../app.css";
</script>

<slot />
アプリを開始する
npm run dev
プロジェクトでTailwindの利用を開始する
<h1 class="text-3xl font-bold underline">Hello world!</h1>
確認する
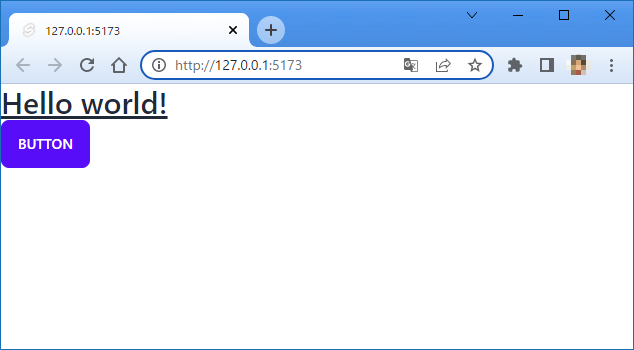
Tailwind が適用されていることを確認できました。

daisyUI をセットアップする
daisyUI をインストールする
npm i daisyui
プラグインを追加する
tailwind.config.js ファイルに daisyUI を追加します。
/** @type {import('tailwindcss').Config} */
export default {
  content: ['./src/**/*.{html,js,svelte,ts}'],
  theme: {
    extend: {},
  },
-  plugins: [],
+  plugins: [require("daisyui")],
}
プロジェクトで daisyUI の使用を開始する
<h1 class="text-3xl font-bold underline">Hello world!</h1>

+<button class="btn btn-primary">Button</button>
確認
daisyUI のクラス指定が効いていることを確認できました。

よくありそうな画面を作成してみる
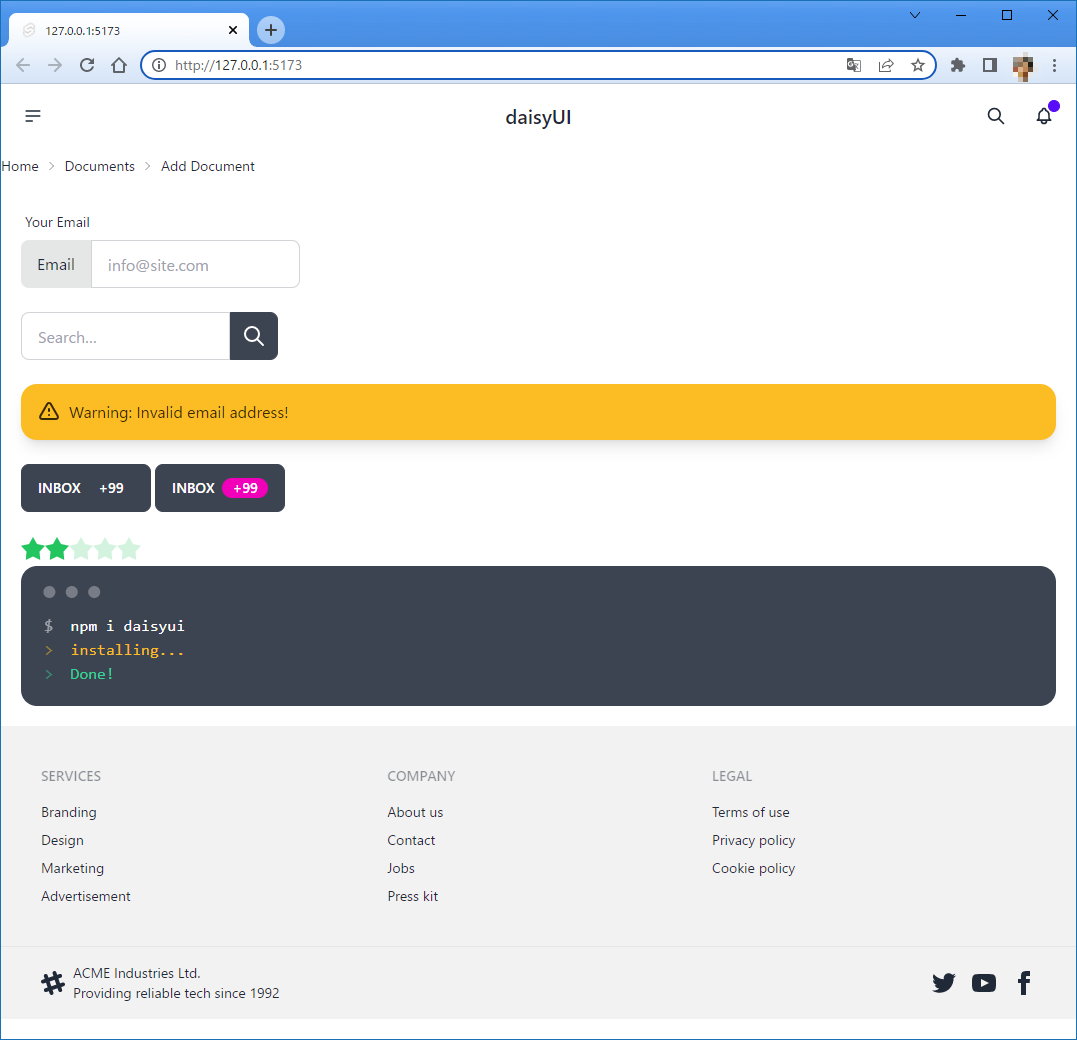
daisyUI を導入できたので、よくありそうな画面を作成してみようと思います。
ソースコード
基本的には、daisyUI のドキュメントからコードをコピペするだけです。
以下のソースコードにはコピー元のリンクも併記しました。
+layout.svelte
<script>
	import '../app.css';
</script>

<!-- ヘッダー -->
<!-- https://daisyui.com/components/navbar/#navbar-with-dropdown-center-logo-and-icon -->
<div class="navbar bg-base-200">
	<div class="navbar-start">
		<div class="dropdown">
			<label tabindex="0" class="btn btn-ghost btn-circle">
				<svg
					xmlns="http://www.w3.org/2000/svg"
					class="h-5 w-5"
					fill="none"
					viewBox="0 0 24 24"
					stroke="currentColor"
					><path
						stroke-linecap="round"
						stroke-linejoin="round"
						stroke-width="2"
						d="M4 6h16M4 12h16M4 18h7"
					/></svg
				>
			</label>
			<ul
				tabindex="0"
				class="menu menu-compact dropdown-content mt-3 p-2 shadow bg-base-100 rounded-box w-52"
			>
				<li><a>Homepage</a></li>
				<li><a>Portfolio</a></li>
				<li><a>About</a></li>
			</ul>
		</div>
	</div>
	<div class="navbar-center">
		<a class="btn btn-ghost normal-case text-xl">daisyUI</a>
	</div>
	<div class="navbar-end">
		<button class="btn btn-ghost btn-circle">
			<svg
				xmlns="http://www.w3.org/2000/svg"
				class="h-5 w-5"
				fill="none"
				viewBox="0 0 24 24"
				stroke="currentColor"
				><path
					stroke-linecap="round"
					stroke-linejoin="round"
					stroke-width="2"
					d="M21 21l-6-6m2-5a7 7 0 11-14 0 7 7 0 0114 0z"
				/></svg
			>
		</button>
		<button class="btn btn-ghost btn-circle">
			<div class="indicator">
				<svg
					xmlns="http://www.w3.org/2000/svg"
					class="h-5 w-5"
					fill="none"
					viewBox="0 0 24 24"
					stroke="currentColor"
					><path
						stroke-linecap="round"
						stroke-linejoin="round"
						stroke-width="2"
						d="M15 17h5l-1.405-1.405A2.032 2.032 0 0118 14.158V11a6.002 6.002 0 00-4-5.659V5a2 2 0 10-4 0v.341C7.67 6.165 6 8.388 6 11v3.159c0 .538-.214 1.055-.595 1.436L4 17h5m6 0v1a3 3 0 11-6 0v-1m6 0H9"
					/></svg
				>
				<span class="badge badge-xs badge-primary indicator-item" />
			</div>
		</button>
	</div>
</div>

<!-- パンくずリスト -->
<!-- https://daisyui.com/components/breadcrumbs/#breadcrumbs -->
<div class="text-sm breadcrumbs">
	<ul>
		<li><a>Home</a></li>
		<li><a>Documents</a></li>
		<li>Add Document</li>
	</ul>
</div>

<!-- コンテンツ -->
<div class="w-full p-5">
	<slot />
</div>

<!-- フッター -->
<!-- https://daisyui.com/components/footer/#two-footer -->
<footer class="footer p-10 bg-base-200 text-base-content">
	<div>
		<span class="footer-title">Services</span>
		<a class="link link-hover">Branding</a>
		<a class="link link-hover">Design</a>
		<a class="link link-hover">Marketing</a>
		<a class="link link-hover">Advertisement</a>
	</div>
	<div>
		<span class="footer-title">Company</span>
		<a class="link link-hover">About us</a>
		<a class="link link-hover">Contact</a>
		<a class="link link-hover">Jobs</a>
		<a class="link link-hover">Press kit</a>
	</div>
	<div>
		<span class="footer-title">Legal</span>
		<a class="link link-hover">Terms of use</a>
		<a class="link link-hover">Privacy policy</a>
		<a class="link link-hover">Cookie policy</a>
	</div>
</footer>
<footer class="footer px-10 py-4 border-t bg-base-200 text-base-content border-base-300">
	<div class="items-center grid-flow-col">
		<svg
			width="24"
			height="24"
			viewBox="0 0 24 24"
			xmlns="http://www.w3.org/2000/svg"
			fill-rule="evenodd"
			clip-rule="evenodd"
			class="fill-current"
			><path
				d="M22.672 15.226l-2.432.811.841 2.515c.33 1.019-.209 2.127-1.23 2.456-1.15.325-2.148-.321-2.463-1.226l-.84-2.518-5.013 1.677.84 2.517c.391 1.203-.434 2.542-1.831 2.542-.88 0-1.601-.564-1.86-1.314l-.842-2.516-2.431.809c-1.135.328-2.145-.317-2.463-1.229-.329-1.018.211-2.127 1.231-2.456l2.432-.809-1.621-4.823-2.432.808c-1.355.384-2.558-.59-2.558-1.839 0-.817.509-1.582 1.327-1.846l2.433-.809-.842-2.515c-.33-1.02.211-2.129 1.232-2.458 1.02-.329 2.13.209 2.461 1.229l.842 2.515 5.011-1.677-.839-2.517c-.403-1.238.484-2.553 1.843-2.553.819 0 1.585.509 1.85 1.326l.841 2.517 2.431-.81c1.02-.33 2.131.211 2.461 1.229.332 1.018-.21 2.126-1.23 2.456l-2.433.809 1.622 4.823 2.433-.809c1.242-.401 2.557.484 2.557 1.838 0 .819-.51 1.583-1.328 1.847m-8.992-6.428l-5.01 1.675 1.619 4.828 5.011-1.674-1.62-4.829z"
			/></svg
		>
		<p>ACME Industries Ltd. <br />Providing reliable tech since 1992</p>
	</div>
	<div class="md:place-self-center md:justify-self-end">
		<div class="grid grid-flow-col gap-4">
			<a
				><svg
					xmlns="http://www.w3.org/2000/svg"
					width="24"
					height="24"
					viewBox="0 0 24 24"
					class="fill-current"
					><path
						d="M24 4.557c-.883.392-1.832.656-2.828.775 1.017-.609 1.798-1.574 2.165-2.724-.951.564-2.005.974-3.127 1.195-.897-.957-2.178-1.555-3.594-1.555-3.179 0-5.515 2.966-4.797 6.045-4.091-.205-7.719-2.165-10.148-5.144-1.29 2.213-.669 5.108 1.523 6.574-.806-.026-1.566-.247-2.229-.616-.054 2.281 1.581 4.415 3.949 4.89-.693.188-1.452.232-2.224.084.626 1.956 2.444 3.379 4.6 3.419-2.07 1.623-4.678 2.348-7.29 2.04 2.179 1.397 4.768 2.212 7.548 2.212 9.142 0 14.307-7.721 13.995-14.646.962-.695 1.797-1.562 2.457-2.549z"
					/></svg
				></a
			>
			<a
				><svg
					xmlns="http://www.w3.org/2000/svg"
					width="24"
					height="24"
					viewBox="0 0 24 24"
					class="fill-current"
					><path
						d="M19.615 3.184c-3.604-.246-11.631-.245-15.23 0-3.897.266-4.356 2.62-4.385 8.816.029 6.185.484 8.549 4.385 8.816 3.6.245 11.626.246 15.23 0 3.897-.266 4.356-2.62 4.385-8.816-.029-6.185-.484-8.549-4.385-8.816zm-10.615 12.816v-8l8 3.993-8 4.007z"
					/></svg
				></a
			>
			<a
				><svg
					xmlns="http://www.w3.org/2000/svg"
					width="24"
					height="24"
					viewBox="0 0 24 24"
					class="fill-current"
					><path
						d="M9 8h-3v4h3v12h5v-12h3.642l.358-4h-4v-1.667c0-.955.192-1.333 1.115-1.333h2.885v-5h-3.808c-3.596 0-5.192 1.583-5.192 4.615v3.385z"
					/></svg
				></a
			>
		</div>
	</div>
</footer>
+page.svelte
<!-- https://daisyui.com/components/input-group/#group-label-and-text-input-horizontally -->
<div class="form-control">
	<label class="label">
		<span class="label-text">Your Email</span>
	</label>
	<label class="input-group">
		<span>Email</span>
		<input type="text" placeholder="info@site.com" class="input input-bordered" />
	</label>
</div>

<br />

<!-- https://daisyui.com/components/input-group/#group-text-input-and-button -->
<div class="form-control">
	<div class="input-group">
		<input type="text" placeholder="Search…" class="input input-bordered" />
		<button class="btn btn-square">
			<svg
				xmlns="http://www.w3.org/2000/svg"
				class="h-6 w-6"
				fill="none"
				viewBox="0 0 24 24"
				stroke="currentColor"
				><path
					stroke-linecap="round"
					stroke-linejoin="round"
					stroke-width="2"
					d="M21 21l-6-6m2-5a7 7 0 11-14 0 7 7 0 0114 0z"
				/></svg
			>
		</button>
	</div>
</div>

<br />

<!-- https://daisyui.com/components/alert/#warning-color -->
<div class="alert alert-warning shadow-lg">
	<div>
		<svg
			xmlns="http://www.w3.org/2000/svg"
			class="stroke-current flex-shrink-0 h-6 w-6"
			fill="none"
			viewBox="0 0 24 24"
			><path
				stroke-linecap="round"
				stroke-linejoin="round"
				stroke-width="2"
				d="M12 9v2m0 4h.01m-6.938 4h13.856c1.54 0 2.502-1.667 1.732-3L13.732 4c-.77-1.333-2.694-1.333-3.464 0L3.34 16c-.77 1.333.192 3 1.732 3z"
			/></svg
		>
		<span>Warning: Invalid email address!</span>
	</div>
</div>

<br />

<!-- https://daisyui.com/components/badge/#badge-in-a-button -->
<button class="btn gap-2">
	Inbox
	<div class="badge">+99</div>
</button>
<button class="btn gap-2">
	Inbox
	<div class="badge badge-secondary">+99</div>
</button>

<br />
<br />

<!-- https://daisyui.com/components/rating/#mask-star-2-with-green-500-color -->
<div class="rating">
	<input type="radio" name="rating-4" class="mask mask-star-2 bg-green-500" />
	<input type="radio" name="rating-4" class="mask mask-star-2 bg-green-500" checked />
	<input type="radio" name="rating-4" class="mask mask-star-2 bg-green-500" />
	<input type="radio" name="rating-4" class="mask mask-star-2 bg-green-500" />
	<input type="radio" name="rating-4" class="mask mask-star-2 bg-green-500" />
</div>

<br />

<!-- https://daisyui.com/components/mockup-code/#multi-line -->
<div class="mockup-code">
	<pre data-prefix="$"><code>npm i daisyui</code></pre>
	<pre data-prefix=">" class="text-warning"><code>installing...</code></pre>
	<pre data-prefix=">" class="text-success"><code>Done!</code></pre>
</div>
結果画面
色のカスタマイズ
daisyUI では色クラス名を 意味 で指定できるように構築されています。その利点が分かる例を以下に記載します。
ヘッダーの背景色変更
現状のヘッダーの背景色はコンテンツの背景色と同じなので、ヘッダーの存在を判別しづらいです。ヘッダーの背景色を変更して改善してみます。
クラス名で色を指定できます。こちら に daisyUI 用のクラス名が記載されています。今回は bg-base-200 を設定します。
...
<!-- ヘッダー -->
<!-- https://daisyui.com/components/navbar/#navbar-with-dropdown-center-logo-and-icon -->
-<div class="navbar">
+<div class="navbar bg-base-200">
	<div class="navbar-start">
	  <div class="dropdown">
...
結果、ヘッダーの背景色がうすい灰色に変更されました。これでヘッダーを判別しやすくなりましたね。

カラーテーマの変更
daisyUI には複数の デフォルトカラーテーマ が用意されています。親要素の data-theme 属性にテーマ名を設定することでカラーテーマを変更できます。尚、デフォルトのカラーテーマは light です。
それでは、カラーテーマを garden に変更してみます。親となる <div> 要素を追加して data-theme 属性に garden を設定します。
...
+<div data-theme="garden">
	<!-- ヘッダー -->
	<!-- https://daisyui.com/components/navbar/#navbar-with-dropdown-center-logo-and-icon -->
	<div class="navbar bg-base-200">
		<div class="navbar-start">
	...
+</div>
ヘッダーの背景色がカラーテーマに沿った色に変更されていることが分かりますね。これは、1つ前でヘッダーの背景色を変更したときに bg-base-200 を設定したことで実現できています。
もし、Tailwind のクラス名、例えば bg-amber-300 を設定していたら、カラーテーマを変更してもヘッダーの背景色は変更されません。
まとめ
daisyUI を扱ってみて良かったと思うのは以下になります。
- 意味で色を指定しつつテーマを変更、の流れが心地よい。
- コンポーネントを
importしなくても良い。例えば Sveltestrap だとコンポーネントのimportが必要。 - カラーテーマの自作 が簡単。
- Svelte では HTML をそのまま記載できるので daisyUI と相性が良い。
また、簡単にそれなりの見栄えの画面を構築できることと、SvelteKit の手軽さも相まって、MVP(Minimum Viable Product) の作成に向いているのでは、と感じました。(もしかしたら Figma のようなUIデザインツールによる設計プロセスを省けるかも...?)
ただ、導入までの手順がちょっと面倒なので、テンプレートプロジェクトを GitHub に用意しておくと良いかもしれませんね。![]()

