インストール
本記事ではインストール手順については触れませんが、公式のチュートリアルに従ってインストールしていただくのがよろしいかと思います。
https://developer.hashicorp.com/terraform/tutorials/azure-get-started/install-cli
なお私はWSL環境のUbuntuにインストールを行いましたが、チュートリアルの指示通りに実行したところエラー等なくスムーズにインストールすることができました。
サービスプリンシパルの作成
本稿ではterraform用のサービスプリンシパルを作成し使うようにしています。
まずはサービスプリンシパルを作成するためにAzureにログインします。
az login
ログインできましたら、サービスプリンシパルを作成します
$ az ad sp create-for-rbac --role="Contributor" --scopes="/subscriptions/<subscription-ID>" --display-name="sp-terraform-firsttime"
作成されますと、サービスプリンシパルのID等が表示されます。
これらのIDを環境変数に設定します。
 export ARM_CLIENT_ID="<APPID_VALUE>"
 export ARM_CLIENT_SECRET="<PASSWORD_VALUE>"
 export ARM_SUBSCRIPTION_ID="<SUBSCRIPTION_ID>"
 export ARM_TENANT_ID="<TENANT_VALUE>"
ここでは環境変数に設定する方法を選択しましたが、構成ファイルに記載する方法もあります。
構成ファイルに記載する場合は次のセクションで説明しているproviderブロックを下記に置き換えてください。
provider "azurerm" {
  features {}

  subscription_id   = "<azure_subscription_id>"
  tenant_id         = "<azure_subscription_tenant_id>"
  client_id         = "<service_principal_appid>"
  client_secret     = "<service_principal_password>"
}
以上で事前準備は完了です。
以降のセクションでは構成ファイルを作成しながらAzure上にリソースを作成してきます。
リソースグループの作成
まずはリソースグループを作成する構成ファイル(main.tf)を作成します。
provider "azurerm" {
  features {}
}

resource "azurerm_resource_group" "rg" {
  name = "rg-terraform-firsttime"
  location = "Japan East"
}
リソースグループの名前はrg-terraform-firsttimeとしました。
構成ファイルができたら、まずはterraformの初期化を行います。
$ terraform init

Initializing the backend...

Initializing provider plugins...
- Finding latest version of hashicorp/azurerm...
- Installing hashicorp/azurerm v3.49.0...
- Installed hashicorp/azurerm v3.49.0 (signed by HashiCorp)
初期化が完了したら、リソースを作成する前にmain.tfの検証を行います。
検証用のコマンドが用意されていますので実行します。
$ terraform validate
Success! The configuration is valid.
成功したら、リソースの作成を行います。
$ terraform apply

Terraform used the selected providers to generate the following execution plan. Resource actions are indicated with the following symbols:
  + create
途中、実行して問題ないか確認されますので、yesと入力します。
Do you want to perform these actions?
  Terraform will perform the actions described above.
  Only 'yes' will be accepted to approve.

  Enter a value: yes
少し待つとAzure上にリソースが作成されます。
Azure Portalでリソースが作成できているか確認してみます。

ちゃんと作成できていました。
Azure Functionsの作成
リソースグループの作成ができましたので、作成したリソースグループの中にAzureFunctionsを作成します。
main.tfを下記の通り修正します。
provider "azurerm" {
  features {}
}

resource "azurerm_resource_group" "rg" {
  name     = "rg-terraform-firsttime"
  location = "Japan East"
}

resource "azurerm_storage_account" "st" {
  name                     = "storeterraformfirsttime"
  resource_group_name      = azurerm_resource_group.rg.name
  location                 = azurerm_resource_group.rg.location
  account_tier             = "Standard"
  account_replication_type = "LRS"
}

resource "azurerm_service_plan" "sp" {
  name                = "sp-terraform-firsttime"
  resource_group_name = azurerm_resource_group.rg.name
  location            = azurerm_resource_group.rg.location
  os_type             = "Windows"
  sku_name            = "Y1"
}

resource "azurerm_windows_function_app" "func" {
  name                = "func-terraform-firsttime"
  resource_group_name = azurerm_resource_group.rg.name
  location            = azurerm_resource_group.rg.location

  storage_account_name       = azurerm_storage_account.st.name
  storage_account_access_key = azurerm_storage_account.st.primary_access_key
  service_plan_id            = azurerm_service_plan.sp.id

  site_config {}
}
resourceタグを3つ追加していますが、それぞれAzureFunctions用のストレージアカウントとサービスプラン、最後にFunction-appsリソースを作成しています。
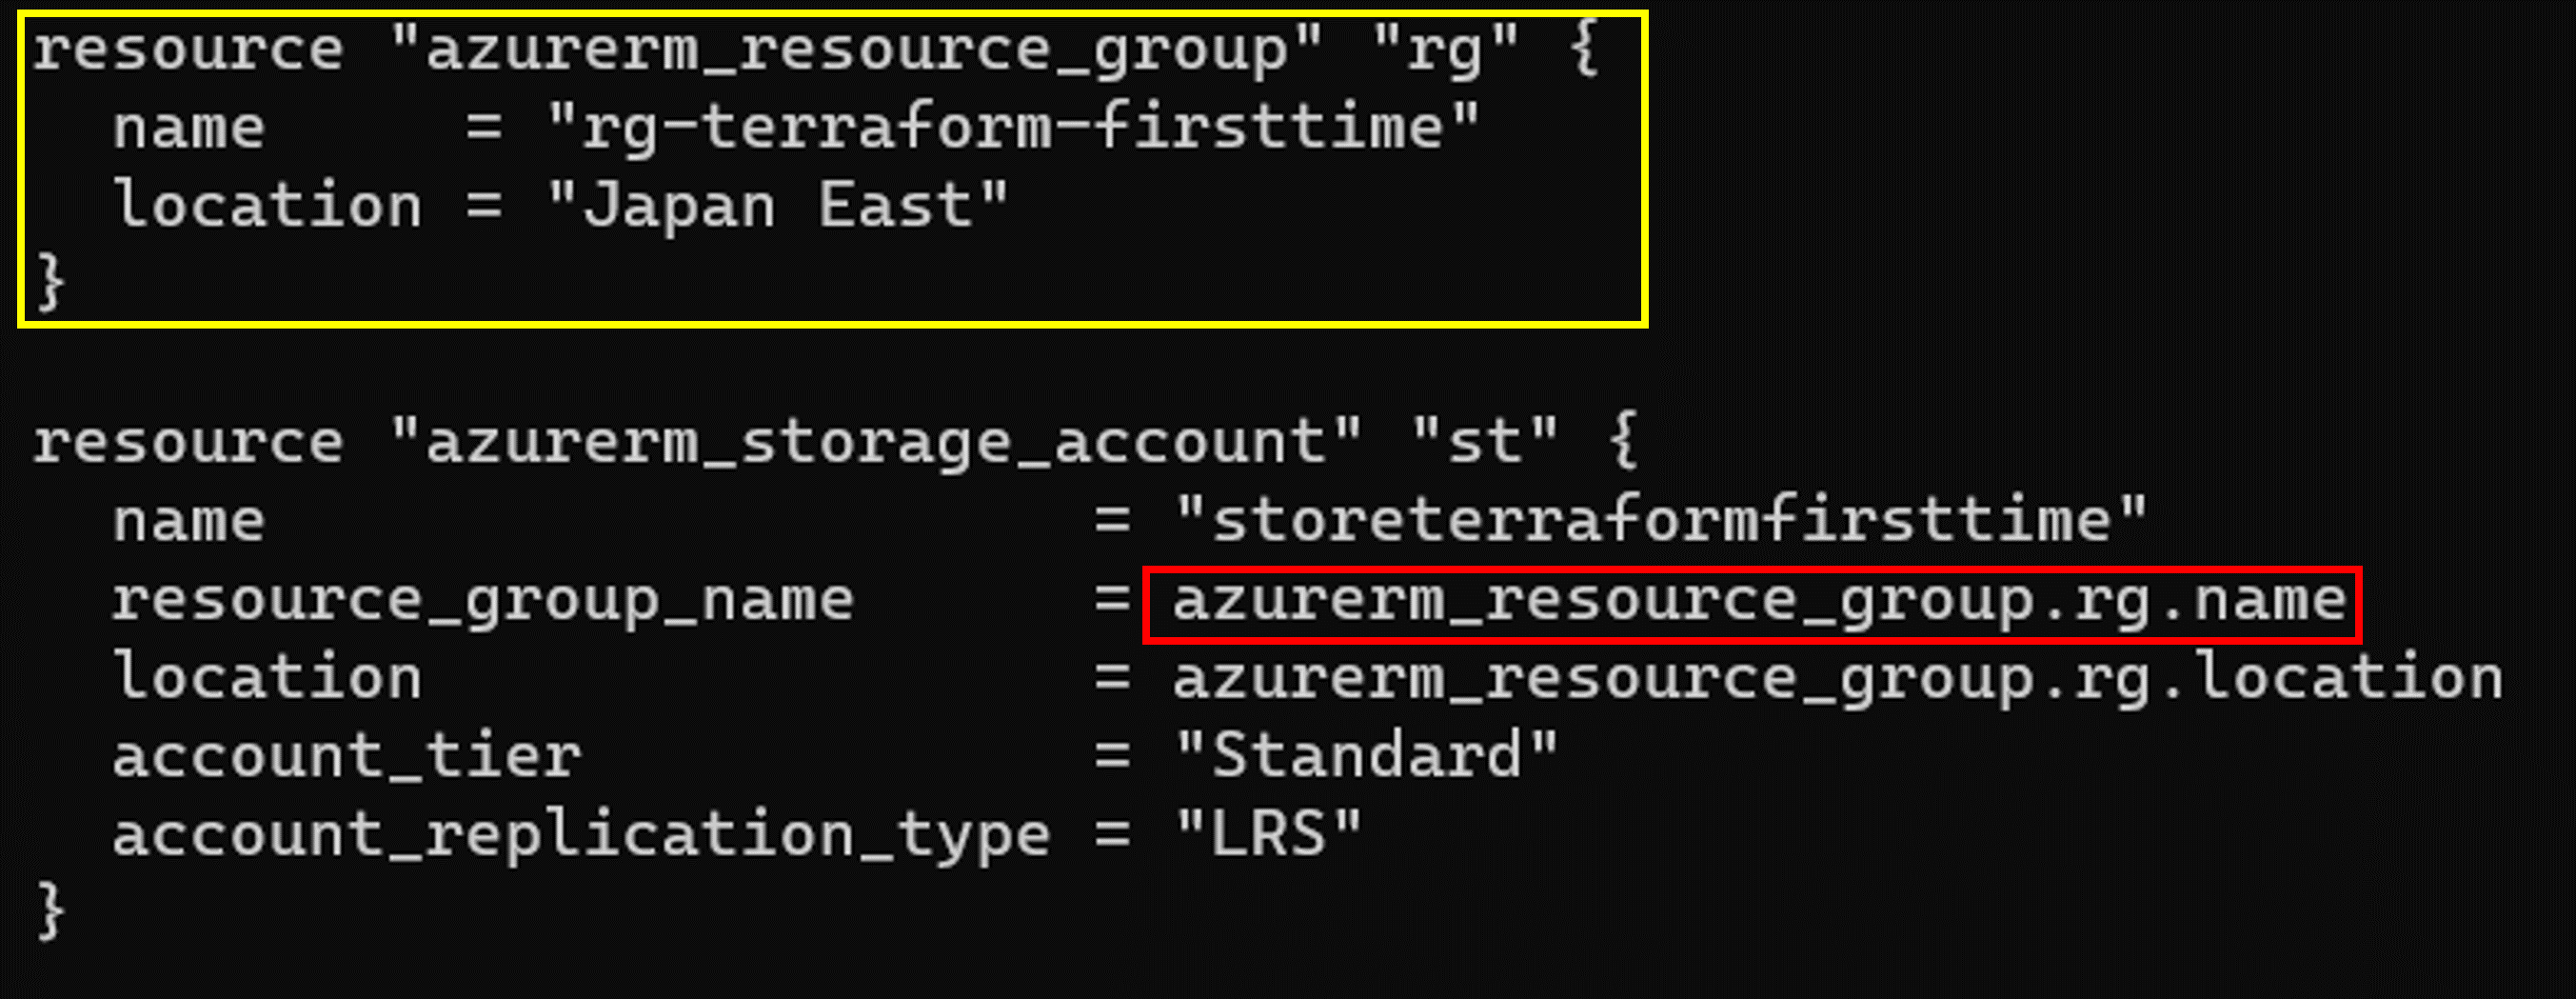
なお各リソースを関連付ける際に以下のようにして相互に参照させることができます。
例えば下図の赤枠のところで、黄色枠で囲ったリソースブロックのnameを参照させています。

main.tfの修正が完了したので、Azure上にリソースを作成します。
先ほどと同様に構成ファイルの検証を行った後、リソースの作成を行います。
$ terraform validate
Success! The configuration is valid.

$ terraform apply
しばらくするとリソースの作成が完了します。
改めてAzurePortalで確認してみます。

ちゃんとリソースグループ内にリソースが作成されました。
最後にランタイムの設定を追記します。
ランタイムはsite_configブロックの中に記載します。なお今回はnodejsを使用しました。
provider "azurerm" {
  features {}
}

resource "azurerm_resource_group" "rg" {
  name     = "rg-terraform-firsttime"
  location = "Japan East"
}

resource "azurerm_storage_account" "st" {
  name                     = "storeterraformfirsttime"
  resource_group_name      = azurerm_resource_group.rg.name
  location                 = azurerm_resource_group.rg.location
  account_tier             = "Standard"
  account_replication_type = "LRS"
}

resource "azurerm_service_plan" "sp" {
  name                = "sp-terraform-firsttime"
  resource_group_name = azurerm_resource_group.rg.name
  location            = azurerm_resource_group.rg.location
  os_type             = "Windows"
  sku_name            = "Y1"
}

resource "azurerm_windows_function_app" "func" {
  name                = "func-terraform-firsttime"
  resource_group_name = azurerm_resource_group.rg.name
  location            = azurerm_resource_group.rg.location

  storage_account_name       = azurerm_storage_account.st.name
  storage_account_access_key = azurerm_storage_account.st.primary_access_key
  service_plan_id            = azurerm_service_plan.sp.id

  site_config {
    application_stack {
      node_version = "~18"
    }
  }
}
以上で関数アプリの作成は完了です。
リソースの削除
下記のコマンドでリソースを削除することができます。
$ terraform destroy
画像は載せませんが、実行後portalから確認するとリソースが削除されていることが確認できます。
その他のリソースを作成したい場合
本稿ではリソースグループとFunctionsの作成を行いましたが、その他のリソースを作成したい場合は下記ドキュメントが参考になります。
https://registry.terraform.io/providers/hashicorp/azurerm/latest/docs