Realm Advent Calendar 2016の22日目のかっくんです。
3日目に引き続きの投稿です。
昨日のRealm meetup 忘年会 + LT大会 2016にて発表した内容を記事にしておきたかったのでAdvent Calendarにも投稿したいと思います。
僕はRealm Mobile Platformが発表された頃から興味を持ち始めて少しずつ調べていました。
自社のブログやイベントで紹介する等して少しでも広まれば良いなと思っていました。
しかし、そんな折に大きな障壁が僕の前に立ちはだかりました。
まずはこちらをご覧ください。
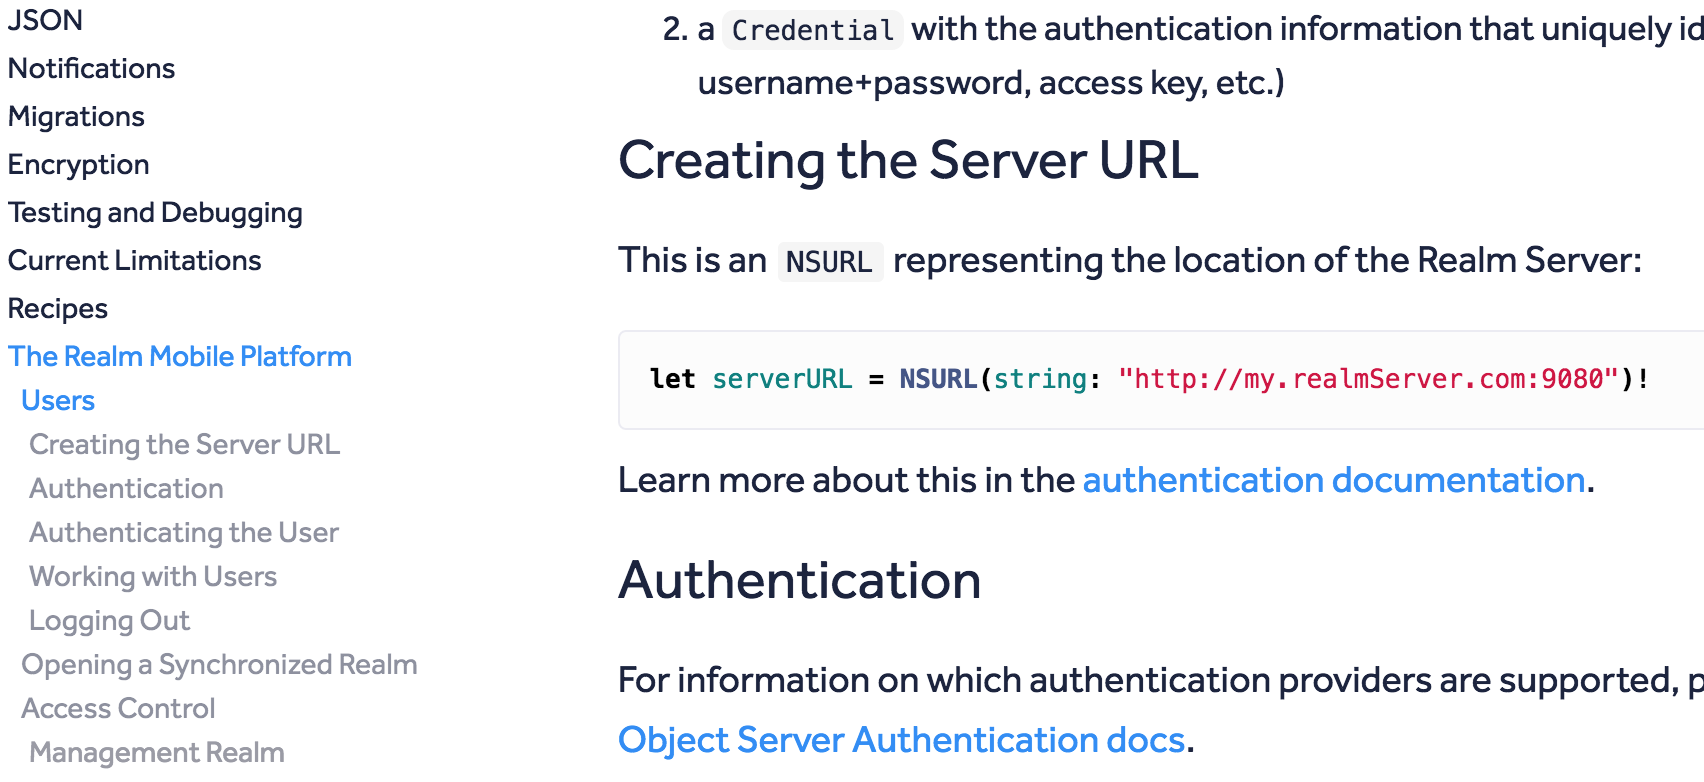
Realm SwiftのドキュメントのRealm Mobile Platformに関するサンプルコードですが、
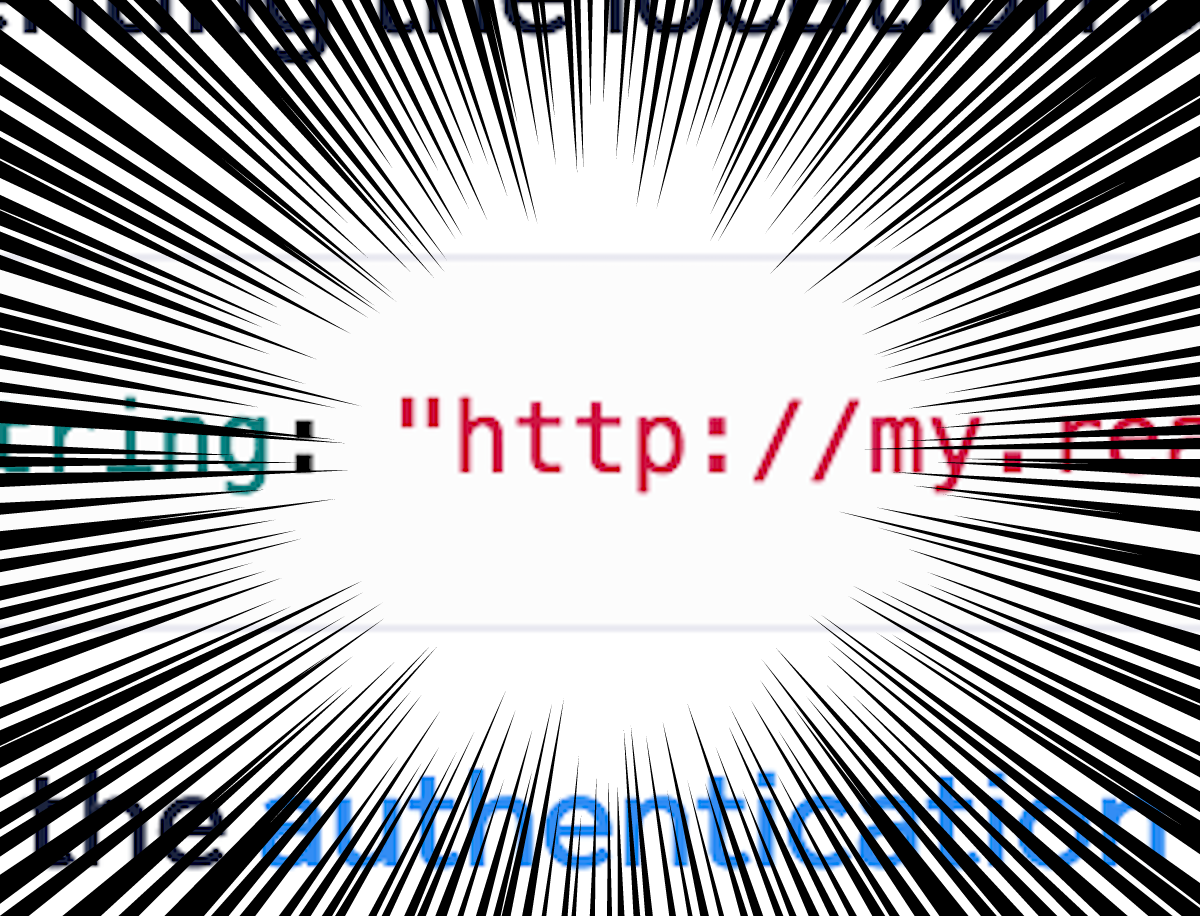
見事に http ですね。
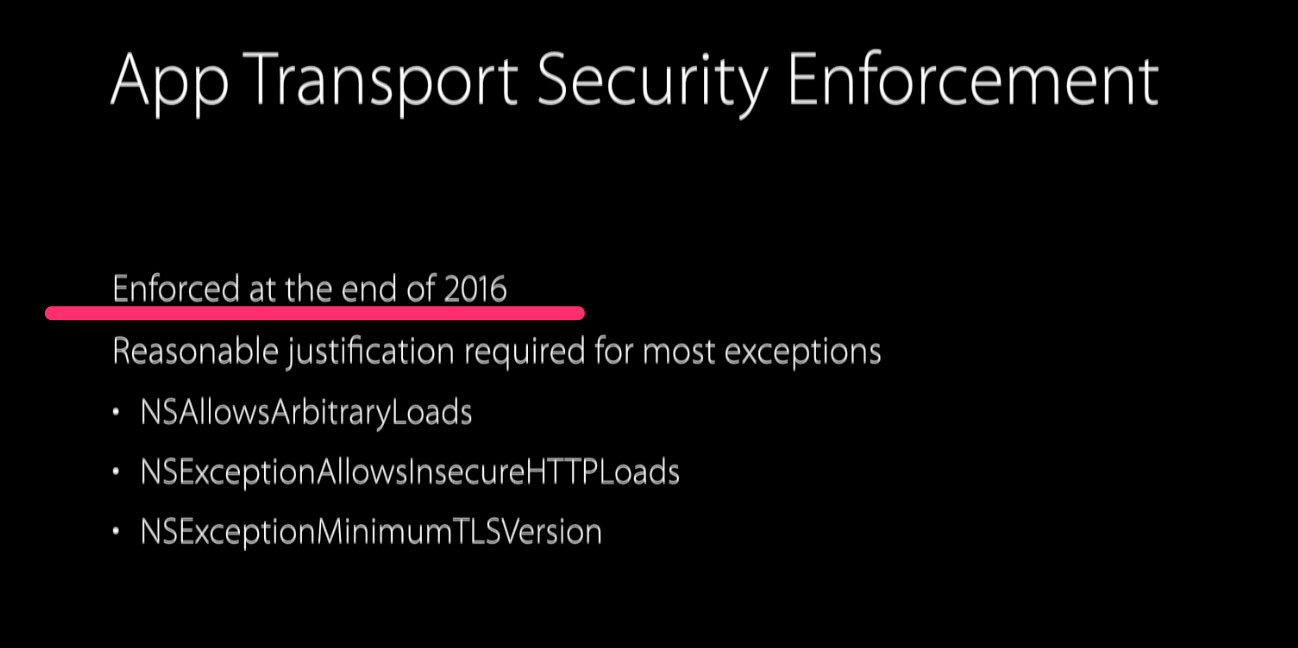
そうです、障壁とは年末にやってくるこれですね。
という事で、普段はiOSエンジニアをやっている僕がRealm Mobile PlatformをSSLで通信出来る様にした事を共有出来ればと思います。
環境
- Sakura VPS
- CentOS 7
- Nginx(proxy)
- Let's Encrypt
- Realm Object Server
前提
Let's encryptを使用するのでドメインが必要です。
ドメインのネームサーバー等の設定が済んでおり、ドメインがVPSのIPに向いている事を前提とします。
(この辺がいきなりハードル高いかも...)
※記事の中にyourdomain.comと表記されている所は適宜書き換えて下さい
初期設定
とりあえずの環境構築なので初期設定状態からrootでログインしたまま始めます。
※本来はログイン専用のユーザーを作ってSSHのポート変更をまずやるべきですがここでは省略します。
Firewallの設定を変更
CentOS 7から iptables ではなく firewall になってたんですね。
必要なポートのみ開けておきます。
firewall-cmd --add-service=http --zone=public --permanent
firewall-cmd --add-service=https --zone=public --permanent
firewall-cmd --permanent --add-port=9080/tcp --permanent
firewall-cmd --reload
Realm Object Server のインストール
こちらはドキュメントにそってインストールします。
# Setup Realm's PackageCloud repository
curl -s https://packagecloud.io/install/repositories/realm/realm/script.rpm.sh | sudo bash

# Install the Realm Object Server
sudo yum -y install realm-object-server-de

# Enable and start the service
sudo systemctl enable realm-object-server
sudo systemctl start realm-object-server
一旦通常のDashboardを開いてみる
http://yourdomain.com:9080/ にアクセスして
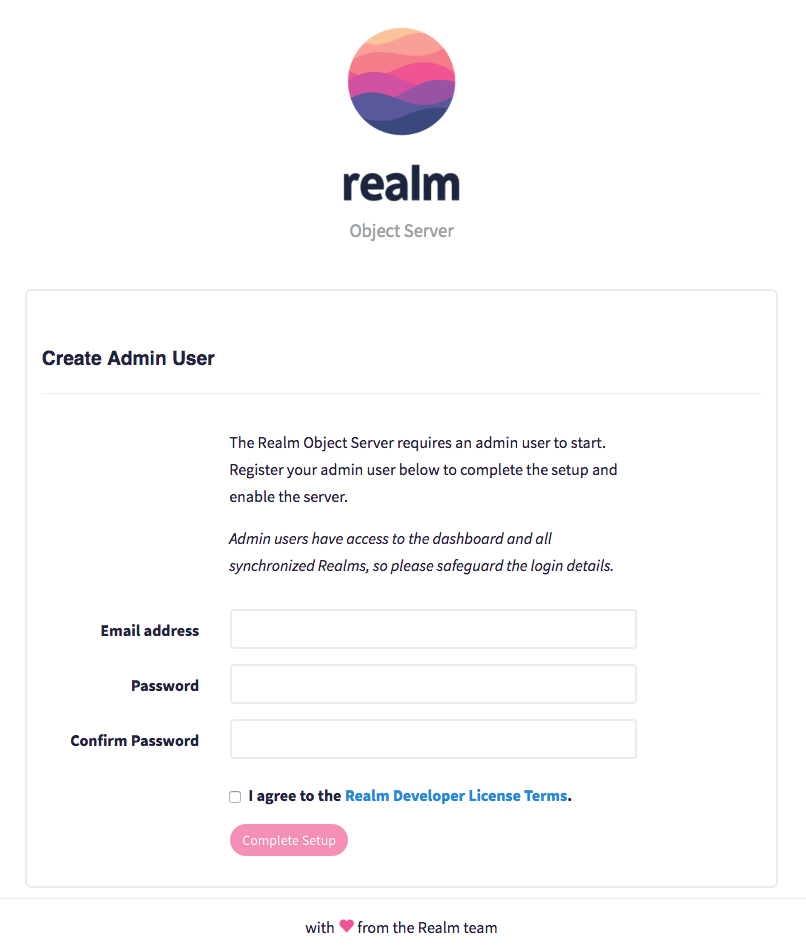
と新規登録画面が表示される事を確認します。
Nginxのインストール
rpm -ivh http://nginx.org/packages/centos/7/noarch/RPMS/nginx-release-centos-7-0.el7.ngx.noarch.rpm
yum -y update nginx-release-centos
yum -y --enablerepo=nginx install nginx
Nginx の設定を変更して http でプロキシを利用する
/etc/nginx/conf.d/default.conf を下記の様に編集します。
server {
    listen 80;

    server_name _;

    location / {
        proxy_set_header   X-Real-IP $remote_addr;
        proxy_set_header   Host      $http_host;
        proxy_pass         http://127.0.0.1:9080;
    }
}
これでNginxを起動します。
systemctl start nginx
http でのアクセスを確認
http://yourdomain.com/ でアクセス(ポート9080を削除)して先程と同様にRealmの管理者新規登録ページが表示される事を確認します。
Let's Encrypt
80ポートでのアクセスが確認出来れば次はSSL化です。
2016年4月より本番運用されているLet's Encryptを利用します。
インストール
cd /opt
git clone https://github.com/certbot/certbot
cd ./certbot
./certbot-auto certonly --standalone -d yourdomain.com
必要なライブラリのインストールが始まり、途中でメールアドレスの入力と規約の同意が求められます。
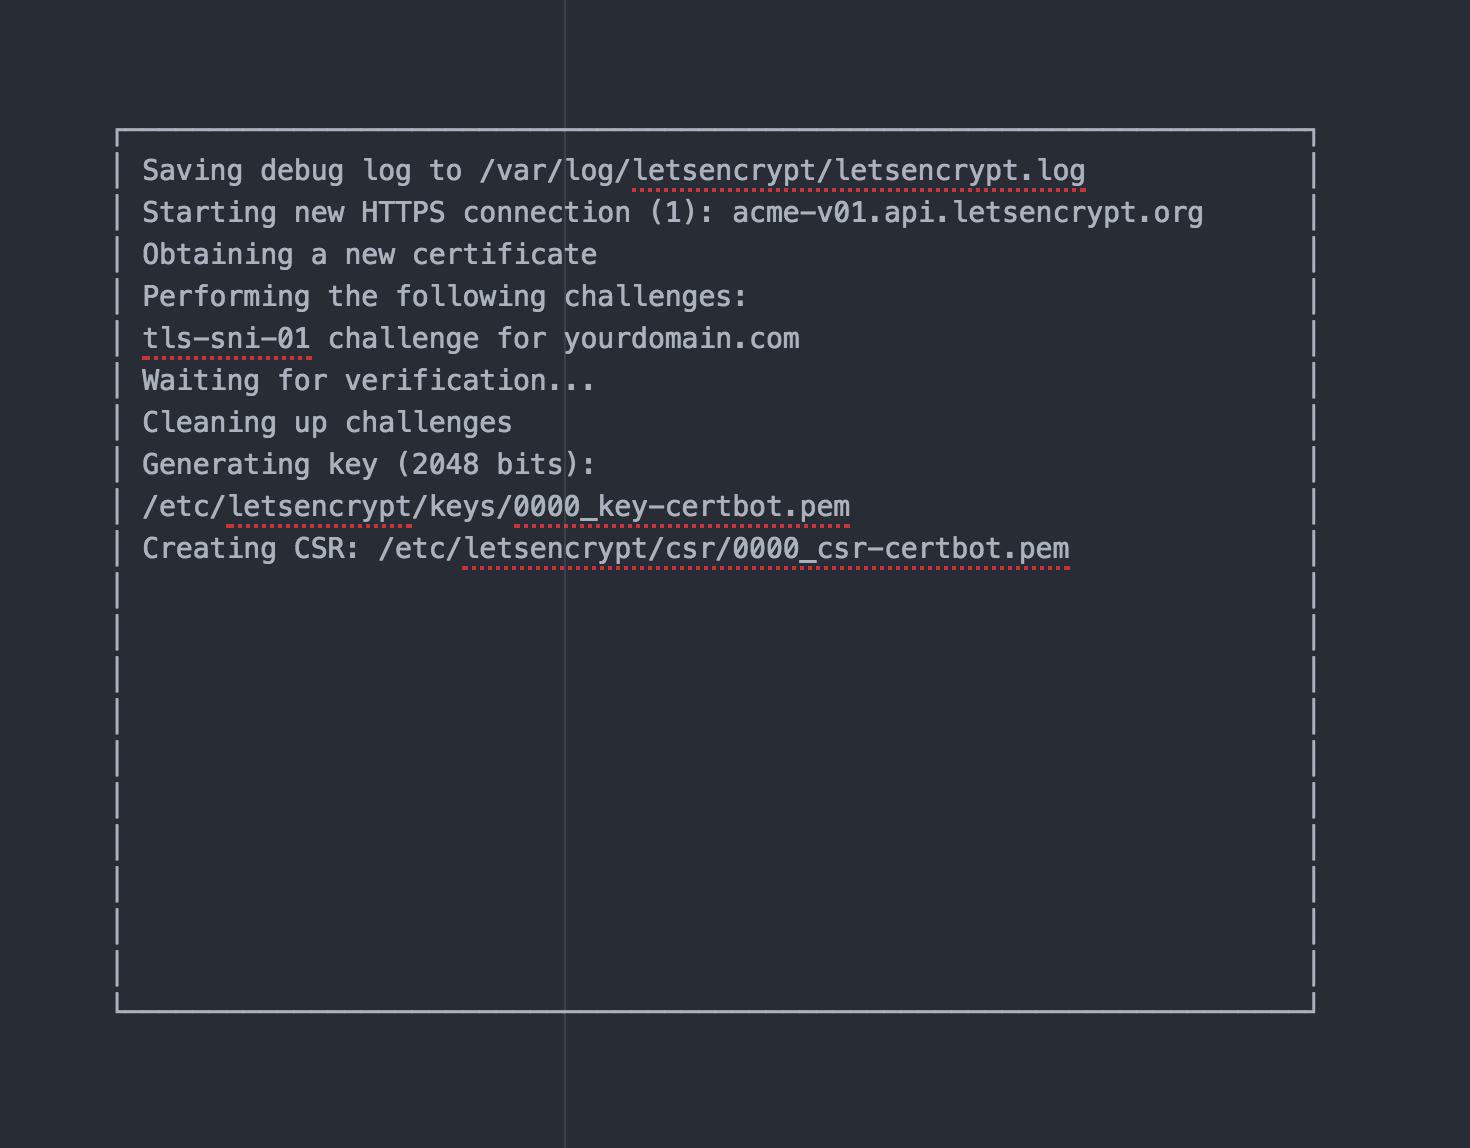
という画面と、
IMPORTANT NOTES:
 - Congratulations! Your certificate and chain have been saved at
   /etc/letsencrypt/live/yourdomain.com/fullchain.pem. Your cert will
   expire on 2017-03-03. To obtain a new or tweaked version of this
   certificate in the future, simply run certbot-auto again. To
   non-interactively renew *all* of your certificates, run
   "certbot-auto renew"
 - If you lose your account credentials, you can recover through
   e-mails sent to youremail@domain.com.
 - Your account credentials have been saved in your Certbot
   configuration directory at /etc/letsencrypt. You should make a
   secure backup of this folder now. This configuration directory will
   also contain certificates and private keys obtained by Certbot so
   making regular backups of this folder is ideal.
 - If you like Certbot, please consider supporting our work by:

   Donating to ISRG / Let's Encrypt:   https://letsencrypt.org/donate
   Donating to EFF:                    https://eff.org/donate-le
というログが表示されればインストール完了です。
Nginxの設定
先程のログに証明書の保存場所が記載されているのでそれを利用してNginxの設定を書き換えます。
/etc/nginx/conf.d/default.conf
server {
    listen 443 ssl;
    server_name yourdomain.com;
    ssl_certificate /etc/letsencrypt/live/yourdomain.com/fullchain.pem;
    ssl_trusted_certificate /etc/letsencrypt/live/yourdomain.com/chain.pem;
    ssl_certificate_key /etc/letsencrypt/live/yourdomain.com/privkey.pem;
    ssl_session_timeout 1d;
    ssl_session_cache shared:SSL:50m;
    ssl_protocols TLSv1 TLSv1.1 TLSv1.2;
    ssl_ciphers ECDHE+RSAGCM:ECDH+AESGCM:DH+AESGCM:ECDH+AES256:DH+AES256:ECDH+AES128:DH+AES:!aNULL!eNull:!EXPORT:!DES:!3DES:!MD5:!DSS;
    ssl_prefer_server_ciphers on;

    ssl_stapling on;
    ssl_stapling_verify on;

    location / {
        proxy_set_header   X-Real-IP $remote_addr;
        proxy_set_header   Host      $http_host;
        proxy_pass         http://127.0.0.1:9080;
    }
}
Nginxの再起動を行います。
systemctl restart nginx
httpsでのアクセスの確認
無事httpsでアクセスが出来ましたでしょうか?
念のため、新規登録やログインが正しく出来る事を確認しましょう。
と、ここまでNginxをプロキシとして利用していましたが、Realm Object Server自体がプロキシ機能を持っているので本来は必要無いはずなんですよね...参照
ただ、/etc/realm/configuration.ymlを変更してRealm Object Serverを再起動するとダッシュボードすら開かなくなってしまったので今回はNginxでの設定にしました。
どなたか、configuration.ymlでの設定方法をご存知ならご教授下さいm(_ _)m
Realm Swiftの初期設定部分のコードも修正します
これまで http と書いていた箇所を https にしてポート番号を削除、もしくは、443ポートに変更します。
import Realm
import RealmSwift

let credential: SyncCredentials = SyncCredentials.usernamePassword(username: "YOUR USER NAME",
                                                                   password: "YOUR PASSWORD")
SyncUser.logIn(with: credential,
             server: URL(string: "https://yourdomain.com/")!,
       onCompletion: { [weak self] (user, error) in
    if let user = user {
        let configuration = Realm.Configuration(syncConfiguration:
          SyncConfiguration(user: user, realmURL: URL(string: "realm://yourdomain.com:9080/~/realm")!))
        Realm.Configuration.defaultConfiguration = configuration
        //write your code!
    } else if let error = error {
        print("login failed \(error)")
    }
})
realmスキームはそのままでも問題無さそうだったので変更はしていません。
あ、Info.plistのATSの設定も削除してしまいましょう。
- <key>NSAppTransportSecurity</key>
- <dict>
- 	<key>NSAllowsArbitraryLoads</key>
- 	<true/>
- </dict>
無事、アプリも正しく動く事を確認しましょう。
Realm Browserを利用すればリアルタイム同期がちゃんと動作している事を確認出来ます。
まとめ
なんとかRealm Mobile PlatformをHTTPSで接続する事に成功しました。iOSアプリを作成するのにATS対応は今後大きな障壁になりそうですが、Let's Encryptを利用すればその問題も解決出来ます。
せっかく新しく出てきたPlatformなのにちょっとした障壁のせいで利用を諦めてしまうのも勿体無いので、これを機に2017年に向けて開発の準備を進めていきましょう!