この記事で理解できること
- タブの追加方法
- タブアイコンの指定方法
- タブアイコンのカスタマイズ方法
- タブバーのカスタマイズ方法
1. プロジェクトの用意
前準備として「TabbedApplication」をテンプレートに指定してプロジェクトを作成します。ストーリーボードは図のようになっているはずです。
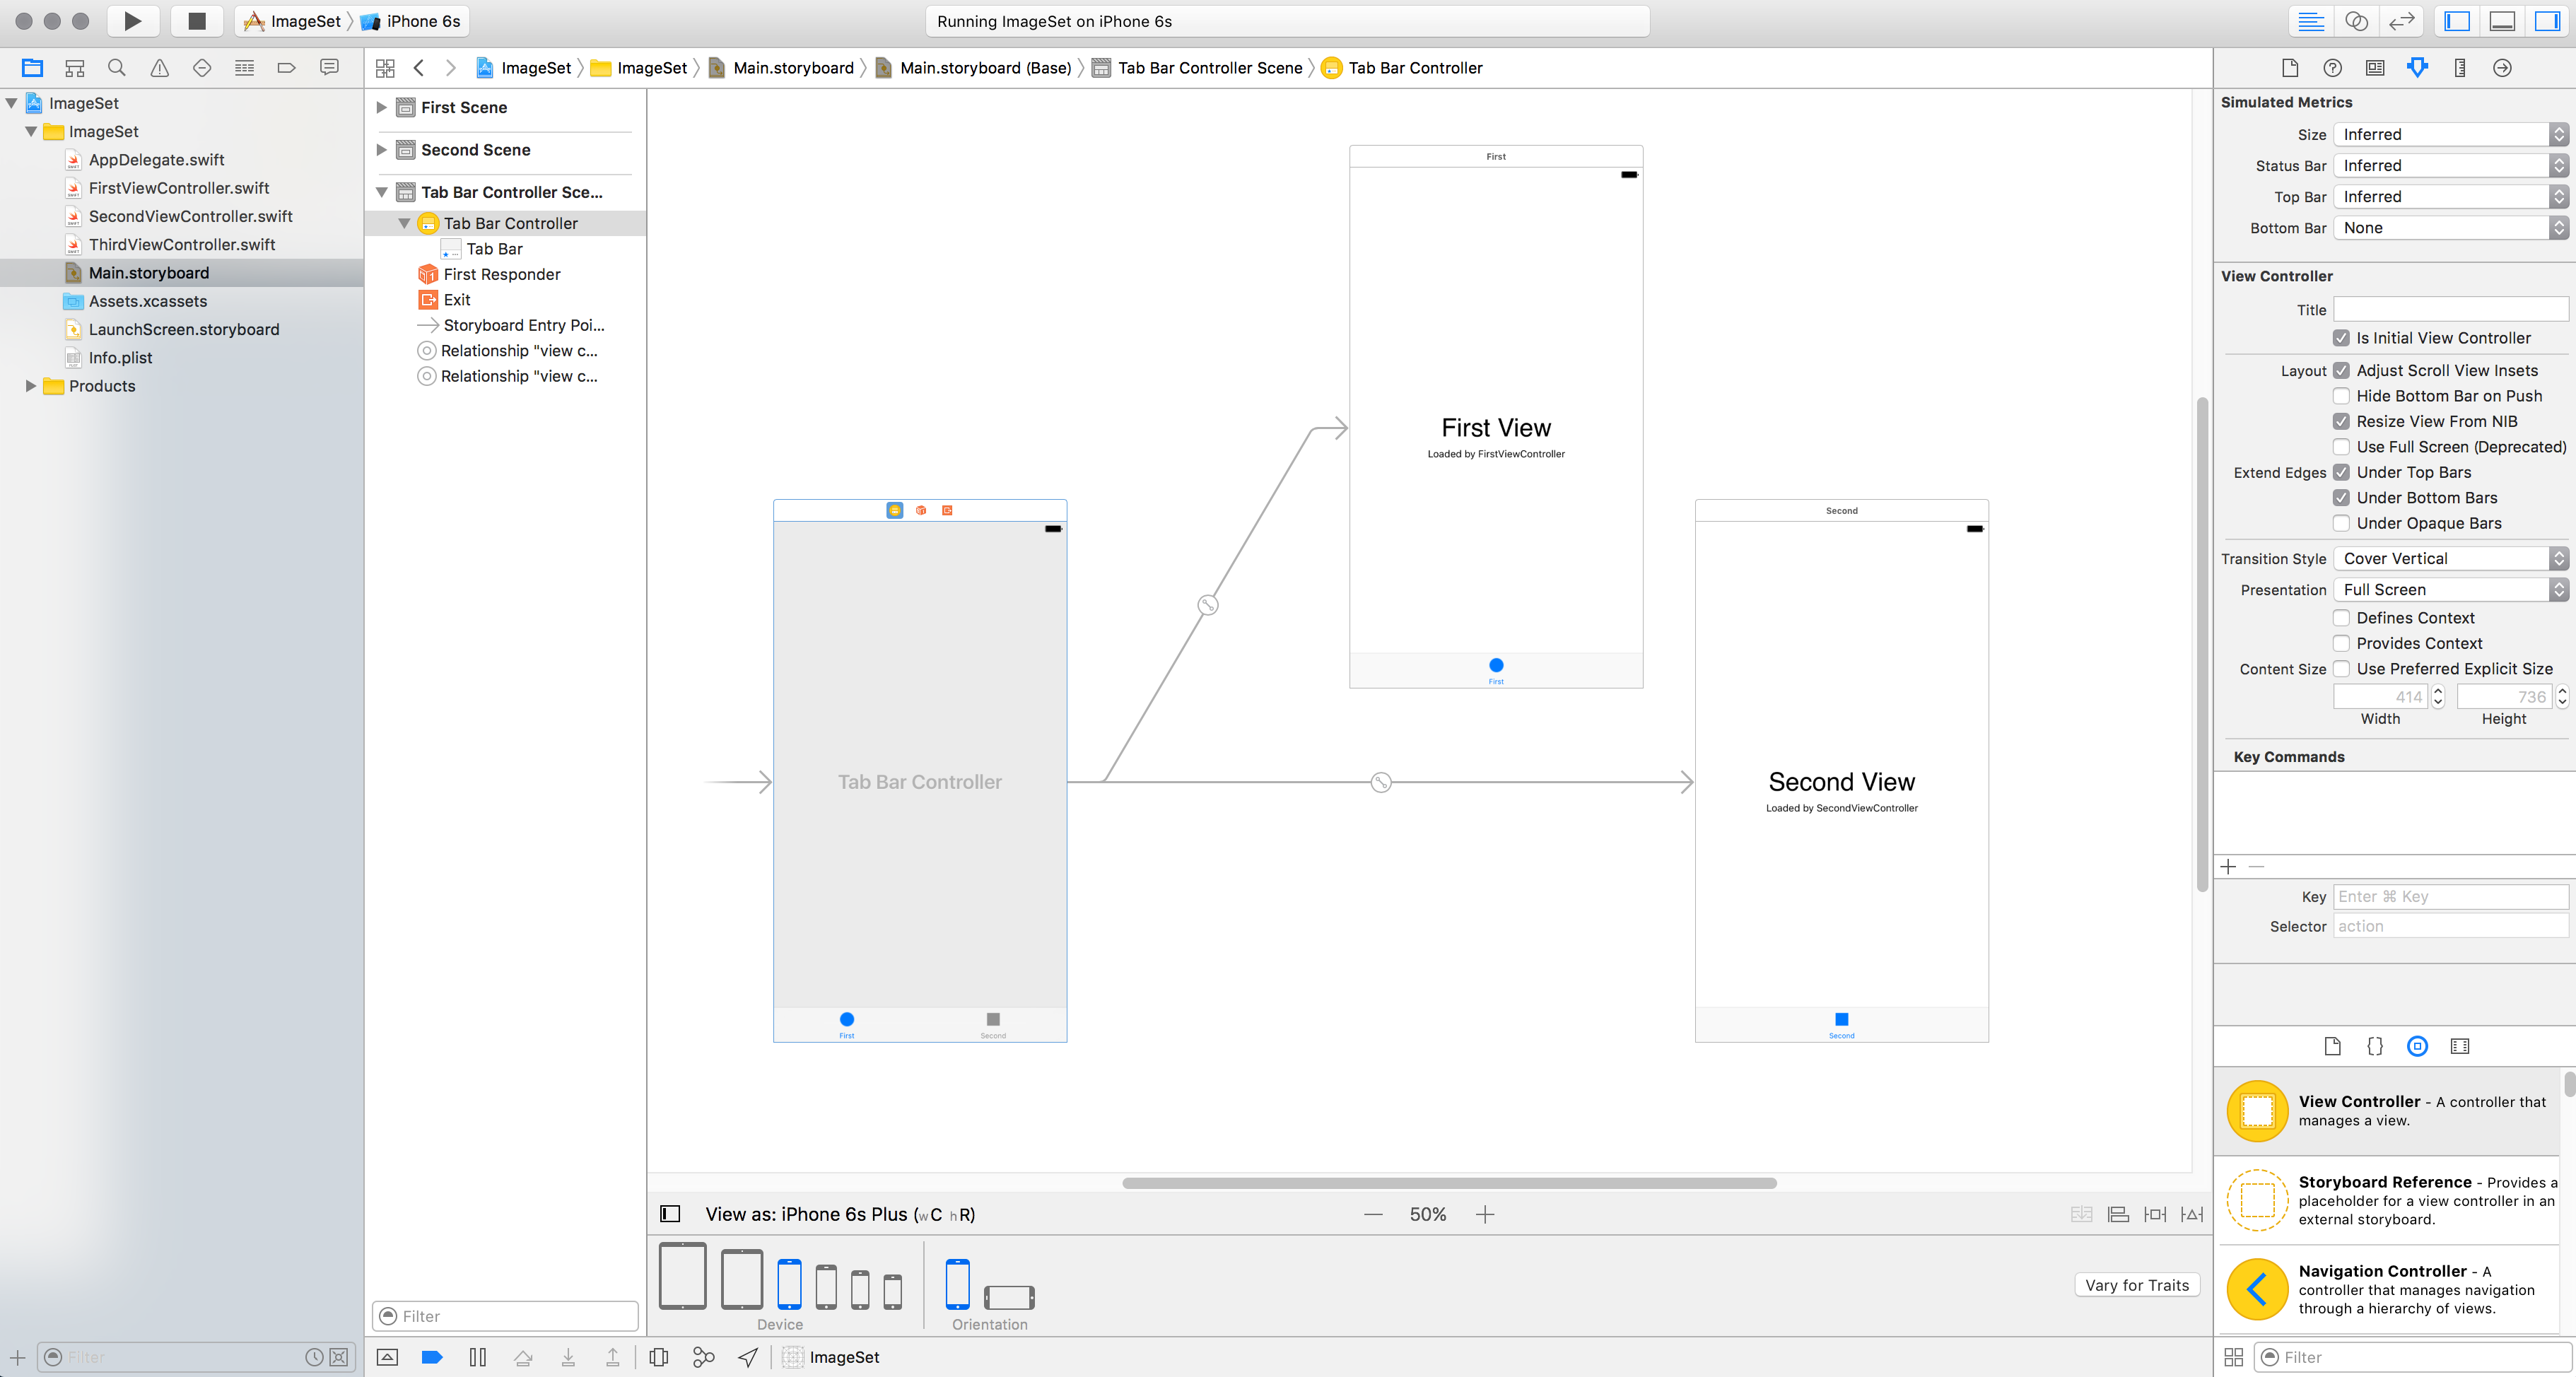
2. タブの追加
タブを追加してみます。新しいタブに対応するViewControllerを一つ増やします。TabBarControllerから追加したViewControllerへ向けてControl + ドラッグします。ポップアップからview controllersを選択します。
タブの並びを変更したい時は、TabBarController上のアイコンをshiftを押しながらドラッグします。
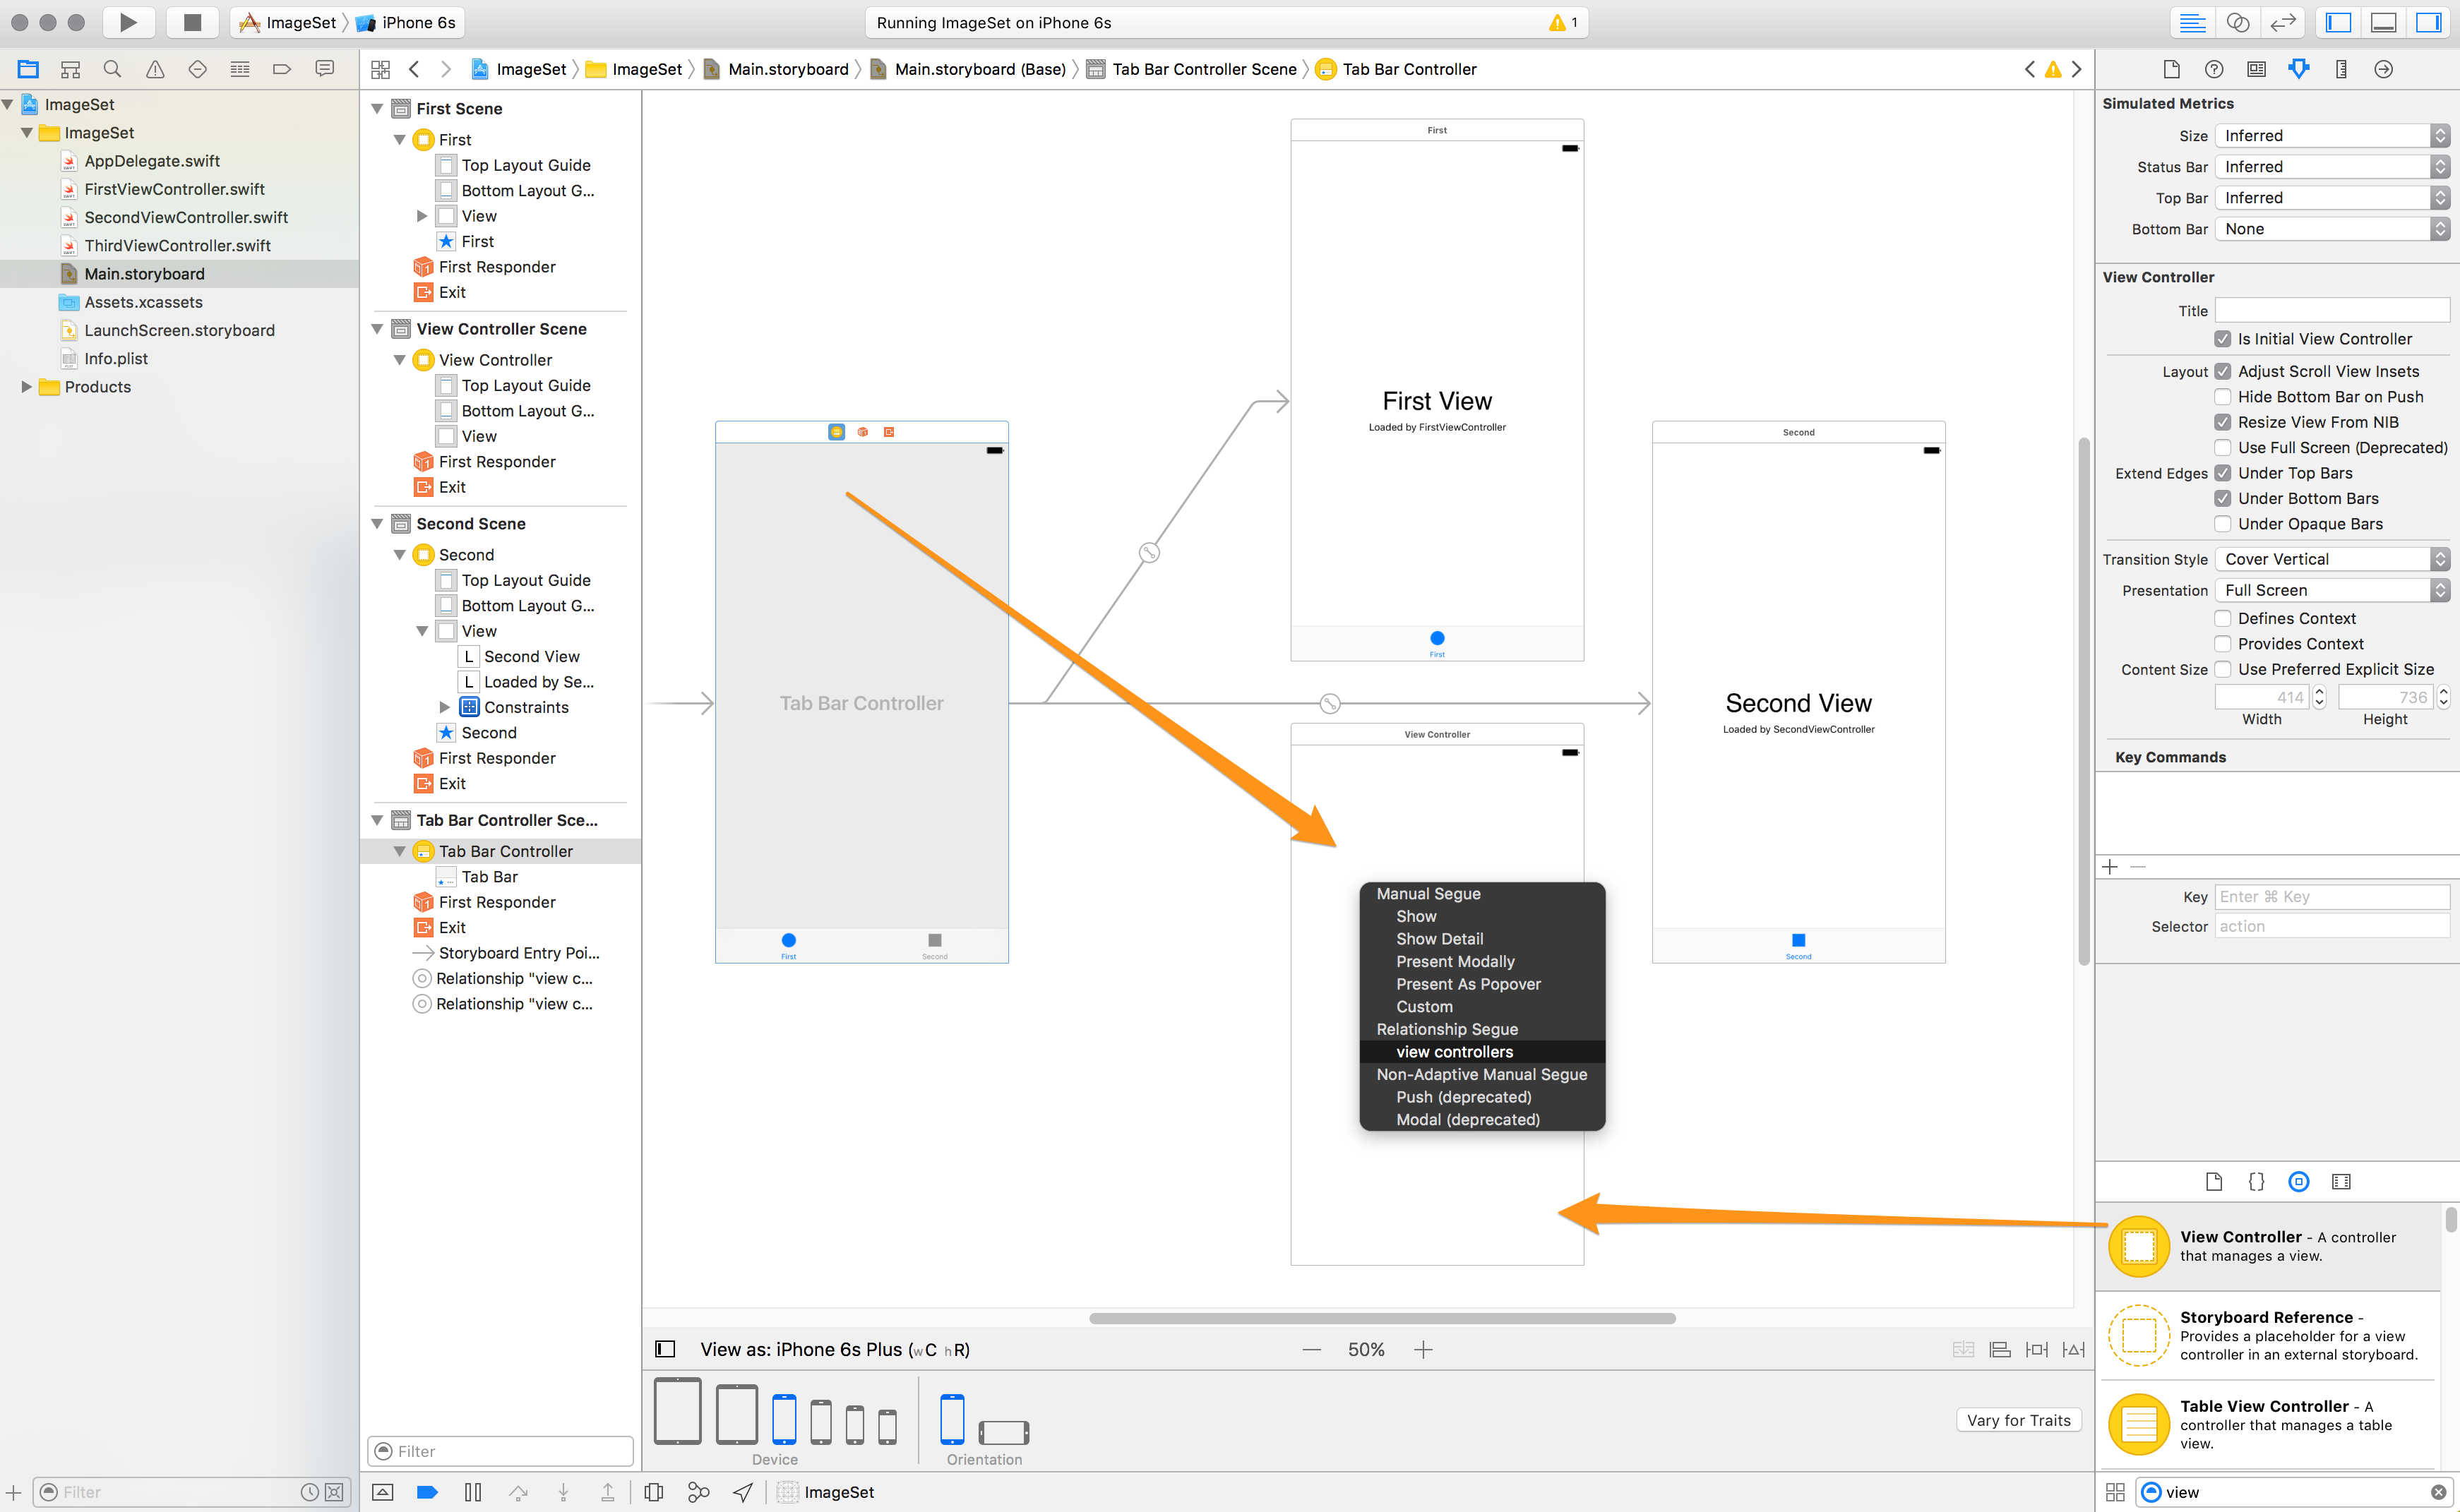
3. タブアイコンの指定
タブアイコンの指定はTabBarControllerではなく、ViewControllerの下部を選択状態にしてから指定します。ここではシステムアイコンのFavoritesを指定しています。
4. カスタムタブアイコンの指定
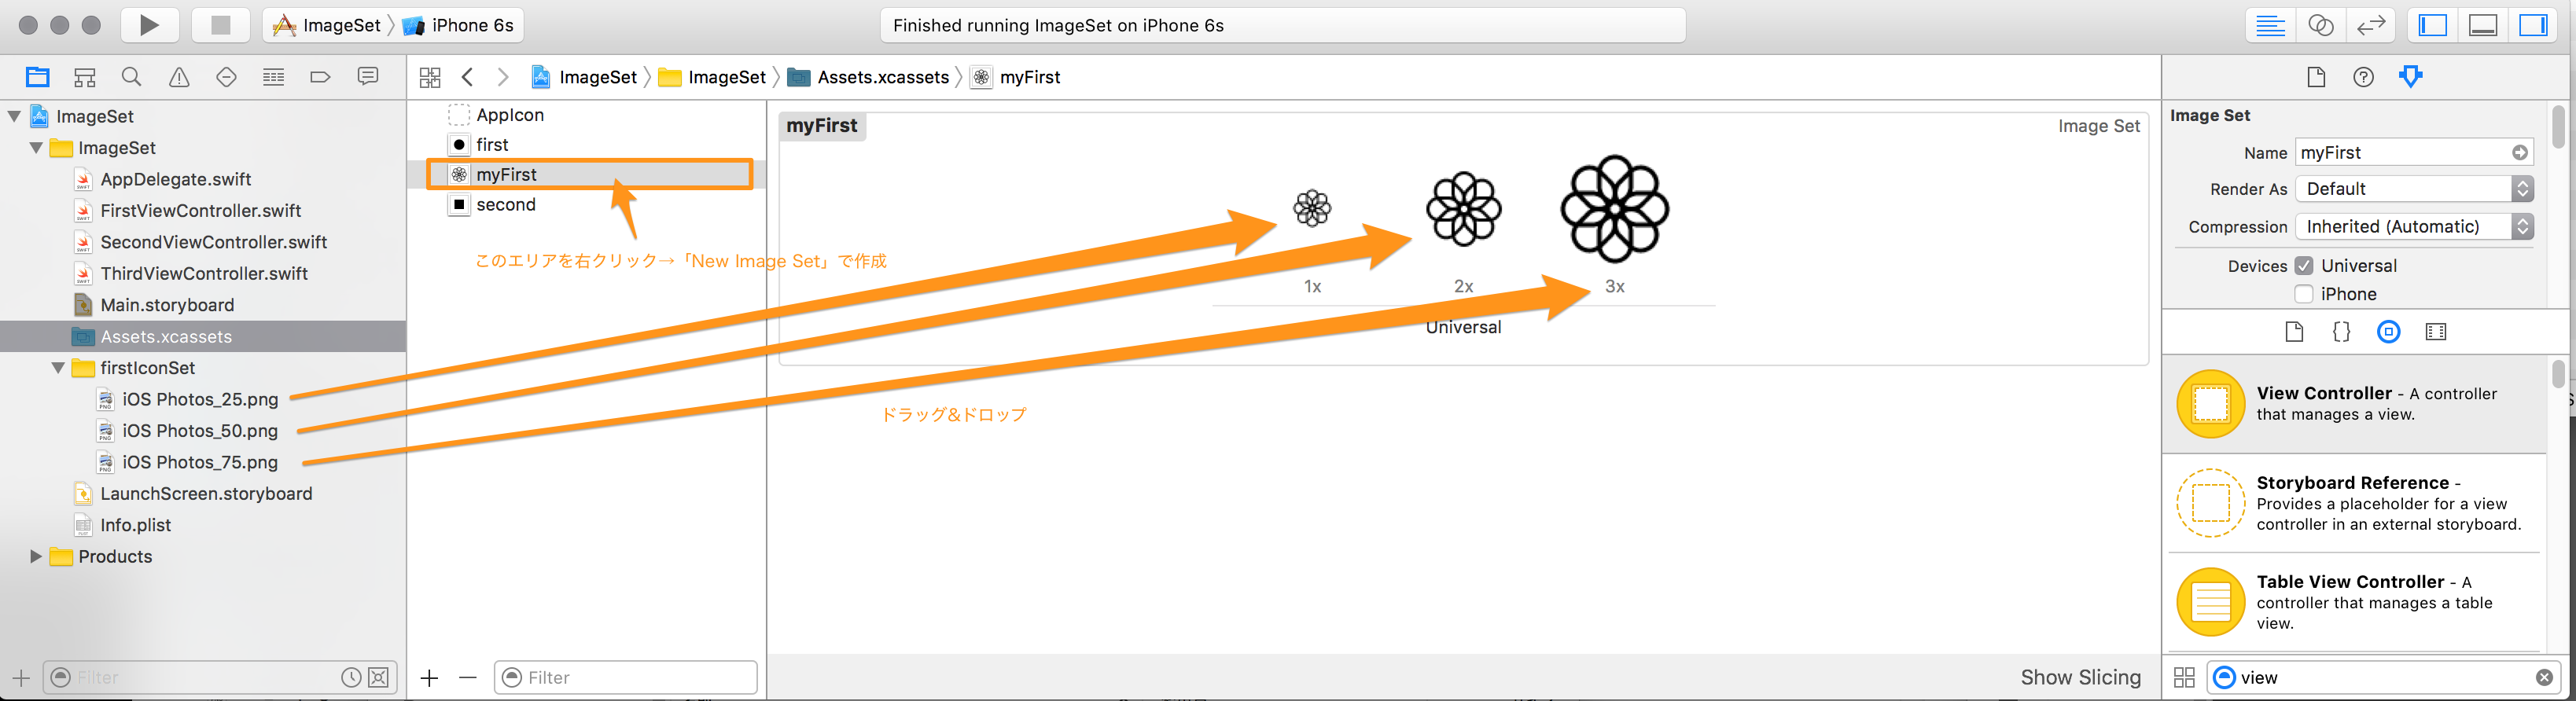
デフォルトのものからカスタムアイコンに変更してみます。前準備としてImage Setを作成しておきましょう。私の場合は、1xには25px,2xには50px,3xには75pxのサイズを割り当てることが多いです。今回はmyFirstという名前のImage Set作成しました。
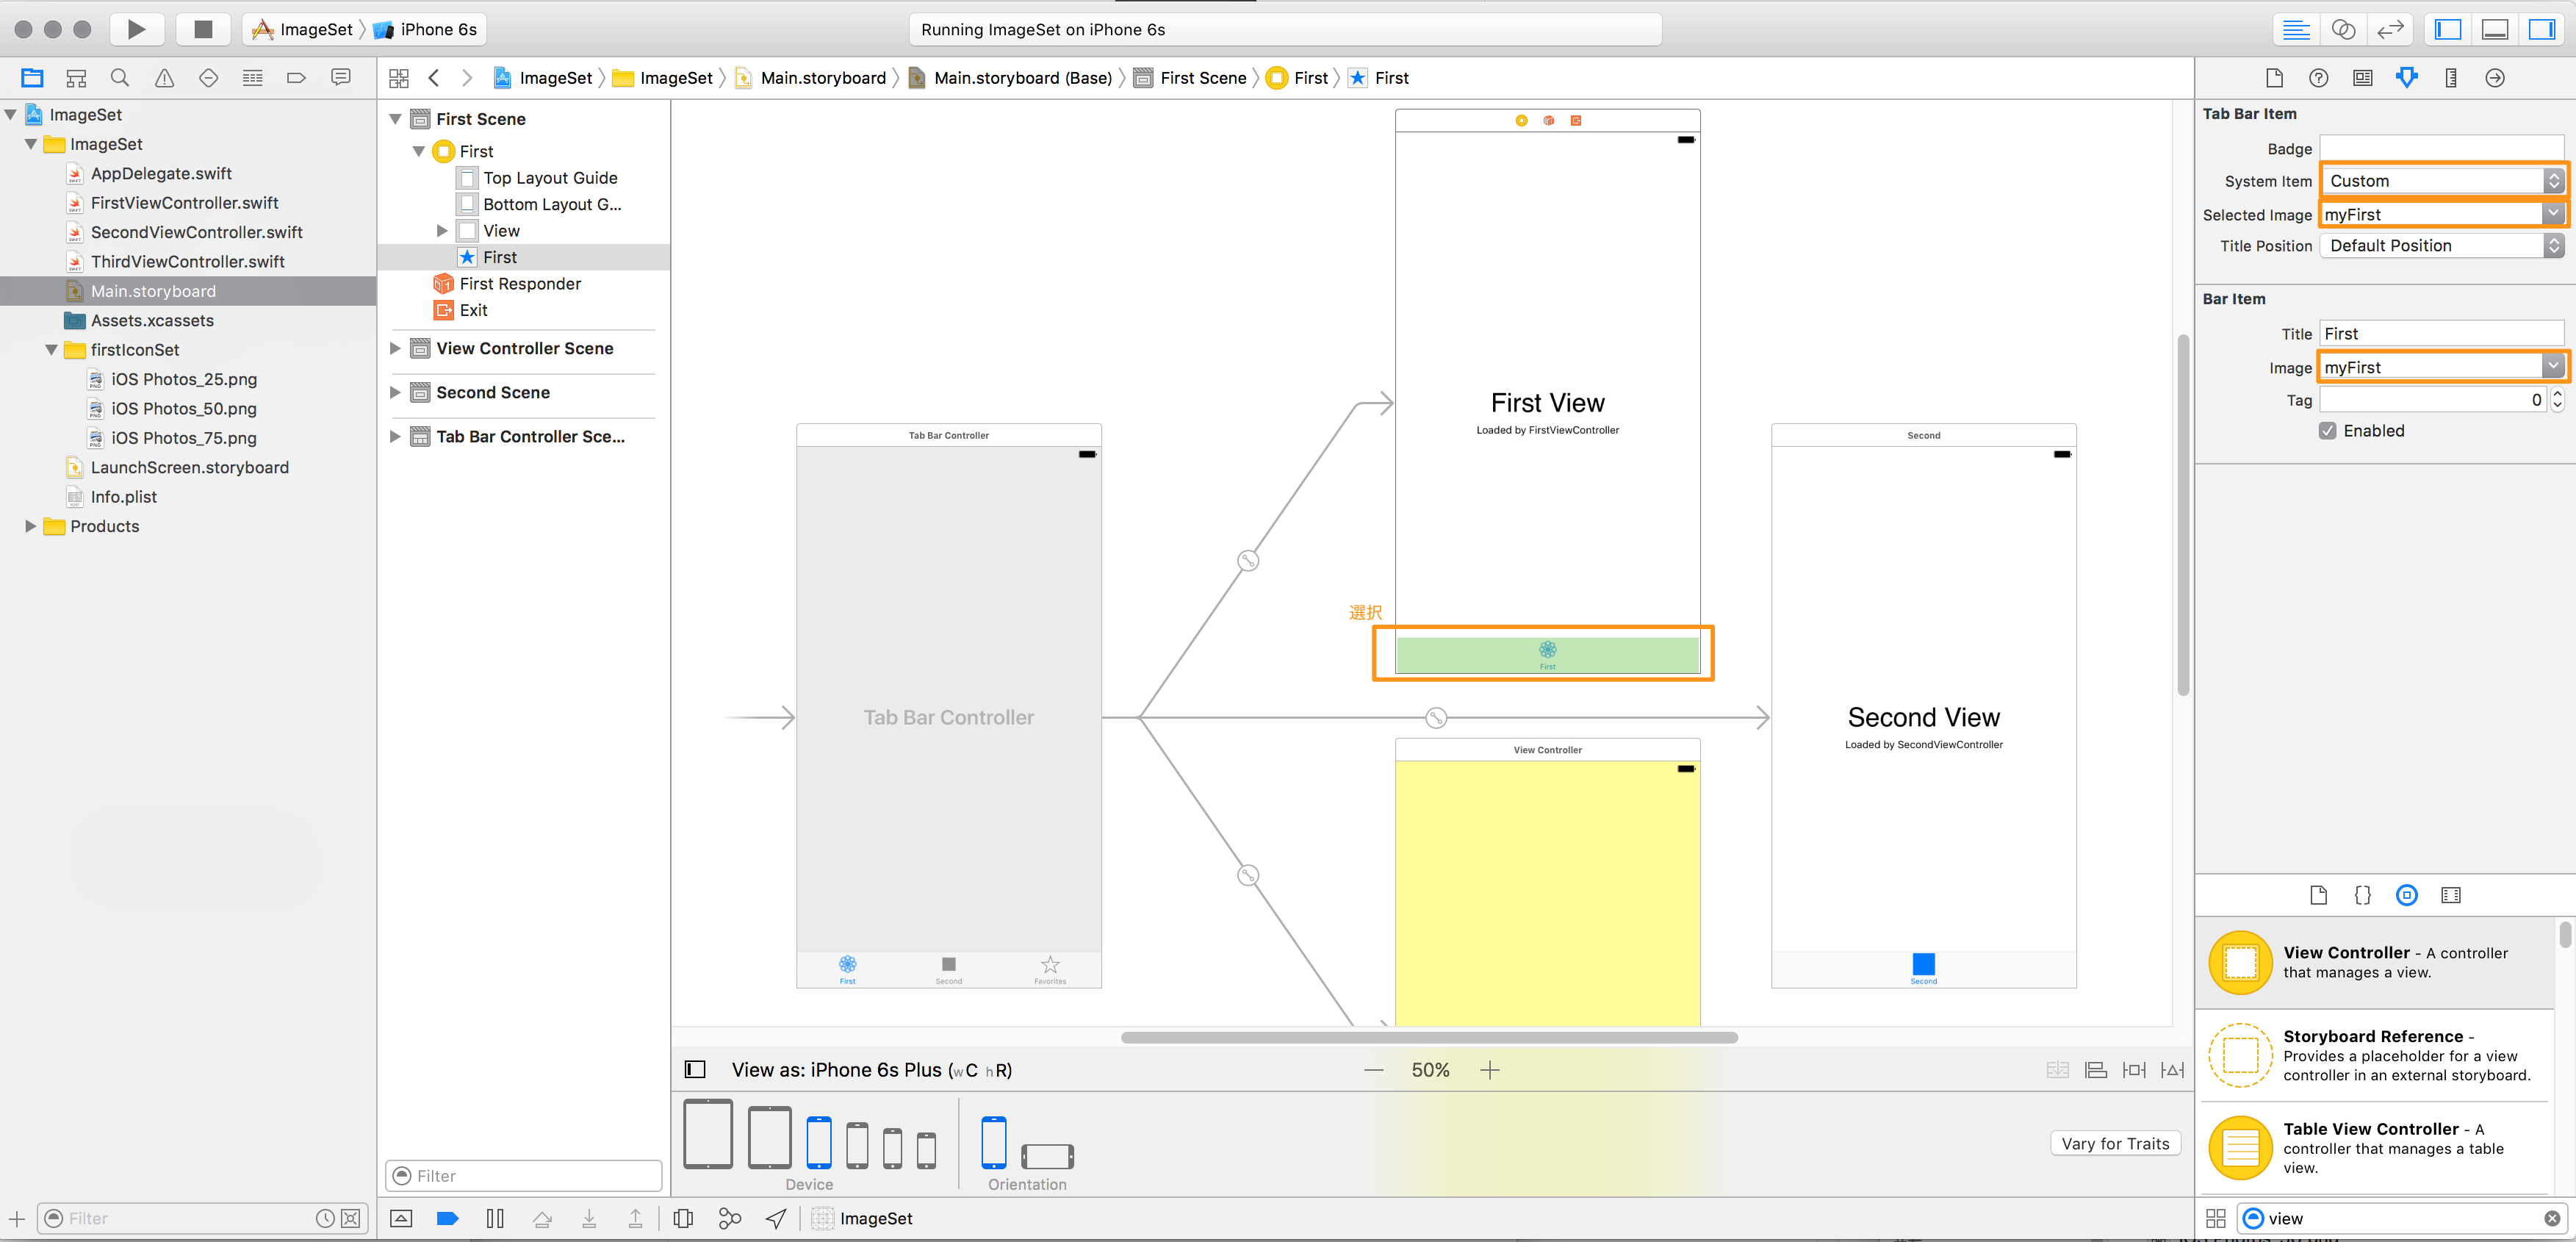
System ItemをCustomに、selected imageをmyFirstに変更します。Bar Itemのほうも忘れずにImageにmyFirstを指定します。未選択時のアイコンの状態の設定となります。
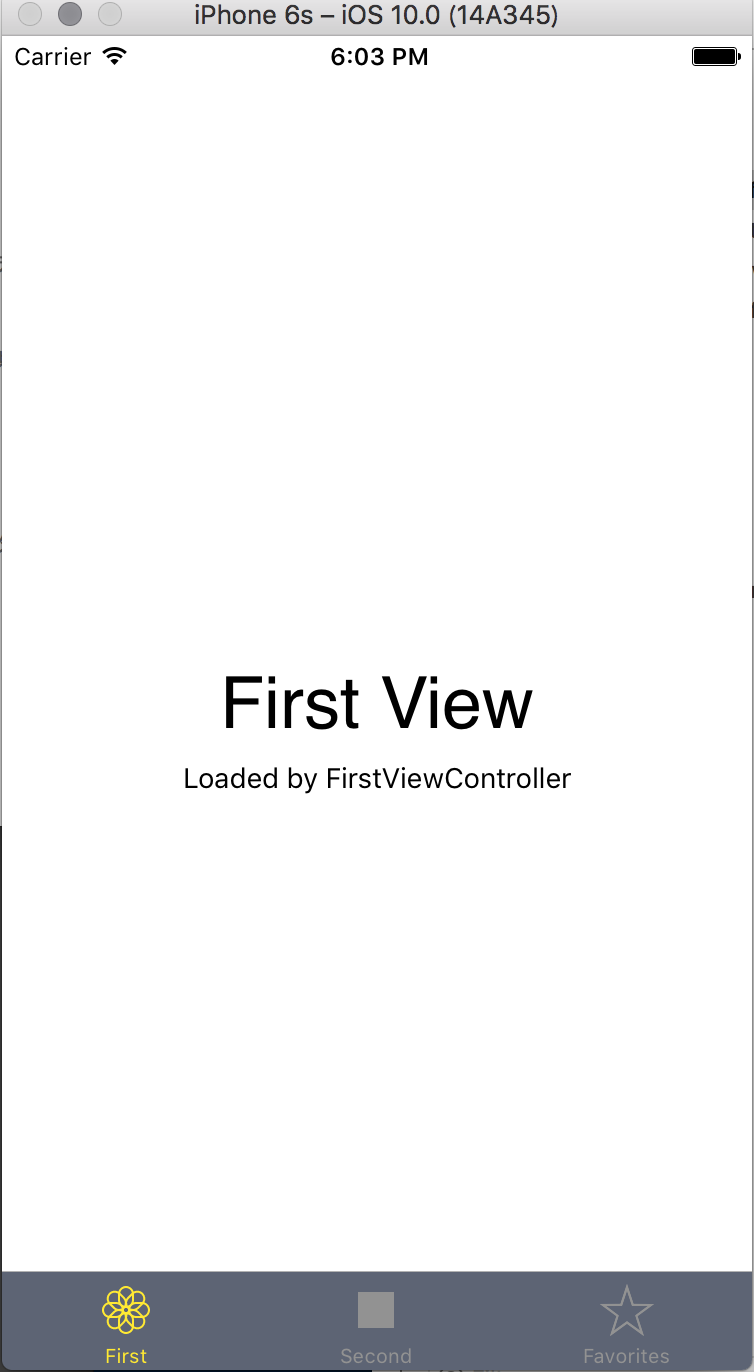
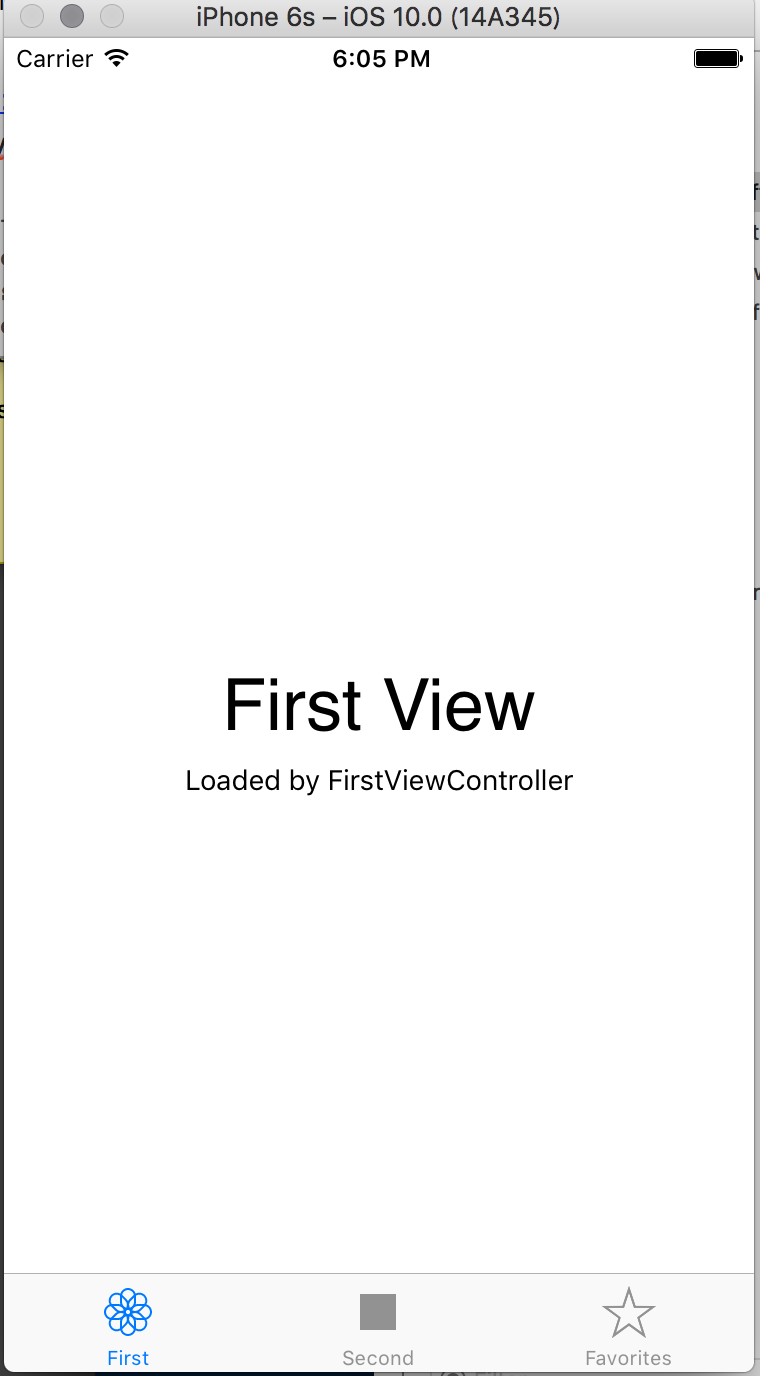
5. 確認してみる
ここで一度ビルドしてみます。
6. タブバーをカスタマイズする
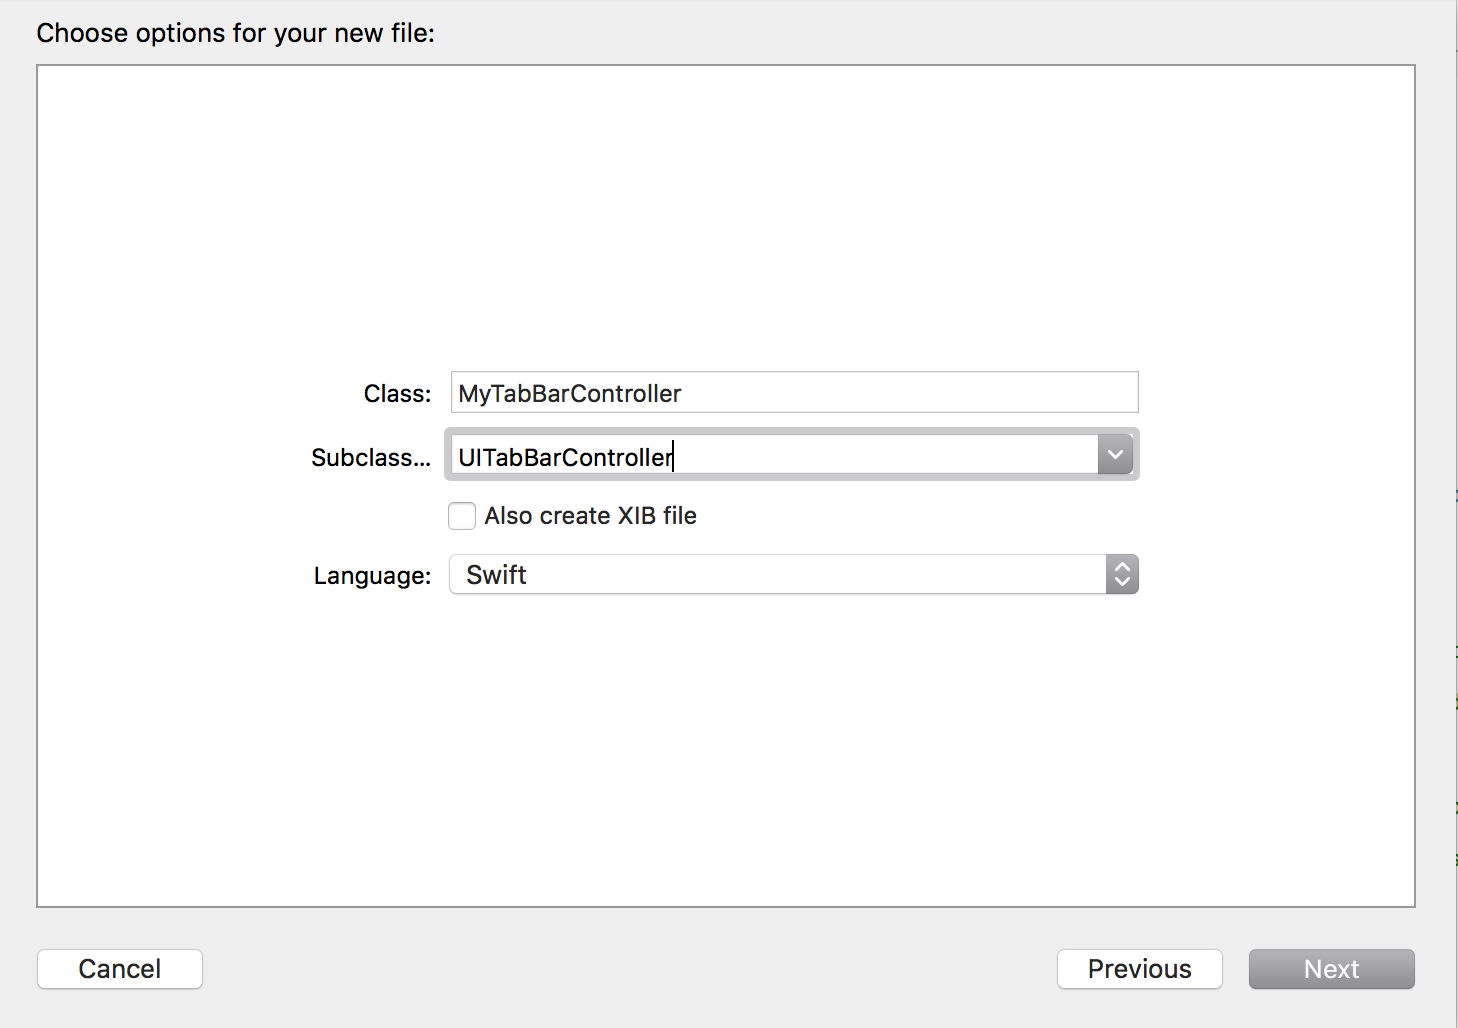
TabbarControllerのカスタムクラスを用意します。メニュー:File → New → FileでCocoa Touch Classをテンプレとして選び、SubclassにUITabBarControllerを指定します。クラス名はMyTabBarControllerとしました。
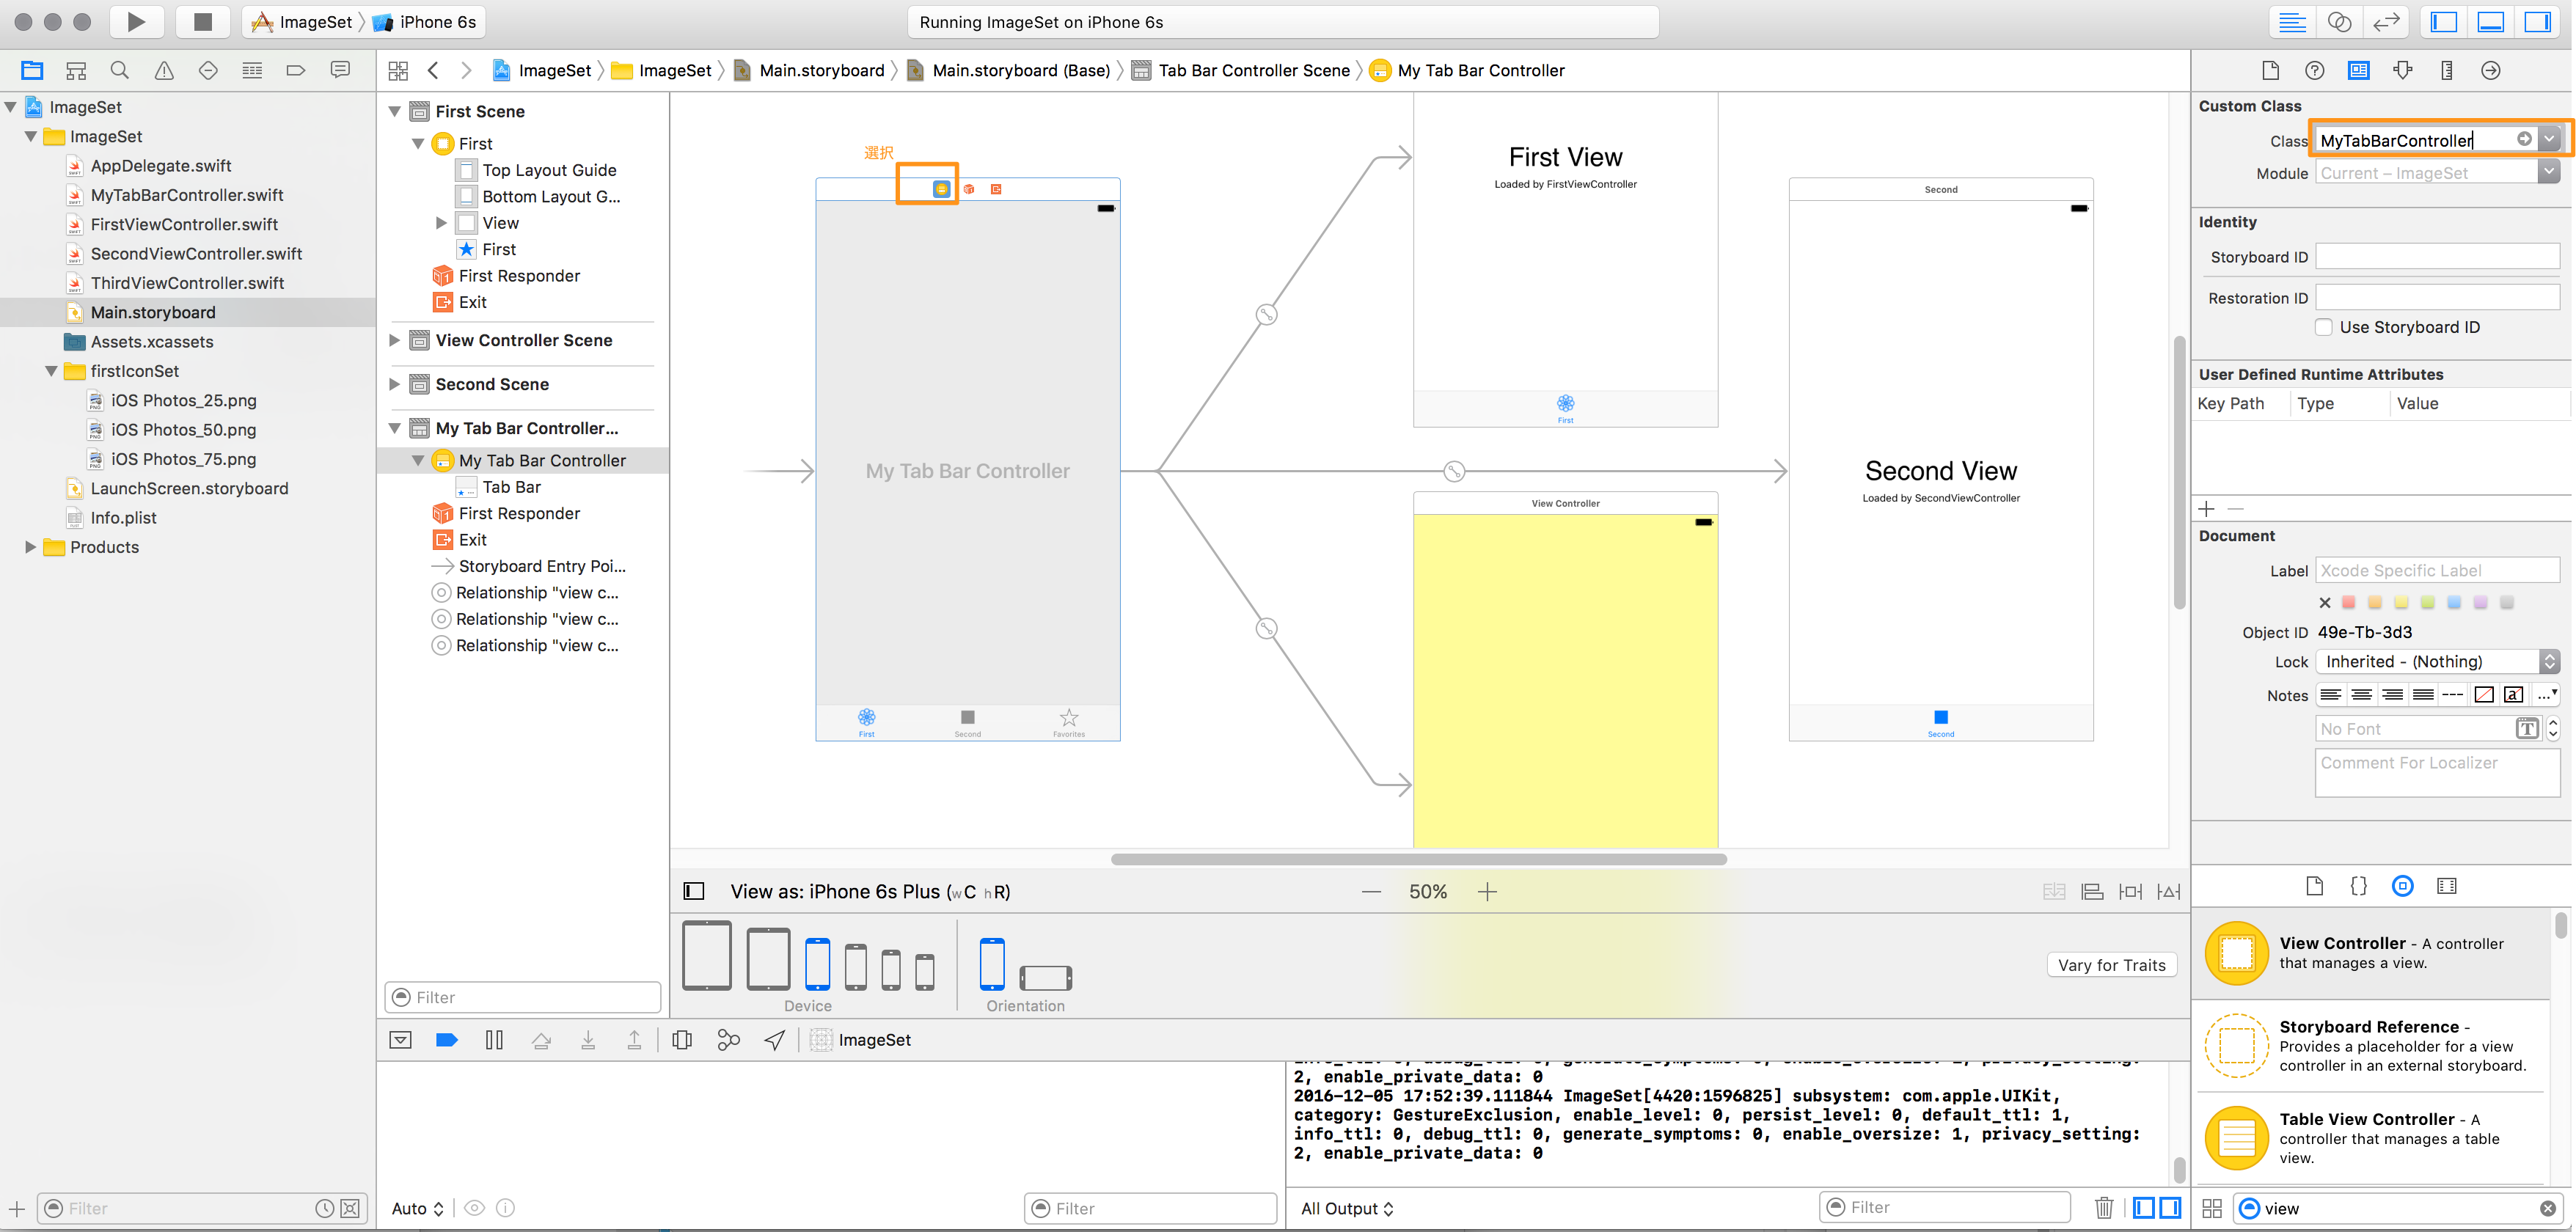
ストーリーボード上のMyTabBarControllerを選択し、Custom Class欄で、MyTabBarControllerを指定します。
例としてタブバーのアイコンと背景を変更してみましょう。MyTabBarController.swiftに変更のコードを追加します。
MyTabBarController.swift
//
//  MyTabBarController.swift
//

import UIKit

class MyTabBarController: UITabBarController {

    override func viewDidLoad() {
        super.viewDidLoad()

        // カスタマイズ

        // アイコンの色
        UITabBar.appearance().tintColor = UIColor(red: 255/255, green: 233/255, blue: 51/255, alpha: 1.0) // yellow

        // 背景色
        UITabBar.appearance().barTintColor = UIColor(red: 66/255, green: 74/255, blue: 93/255, alpha: 1.0) // grey black


    }

    override func didReceiveMemoryWarning() {
        super.didReceiveMemoryWarning()
        // Dispose of any resources that can be recreated.
    }


    /*
    // MARK: - Navigation

    // In a storyboard-based application, you will often want to do a little preparation before navigation
    override func prepare(for segue: UIStoryboardSegue, sender: Any?) {
        // Get the new view controller using segue.destinationViewController.
        // Pass the selected object to the new view controller.
    }
    */

}
7. 確認してみる