概要
前回の記事から約1年経って、Laravelのバージョンも上がったし、私の知識も少しだけ増えたので書き直してみました。
環境
Laravel:6.18.31
PHP:7.4.6
SlackのWebhook URLを取得
SlackにメッセージをPOSTするためのWebhook URLを取得します。
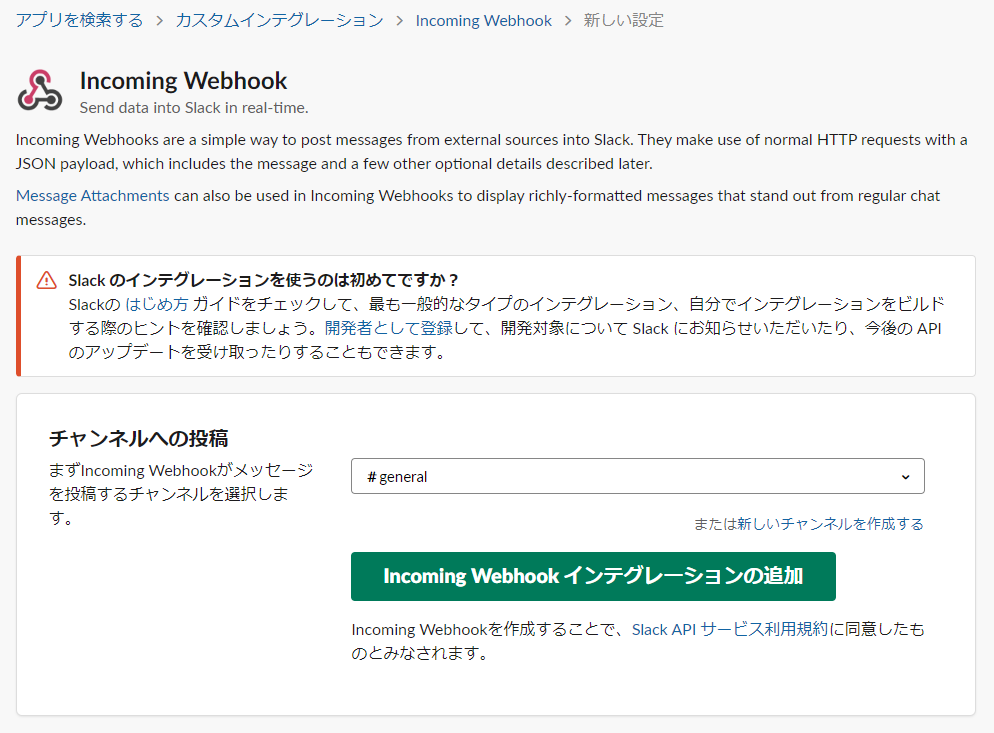
Incoming Webhook を Slack に追加
アプリから取得する場合は、ワークスペースの「App」メニューから検索欄に“Incoming Webhook”と入力して検索してください。
ブラウザで取得する場合は、以下のURLにアクセスしてください。
https://slack.com/apps/A0F7XDUAZ--incoming-webhook-
-
Slack に追加ボタンをクリック - 通知するチャンネルを選択し、
Incoming Webhook インテグレーションの追加ボタンをクリック - Webhook URLをコピーする
通知先のチャネルや投稿されるときの名前等は設定画面で登録しておくことができますが、通知するときに指定することもできます。
取得したURLは.envファイルに記載しておきます。
SLACK_URL=https://hooks.slack.com/services/XXXXXXXXX/XXXXXXXXX/xxxxxXXxxXxXXxxXXXXXxx
また、Slack 通知用の設定ファイルも用意しておきましょう。
<?php

return [
    // Webhook URL
    'url' => env('SLACK_URL'),
];
Slack 通知の準備
Slack 通知については公式ドキュメントに記載がありますのでそちらも参考にしてください
Slack 通知チャンネルのインストール
composer require laravel/slack-notification-channel
通知クラスの作成
以下のコマンドで Slack 通知クラスを作成します。
php artisan make:notification SlackNotification
app/Notifications/SlackNotification.php というファイルが作成されますので、Slack 通知用に変更していきます。
-
viaメソッドが返す配信チャンネルを slack に変更する - SlackMessage クラスのインスタンスを返す
toSlackメソッドを追加する
SlackMessage クラスの content メソッドでテキストメッセージを送信することができますが、 attachment メソッドで活用することでより詳細な情報をSlackに送ることができます。
<?php

namespace App\Notifications;

use Illuminate\Bus\Queueable;
use Illuminate\Contracts\Queue\ShouldQueue;
use Illuminate\Notifications\Notification;
use Illuminate\Notifications\Messages\SlackMessage;
use Illuminate\Notifications\Messages\SlackAttachment;

class SlackNotification extends Notification
{
    use Queueable;

    /**
     * 通知チャンネル情報
     *
     * @var array
     */
    protected $channel;

    /**
     * 通知メッセージ
     *
     * @var string
     */
    protected $message;

    /**
     * 添付情報
     *
     * @var array
     */
    protected $attachment;

    /**
     * 通知インスタンスの作成
     *
     * @return void
     */
    public function __construct($channel = null, $message = null, $attachment = null)
    {
        $this->channel = $channel;
        $this->message = $message;
        $this->attachment = $attachment;
    }

    /**
     * 通知の配信チャンネルの取得
     *
     * @param  mixed  $notifiable
     * @return array
     */
    public function via($notifiable)
    {
        return ['slack'];
    }
    /**
     * Slack通知表現を返す
     *
     * @param  mixed  $notifiable
     * @return \Illuminate\Notifications\Messages\SlackMessage
     */
    public function toSlack($notifiable)
    {
        $message = (new SlackMessage)
            ->from($this->channel['username'], $this->channel['icon'])
            ->to($this->channel['channel'])
            ->content($this->message);

        if (!is_null($this->attachment) && is_array($this->attachment)) {
            $message->attachment(function ($attachment) {
                if (isset($this->attachment['title'])) {
                    $attachment->title($this->attachment['title']);
                }
                if (isset($this->attachment['content'])) {
                    $attachment->content($this->attachment['content']);
                }
                if (isset($this->attachment['field']) && is_array($this->attachment['field'])) {
                    foreach($this->attachment['field'] as $k => $v) {
                        $attachment->field($k, $v);
                    }
                }
            });
        }
        return $message;
    }
}
Slack通知ファサードの作成
設定ファイルにチャンネル情報を追加
<?php

return [
    // Webhook URL
    'url' => env('SLACK_URL'),

    // チャンネル設定
    'default' => 'work',

    'channels' => [
        'work' => [
            'username' => '作業通知',
            'icon' => ':face_with_rolling_eyes:',
            'channel' => 'notice-work',
        ],
        'error' => [
            'username' => 'エラー通知',
            'icon' => ':scream:',
            'channel' => 'notice-error',
        ],
    ],
];
Slack通知サービスの作成
以下の処理を実行するためのサービスを作成します。
- Notifiableトレイトを利用する
- 通知先のURLを返す
routeNotificationForSlackメソッドを追加する - 通知するチャンネルを指定する
channelメソッドを追加する -
sendメソッドで Slack 通知クラスのインスタンスを引数として$this->notify()を呼び出す
<?php

namespace App\Services;

use Illuminate\Notifications\Notifiable;
use App\Notifications\SlackNotification;

class SlackService
{
    use Notifiable;

    /**
     * 通知チャンネル情報
     *
     * @var array
     */
    protected $channel = null;

    /**
     * 通知チャンネルを指定
     *
     * @param array $channnel
     * @return this
     */
    public function channel($channel)
    {
        $this->channel = config('slack.channels.' . $channel);

        return $this;
    }

    /**
     * 通知処理
     *
     * @param string $message
     * @return void
     */
    public function send($message = null)
    {
        if (!isset($this->channel)) {
            $this->channel(config('slack.default'));
        }

        $this->notify(new SlackNotification($this->channel, $message));
    }

    /**
     * Slack通知用URLを指定する
     *
     * @return string
     */
    protected function routeNotificationForSlack()
    {
        return config('slack.url');
    }
}
ファサードクラスの作成
<?php
namespace App\Facades;

use Illuminate\Support\Facades\Facade;

class Slack extends Facade
{
    protected static function getFacadeAccessor()
    {
        return 'slack';
    }
}
サービスプロバイダの作成
AppServiceProvider に記載することも可能ですが、常に必要な処理ではないので個別にサービスプロバイダを作成することにします。
サービスプロバイダは以下のコマンドで作成します。
php artisan make:provider SlackServiceProvider
app/Providers/SlackServiceProvider.php というファイルが作成されますので、register メソッドにキーとサービスをバインドする初期を記述します。
<?php

namespace App\Providers;

use Illuminate\Support\ServiceProvider;
use App\Services\SlackService;

class SlackServiceProvider extends ServiceProvider
{
    /**
     * Register services.
     *
     * @return void
     */
    public function register()
    {
        $this->app->bind('slack', SlackService::class);
    }

    /**
     * Bootstrap services.
     *
     * @return void
     */
    public function boot()
    {
        //
    }
}
サービスプロバイダとエイリアスを追記する
    'providers' => [
        (省略)
        App\Providers\SlackServiceProvider::class,
        (省略)
    ],
    'aliases' => [
        (省略)
        'Slack' => App\Facades\Slack::class,
        (省略)
    ],
通知処理
以下のように記述すればシステム内のどこからでも Slack への通知が可能です。
// メッセージを送信
\Slack::send('Hello World!');

// チャンネルを指定して送信する場合
\Slack::channel('error')->send('Error!!');
おまけ
Tinkerを使えば、画面やコンソールコマンドを用意しなくても動作が確認できます。
php artisan tinker
Psy Shell v0.10.4 (PHP 7.4.6 ― cli) by Justin Hileman
>>> \Slack::send('Hello World!');
=> null
>>> exit
Exit:  Goodbye
詳しくはこちらをご確認ください。
