環境
・Laravel 6.18.43
・PHP 7.3.11
・ブラウザ:クローム
画面構成
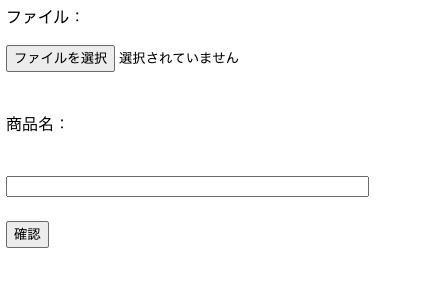
フォーム
ファイルと商品名を入力します。
 |
|---|
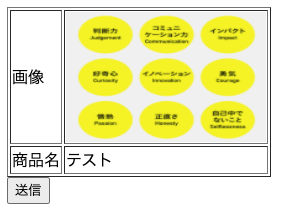
確認画面
確認画面を表示します。
input->confirmの際に一度Storage/app/public内のtempディレクトリに仮保存し、
confirm->completeの際にStorage/app/public内のproductImageディレクトリに移動します。
 |
|---|
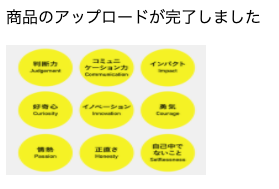
完了画面
完了画面です。
 |
|---|
ソース
まずはルーティングを作成。
Route::get('/image_input', 'ImageController@getImageInput');
Route::post('/image_confirm', 'ImageController@postImageConfirm');
Route::post('/image_complete', 'ImageController@postImageComplete');
続いてフォームの作成。
formタグ内でenctype="multipart/form-dataを記述する必要があるようです。
<form action="image_confirm" method="post" enctype="multipart/form-data" id="form">
  @csrf
  <p>ファイル:</p>
  <input type="file" name="imagefile" value=""/><br /><br />

  <p>商品名:</p><br />
  <input type="text" name="product_name" size="50" value="{{ old('name') }}"/><br /><br />

  <input type="submit" name="confirm" id="button" value="確認" />
</form>
確認画面
<form action="image_complete" method="post">
  @csrf
  <table border="1">
    <tr>
      <td>画像</td>
      <td><img src="{{ $data['read_temp_path'] }}" width="200" height="130"></td>
    </tr>
    <tr>
      <td>商品名</td>
      <td>{{ $data['product_name'] }}</td>
    </tr>
  </table>
  <input type="submit" name="action" value="送信" />
</form>
完了画面
<p>商品のアップロードが完了しました</p>
<img src="{{ $product->path }}" width="200" height="130">
また、DBは次のmigrationファイルを基にして作り、Modelも作成しておきます。
<?php

use Illuminate\Database\Migrations\Migration;
use Illuminate\Database\Schema\Blueprint;
use Illuminate\Support\Facades\Schema;

class CreateProductsTable extends Migration
{
    public function up()
    {
        Schema::create('products', function (Blueprint $table) {
            $table->bigIncrements('id');
            $table->string('path');
            $table->string('product_name');
            $table->timestamps();
        });
    }

    public function down()
    {
        Schema::dropIfExists('products');
    }
}
コントローラー
フォームから画像と名前を受け取って、画像には一意のファイル名としてtempディレクトリに保存します。
また、sessionに保存して、confirm画面から読み込めるようにします。
useの記述漏れに注意。
<?php

namespace App\Http\Controllers;

use Illuminate\Http\Request;
use App\Models\Product;
use Illuminate\Support\Facades\DB;
use Illuminate\Support\Facades\Storage;

class ImageController extends Controller
{
    public function getImageInput(){
        return view('image_input');
    }

    public function postImageConfirm(Request $request){

        $post_data = $request->except('imagefile');
        $imagefile = $request->file('imagefile');

        $temp_path = $imagefile->store('public/temp');
        $read_temp_path = str_replace('public/', 'storage/', $temp_path); //追加

        $product_name = $post_data['product_name'];

        $data = array(
            'temp_path' => $temp_path,
            'read_temp_path' => $read_temp_path, //追加
            'product_name' => $product_name,
        );
        $request->session()->put('data', $data);

        return view('image_confirm', compact('data') );
    }

    public function postImageComplete(Request $request) {//getをpostに変更

        $data = $request->session()->get('data');
        $temp_path = $data['temp_path'];
        $read_temp_path = $data['read_temp_path'];

        $filename = str_replace('public/temp/', '', $temp_path);
        //ファイル名は$temp_pathから"public/temp/"を除いたもの
        $storage_path = 'public/productimage/'.$filename;
        //画像を保存するパスは"public/productimage/xxx.jpeg"

        $request->session()->forget('data');

        Storage::move($temp_path, $storage_path);
        //Storageファサードのmoveメソッドで、第一引数->第二引数へファイルを移動

        $read_path = str_replace('public/', 'storage/', $storage_path);
        //商品一覧画面から画像を読み込むときのパスはstorage/productimage/xxx.jpeg"
        $product_name = $data['product_name'];

        $product = new Product;
        $product->path = $read_path;
        $product->product_name = $product_name;

        $product->save();

        return view('image_complete', compact('product'));
    }
}
シンボリックリンク
Laravel で作ったアプリケーションが公開されるとき、公開されるのは一番上の階層にある public ディレクトリのみです。public ディレクトリにファイルや処理のすべてが集約されています。なので、保存した画像も public ディレクトリ内に存在しないとアクセスすることができません。そこでシンボリックリンクを利用して storage ディレクトリにアクセスできるようにします。
Laravelの場合、画像を読み込むディレクトリはpublic/storageディレクトリです。
なのでpublic/storageから、storage/app/public内を読み込めるよう(シンボリックリンクを張る)にします。
保存:storage/app/public
読込:public/storage
シンボリックリンクは Artisan コマンドで作成できます。
php artisan storage:link
これで、storage/app/public内を覗けるようになりました。