はじめに
ITスクールのハッカソンで作成したチャットアプリを、Terraformを活用してAWSに本番デプロイします。
Terraformのコードを活用することで、GitやDocker、Docker Composeのセットアップを自動化し、手動操作を最小限に抑えた効率的なデプロイを実現します。
この記事は、未来の自分への備忘録としても活用できるようにまとめています。
デプロイするAWSの構成について
この記事では、GitやDocker、Docker Composeのセットアップを自動化する部分に重点を置いて解説します。
そのため、AWSのインフラ構成(シングルAZ)はシンプルかつ必要最低限のものとなっている点をご留意ください。
このセットアップにより、次のようなAWSリソースを自動的に作成できます。
- VPC: カスタムVPC(CIDR範囲: 10.0.0.0/16)
- サブネット: パブリックサブネット
- インターネットゲートウェイ: 外部接続を有効化
- ルートテーブルとサブネットの関連付け
- セキュリティグループ: 特定のポートを許可
- EC2インスタンス: DockerとDocker Composeをインストール済み
ITスクールで作成した成果物について
ITスクールのハッカソンで、FlaskとDockerを活用した都道府県ベースのマッチングチャットアプリを作成しました。
詳しい内容については割愛しますが、興味のある方は以下のパブリックリポジトリでコードを読んでみてください!
今回の記事では、このチャットアプリをTerraformを使ってAWS環境に自動デプロイする手順を解説します。
実際にTerraformのコードをかいてみた
1. Terraformプロバイダ設定
まずは、TerraformでAWSを操作するためのプロバイダ設定を行います。今回は東京リージョン(ap-northeast-1)を使用します。
provider "aws" {
  region = "ap-northeast-1" # Tokyo region
}
2. VPCの作成
次に、VPC(Virtual Private Cloud)を作成します。このVPCはDNSサポートとホスト名の解決を有効化しています。
resource "aws_vpc" "main_vpc" {
  cidr_block           = "10.0.0.0/16"
  enable_dns_support   = true
  enable_dns_hostnames = true

  tags = {
    Name = "terraform-main-vpc"
  }
}
3. サブネットの作成
VPC内にパブリックサブネットを作成します。map_public_ip_on_launchをtrueに設定することで、作成したインスタンスがパブリックIPを取得可能になります。
resource "aws_subnet" "public_subnet" {
  vpc_id                  = aws_vpc.main_vpc.id
  cidr_block              = "10.0.1.0/24"
  map_public_ip_on_launch = true

  tags = {
    Name = "terraform-public-subnet"
  }
}
4. インターネットゲートウェイの作成
外部インターネットへの接続を可能にするため、インターネットゲートウェイを作成します。
resource "aws_internet_gateway" "main_igw" {
  vpc_id = aws_vpc.main_vpc.id

  tags = {
    Name = "terraform-main-igw"
  }
}
5. ルートテーブルの作成と関連付け
ルートテーブルを作成し、サブネットをインターネットゲートウェイに関連付けます。
resource "aws_route_table" "public_route_table" {
  vpc_id = aws_vpc.main_vpc.id

  route {
    cidr_block = "0.0.0.0/0"
    gateway_id = aws_internet_gateway.main_igw.id
  }

  tags = {
    Name = "terraform-public-route-table"
  }
}

resource "aws_route_table_association" "public_association" {
  subnet_id      = aws_subnet.public_subnet.id
  route_table_id = aws_route_table.public_route_table.id
}
6. セキュリティグループの作成
ポート5000(アプリケーション用)とポート22(SSH接続用)を許可するセキュリティグループを作成します。
resource "aws_security_group" "public_sg" {
  vpc_id = aws_vpc.main_vpc.id

  ingress {
    from_port   = 5000
    to_port     = 5000
    protocol    = "tcp"
    cidr_blocks = ["0.0.0.0/0"]
  }

  ingress {
    from_port   = 22
    to_port     = 22
    protocol    = "tcp"
    cidr_blocks = ["0.0.0.0/0"]
  }

  egress {
    from_port   = 0
    to_port     = 0
    protocol    = "-1"
    cidr_blocks = ["0.0.0.0/0"]
  }

  tags = {
    Name = "terraform-public-sg"
  }
}
7. EC2インスタンスの作成
最後に、DockerとDocker ComposeをセットアップしたEC2インスタンスを作成します。
- GitとDockerのインストール
- Docker Composeのセットアップ
- 指定リポジトリのクローンとアプリケーションの起動
user_dataで起動時スクリプトを設定し、インスタンス起動時に以下の処理を自動化します。
resource "aws_instance" "docker_ec2" {
  ami                         = "ami-0b6fe957a0eb4c1b9" # Amazon Linux 2 AMI (Tokyo region)
  instance_type               = "t2.micro"
  subnet_id                   = aws_subnet.public_subnet.id
  security_groups             = [aws_security_group.public_sg.id]
  associate_public_ip_address = true

  user_data = <<-EOF
    #!/bin/bash
    yum update -y
    yum install -y git
    yum install -y docker
    systemctl start docker
    systemctl enable docker
    usermod -a -G docker ec2-user
    curl -SL https://github.com/docker/compose/releases/download/v2.4.1/docker-compose-linux-x86_64 -o /usr/local/lib/docker/cli-plugins/docker-compose
    chmod +x /usr/local/lib/docker/cli-plugins/docker-compose
    git clone https://github.com/RareTECH-Iteam/Iteam_0819.git
    cd Iteam_0819
    docker compose up -d
  EOF

  depends_on = [aws_security_group.public_sg]

  tags = {
    Name = "terraform-docker-ec2"
  }
}
完成したコード
これまでの内容を踏まえて、最終的に完成したコードは以下になります。
provider "aws" {
  region = "ap-northeast-1" # Tokyo region
}

# VPC作成
resource "aws_vpc" "main_vpc" {
  cidr_block           = "10.0.0.0/16"
  enable_dns_support   = true
  enable_dns_hostnames = true

  tags = {
    Name = "terraform-main-vpc"
  }
}

# サブネット作成 (パブリックサブネット)
resource "aws_subnet" "public_subnet" {
  vpc_id                  = aws_vpc.main_vpc.id
  cidr_block              = "10.0.1.0/24"
  map_public_ip_on_launch = true

  tags = {
    Name = "terraform-public-subnet"
  }
}

# インターネットゲートウェイ作成
resource "aws_internet_gateway" "main_igw" {
  vpc_id = aws_vpc.main_vpc.id

  tags = {
    Name = "terraform-main-igw"
  }
}

# ルートテーブル作成
resource "aws_route_table" "public_route_table" {
  vpc_id = aws_vpc.main_vpc.id

  route {
    cidr_block = "0.0.0.0/0"
    gateway_id = aws_internet_gateway.main_igw.id
  }

  tags = {
    Name = "terraform-public-route-table"
  }
}

# サブネットとルートテーブルの関連付け
resource "aws_route_table_association" "public_association" {
  subnet_id      = aws_subnet.public_subnet.id
  route_table_id = aws_route_table.public_route_table.id
}

# セキュリティグループ作成
resource "aws_security_group" "public_sg" {
  vpc_id = aws_vpc.main_vpc.id

  ingress {
    from_port   = 5000
    to_port     = 5000
    protocol    = "tcp"
    cidr_blocks = ["0.0.0.0/0"] # ポート5000のアクセスを許可
  }

  ingress {
    from_port   = 22
    to_port     = 22
    protocol    = "tcp"
    cidr_blocks = ["0.0.0.0/0"] # SSHアクセスを許可
  }

  egress {
    from_port   = 0
    to_port     = 0
    protocol    = "-1"
    cidr_blocks = ["0.0.0.0/0"] # すべてのアウトバウンドを許可
  }

  tags = {
    Name = "terraform-public-sg"
  }
}

# EC2インスタンス作成
resource "aws_instance" "docker_ec2" {
  ami                         = "ami-0b6fe957a0eb4c1b9" # Amazon Linux 2 AMI (Tokyo region)
  instance_type               = "t2.micro"
  subnet_id                   = aws_subnet.public_subnet.id
  security_groups             = [aws_security_group.public_sg.id]
  associate_public_ip_address = true # パブリックIPv4アドレスを有効化

  user_data = <<-EOF
    #!/bin/bash
    # システム更新
    yum update -y

    # Gitのインストール
    yum install -y git
    git --version

    # Dockerのインストール
    yum install -y docker
    systemctl start docker
    systemctl enable docker
    usermod -a -G docker ec2-user
    newgrp docker
    docker info

    # Docker Composeのインストール
    mkdir -p /usr/local/lib/docker/cli-plugins
    curl -SL https://github.com/docker/compose/releases/download/v2.4.1/docker-compose-linux-x86_64 -o /usr/local/lib/docker/cli-plugins/docker-compose
    chmod +x /usr/local/lib/docker/cli-plugins/docker-compose
    docker compose version

    # GitHubリポジトリのクローンとアプリケーション起動
    git clone https://github.com/RareTECH-Iteam/Iteam_0819.git
    cd Iteam_0819
    docker compose up -d # アプリケーションの起動
  EOF

  depends_on = [aws_security_group.public_sg]

  tags = {
    Name = "terraform-docker-ec2"
  }
}
実際にやってみた
ここでは、CloudShellでの Terraform のセットアップが完了していることを前提に進めます。
まだセットアップが完了していない方は、過去の記事を参考にしてセットアップを実施してください。
まず、以下のコマンドを入力して、main.tfというファイルを作成します。
vi main.tf
viでは、ファイル編集後にESCキーを押し、:wqで保存して終了します。
# 上記の完成した全体のコードをコピーして貼り付けてください。
次に、以下のコマンドで Terraform を初期化します。
terraform init
実際に、以下のように「Terraform has been successfully initialized!」と表示され、成功が確認できました。
Partner and community providers are signed by their developers.
If you'd like to know more about provider signing, you can read about it here:
https://www.terraform.io/docs/plugins/signing.html

Terraform has created a lock file .terraform.lock.hcl to record the provider
selections it made above. Include this file in your version control repository
so that Terraform can guarantee to make the same selections by default when
you run "terraform init" in the future.

Terraform has been successfully initialized!

You may now begin working with Terraform. Try running "terraform plan" to see
any changes that are required for your infrastructure. All Terraform commands
should now work.

If you ever set or change modules or backend configuration for Terraform,
rerun this command to reinitialize your working directory. If you forget, other
commands will detect it and remind you to do so if necessary.
次に、以下のコマンドを入力して、確認メッセージが表示されたら「yes」と入力します。
terraform apply
その後、以下のように「Apply complete! Resources: xxx added, 0 changed, 0 destroyed.」と表示され、作成が成功したことが確認できました。
ブラウザからアクセスしてみた
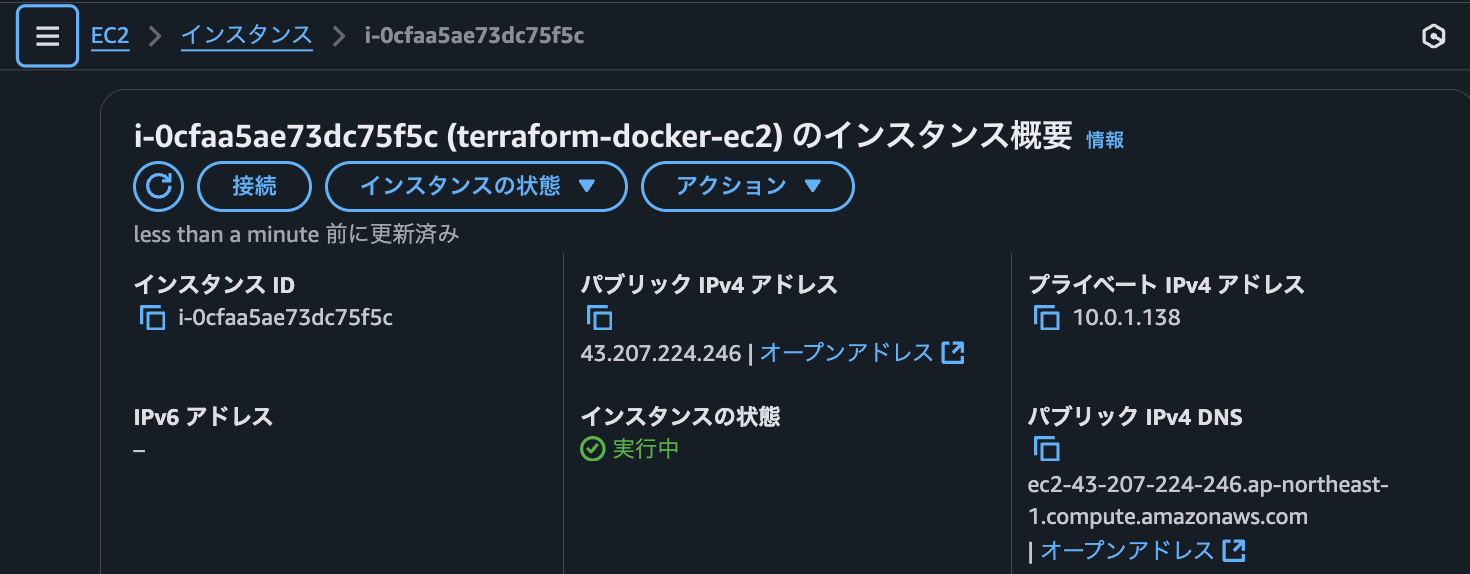
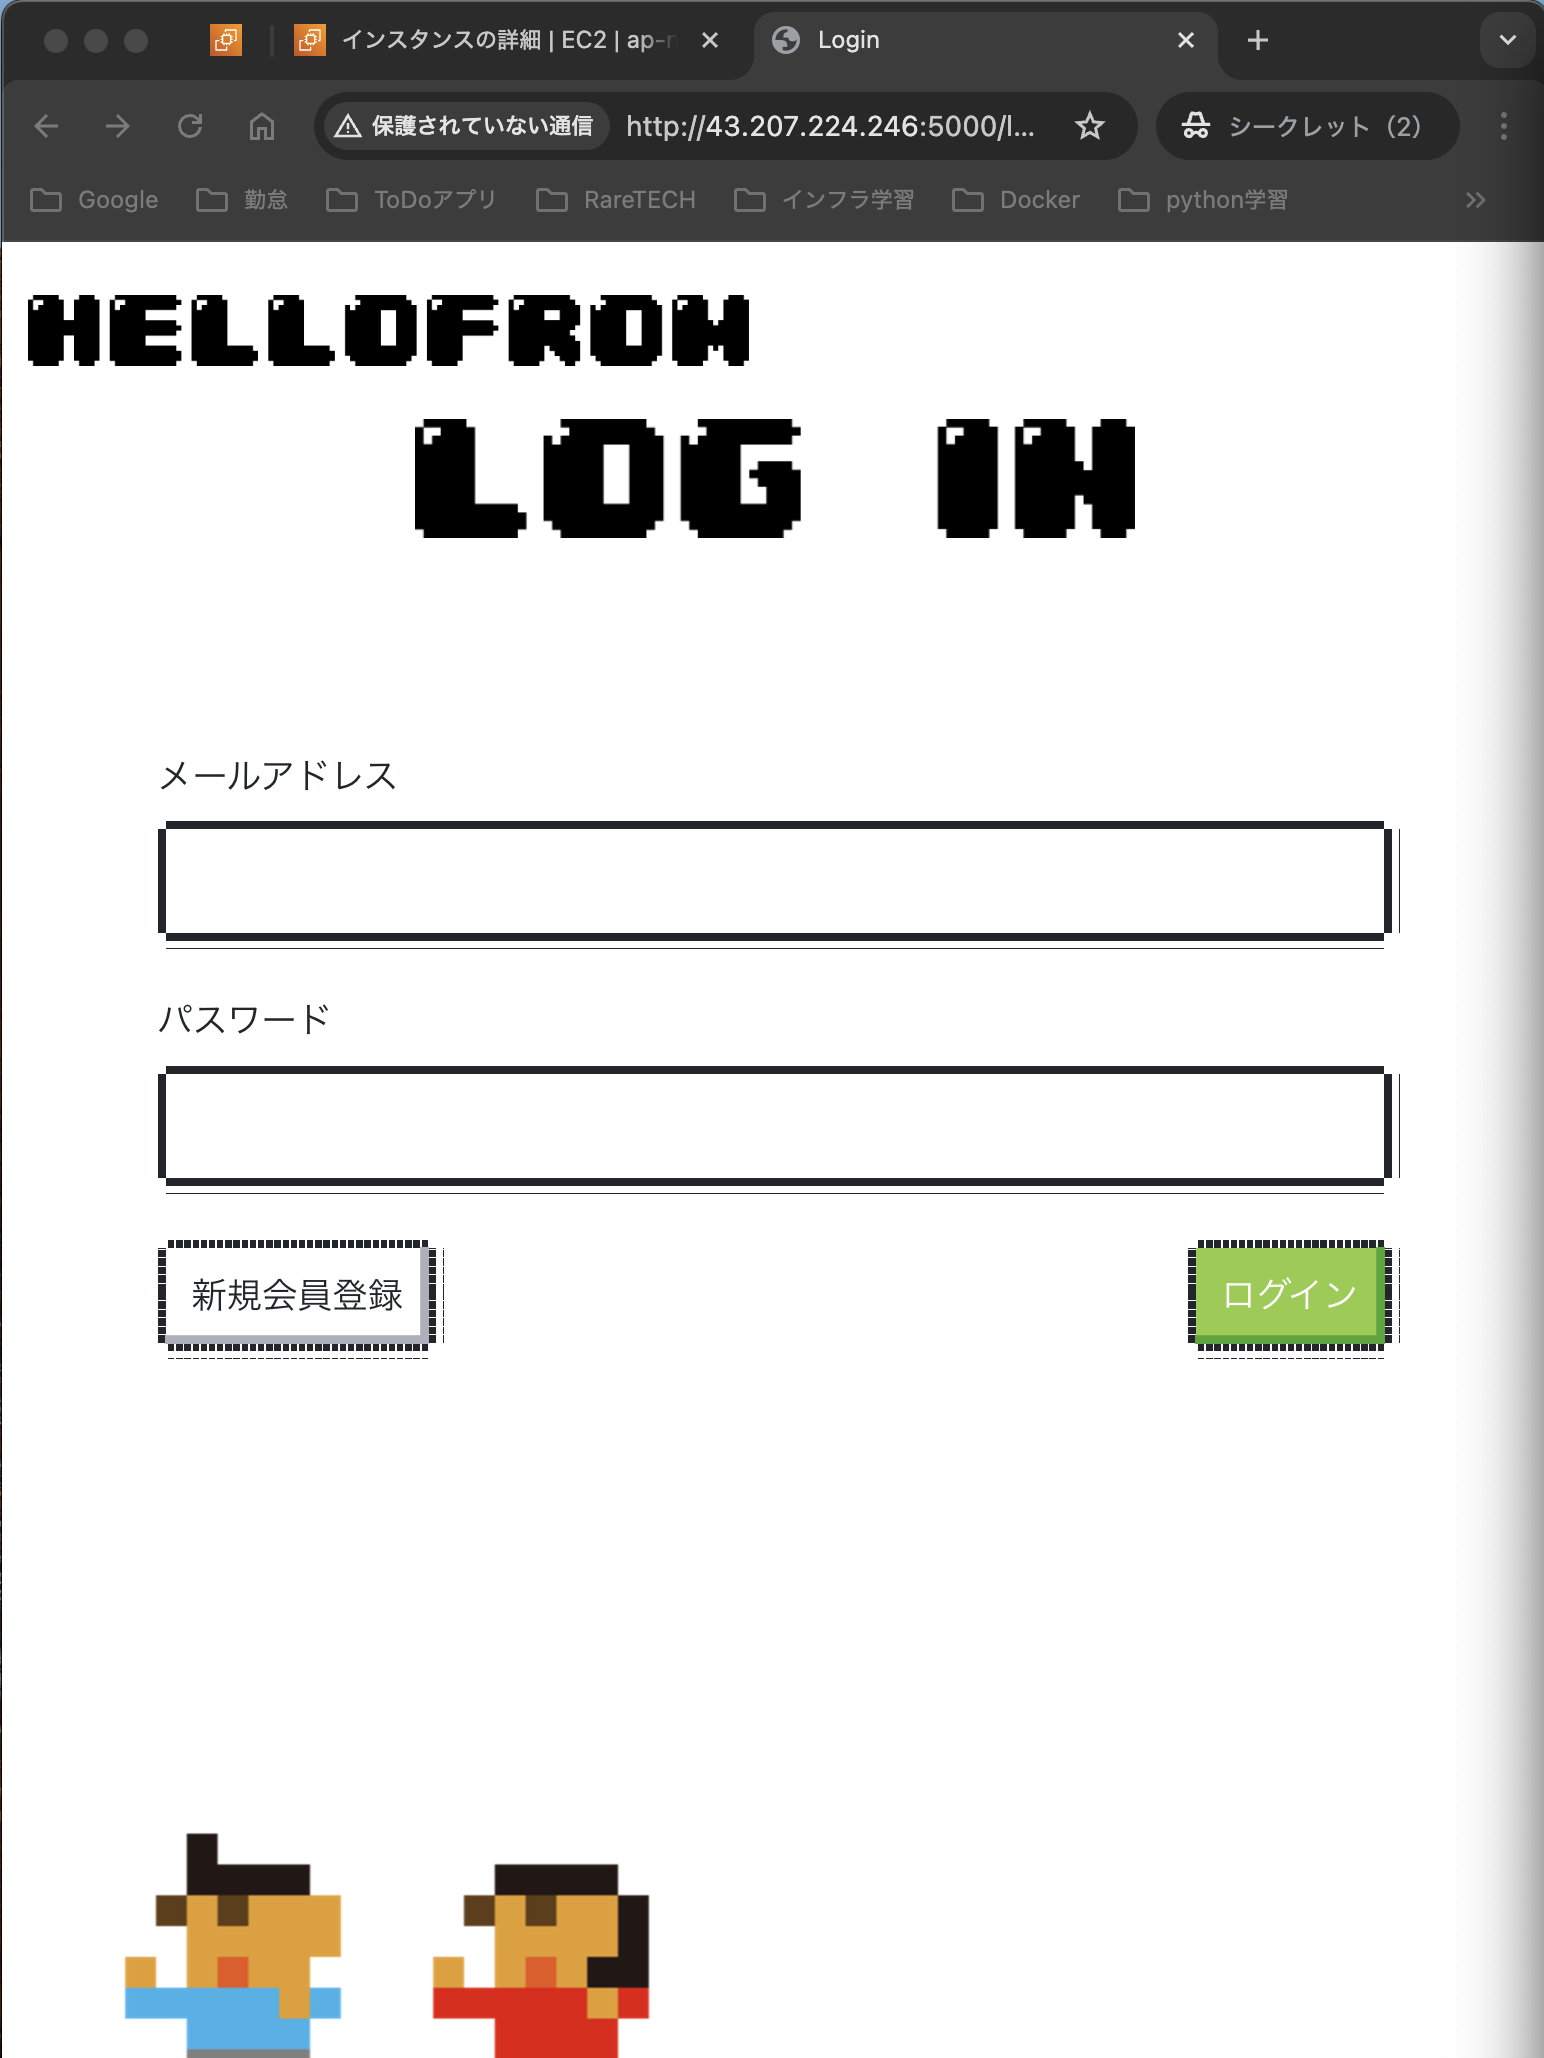
次に、Flaskのアプリケーションがデフォルトで5000番ポートで動作するので、ブラウザでアクセスして確認してみます。
EC2インスタンスのパブリックIPアドレスを確認し、末尾に :5000 を追加してアクセスしてください。
http://43.207.224.246:5000/
無事に、ITスクールで時間をかけて作成したFlaskアプリがブラウザに表示されることを確認できました。これで、検証は大成功です!
さらに時間があれば、どのような技術スタックを使ってアプリを作成したのかについて、別の記事で紹介できればと思っています。
まとめ
Terraformを使ってAWS上にDocker対応のEC2インスタンスをセットアップする方法を解説しました。ネットワークやセキュリティ設定もコードで管理することで、再利用性や保守性が向上します。
インフラ構築から、git clone/docker compose up までを自動化し、Terraformを実行するだけでブラウザにアプリが表示されるのは感動的ですね!
この技術検証が、誰かの助けになれば嬉しいです!
参考記事


