はじめに
この記事では、AWSのCloudFormationテンプレートを用いて、SSMセッションマネージャーのセットアップコードを追加する方法について説明します。
セッションマネージャーについての詳しい情報は、過去の記事で解説しているため、より深く知りたい方はぜひご参照ください。
コードはインフラをコード化する観点から可読性を重視しているため、内容が少し長くなっていますがご了承ください。🙇
前回の記事の続きになります。
この記事は過去の記事の続きです。詳しく知りたい方は以下の記事も参考にしてください。
今回は、CloudFormationを用いてSSMセッションマネージャーの追加設定を行うコードを記述します。
具体的には、以下のリソースを定義し、各構成要素について詳しく解説します。
- SSM用IAMロールの作成とアタッチ
- SSM用VPCエンドポイントのセキュリティグループ
- SSM関連のVPCエンドポイント
SSMセッションマネージャーをセットアップ
ここでは、AWSのCloudFormationテンプレートを用いて、SSMセッションマネージャーをセットアップするコードを追加していきます。
  # SSM用のIAMロール
  SSMRole:
    Type: AWS::IAM::Role
    Properties:
      AssumeRolePolicyDocument:
        Version: "2012-10-17"
        Statement:
          - Effect: Allow
            Principal:
              Service: ec2.amazonaws.com
            Action: sts:AssumeRole
      ManagedPolicyArns:
        - arn:aws:iam::aws:policy/AmazonSSMManagedInstanceCore
      Tags:
        - Key: Name
          Value: ホンダ-ssm-role

  # SSMインスタンスプロファイルの作成
  SSMInstanceProfile:
    Type: AWS::IAM::InstanceProfile
    Properties:
      Roles:
        - !Ref SSMRole

  # 本番サーバー用のEC2インスタンスにIAMロールをアタッチ
  ProductionInstance:
    Type: AWS::EC2::Instance
    Properties:
      InstanceType: t2.micro
      SubnetId: !Ref PrivateSubnet1
      ImageId: ami-0b6fe957a0eb4c1b9
      KeyName: "honda"
      SecurityGroupIds:
        - !Ref ProductionSecurityGroup
      IamInstanceProfile: !Ref SSMInstanceProfile  # インスタンスプロファイルをアタッチ
      Tags:
        - Key: Name
          Value: "本番サーバー"
      UserData:
        Fn::Base64: !Sub |
          #!/bin/bash
          sudo yum install -y httpd
          sudo systemctl start httpd
          sudo systemctl enable httpd

  # SSM 用 VPC エンドポイントセキュリティグループ
  SSMVpcEndpointSecurityGroup:
    Type: AWS::EC2::SecurityGroup
    Properties:
      GroupDescription: SSM VPC Endpoint Security Group
      VpcId: !Ref HondaVpc
      SecurityGroupIngress:
        - IpProtocol: tcp
          FromPort: 443
          ToPort: 443
          CidrIp: 0.0.0.0/0  # 必要に応じてIPレンジを制限
      Tags:
        - Key: Name
          Value: SSM-VPCEndpoint-SG

  # SSM VPC エンドポイント
  SSMVpcEndpoint:
    Type: AWS::EC2::VPCEndpoint
    Properties:
      VpcId: !Ref HondaVpc
      ServiceName: com.amazonaws.ap-northeast-1.ssm
      VpcEndpointType: Interface
      SubnetIds:
        - !Ref PrivateSubnet1
      SecurityGroupIds:
        - !Ref SSMVpcEndpointSecurityGroup

  # EC2 メッセージ VPC エンドポイント
  EC2MessagesVpcEndpoint:
    Type: AWS::EC2::VPCEndpoint
    Properties:
      VpcId: !Ref HondaVpc
      ServiceName: com.amazonaws.ap-northeast-1.ec2messages
      VpcEndpointType: Interface
      SubnetIds:
        - !Ref PrivateSubnet1
      SecurityGroupIds:
        - !Ref SSMVpcEndpointSecurityGroup

  # SSM メッセージ VPC エンドポイント
  SSMMessagesVpcEndpoint:
    Type: AWS::EC2::VPCEndpoint
    Properties:
      VpcId: !Ref HondaVpc
      ServiceName: com.amazonaws.ap-northeast-1.ssmmessages
      VpcEndpointType: Interface
      SubnetIds:
        - !Ref PrivateSubnet1
      SecurityGroupIds:
        - !Ref SSMVpcEndpointSecurityGroup
ここでは、SSMセッションマネージャーを使用するために、必要なVPC設定を行っています。
完成したコード
前回のコードと新たに追加した部分を組み合わせた最終的なコードは、以下の通りです。
複雑なアーキテクチャとなっているため、コードが長くなっていますが、流れをつかむ感じで見ていただければと思います(笑)。
Resources:
  # VPCの作成
  HondaVpc:
    Type: AWS::EC2::VPC
    Properties:
      CidrBlock: 10.0.0.0/16
      EnableDnsSupport: true
      EnableDnsHostnames: true
      InstanceTenancy: default
      Tags:
        - Key: Name
          Value: ホンダ-vpc

  # パブリックサブネットの作成
  PublicSubnet1:
    Type: AWS::EC2::Subnet
    Properties:
      VpcId: !Ref HondaVpc
      CidrBlock: 10.0.0.0/20
      AvailabilityZone: ap-northeast-1a
      Tags:
        - Key: Name
          Value: ホンダ-subnet-public1-ap-northeast-1a

  PublicSubnet2:
    Type: AWS::EC2::Subnet
    Properties:
      VpcId: !Ref HondaVpc
      CidrBlock: 10.0.16.0/20
      AvailabilityZone: ap-northeast-1c
      Tags:
        - Key: Name
          Value: ホンダ-subnet-public2-ap-northeast-1c

  # プライベートサブネットの作成
  PrivateSubnet1:
    Type: AWS::EC2::Subnet
    Properties:
      VpcId: !Ref HondaVpc
      CidrBlock: 10.0.128.0/20
      AvailabilityZone: ap-northeast-1a
      Tags:
        - Key: Name
          Value: ホンダ-subnet-private1-ap-northeast-1a

  PrivateSubnet2:
    Type: AWS::EC2::Subnet
    Properties:
      VpcId: !Ref HondaVpc
      CidrBlock: 10.0.144.0/20
      AvailabilityZone: ap-northeast-1c
      Tags:
        - Key: Name
          Value: ホンダ-subnet-private2-ap-northeast-1c

  PrivateSubnet3:
    Type: AWS::EC2::Subnet
    Properties:
      VpcId: !Ref HondaVpc
      CidrBlock: 10.0.160.0/20
      AvailabilityZone: ap-northeast-1a
      Tags:
        - Key: Name
          Value: ホンダ-subnet-private3-ap-northeast-1a

  PrivateSubnet4:
    Type: AWS::EC2::Subnet
    Properties:
      VpcId: !Ref HondaVpc
      CidrBlock: 10.0.176.0/20
      AvailabilityZone: ap-northeast-1c
      Tags:
        - Key: Name
          Value: ホンダ-subnet-private4-ap-northeast-1c

  # インターネットゲートウェイの作成
  InternetGateway:
    Type: AWS::EC2::InternetGateway
    Properties:
      Tags:
        - Key: Name
          Value: ホンダ-igw

  # インターネットゲートウェイをVPCにアタッチ
  AttachGateway:
    Type: AWS::EC2::VPCGatewayAttachment
    Properties:
      VpcId: !Ref HondaVpc
      InternetGatewayId: !Ref InternetGateway

  # パブリックルートテーブルの作成とパブリックサブネットとの関連付け
  PublicRouteTable:
    Type: AWS::EC2::RouteTable
    Properties:
      VpcId: !Ref HondaVpc
      Tags:
        - Key: Name
          Value: ホンダ-rtb-public

  PublicRoute:
    Type: AWS::EC2::Route
    Properties:
      RouteTableId: !Ref PublicRouteTable
      DestinationCidrBlock: 0.0.0.0/0
      GatewayId: !Ref InternetGateway

  PublicSubnet1RouteTableAssociation:
    Type: AWS::EC2::SubnetRouteTableAssociation
    Properties:
      SubnetId: !Ref PublicSubnet1
      RouteTableId: !Ref PublicRouteTable

  PublicSubnet2RouteTableAssociation:
    Type: AWS::EC2::SubnetRouteTableAssociation
    Properties:
      SubnetId: !Ref PublicSubnet2
      RouteTableId: !Ref PublicRouteTable

  # Elastic IP の作成
  ElasticIP1:
    Type: AWS::EC2::EIP
    Properties:
      Domain: vpc
      Tags:
        - Key: Name
          Value: ホンダ-eip-ap-northeast-1a

  # NATゲートウェイの作成
  NatGateway:
    Type: AWS::EC2::NatGateway
    Properties:
      SubnetId: !Ref PublicSubnet1
      AllocationId: !GetAtt ElasticIP1.AllocationId
      Tags:
        - Key: Name
          Value: ホンダ-nat-public1-ap-northeast-1a

  # プライベートルートテーブルの作成と各サブネットとの関連付け
  PrivateRouteTable1:
    Type: AWS::EC2::RouteTable
    Properties:
      VpcId: !Ref HondaVpc
      Tags:
        - Key: Name
          Value: ホンダ-rtb-private1-ap-northeast-1a

  PrivateRoute1:
    Type: AWS::EC2::Route
    Properties:
      RouteTableId: !Ref PrivateRouteTable1
      DestinationCidrBlock: 0.0.0.0/0
      NatGatewayId: !Ref NatGateway

  PrivateSubnet1RouteTableAssociation:
    Type: AWS::EC2::SubnetRouteTableAssociation
    Properties:
      SubnetId: !Ref PrivateSubnet1
      RouteTableId: !Ref PrivateRouteTable1

  # 踏み台サーバー(Bastion)用のセキュリティグループの作成
  BastionSecurityGroup:
    Type: AWS::EC2::SecurityGroup
    Properties:
      GroupDescription: "Allow SSH access"
      VpcId: !Ref HondaVpc
      SecurityGroupIngress:
        - IpProtocol: tcp
          FromPort: 22
          ToPort: 22
          CidrIp: 0.0.0.0/0
      Tags:
        - Key: Name
          Value: ホンダ-sg-bastion

  # Elastic IP の作成(別のElastic IP)
  ElasticIP2:
    Type: AWS::EC2::EIP
    Properties:
      Domain: vpc
      Tags:
        - Key: Name
          Value: ホンダ-eip-ap-northeast-1c

  # 踏み台サーバーのEC2インスタンスの作成
  BastionInstance:
    Type: AWS::EC2::Instance
    Properties:
      InstanceType: t2.micro
      SubnetId: !Ref PublicSubnet1
      ImageId: ami-0b6fe957a0eb4c1b9
      KeyName: "honda"
      SecurityGroupIds:
        - !Ref BastionSecurityGroup
      Tags:
        - Key: Name
          Value: "踏み台サーバー"

  # ALBのセキュリティグループの作成
  ALBSecurityGroup:
    Type: AWS::EC2::SecurityGroup
    Properties:
      GroupDescription: "Allow HTTP access to ALB"
      VpcId: !Ref HondaVpc
      SecurityGroupIngress:
        - IpProtocol: tcp
          FromPort: 80
          ToPort: 80
          CidrIp: 0.0.0.0/0
      Tags:
        - Key: Name
          Value: ホンダ-sg-alb

  # 本番サーバー用セキュリティグループの作成
  ProductionSecurityGroup:
    Type: AWS::EC2::SecurityGroup
    Properties:
      GroupDescription: "Allow HTTP access from ALB and SSH access from anywhere"
      VpcId: !Ref HondaVpc
      SecurityGroupIngress:
        # ALBからのHTTPアクセスを許可
        - IpProtocol: tcp
          FromPort: 80
          ToPort: 80
          SourceSecurityGroupId: !Ref ALBSecurityGroup
        # SSHアクセスを任意の場所から許可
        - IpProtocol: tcp
          FromPort: 22
          ToPort: 22
          CidrIp: 0.0.0.0/0
      Tags:
        - Key: Name
          Value: ホンダ-sg-production

  # SSM用のIAMロール
  SSMRole:
    Type: AWS::IAM::Role
    Properties:
      AssumeRolePolicyDocument:
        Version: "2012-10-17"
        Statement:
          - Effect: Allow
            Principal:
              Service: ec2.amazonaws.com
            Action: sts:AssumeRole
      ManagedPolicyArns:
        - arn:aws:iam::aws:policy/AmazonSSMManagedInstanceCore
      Tags:
        - Key: Name
          Value: ホンダ-ssm-role

  # SSMインスタンスプロファイルの作成
  SSMInstanceProfile:
    Type: AWS::IAM::InstanceProfile
    Properties:
      Roles:
        - !Ref SSMRole

  # 本番サーバー用のEC2インスタンスにIAMロールをアタッチ
  ProductionInstance:
    Type: AWS::EC2::Instance
    Properties:
      InstanceType: t2.micro
      SubnetId: !Ref PrivateSubnet1
      ImageId: ami-0b6fe957a0eb4c1b9
      KeyName: "honda"
      SecurityGroupIds:
        - !Ref ProductionSecurityGroup
      IamInstanceProfile: !Ref SSMInstanceProfile  # インスタンスプロファイルをアタッチ
      Tags:
        - Key: Name
          Value: "本番サーバー"
      UserData:
        Fn::Base64: !Sub |
          #!/bin/bash
          sudo yum install -y httpd
          sudo systemctl start httpd
          sudo systemctl enable httpd

  # ALBの作成
  ApplicationLoadBalancer:
    Type: AWS::ElasticLoadBalancingV2::LoadBalancer
    Properties:
      Name: Honda-ALB
      Scheme: internet-facing
      Subnets:
        - !Ref PublicSubnet1
        - !Ref PublicSubnet2
      SecurityGroups:
        - !Ref ALBSecurityGroup
      Type: application
      Tags:
        - Key: Name
          Value: ホンダ-alb

  # ALBのリスナーの作成
  ALBListener:
    Type: AWS::ElasticLoadBalancingV2::Listener
    Properties:
      DefaultActions:
        - Type: forward
          TargetGroupArn: !Ref ALBTargetGroup
      LoadBalancerArn: !Ref ApplicationLoadBalancer
      Port: 80
      Protocol: HTTP

  # ターゲットグループの作成(80番ポート用)
  ALBTargetGroup:
    Type: AWS::ElasticLoadBalancingV2::TargetGroup
    Properties:
      Name: Honda-TargetGroup
      Port: 80
      Protocol: HTTP
      VpcId: !Ref HondaVpc
      TargetType: instance
      HealthCheckProtocol: HTTP
      HealthCheckPort: "80"
      HealthCheckPath: /
      HealthCheckIntervalSeconds: 30
      HealthCheckTimeoutSeconds: 5
      HealthyThresholdCount: 5
      UnhealthyThresholdCount: 2
      Tags:
        - Key: Name
          Value: ホンダ-target-group
      Targets:
        - Id: !Ref ProductionInstance

  # SSM 用 VPC エンドポイントセキュリティグループ
  SSMVpcEndpointSecurityGroup:
    Type: AWS::EC2::SecurityGroup
    Properties:
      GroupDescription: SSM VPC Endpoint Security Group
      VpcId: !Ref HondaVpc
      SecurityGroupIngress:
        - IpProtocol: tcp
          FromPort: 443
          ToPort: 443
          CidrIp: 0.0.0.0/0  # 必要に応じてIPレンジを制限
      Tags:
        - Key: Name
          Value: SSM-VPCEndpoint-SG

  # SSM VPC エンドポイント
  SSMVpcEndpoint:
    Type: AWS::EC2::VPCEndpoint
    Properties:
      VpcId: !Ref HondaVpc
      ServiceName: com.amazonaws.ap-northeast-1.ssm
      VpcEndpointType: Interface
      SubnetIds:
        - !Ref PrivateSubnet1
      SecurityGroupIds:
        - !Ref SSMVpcEndpointSecurityGroup

  # EC2 メッセージ VPC エンドポイント
  EC2MessagesVpcEndpoint:
    Type: AWS::EC2::VPCEndpoint
    Properties:
      VpcId: !Ref HondaVpc
      ServiceName: com.amazonaws.ap-northeast-1.ec2messages
      VpcEndpointType: Interface
      SubnetIds:
        - !Ref PrivateSubnet1
      SecurityGroupIds:
        - !Ref SSMVpcEndpointSecurityGroup

  # SSM メッセージ VPC エンドポイント
  SSMMessagesVpcEndpoint:
    Type: AWS::EC2::VPCEndpoint
    Properties:
      VpcId: !Ref HondaVpc
      ServiceName: com.amazonaws.ap-northeast-1.ssmmessages
      VpcEndpointType: Interface
      SubnetIds:
        - !Ref PrivateSubnet1
      SecurityGroupIds:
        - !Ref SSMVpcEndpointSecurityGroup
コードが非常に長くなっていますが、基本的にはシンプルで簡単な内容で構成しており、それほど難しくはありません!
今さらですが、こうしたコードは自分のGitHubにアップロードしたほうが良かったかなと、少し後悔しています(笑)。
実際にスタックを実行してみた
CloudFormationのサービス画面からスタックの作成に進み、作成したyamlファイルをアップロードします。

スタック名は任意で設定できます。ここでは私の名前「honda」としています。

画面遷移後のスタックオプション設定については、個々の設定に依存するため、私は設定せずに進めていきます。
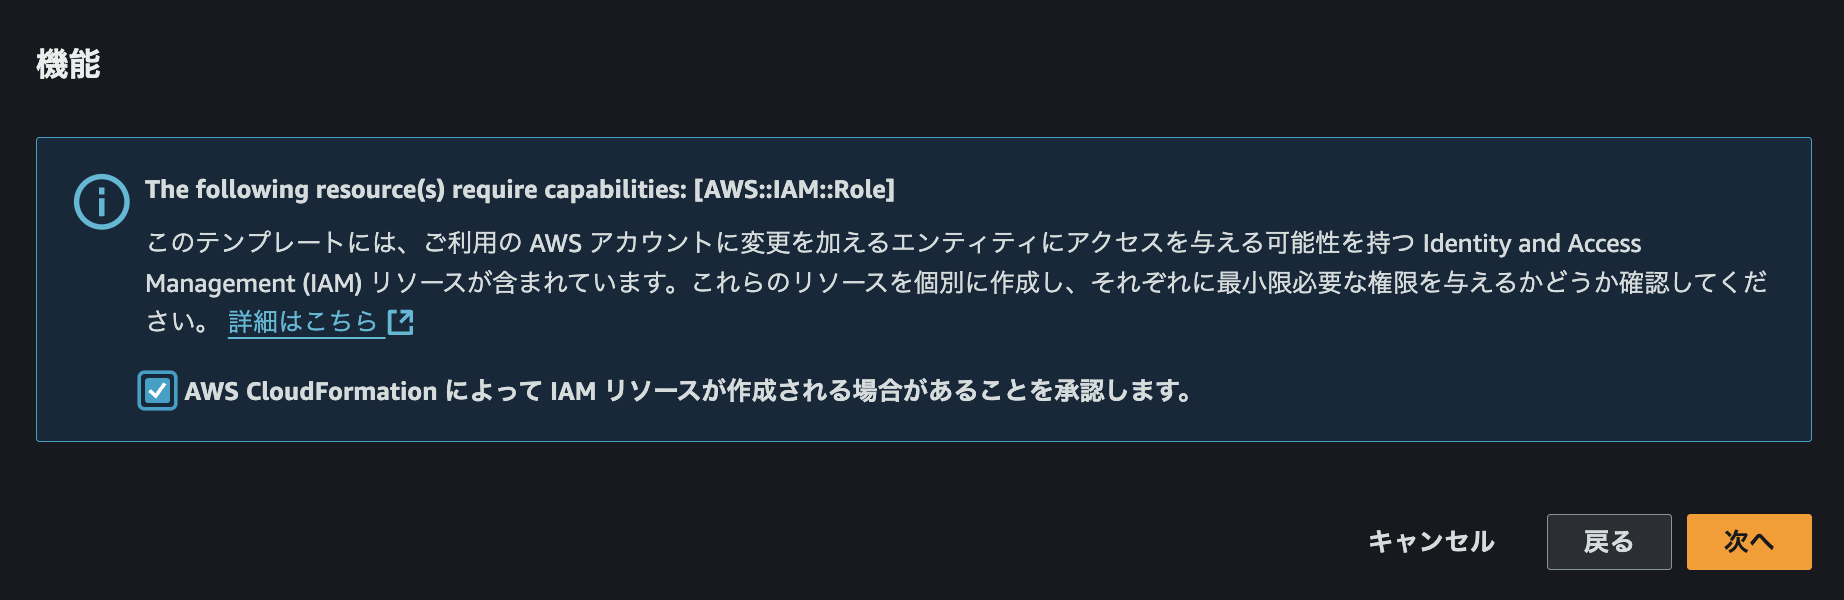
ただ、スタックの中でIAMを使う場合は、以下のように確認が求められますでの、✅を入れて進んでください。
最後に確認を行い、問題がなければ最下部までスクロールし、「送信」をクリックして完了です。

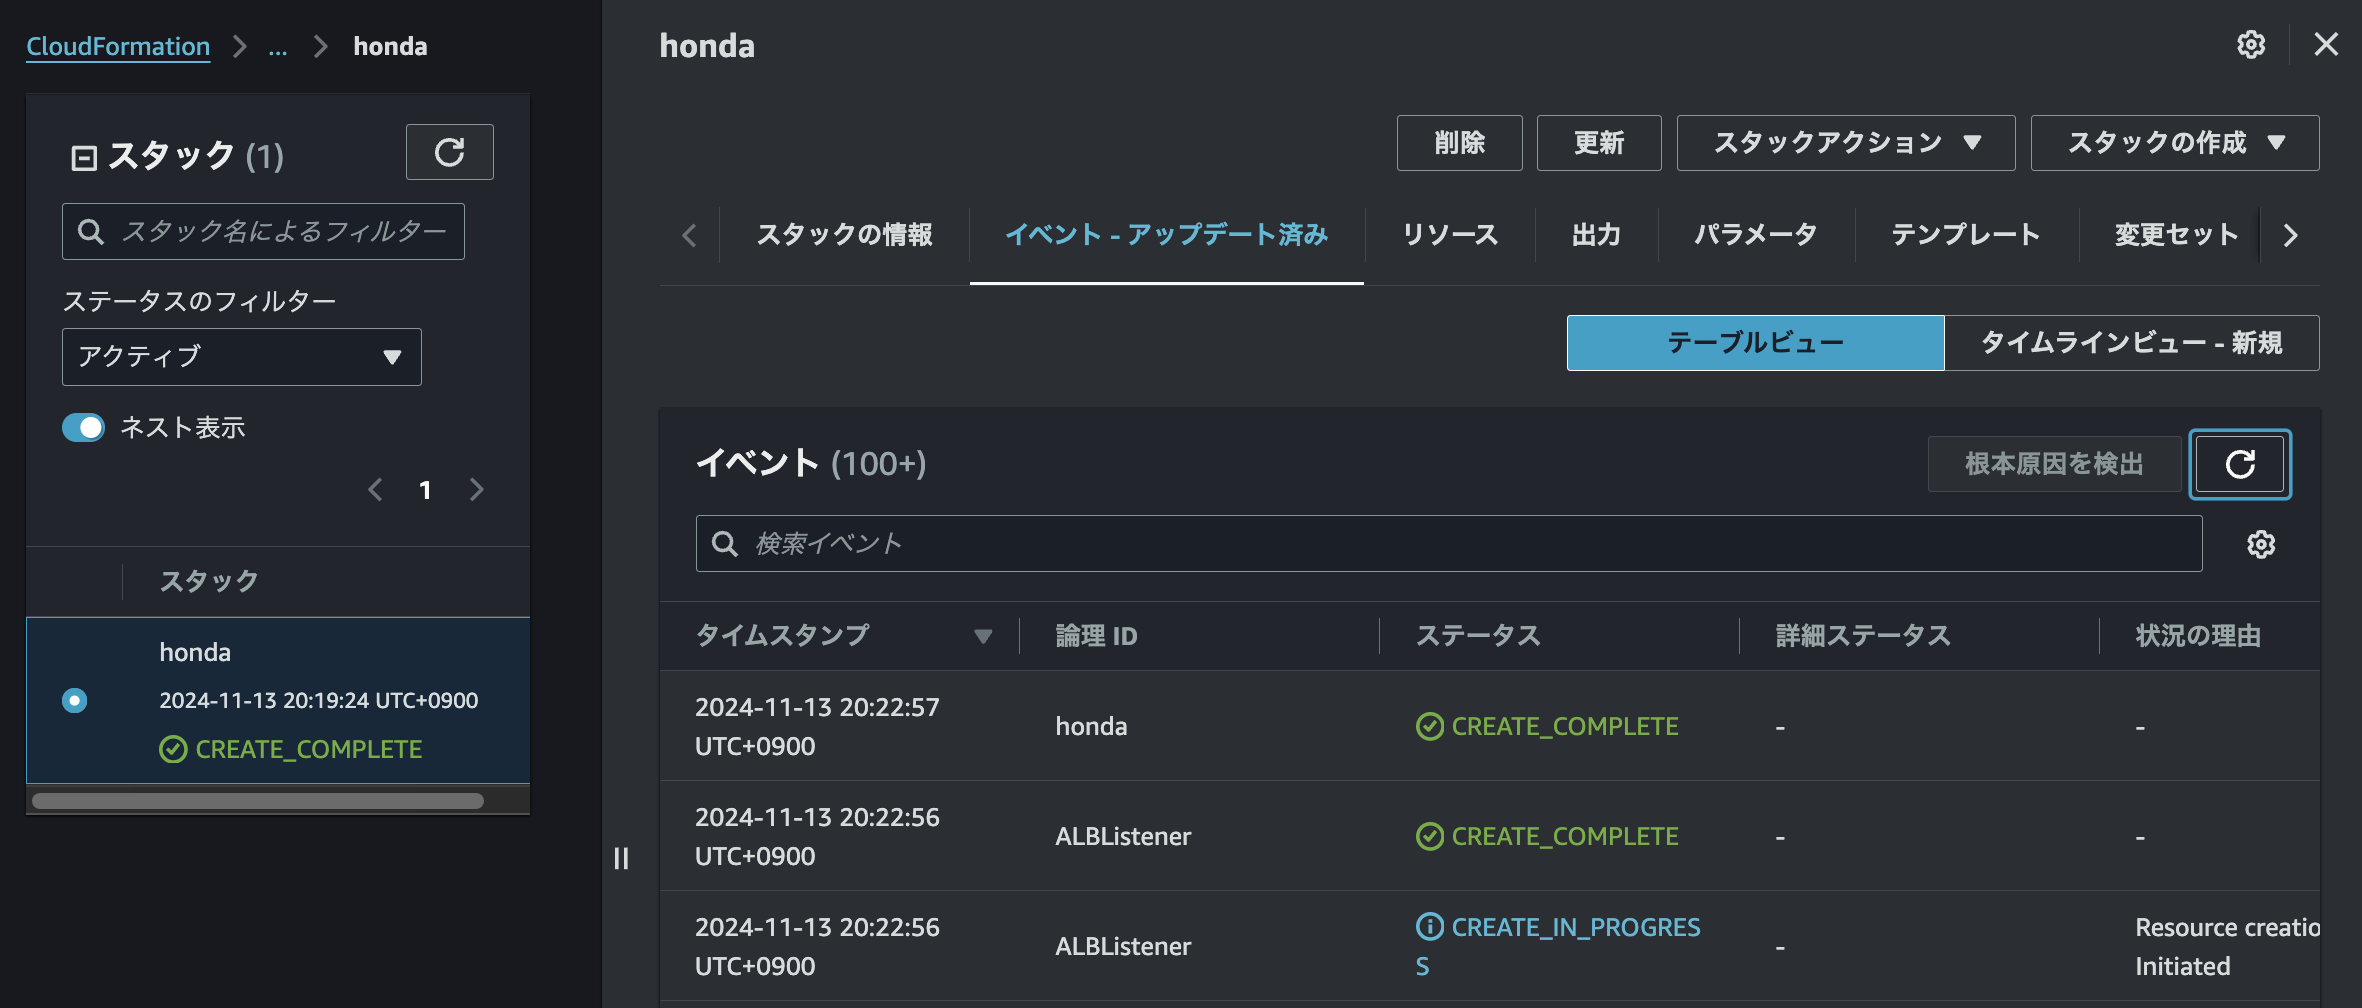
スタックを実行後、イベントタブで成功したことが確認できました(しばらく時間がかかります)。
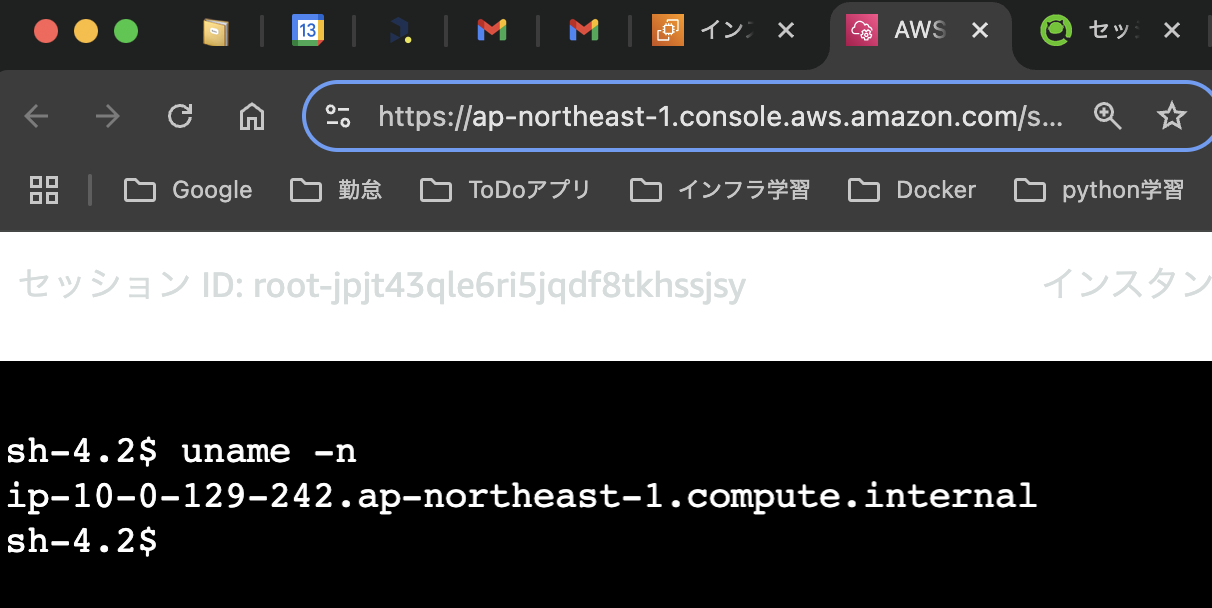
プライベートサブネットの本番サーバーにSSMで接続してみた
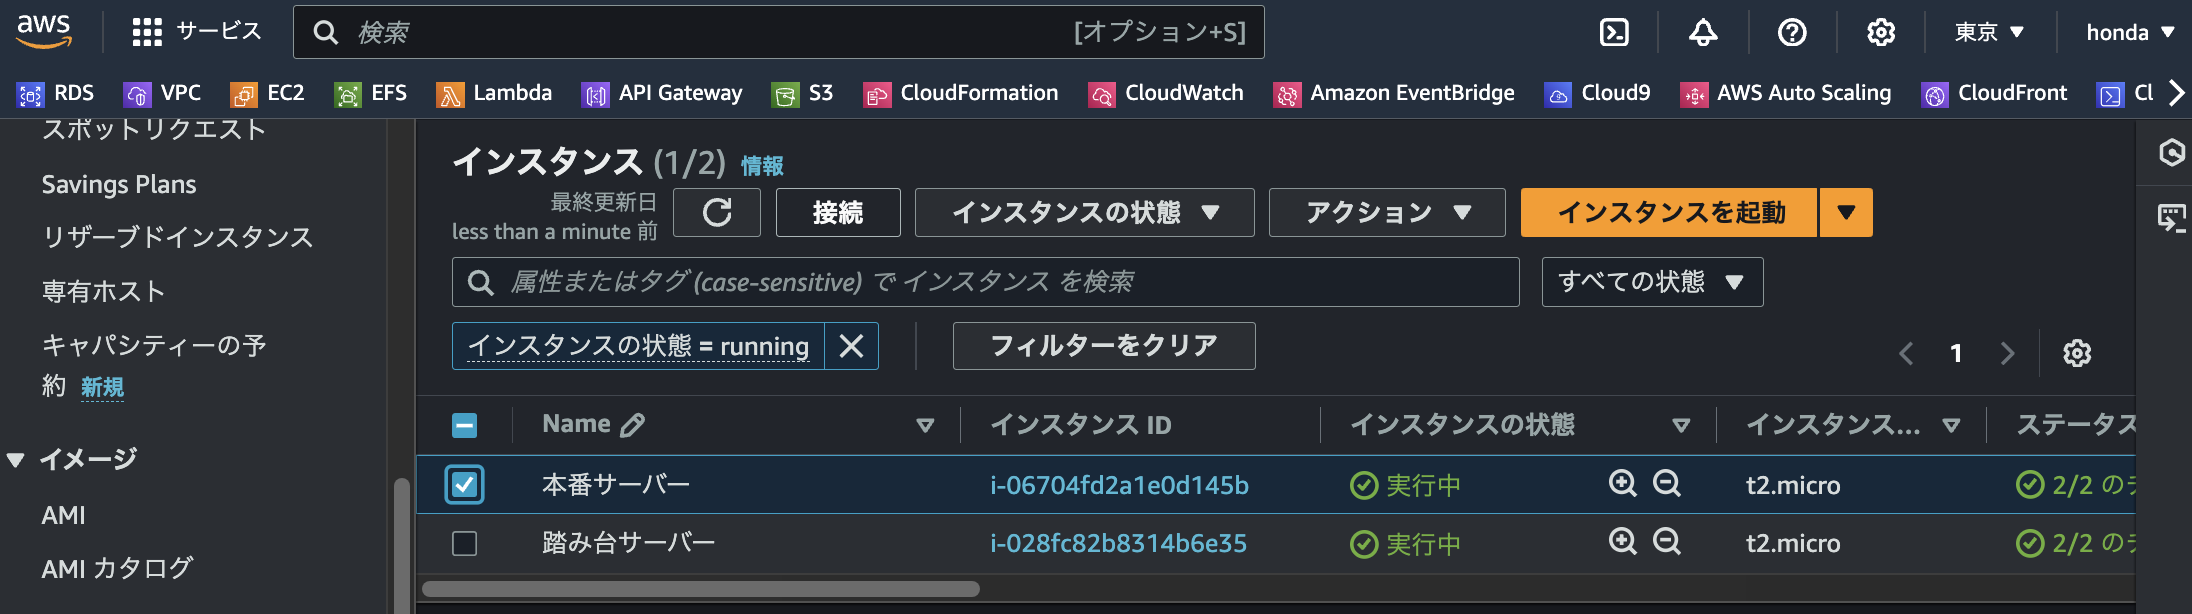
EC2のサービス画面から本番サーバーを選択し、SSMセッションマネージャーで実際に接続を試みました。
画面が遷移し、「インスタンスに接続」画面に切り替わったことを確認して、接続ボタンをクリックします。
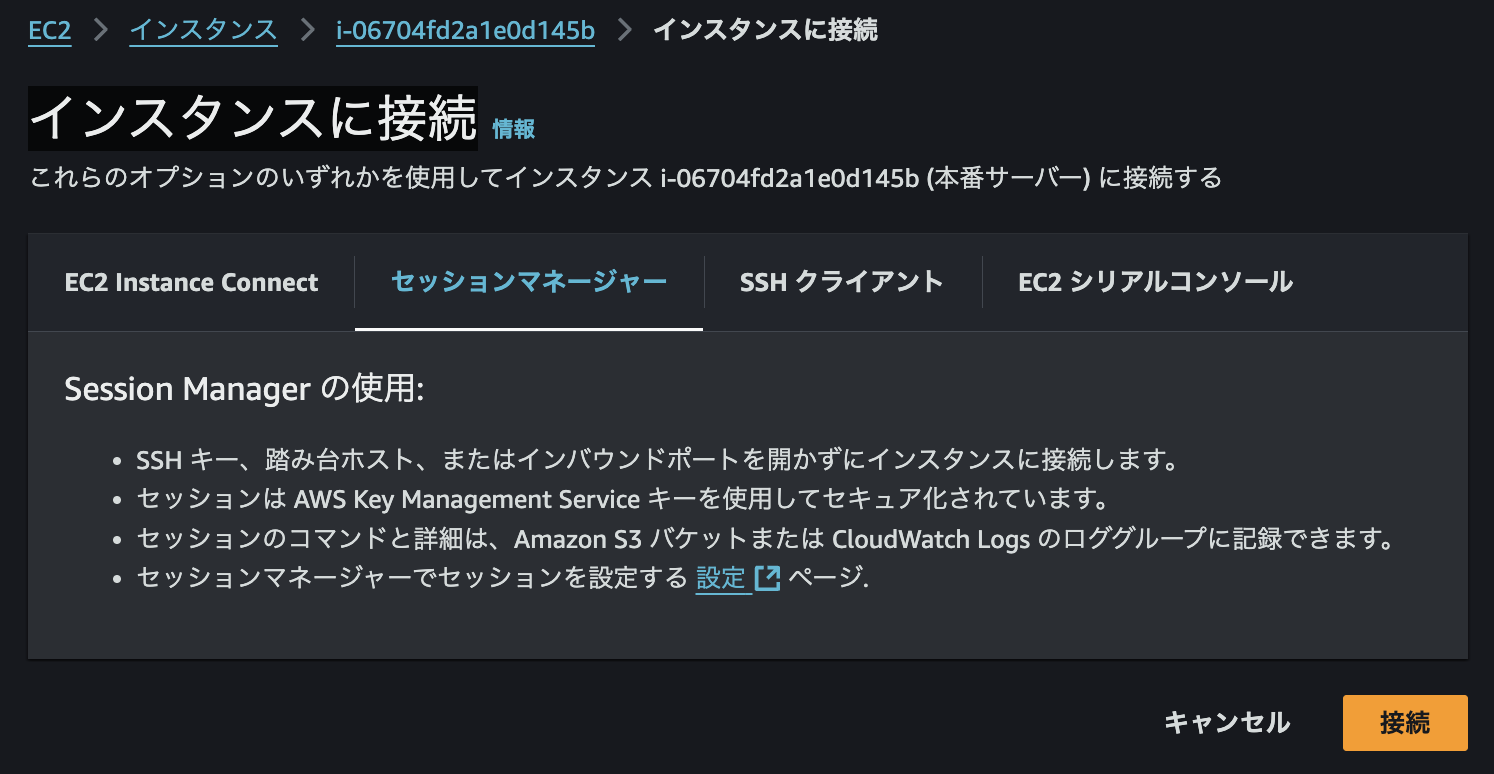
接続が正常に行われていることが確認でき、今回の検証は成功です!
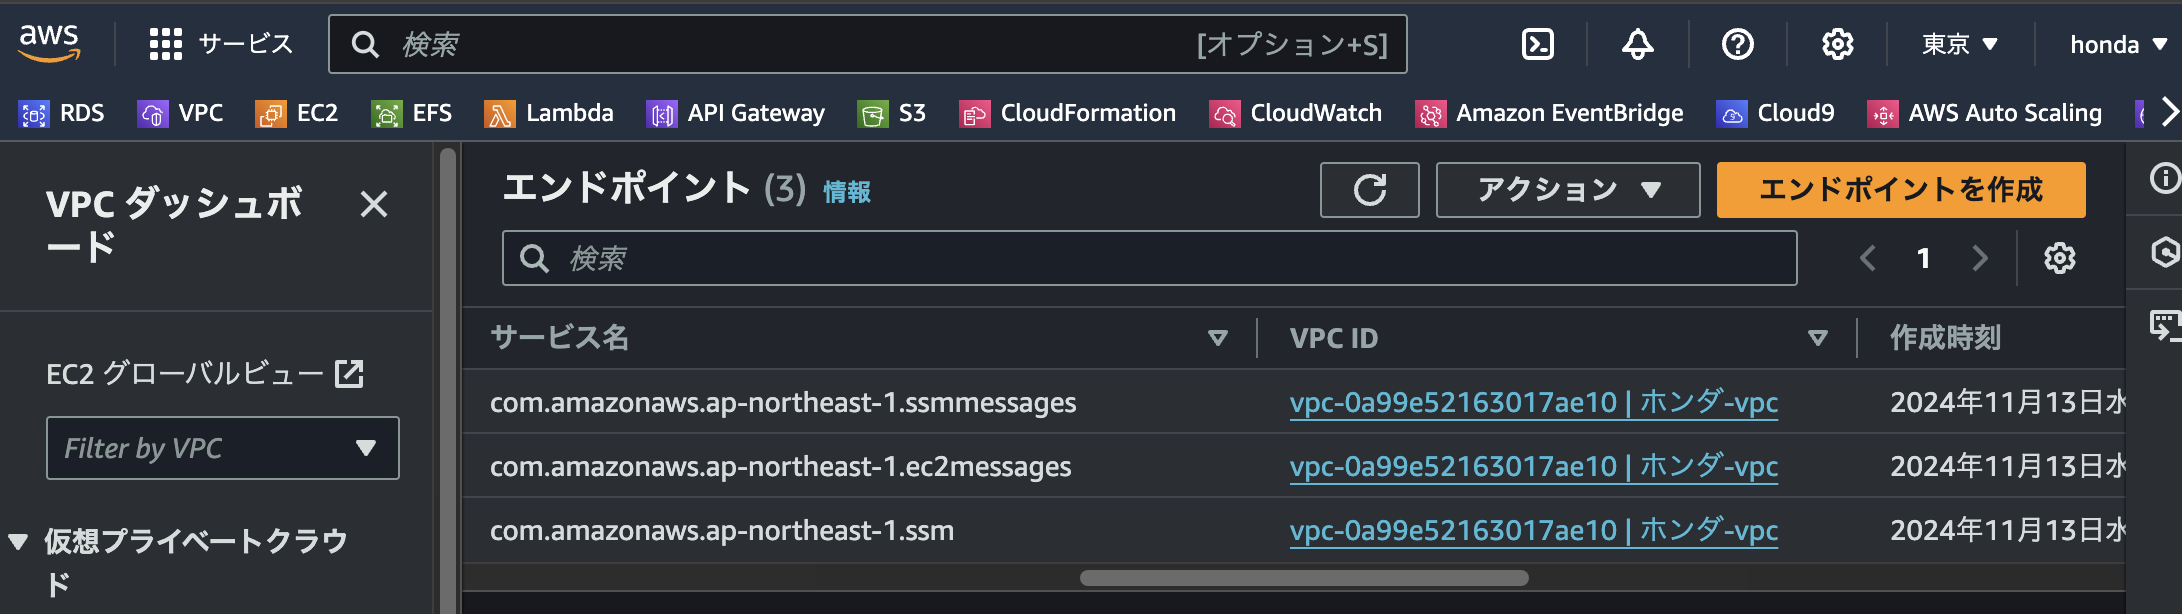
また、スタックでコード化した3つのVPCエンドポイントも問題なく作成されていることが、サービス画面から確認できました。
まとめ
今回の検証で、SSMセッションマネージャーを活用してプライベートサブネット内の本番サーバーに安全に接続できることを確認できました。
コード化したVPCエンドポイントも正しく機能しており、インフラの信頼性が向上しました。
SSMはシンプルでありながら強力な管理ツールで、今後も多くの場面で活用していきたいと思います。
CloudFormationによるインフラのコード化もだいぶ慣れてきたので、一旦、記事としてのアウトプットはここまでとします!