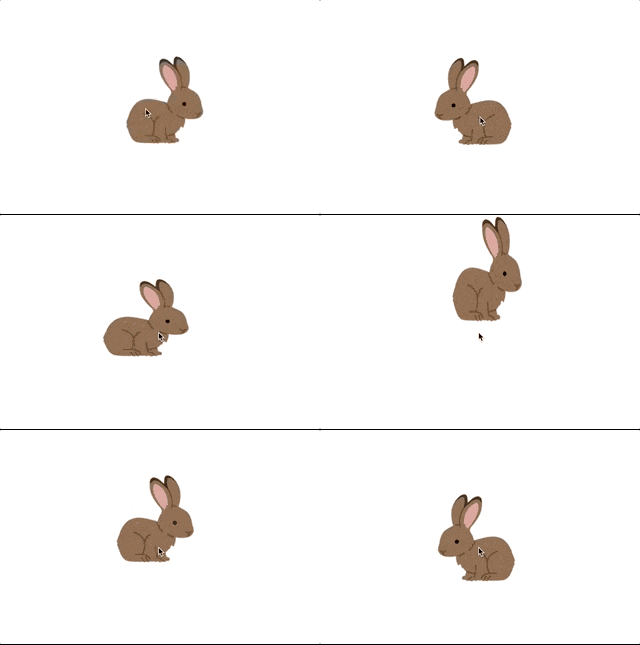
フロントエンドの学習のためにうさぎを増やしたり跳ねさせたりできるサイトを作製しました。
ソースはGitHubに置いています。
DOM要素を動かす
DOMの論理的な構造はHTMLが担いますが、見た目に関する部分はCSSが担います。アニメーションについてもCSSを使います。
参考: コピペで使える! CSS Animationだけで実現するキャラクターアニメーション - ICS MEDIA
せっかくならもう少しアクロバティックに動かしたいですね。
うさぎを動き回らせる
画面上の要素の配置を決めるのもCSSであるため、プロパティをstyleに紐づけ、その値を動的に変更することで、動的に位置を変えることにしました。
<div :style="styleObject" class="creature">
  <img :src="image.src">
</div>
@Component({})
export default class Creature extends Vue {
  @Prop() position: {x: number, y:number};
  @Prop() image: ImageProp;

  get styleObject() {
    return {
      top: (this.position.y - this.image.size.height / 2) + "px",
      left: (this.position.x - this.image.size.width / 2) + "px",
      position: "absolute",
      width: this.image.size.width + "px",
      height: this.image.size.height + "px",
    }
  }
}
今回は一定時間ごとにコールバックを実行するsetIntervalを使い、一定時間ごとにランダムで位置positionを増減させることにします。
export default class Usagi extends Vue {
  //...
  inverse: boolean = false;

  mounted(): void {
    setInterval(() => {
      const getDelta = () => Math.floor(Math.random() * 100) - 50;
      var deltaX = getDelta();
      var deltaY = getDelta();

      this.position.x += deltaX;
      this.position.y += deltaY;
      this.inverse = (this.image.orientation == "left") ? (deltaX > 0) : !(deltaX > 0);
    },300);
  }
}
さらに、CSSのtransition属性を設定することで滑らかに動くようになりました。.inverseは左右に移動する時に移動する方向に向くように画像を反転するために使います。
.creature {
  transition: top 0.3s, left 0.3s;

  &.inverse {
    transform: scale(-1,1);
  }
}
うさぎを跳ねさせる
クリック時に動的にクラスを追加するようにすれば、クリック時にのみアニメーションさせることも可能です。跳ねるアニメーションについては先ほどのサイトを参考にしました。
<div :style="styleObject" class="creature" :class="{touched: touched, inverse: inverse}">
export default class Creature extends Vue {
  //...

  touched: boolean = false;

  touch(): void {
    if (this.touched) return;

    this.touched = true;
    setTimeout(() => { this.touched = false }, 1100);
  }
}
.creature {
  &.touched {
    animation: fluffy 0.7s linear 0s 1;
  }
}

@keyframes fluffy {
  0%   { transform: scale(1.0, 1.0) translate(0%, 0%); }
  10%  { transform: scale(1.1, 0.9) translate(0%, 5%); }
  40%  { transform: scale(1.2, 0.8) translate(0%, 15%); }
  50%  { transform: scale(1.0, 1.0) translate(0%, 0%); }
  60%  { transform: scale(0.9, 1.2) translate(0%, -50%); }
  75%  { transform: scale(0.9, 1.2) translate(0%, -20%); }
  85%  { transform: scale(1.2, 0.8) translate(0%, 15%); }
  100% { transform: scale(1.0, 1.0) translate(0%, 0%); }
}
うさぎを増やす
Vue.jsはリアクティブなフレームワークなので、Vueオブジェクトのプロパティを変更すると、その変更を自動的にDOM要素の描画に反映してくれます。
今回は背景のクリックイベントでうさぎの生成位置を追加し、v-forディレクティブによってうさぎを増やすようにしました。
<template>
  <div class="field" @click="addUsagi">
    <usagi v-for="(position, i) in positions" :key="i" :position="position"/>
  </div>
</template>

<script lang="ts">
import {
  Component,
  Vue
} from "nuxt-property-decorator"
import Usagi from "~/components/Usagi.vue"

@Component({
  components: {
    Usagi
  }
})
export default class UsagiField extends Vue {
  positions: {x: number, y: number}[] = [];

  addUsagi(evt: MouseEvent): void {
    this.positions.push({
      x: evt.x,
      y: evt.y,
    });
  }
}
</script>

<style lang="scss" scoped>
.field {
  position: fixed;
  width: 100%;
  height: 100%;
  -webkit-tap-highlight-color: transparent;
}
</style>
うさぎの画像は、3種類の中からランダムで選ぶようにしています。
<template>
    <creature :position="position" :image="getUsagiImage()"/>
</template>

<script lang="ts">
import {
  Component,
  Prop,
  Vue
} from "nuxt-property-decorator"
import Creature, { ImageProp } from "~/components/Creature.vue"

@Component({
  components: {
    Creature
  }
})
export default class UsagiFactory extends Vue {
  @Prop() position: {x: number, y: number};

  static readonly usagiImages: ImageProp[] = [
    { src: require("~/assets/usagi1.png"), size: {width:160, height: 160}, orientation: "left"},
    { src: require("~/assets/usagi2.png"), size: {width:170, height: 170}, orientation: "right"},
    { src: require("~/assets/usagi3.png"), size: {width:170, height: 170}, orientation: "right"},
  ];

  getUsagiImage(): ImageProp {
    return UsagiFactory.usagiImages[Math.floor(Math.random() * UsagiFactory.usagiImages.length)];
  }
}
</script>
感想
当たり判定とかつけるともっとゲームっぽくできるかな〜という感じですね。


