windows10にはガジェットが存在しない
windows vista等にあったガジェットがふと懐かしくなったのでそれに近いものを作ろうということでwxpythonを使用して作ってみました。
最終的なコードだけ見たい方は一番下にあります。
※ガジェットは絶対使えないわけではないがセキュリティの欠陥があるため非推奨
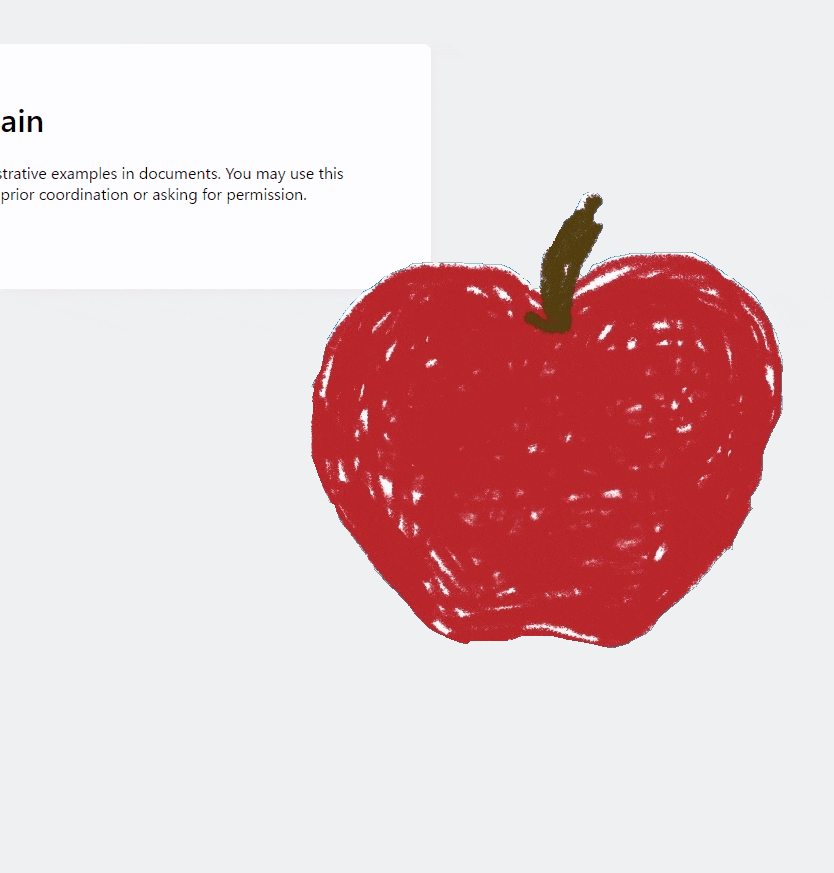
成果物
環境
windows 10
python 3.6.10
wxPython 4.1.0
背景を透明にして、画像の表示をする
背景を透明にし、ウィンドウも画像の形状に変化させます。
まず、初期化処理でNO_BORDER,FRAME_SHAPEDとすることで、タイトルバーを削除し、SetShapeメソッドが使用可能になります。
wx.Frame.__init__(self, None, title="Apple!!",
        style=wx.NO_BORDER | wx.FRAME_SHAPED, pos=(110, 10))
その後
任意の画像を読み込み、ウィンドウサイズの変更、ウィンドウ形状の変更を行います。
透過画像として
読み込めなかったので、色(0,0,0)を透明色として扱うことにしています。
image = wx.Image("apple.png")
self.bitmap = image.ConvertToBitmap()
self.imageSize = image.GetSize()
self.SetClientSize(self.imageSize)
self.SetShape(wx.Region(self.bitmap, wx.Colour(0, 0, 0)))
最後にonPaintイベントをバインドして、画像を描画します。
self.Bind(wx.EVT_PAINT, self.onPaint)

def onPaint(self, event=None):
    DC = wx.PaintDC(self)
    DC.DrawBitmap(self.bitmap, 0, 0, True)
これで画像型ウィンドウの表示ができました。
タイトルバーがないのでウィンドウが動かせない!!
せっかくなので動かせるようにしたいと思います。
ここはもう少し簡単な方法もありそうですがMoveイベントでクリックされてるかつ移動してる部分を検知して位置を更新するようにしています。
取得位置をスクリーンの絶対位置に変換しているのが大事な部分です。
def onEvent(self, event):
    pos = event.Position
    pos = self.ClientToScreen(pos)
    if self.leftDown and event.leftIsDown:
        self.position[0] += pos.x-self.x
        self.position[1] += pos.y-self.y
        self.Move(self.position)
    self.x = pos.x
    self.y = pos.y
    self.leftDown = event.leftIsDown
最終的なコード
コードとは関係ないですがpythonwを使って実行するとコンソールを表示せずにウィンドウだけ立ち上がるのでおすすめです。
import wx

class AppFrame(wx.Frame):
    def __init__(self):
        self.position = [100, 100]
        wx.Frame.__init__(self, None, title="Apple!!",
                          style=wx.NO_BORDER | wx.FRAME_SHAPED, pos=(110, 10))
        self.Bind(wx.EVT_MOUSE_EVENTS, self.onEvent)
        self.Bind(wx.EVT_PAINT, self.onPaint)
        self.Move(self.position)
        self.leftDown = False
        self.x = -1
        self.y = -1

        image = wx.Image("apple.png")
        self.bitmap = image.ConvertToBitmap()
        self.imageSize = image.GetSize()
        self.SetClientSize(self.imageSize)
        self.SetShape(wx.Region(self.bitmap, wx.Colour(0, 0, 0)))

    def onEvent(self, event):
        pos = event.Position
        pos = self.ClientToScreen(pos)
        if self.leftDown and event.leftIsDown:
            self.position[0] += pos.x-self.x
            self.position[1] += pos.y-self.y
            self.Move(self.position)
        self.x = pos.x
        self.y = pos.y
        self.leftDown = event.leftIsDown

    def onPaint(self, event=None):
        DC = wx.PaintDC(self)
        DC.DrawBitmap(self.bitmap, 0, 0, True)


app = wx.App(False)
AppFrame().Show()
app.MainLoop()