Google AssistantのUIを試す
Google Assistantで使用するUIや機能をAPI.AI&Cloud Functionsで実装していきます。今回紹介する内容でGoogle AssistantのBotをある程度作れるようになると思いますので、ぜひトライしてみてください♪
新しく出たUIについては、その都度更新していきたいと思います。
API.AIの準備
- 新しいAgentの作成
- 言語は英語を選択してください。
- 新しいIntentsの作成
- Intents name
- RequestHello
- UserSaysに「say hello」と入れる
- ActionsNameに「request.hello」と入れる
- Intents name

API.AIとCloud Functionsの接続
こちらの index.js と package.json を用意しこれらをGCSにデプロイします。
Cloud functionsの初期設定やデプロイについてはこちらの資料をご参考ください。
index.js と package.json の準備
'use strict';

process.env.DEBUG = 'actions-on-google:*';
const App = require('actions-on-google').ApiAiApp;

//API.AI actions
const REQUEST_HELLO = 'request.hello'

exports.requestassistantui = (request, response) => {
  const app = new App({request, response});
  console.log('Request headers: ' + JSON.stringify(request.headers));
  console.log('Request body: ' + JSON.stringify(request.body));

  // Fulfill action business logic
  function sayHello (app) {
    app.ask('Hello!!!');
  }

  const actionMap = new Map();
  actionMap.set(REQUEST_HELLO, sayHello);

  app.handleRequest(actionMap);
};
{
  "name": "request-assistant-ui",
  "description": "Request Assitant UI",
  "version": "0.0.1",
  "private": true,
  "license": "Apache Version 2.0",
  "author": "Google Inc.",
  "engines": {
    "node": "~6.0"
  },
  "scripts": {
    "lint": "semistandard --fix \"**/*.js\"",
    "start": "functions deploy requestassistantui --trigger-http",
    "deploy": "gcloud beta functions deploy requestassistantui --trigger-http --stage-bucket requestassitantui"
  },
  "dependencies": {
    "actions-on-google": "^1.0.0"
  },
  "devDependencies": {
    "semistandard": "^9.1.0"
  }
}
Webhookの有効化
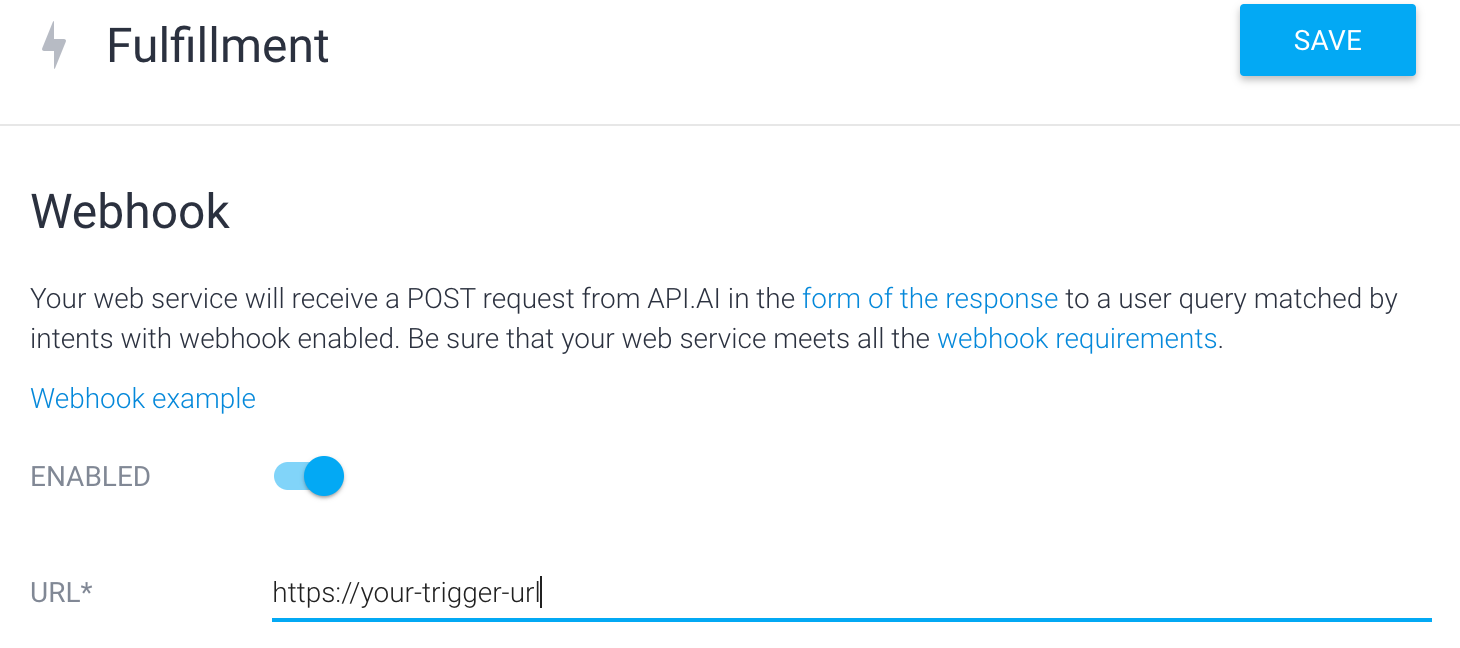
デプロイが成功したらFunctionsのTriggerURLを控えてください。そしてAPI.AIのFulfillmentのWebhookを有効にし、URLに欄に先ほど控えたURLを入力します。
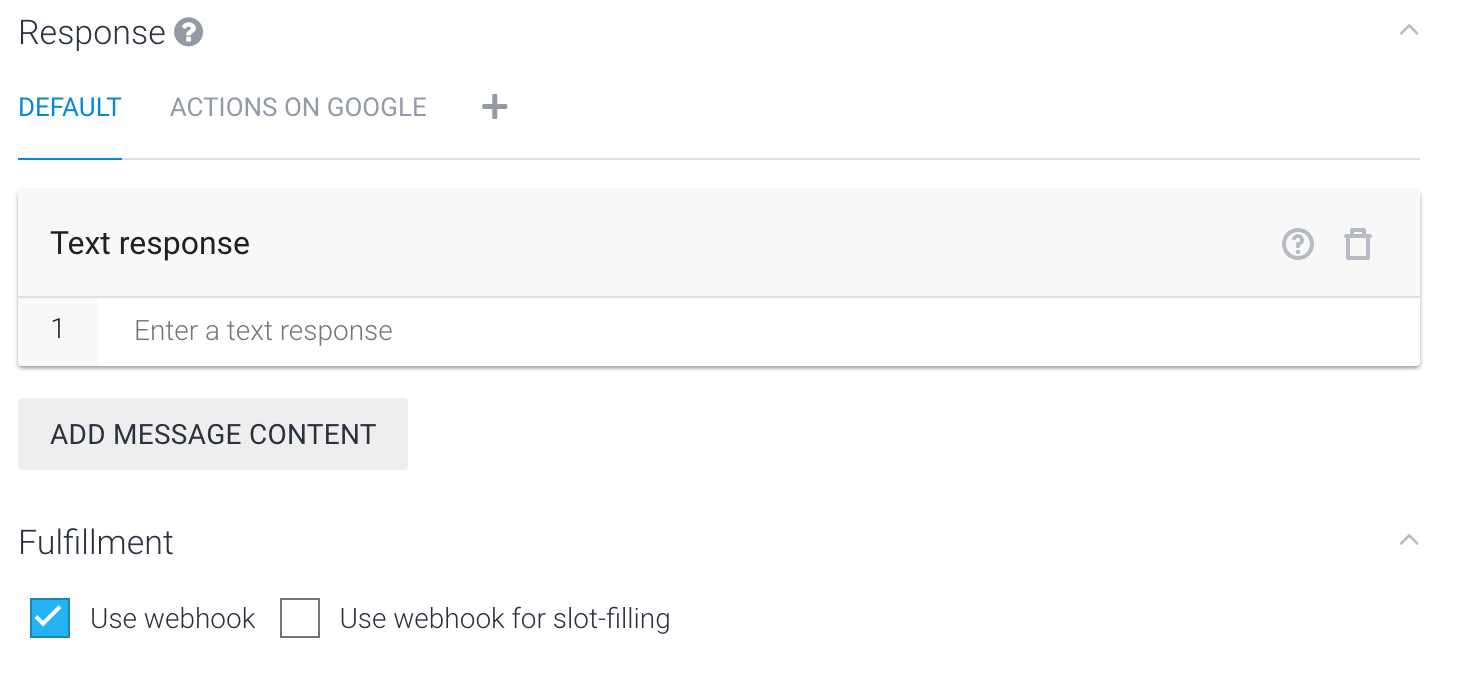
Webhookを有効にしたらIntentsのRequestHelloに行き、Use webhookにチェックを入れます。
とりあえずテスト
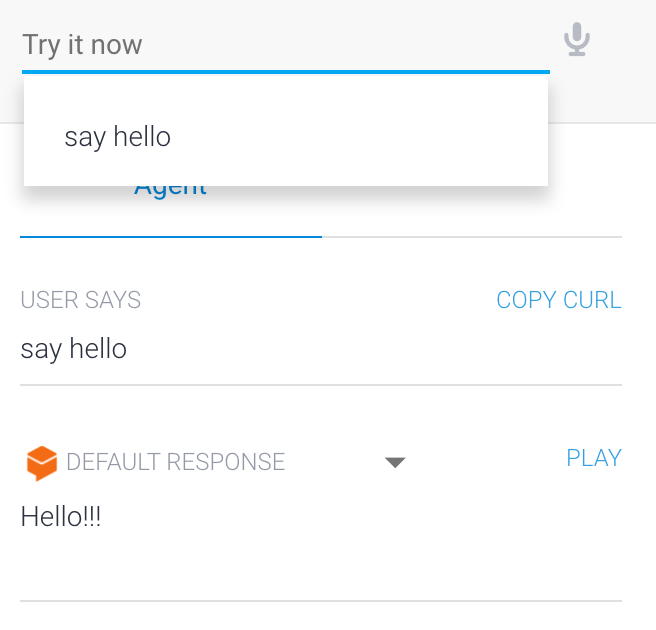
今回はシンプルに「Hello」と返してくれる機能を実装しました。試しにAPI.AIの右側にあるシュミレータに「Say hello」と書いてみましょう。「Hello!!!」と返ってくれば成功です。
IntegrationsのGoogle Assistantを有効化
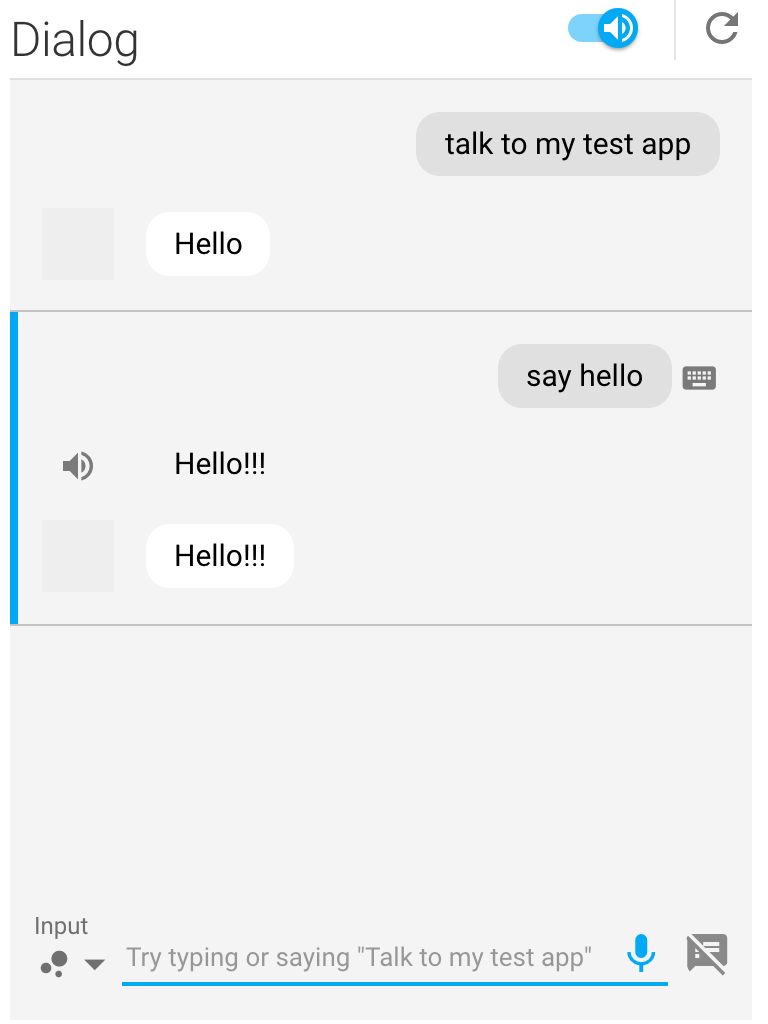
IntegrationsのGoogle Assistantを有効化してください。そしてTESTボタンを押し、シュミレーターを起動してください。シュミレーターが起動したら「talk to my test app」と入力し、アプリを起動します。そこで「SayHello」と入力し「Hello!!!」と返ってくればOKです。
実装の流れ
使用用途に合わせて以下の様なUIを実装することができます。UIの種類毎に、API.AIでIntentsの作成→Index.jsに必要なコードを記述→テストの順番で行っていきたいと思います。
BasicCard

新しいIntentsの作成
- Name
- 「BasicCard」
- User says
- 「Basic card」
- Action name
- 「basic.card」
- Use webhookにチェック
...省略...
//API.AI actions
const BASIC_CARD = 'basic.card'

const IMG_URL = 'https://sample.png'

...省略...

function basicCard (app) {
    app.ask(app.buildRichResponse()
     .addSimpleResponse('This is the first simple response for a basic card')
      .addBasicCard(app.buildBasicCard(`Hello `)
        .setSubtitle('This is a subtitle')
        .setTitle('Title: this is a title')
        .addButton('This is a button', 'https://assistant.google.com/')
        .setImage(IMG_URL, 'Image alternate text'))
    );
  }

...省略...
actionMap.set(BASIC_CARD, basicCard);
...省略...
.addSimpleResponseは必須です。最初に付けないとエラーが起きます。
Carousel
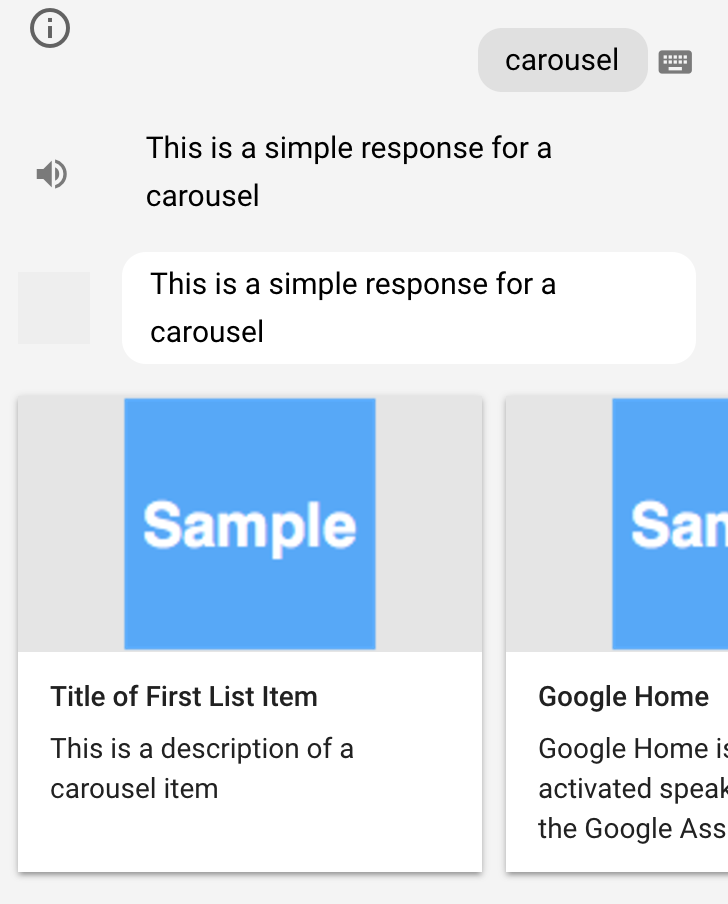
新しいIntentsの作成
- Name
- 「Carousel」
- User says
- 「Carousel」
- Action name
- 「carousel」
- Use webhookにチェック
...省略...
const CAROUSEL = 'carousel';

...省略...
// Carousel
  function carousel (app) {
    app.askWithCarousel(app.buildRichResponse()
      .addSimpleResponse('This is a simple response for a carousel'),
      app.buildCarousel()
        // Add the first item to the carousel
        .addItems(app.buildOptionItem(SELECTION_KEY_ONE,
          ['synonym of title 1', 'synonym of title 2', 'synonym of title 3'])
          .setTitle('Title of First List Item')
          .setDescription('This is a description of a carousel item')
          .setImage(IMG_URL, 'Image alternate text'))
        // Add the second item to the carousel
        .addItems(app.buildOptionItem(SELECTION_KEY_GOOGLE_HOME,
          ['Google Home Assistant', 'Assistant on the Google Home'])
          .setTitle('Google Home')
          .setDescription('Google Home is a voice-activated speaker powered ' +
            'by the Google Assistant.')
          .setImage(IMG_URL, 'Google Home')
        )
    );
  }
...省略...
actionMap.set(CAROUSEL, carousel);
...省略...
List
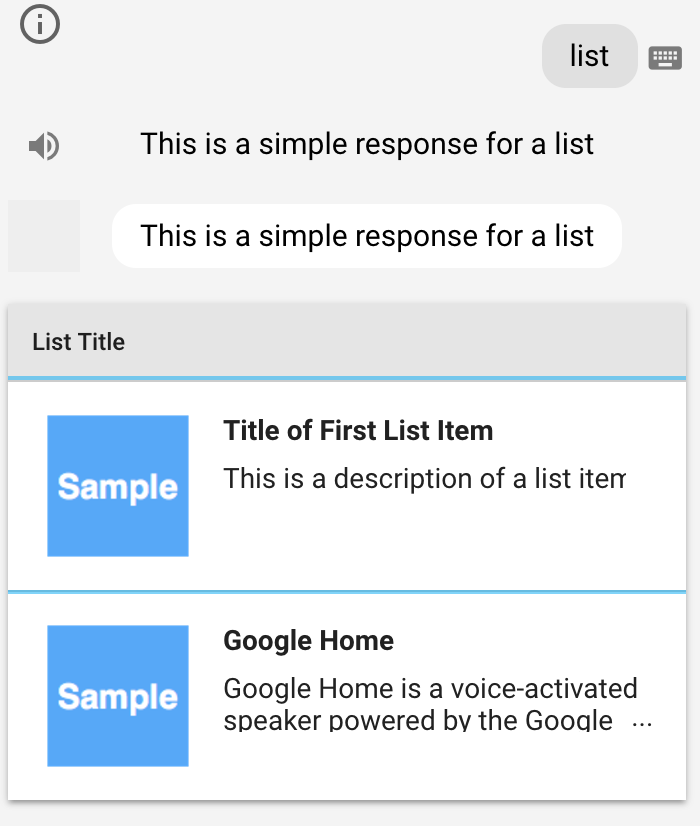
新しいIntentsの作成
- Name
- 「List」
- User says
- 「list」
- Action name
- 「list」
- Use webhookにチェック
...省略...
const LIST = 'list';
...省略...
// List
  function list (app) {
    app.askWithList(app.buildRichResponse()
      .addSimpleResponse('This is a simple response for a list'),
      app.buildList('List Title')
        // Add the first item to the list
        .addItems(app.buildOptionItem(SELECTION_KEY_ONE,
          ['synonym of title 1', 'synonym of title 2'])
          .setTitle('Title of First List Item')
          .setDescription('This is a description of a list item')
          .setImage(IMG_URL, 'Image alternate text'))
        // Add the second item to the list
        .addItems(app.buildOptionItem(SELECTION_KEY_GOOGLE_HOME,
          ['Google Home Assistant', 'Assistant on the Google Home'])
          .setTitle('Google Home')
          .setDescription('Google Home is a voice-activated speaker powered ' +
            'by the Google Assistant.')
          .setImage(IMG_URL, 'Google Home')
        )
    );
  }
...省略...
  actionMap.set(LIST, list);
...省略...
SUGGESTIONS
Suggestionsはボタンの様なもので、BasicCard,Carousel,ListなどのBuilderに追加することでもできます。このUIによりユーザーに適切な選択しを誘導することができます。

新しいIntentsの作成
- Name
- 「Suggestions」
- User says
- 「suggestions」
- Action name
- 「suggestions」
- Use webhookにチェック
...省略...
const SUGGESTIONS = 'suggestions';
...省略...
// Suggestions
  function suggestions (app) {
    app.ask(app
      .buildRichResponse()
      .addSimpleResponse('This is a simple response for suggestions')
      .addSuggestions(['Basic Card', 'List', 'Carousel'])
      .addSuggestionLink('Suggestion Link', 'https://assistant.google.com/'));
  }
...省略...
actionMap.set(SUGGESTIONS, suggestions);
...省略...
その他の機能紹介
その他重要な機能を紹介します。
Itemを選択した時の処理
ListやCarouselでItemが選択された時の処理の方法を紹介します。
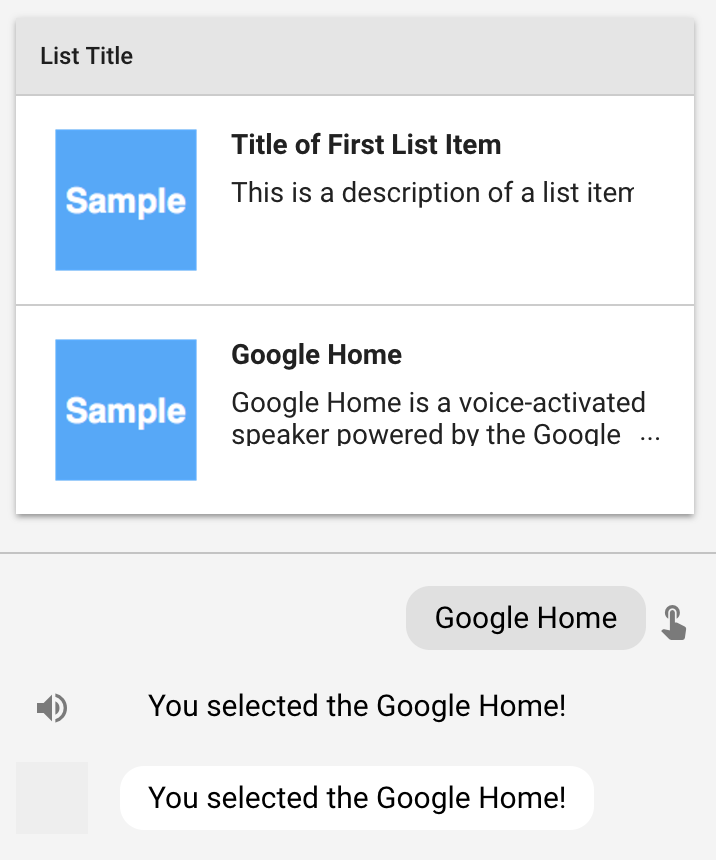
新しいIntentsの作成
- Name
- 「item selected」
-
Event
- 「actions_intent_OPTION」
- Action name
- 「item.selected」
- Use webhookにチェック
Eventsに actions_intent_OPTION を入れることによりItem選択時の処理を受け取ることが出来ます。
...省略...
const ITEM_SELECTED = 'item.selected';
...省略...
// item selected
  function itemSelected (app) {
    console.log('kyohei')
    const param = app.getSelectedOption();
    if (!param) {
      app.ask('You did not select any item from the list or carousel');
    } else if (param === SELECTION_KEY_ONE) {
      app.ask('You selected the first item in the list or carousel');
    } else if (param === SELECTION_KEY_GOOGLE_HOME) {
      app.ask('You selected the Google Home!');
    } else {
      app.ask('You selected an unknown item from the list or carousel');
    }
  }
...省略...
  actionMap.set(ITEM_SELECTED, itemSelected);
...省略...
会話を終了する

新しいIntentsの作成
- Name
- 「Bye」
- User says
- 「bye」
- Action name
- 「request.bye」
- Use webhookにチェック
...省略...
const REQUEST_BYE = 'request.bye';
...省略...
 function bye (app) {
    app.tell('Okay see you later!');
  }
...省略...
  actionMap.set(REQUEST_BYE, bye);
...省略...