概要
新しいWebサービス立ち上げ用に最速/最小構成でHelloWorldできる環境をHeroku+Java+spring-bootで作ってみる
できるようになること
- Heroku上でのHelloWorld
およその作業時間
30分
事前に必要なもの
- Java
- Maven
- git
- Herokuアカウント
Herokuアカウントは以下の記事に記載している1. IntroductionのHeroku Account取得だけでOK
無料ですぐ取得可能(メールアドレスのみ。クレカ登録不要)
無料でWebアプリケーションを公開できるHerokuをやってみた
1.spring-boot環境を作成する
準備するファイルはpom.xml、HelloController.javaの二つ。
pom.xml
<?xml version="1.0" encoding="UTF-8"?>
<project xmlns:xsi="http://www.w3.org/2001/XMLSchema-instance"
  xmlns="http://maven.apache.org/POM/4.0.0"
  xsi:schemaLocation="http://maven.apache.org/POM/4.0.0 http://maven.apache.org/maven-v4_0_0.xsd">
  <modelVersion>4.0.0</modelVersion>
  <groupId>sprin-boot-sample</groupId>
  <artifactId>sprin-boot-sample</artifactId>
  <version>1.0</version>
  <packaging>jar</packaging>

  <name>sprin-boot-sample</name>

  <properties>
    <java.version>1.8</java.version>
    <project.build.sourceEncoding>UTF-8</project.build.sourceEncoding>
    <project.reporting.outputEncoding>UTF-8</project.reporting.outputEncoding>
  </properties>

  <parent>
    <groupId>org.springframework.boot</groupId>
    <artifactId>spring-boot-starter-parent</artifactId>
    <version>1.5.9.RELEASE</version>
  </parent>

  <dependencies>
    <dependency>
      <groupId>org.springframework.boot</groupId>
      <artifactId>spring-boot-starter-web</artifactId>
    </dependency>
  </dependencies>

  <build>
    <plugins>
      <plugin>
        <groupId>org.springframework.boot</groupId>
        <artifactId>spring-boot-maven-plugin</artifactId>
        <executions>
          <execution>
            <goals>
              <goal>build-info</goal>
            </goals>
            <configuration>
              <additionalProperties>
                <encoding.source>${project.build.sourceEncoding}</encoding.source>
                <encoding.reporting>${project.reporting.outputEncoding}</encoding.reporting>
                <java.source>${maven.compiler.source}</java.source>
                <java.target>${maven.compiler.target}</java.target>
              </additionalProperties>
            </configuration>
          </execution>
        </executions>
      </plugin>
    </plugins>
  </build>
</project>
HelloController.java
package com.example;

import org.springframework.boot.SpringApplication;
import org.springframework.boot.autoconfigure.EnableAutoConfiguration;
import org.springframework.stereotype.Controller;
import org.springframework.web.bind.annotation.RequestMapping;
import org.springframework.web.bind.annotation.ResponseBody;

@Controller
@EnableAutoConfiguration
public class HelloController {

    @RequestMapping("/")
    @ResponseBody
    public String home() {
        return "Hello, World!";
    }

    public static void main(String[] arguments) {
        SpringApplication.run(HelloController.class, arguments);
    }

}
2.Heroku環境に合わせ設定ファイルを準備する
必要なファイルは三つ。
Procfile/system.properties/application.properties
Procfile
web: java -jar target/sprin-boot-sample-1.0.jar
system.properties
java.runtime.version=1.8
application.properties
server.port=${PORT:5000}
3.不要なファイルをHerokuに上げないよう.gitignoreを準備する
.gitignore
target
最終的な構成は以下の感じ
{フォルダ}
│  .gitignore
│  pom.xml
│  Procfile
│  system.properties
│
└─src
    └─main
        ├─java
        │  └─com
        │      └─example
        │              HelloController.java
        │
        └─resources
                application.properties
4.ローカルgitリポジトリにコミット
git init
git add .
git commit -m "first commit"
5.Herokuにデプロイ
heroku login
heroku create
git push heroku master
heroku open
6.画面確認
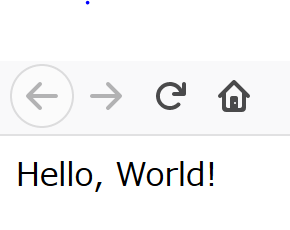
以上.
感想
Herokuアカウントがあれば30分でWebサービスの雛型ができるのが大きい
spring-bootだけの構成だが他のFWも雛型に追加していけばより便利?