背景
ソースコード管理システムとして2大巨頭のgithubとbitbucketですが、前者はパブリック、後者はプライベートリポジトリとして有用ですね。(githubのプライベート利用は有料)
今回はタイトルのままですが、OSS開発で活躍しているデプロイ自動化の技術を、個人開発だったり、企業資産としてコードは外に出したくない場合でも利用できるwerckerを使用してみました。
書店で参考資料を探してもまだ無かったり、Web上だと下位バージョンの情報があふれており各バージョンごとの情報が入り乱れていてなかなか手を出せなかったりするのではと思い書いてみようと思いました。
準備
各サービスのアカウント
- bitbucketアカウント(https://bitbucket.org/)
- githubアカウント(https://github.com/)
- werckerアカウント(http://www.wercker.com/)
リポジトリ
bitbucketにてプライベートリポジトリを作成する。
https://bitbucket.org/repo/create
githubにてパブリックリポジトリを作成する。
https://github.com/new
Webページを用意する
単純なindex.htmlでよいです。
$ vi index.html
<html>
<head>
<title>タイトル</title>
</head>
<body>
本文
</body>
</html>
bitbucketのリポジトリにpushします。
$ git init
$ git remote add https://[user]@bitbucket.org/[user]/[repo].git
$ git add .
$ git commit -m "first commit"
$ git push origin master
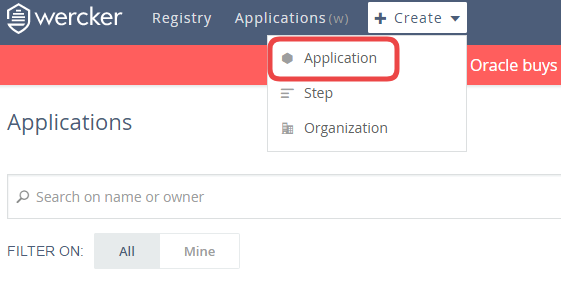
wercker.comでアプリケーションを登録する
事前に作成したwerckerアカウントで、http://www.wercker.com/ にログインして、bitbucketのリポジトリをアプリケーションとして登録します。
上段メニューの「Create」を展開して「Appliction」をクリックします。
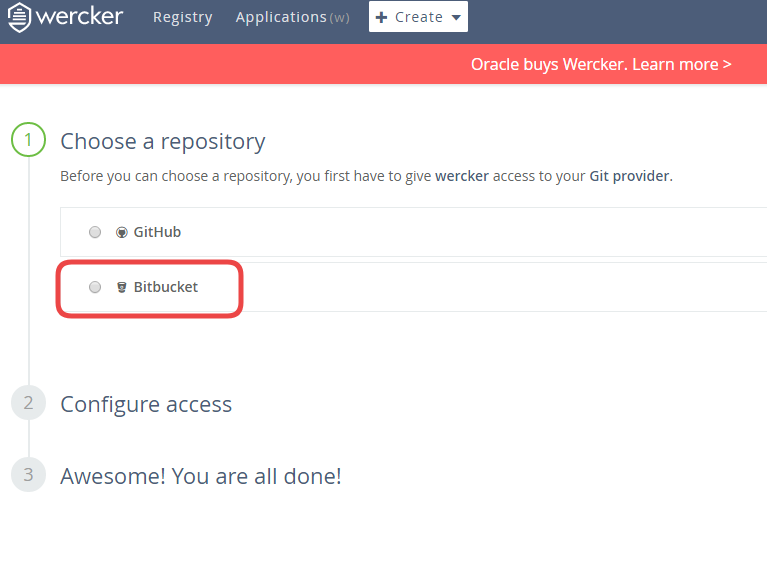
「Choose a repository」で「Bitbucket」を選択します。
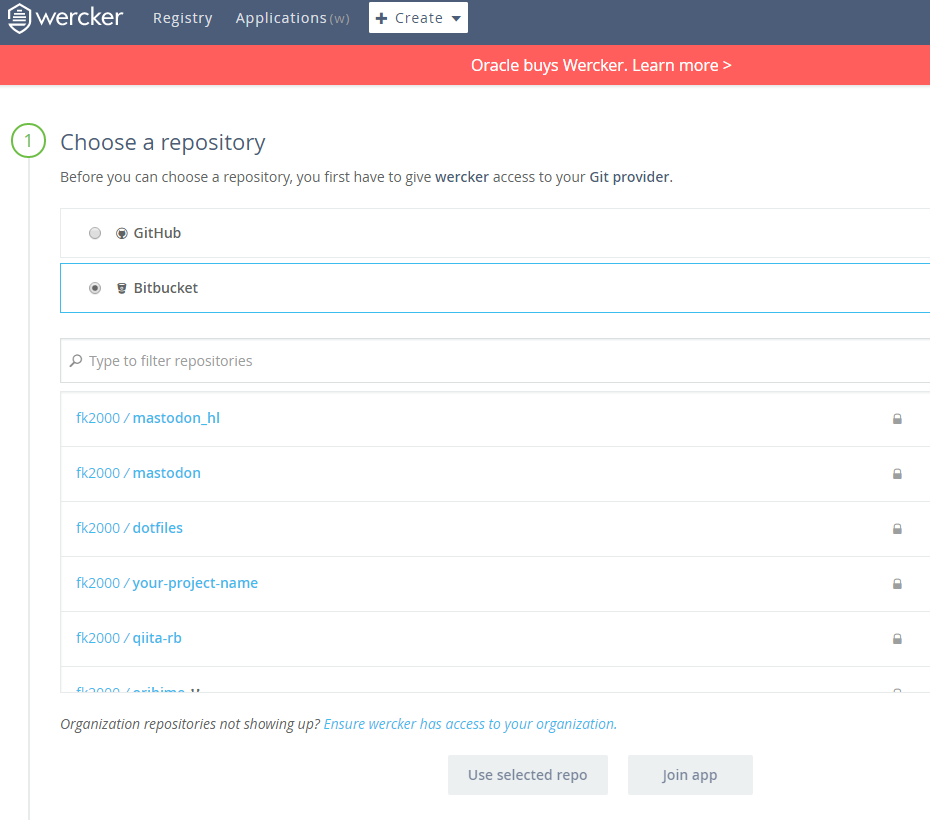
「Bitbucket」を選択すると検索boxが表示されるので、リポジトリ名に含まれる文字列を入れたりして該当リポジトリを探します。(すでに登録済みのリポジトリは表示されません。)
リポジトリを選択すると下部の「Use selected repo」ボタンが有効になるので、クリックします。
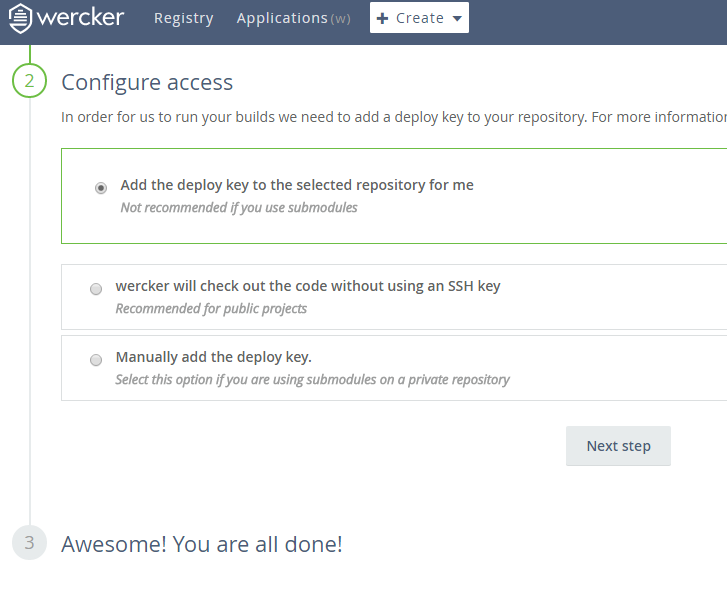
「Configure access」で一番上の「Add the deploy key to the selected repository for me」を選択して、「Next step」をクリックします。
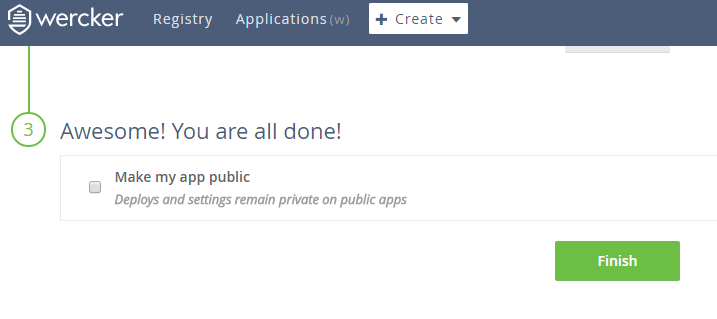
「Awesome! You are all done!」で「Make my app public」にはチェックを入れずに「Finish」をクリックします。
wercker.ymlを作成する
werckerに登録したアプリケーションに対して、ビルド、デプロイの設定を仕掛けていきます。
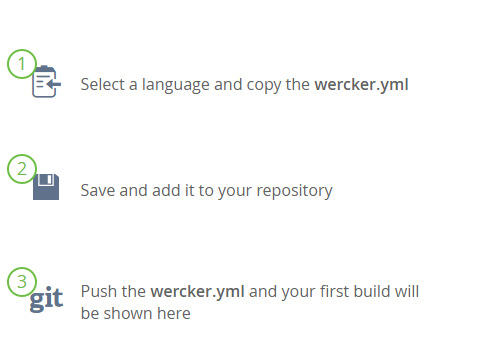
まずは、ビルドから。
プログラム言語を選択する
本稿では「default」を選択します。
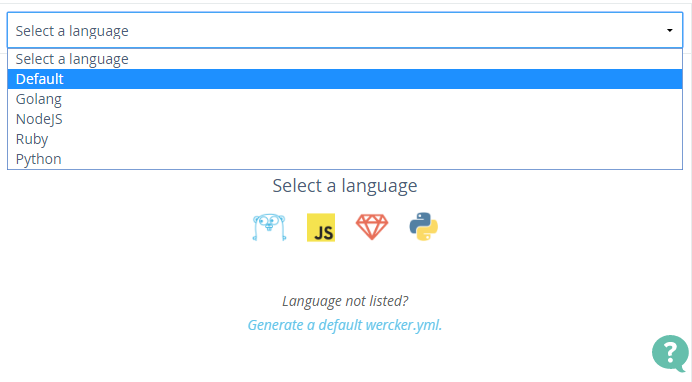
表示されたソースコードをコピーして、bitbucketにpush作業を実行したサーバ上にwercker.ymlとして保存します。
# This references a standard debian container from the
# Docker Hub https://registry.hub.docker.com/_/debian/
# Read more about containers on our dev center
# http://devcenter.wercker.com/docs/containers/index.html
box: debian
# You can also use services such as databases. Read more on our dev center:
# http://devcenter.wercker.com/docs/services/index.html
# services:
    # - postgres
    # http://devcenter.wercker.com/docs/services/postgresql.html

    # - mongo
    # http://devcenter.wercker.com/docs/services/mongodb.html

# This is the build pipeline. Pipelines are the core of wercker
# Read more about pipelines on our dev center
# http://devcenter.wercker.com/docs/pipelines/index.html
build:
    # Steps make up the actions in your pipeline
    # Read more about steps on our dev center:
    # http://devcenter.wercker.com/docs/steps/index.html
  steps:
    - script:
        name: echo
        code: |
          echo "hello world!"
ローカルで保存後、git statusで差分を確認して、リポジトリにaddした後、bitbucketにpushします。
$ git status
# On branch master
# Changes not staged for commit:
#   (use "git add <file>..." to update what will be committed)
#   (use "git checkout -- <file>..." to discard changes in working directory)
#
#       modified:   wercker.yml
#
no changes added to commit (use "git add" and/or "git commit -a")
$ git add .
$ git commit -m "deploy"
[master 49c88ba] deploy
 1 file changed, 8 insertions(+)
$ git push origin master
Password for 'https://fk2000@bitbucket.org':
Counting objects: 5, done.
Compressing objects: 100% (3/3), done.
Writing objects: 100% (3/3), 391 bytes | 0 bytes/s, done.
Total 3 (delta 2), reused 0 (delta 0)
To https://fk2000@bitbucket.org/fk2000/html-site.git
   eeba5b2..49c88ba  master -> master
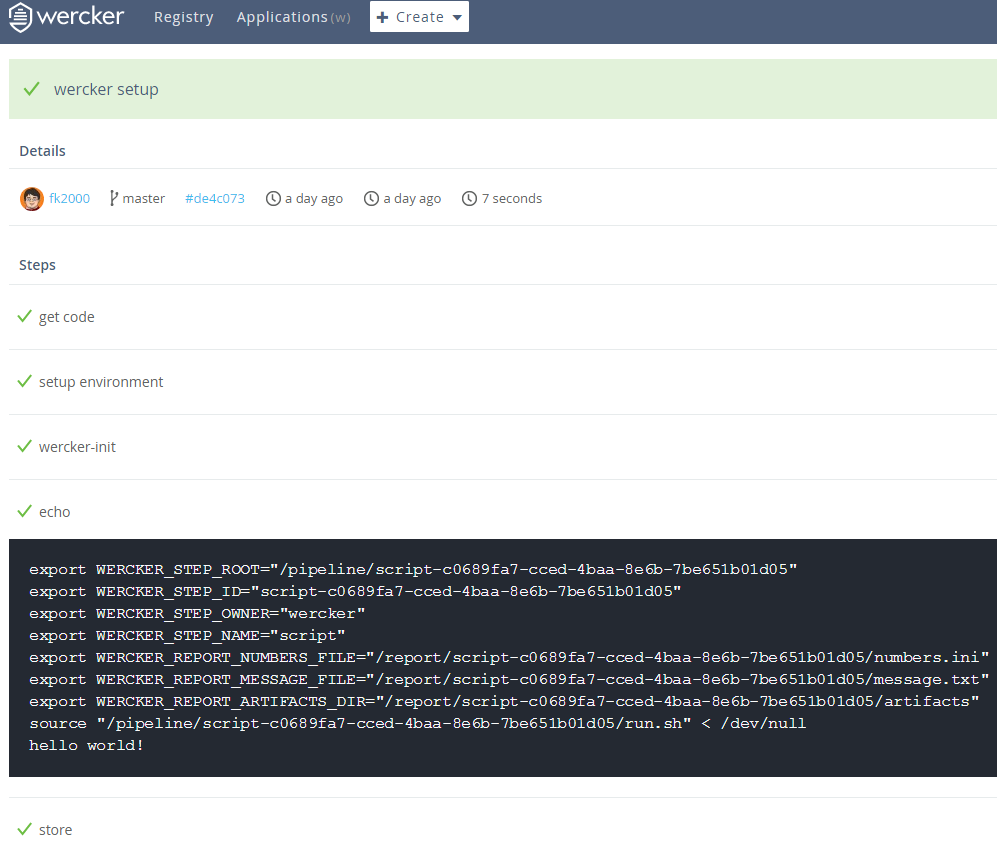
この時点でエラーになることはほとんど無いと思います。
werckerでは以下のステップが実行され、echoステップではビルドが正常に完了したことをしますメッセージ「hello world」が表示されます。
- werckerのbuild steps
- get code
- setup environment
- wercker-init
- echo
- store
slackに通知してみる
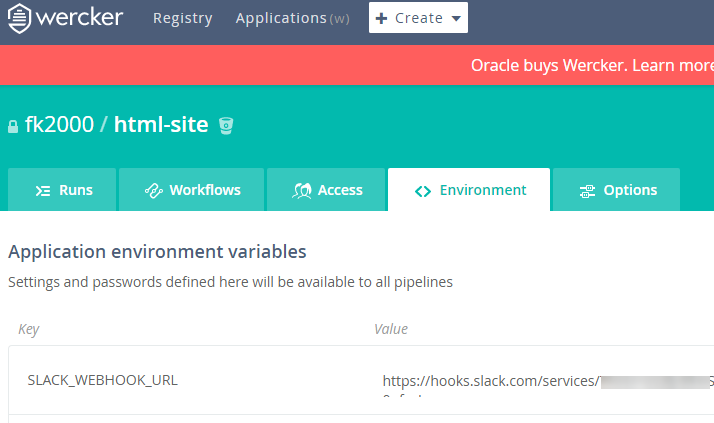
slackのIncoming WebHooksを利用してビルドが成功したら通知が来るように設定してみましょう。
参考:werckerからslackにビルド結果のnotificationを送る
wercker側のEnvironmentで「key」に「SLACK_WEBHOOK_URL」、「value」にslackから取得したトークンを追加します。
つぎにwercker.ymlを編集するのですが、wantedlyさんがいい感じのものを作って公開してくれてます。
これを使うためにはrubyがinstallされている必要があるので、boxも変更します。
- box: debian
+ box: ruby

# build:steps:ブロックの下に追記
+   after-steps:
+     # notify to Slack
+     - wantedly/pretty-slack-notify:
+         webhook_url: $SLACK_WEBHOOK_URL
+         channel: notifications
+         username: wercker
wercker.ymlをbitbuckletにpushすると、ビルド正常終了時にslackの指定したチャンネルに(ここでは#notifications)通知が来るようになります。

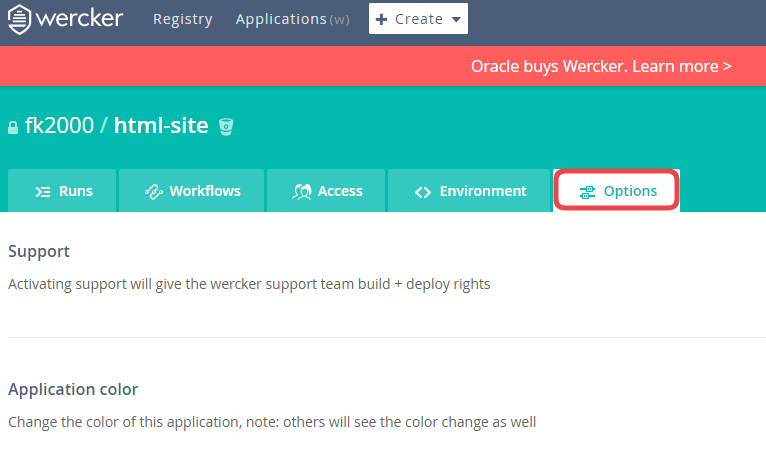
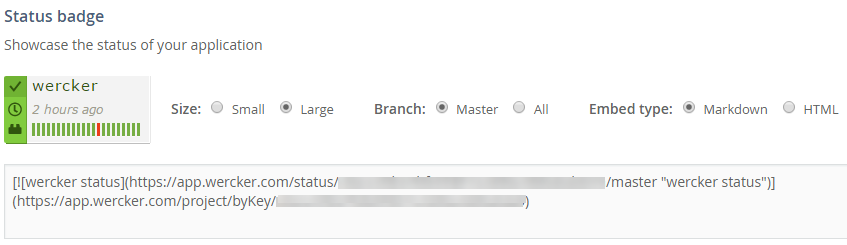
ステータスバッチ
個人的には自動CI最大の魅力がステータスバッジにあると思っています。
werckerのoptionsを開いて、「Status badge」にあるMarkdownのコードをリポジトリに含めるREADME.mdにペーストします。
smallとlargeが用意されているので、お好みの方をお選びください。
small
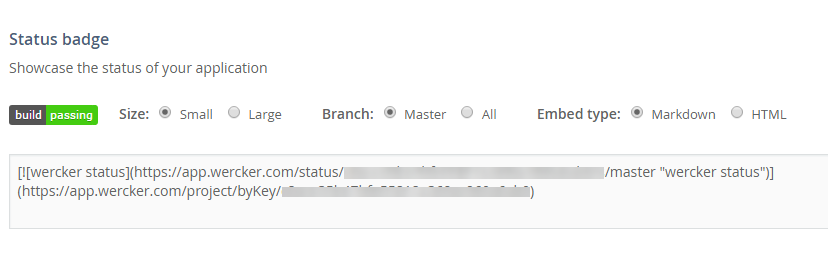
large
デプロイ
ここまで来たらゴールはもうすぐです。githubのリポジトリにもwerckerのトークンを作成します。
githubの「Personal settings」にある「Personal access tokens」を開いて、「Generate new token」ボタンをクリックします。
「Token description」には任意の文字列、「Select scopes」では「repo」にチェックを入れて、最下部にある緑色の「Generate token」ボタンをクリックします。
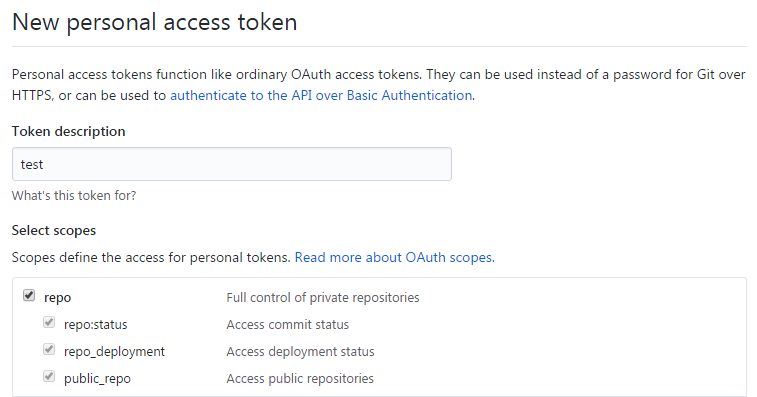
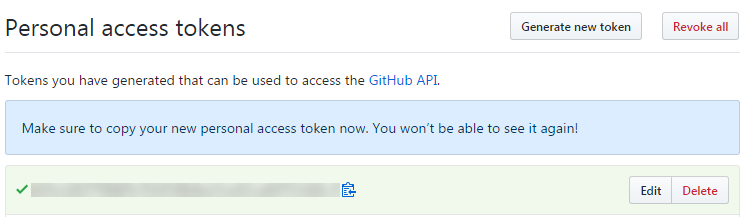
次画面でトークンが表示されますが、初回のみ表示されるためコピーを忘れずにしておきます。(忘れてしまった場合は再生成できますが、それまで使用していたアプリケーションすべて更新が必要になってしまいます。)
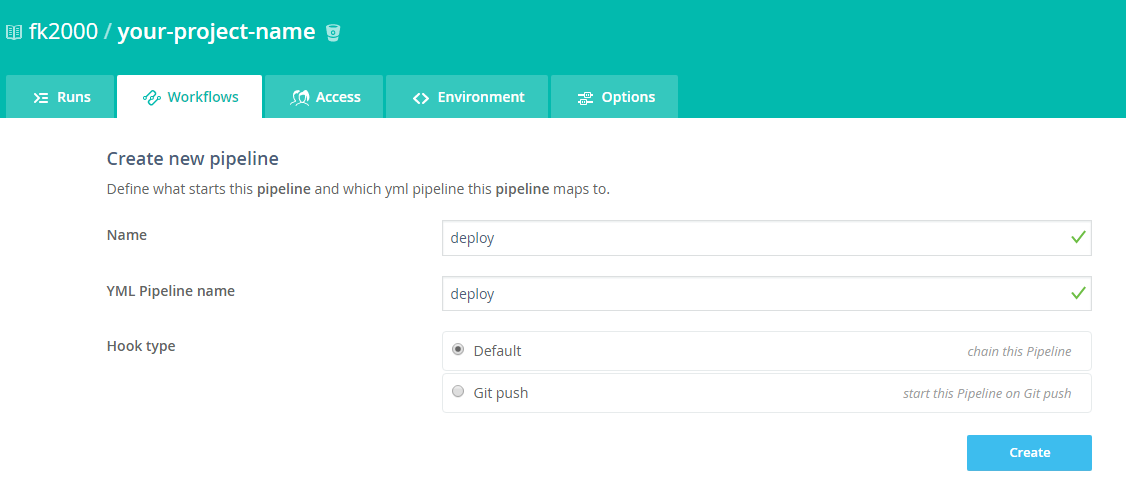
生成されたトークンを、wercker側の環境変数に登録するのですが、入力場所は「Workflows」の「Add new pipeline」をクリックした後の画面になります。
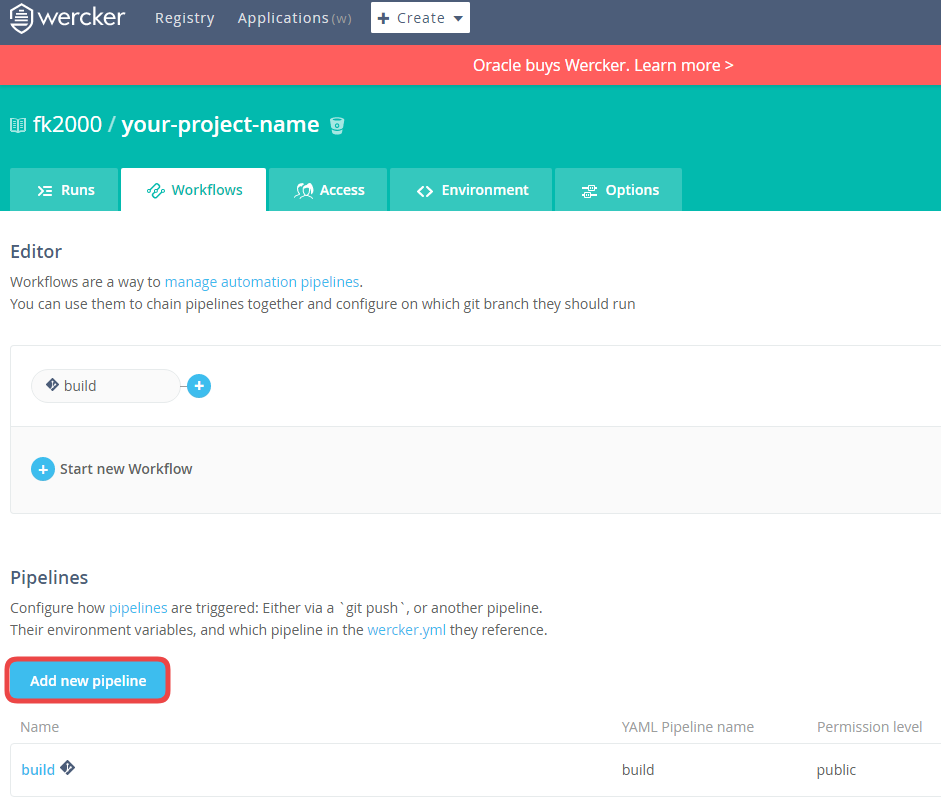
NameにもYML Pipeline nameにも「deploy」と記入します。Hook typeは「Default」のまま、「Create」ボタンをクリックします。
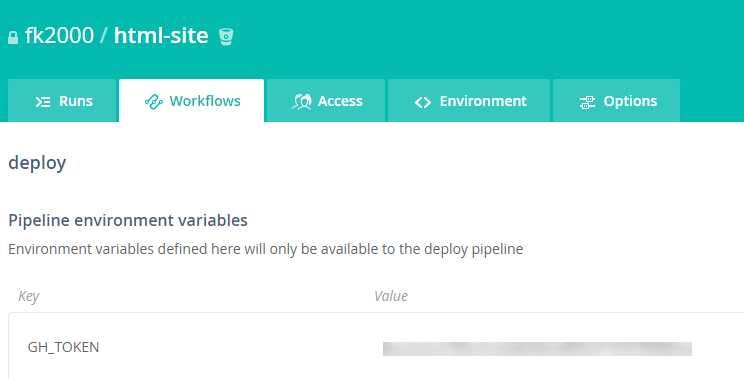
次の画面に現れる「Pipeline environment variables」に、githubで取得したトークンを登録します。
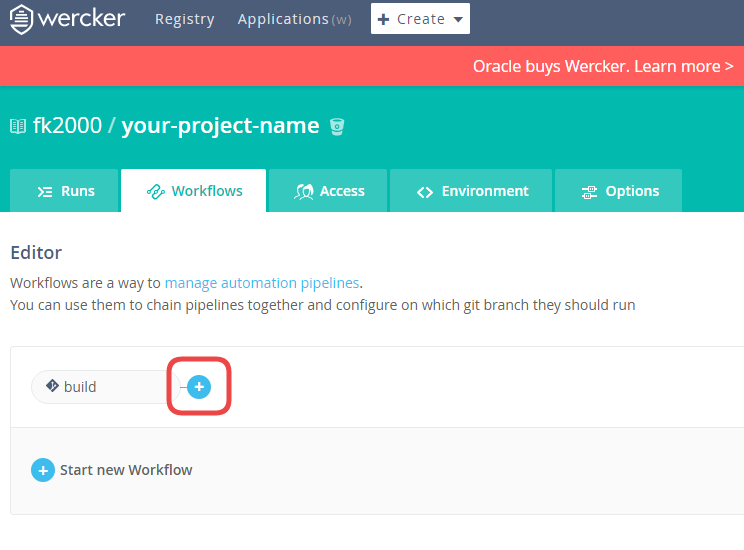
トークンを登録したら、一旦Workflowsタブをクリックして、buildの後ろのプラスのボタンをクリックして、作成したdeploy pipelineを追加します。
build pipelineが完了した際のブランチを指定するため、「master」と入力します。実行するpipelineとして「Excute pipeline」に「deploy」を選択し、「add」ボタンをクリックします。
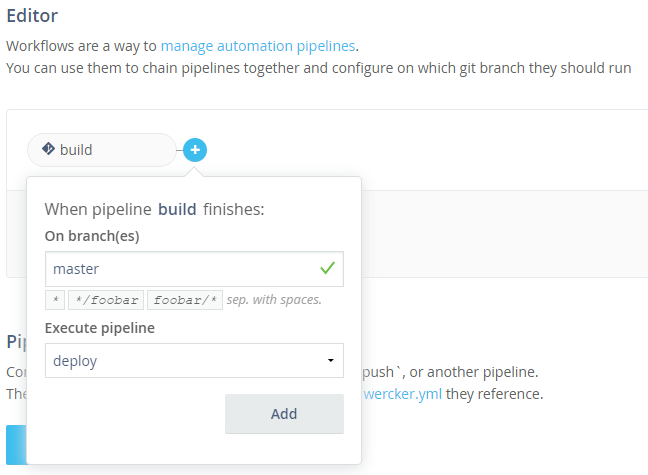
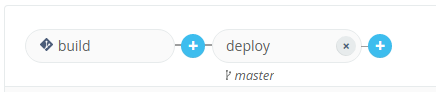
Workflow画面で、buildとdeployが連結したことが表示されます。
つぎにwercker.ymlの最下段に以下を追記して、pushしましょう。
tokenにはgithubで生成したトークンをwercker上に設定した環境変数「GH_TOKEN」を指定しています。
repoには、github上のリポジトリを「user/repository」形式で記述します。
+ deploy:
+   steps:
+     - install-packages:
+         packages: git ssh-client
+     - lukevivier/gh-pages@0.2.1:
+         token: $GH_TOKEN
+         repo: fk2000/html-site
+         branch: master
wercker上でbuild後にdeployが実行されます。

githubであらかじめgithub pagesの設定をしておくことで、パブリックリポジトリへのデプロイが完了した時点でgithub.ioでの公開されることとなります。
まとめ
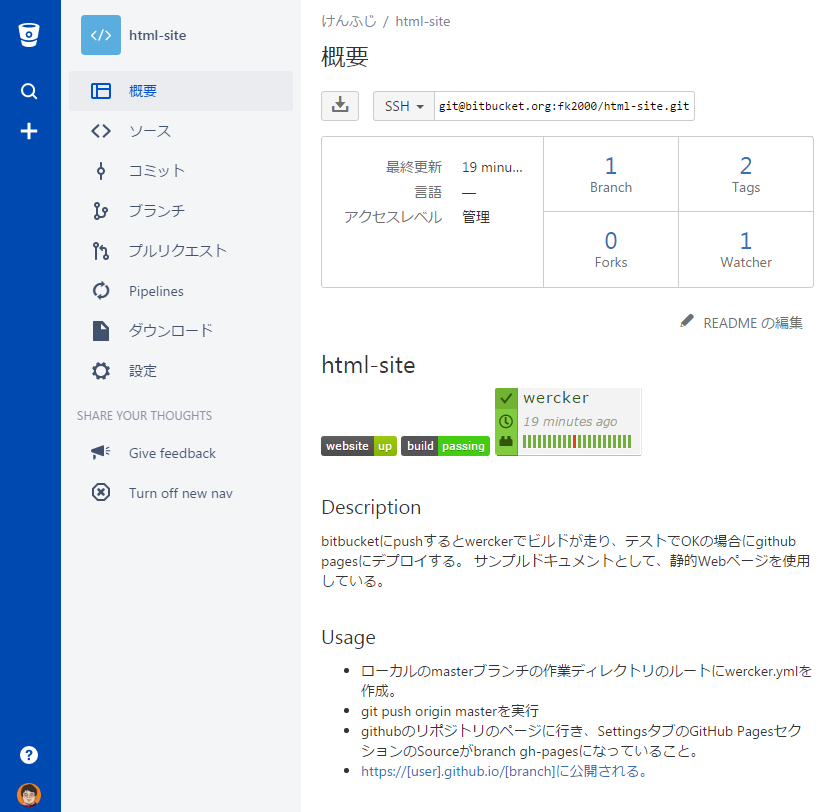
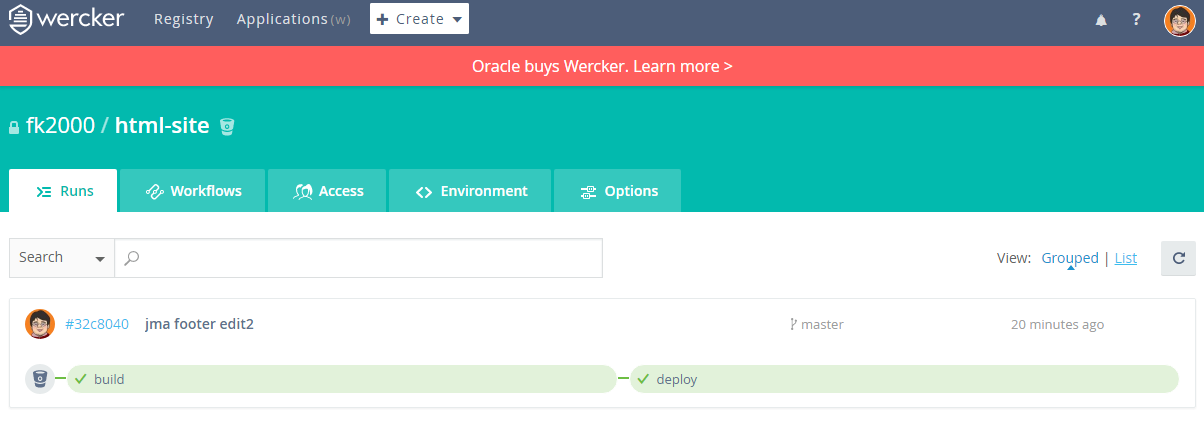
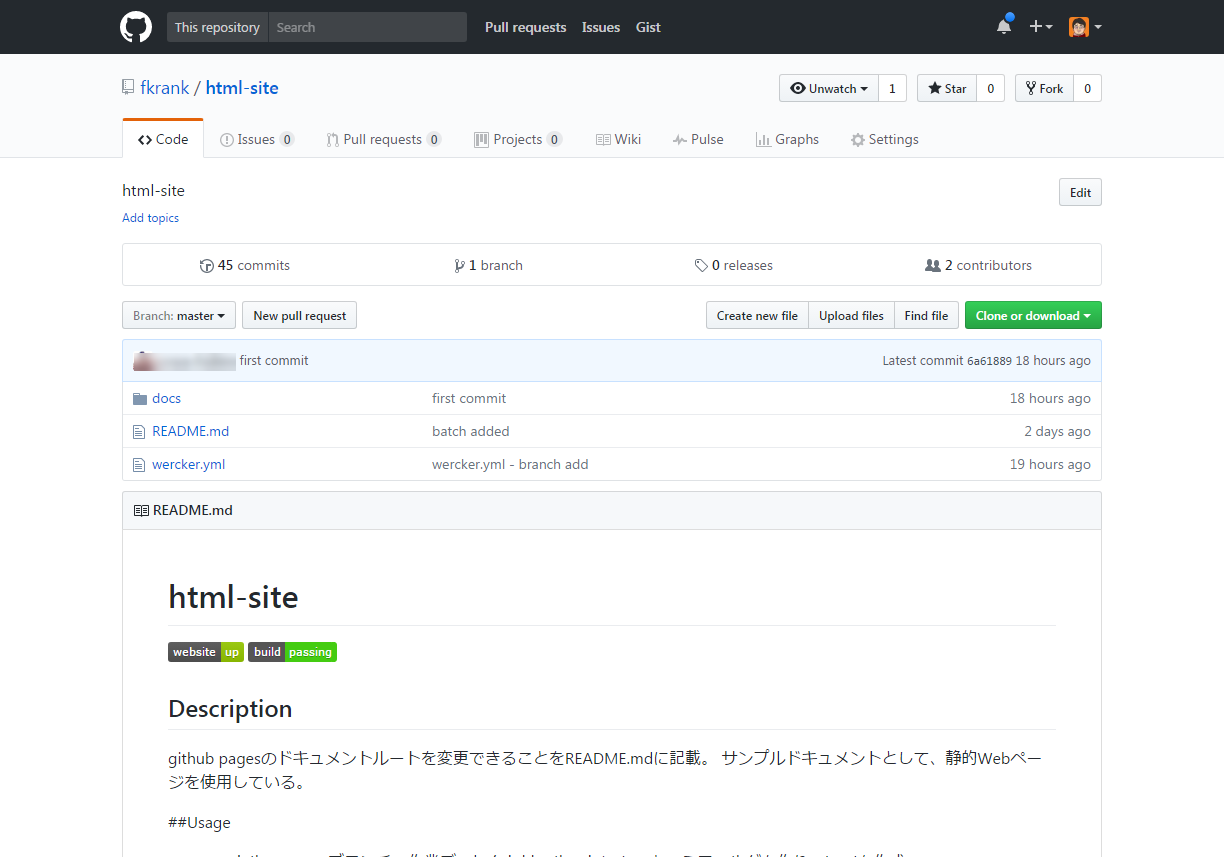
- bitbucket(非公開):https://bitbucket.org/fk2000/html-site/
- wercker(非公開):https://app.wercker.com/fk2000/html-site/
- ソースコード(公開): https://github.com/fkrank/html-site
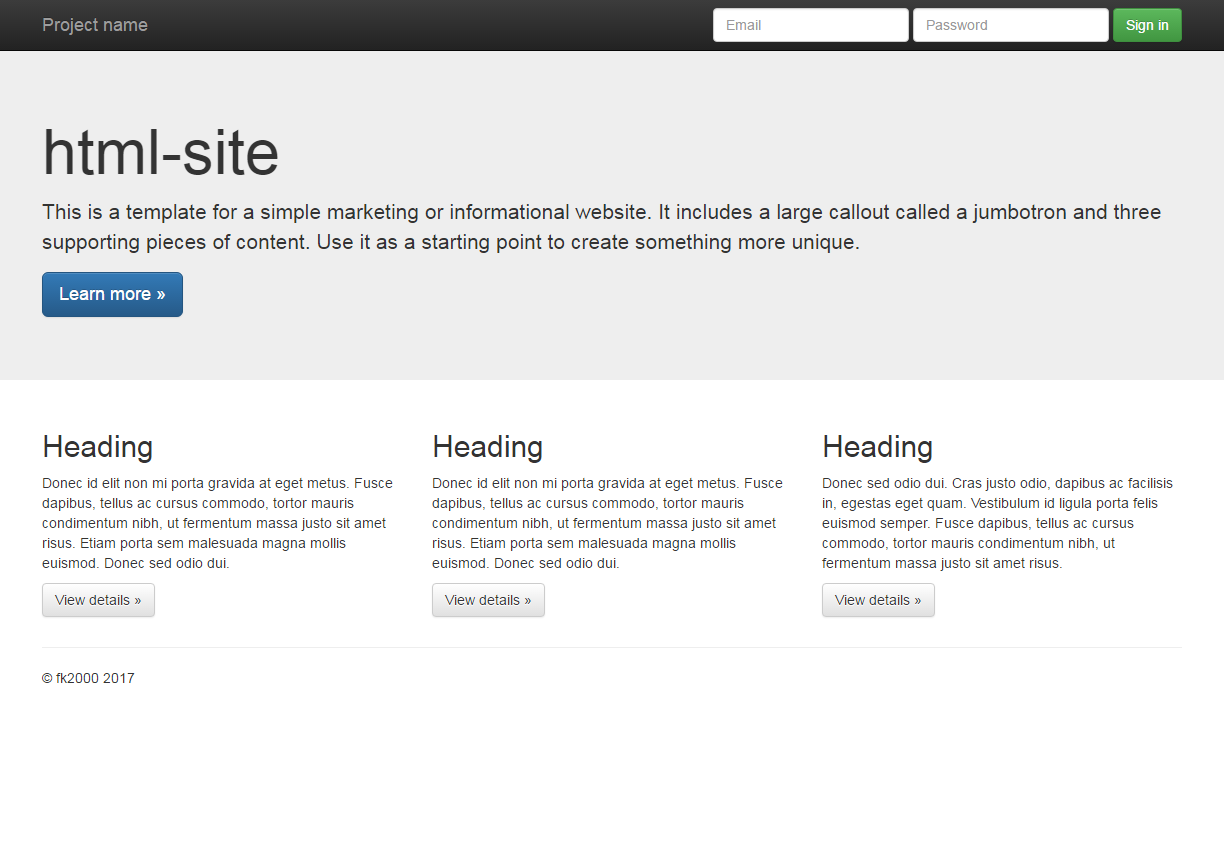
- 公開ページ: https://fk2000.github.io/html-site/
画面キャプチャー
bitbucket(非公開)
wercker(非公開)
ソースコード(公開)
公開ページ