皆さん、はじめまして。
仕事には直接関係ないけれど、効率良くやっていくのに役立ちそうなアレコレを書いていきたいと思います。
はじめに
今回は、WSL2にUbuntuを導入して、Dockerやsystemd、Xserverが動く環境を作ります。3部構成でやります。
背景
Webアプリ開発などしていると、ちょっとLinuxコマンド(例えばcurlとかjqとか)叩いてみたくなります。PCがWindows縛りだと、Hyper-Vに環境を作るなどしていたのですが、Windows Subsystem for Linux 2(以下、WSL2)が使える感じになってきました。
更にDocker Desktopが有償になったので、お手軽に用意できる実行環境としてもWSL2が大活躍です。
でも、systemctlが動かないとか、どうせならGUI使いたいとか、欲が出てきたので一式そろえてみることにしました。
環境
- OS : Windows 11 Pro / 21H2
- CPU : AMD Ryzen 5 PRO 4650G with Radeon Graphics
- RAM : 32 GB
- Terminal : Windows Terminal
ゴール
- WSL2にUbuntu-20.04をインストールする。<-本章はココ
- systemdが動くようにする(Genieの導入)。
- Dockerを使えるようにする。
- リモートデスクトップで接続できるようにする(xrdpの導入)。
上から順にやっていくと何となくWSLが使えるようになることを目指していますが、うまくいかない環境がある点についてもご了承ください。
準備
WSL2にUbuntu-20.04を導入するにあたり、カーネルのアップデートやWSL2の設定をしておきます。
管理者でTerminalを開いて、カーネルのupdateとwslの再起動を行います。
PS C:\Users\fjij> wsl --update
更新をチェック中...
更新をダウンロード中...
更新をインストール中...
この変更は、次回の WSL 再起動時に有効になります。強制的に再起動するには、'wsl --shutdown' を実行してください。
カーネル バージョン: 5.10.102.1
PS C:\Users\fjij> wsl --shutdown
導入
Ubuntu-20.04のインストール
通常ユーザー権限でTerminalを開いた後、install コマンドを実行します。-dオプションでUbuntu-20.04を指定します。
PS C:\Users\fjij> wsl --install -d Ubuntu-20.04
ダウンロード中: Ubuntu 20.04 LTS
[==============            25.4%                           ]
インストール中: Ubuntu 20.04 LTS
Ubuntu 20.04 LTS はインストールされました。
Ubuntu 20.04 LTS を起動しています...
PS C:\Users\fjij>
このあと、次のように別ウインドウが開くので初期設定を行います。
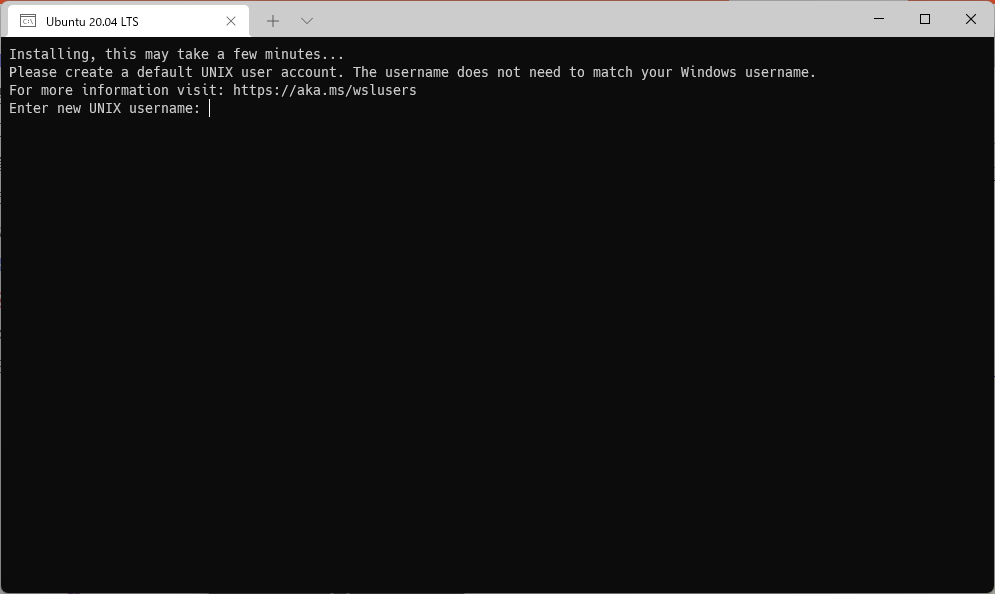
入力するべき内容は以下の通りです。
- Enter new UNIX username 作成するユーザ名
- New password: 作成するユーザーのパスワード
- Retype new password: パスワードの再入力
Installing, this may take a few minutes...
Please create a default UNIX user account. The username does not need to match your Windows username.
For more information visit: https://aka.ms/wslusers
Enter new UNIX username: fjij
New password:
Retype new password:
passwd: password updated successfully
Installation successful!
To run a command as administrator (user "root"), use "sudo <command>".
See "man sudo_root" for details.

Welcome to Ubuntu 20.04 LTS (GNU/Linux 5.10.102.1-microsoft-standard-WSL2 x86_64)

 * Documentation:  https://help.ubuntu.com
 * Management:     https://landscape.canonical.com
 * Support:        https://ubuntu.com/advantage

  System information as of Sat Mar 26 20:16:46 JST 2022

  System load:  0.06               Processes:             8
  Usage of /:   0.4% of 250.98GB   Users logged in:       0
  Memory usage: 1%                 IPv4 address for eth0: 172.25.153.214
  Swap usage:   0%

0 updates can be installed immediately.
0 of these updates are security updates.


The list of available updates is more than a week old.
To check for new updates run: sudo apt update


This message is shown once once a day. To disable it please create the
/home/fjij/.hushlogin file.
fjij@STELLA:~$
とりあえず、これでUbuntuが使えるようになります。
設定アレコレ
設定を自分好みに変更します。
- ログインメッセージを抑制する。再び表示するようにするには、ファイル
~/.hushloginを削除してください。
fjij@STELLA:~$ touch ~/.hushlogin
- visudoのエディタをnanoからviに戻す。途中でパスワードを聞かれるので、作成したユーザーのパスワードを入力してください。
fjij@STELLA:~$ sudo update-alternatives --set editor /usr/bin/vim.basic
[sudo] password for fjij:
update-alternatives: using /usr/bin/vim.basic to provide /usr/bin/editor (editor) in manual mode
- sudoでパスワード入力抑止。セキュリティを考慮すると良くはないので、利用する環境(例えば、外部からのネットワークアクセスが無く個人でしか利用できないPC、など)を考えて適用を決めてください。
fjij@STELLA:~$ sudo visudo
%sudoを以下のように編集します。
-   %sudo  ALL=(ALL:ALL) ALL
+   %sudo  ALL=(ALL:ALL) NOPASSWD:ALL
パッケージの更新とインストール
- パッケージを最新に更新
fjij@STELLA:~$ sudo apt update && sudo apt upgrade -y
Get:1 http://archive.ubuntu.com/ubuntu focal InRelease [265 kB]
Get:2 http://security.ubuntu.com/ubuntu focal-security InRelease [114 kB]
Get:3 http://archive.ubuntu.com/ubuntu focal-updates InRelease [114 kB]
Get:4 http://archive.ubuntu.com/ubuntu focal-backports InRelease [108 kB]
Get:5 http://archive.ubuntu.com/ubuntu focal/main amd64 Packages [970 kB]

- 省略 -

Processing triggers for man-db (2.9.1-1) ...
Processing triggers for initramfs-tools (0.136ubuntu6.7) ...
Setting up ubuntu-server (1.450.2) ...
Processing triggers for ca-certificates (20210119~20.04.2) ...
Updating certificates in /etc/ssl/certs...
0 added, 0 removed; done.
Running hooks in /etc/ca-certificates/update.d...
done.
Processing triggers for dbus (1.12.16-2ubuntu2.1) ...
fjij@STELLA:~$
- 日本語化
fjij@STELLA:~$ sudo apt -y install language-pack-ja manpages-ja manpages-ja-dev
Reading package lists... Done
Building dependency tree
Reading state information... Done

- 省略 -

Setting up language-pack-ja (1:20.04+20220211) ...
Setting up language-pack-ja-base (1:20.04+20220211) ...
Generating locales (this might take a while)...
  ja_JP.UTF-8... done
Generation complete.
Processing triggers for man-db (2.9.1-1) ...
fjij@STELLA:~$ sudo update-locale LANG=ja_JP.UTF8
fjij@STELLA:~$
- 使いそうなツールのインストール
fjij@STELLA:~$ sudo apt -y install build-essential linux-headers-generic libncurses-dev git screen zip net-tools
Reading package lists... Done
Building dependency tree
Reading state information... Done

- 省略 -

update-alternatives: using /usr/bin/g++ to provide /usr/bin/c++ (c++) in auto mode
Setting up build-essential (12.8ubuntu1.1) ...
Processing triggers for libc-bin (2.31-0ubuntu9.7) ...
Processing triggers for man-db (2.9.1-1) ...
Processing triggers for mime-support (3.64ubuntu1) ...
fjij@STELLA:~$
(その2へ続く)
Tips
WSL導入でハマりそうな点
Windows 11ではWSL2が使えるはずですが、過去にWSL1環境を利用した場合に、WSL2への移行が必要になることがあります。管理者でTerminalを開いて、以下の手順を試してください。
- Linux 用 Windows サブシステムを有効にする
PS C:\Users\fjij> dism.exe /online /enable-feature /featurename:Microsoft-Windows-Subsystem-Linux /all /norestart
- 仮想マシン プラットフォームの機能を有効にする
PS C:\Users\fjij> dism.exe /online /enable-feature /featurename:VirtualMachinePlatform /all /norestart
- WSL 2 を既定のバージョンとして設定する
PS C:\Users\fjij> wsl --set-default-version 2
ここで一旦PCを再起動してからUbuntuを導入してください。
(参考: https://docs.microsoft.com/ja-jp/windows/wsl/install-manual)