注)本稿は作者のメモ書きのため逐次更新、修正されます
環境
Mac OS X 10.10.3
gvmによるインストール
インストール
bash < <(curl -s -S -L https://raw.githubusercontent.com/moovweb/gvm/master/binscripts/gvm-installer)
初期設定
vi .bash_profile

[[ -s "$HOME/.gvm/scripts/gvm" ]] && source "$HOME/.gvm/scripts/gvm"

export GOPATH="$HOME/Works/gocode"

export PATH="$HOME/.gvm/bin:$PATH"
export PATH="$HOME/Works/gocode/bin:$PATH"
コマンド
# インストール可能なバージョン一覧
gvm listall
# バージョンを指定してインストール
gvm install go1.4.2
# バージョンを指定して利用開始(defaultオプションは任意)
gvm use go1.4.2 --default
ATOMによる開発
インストール
- オフィシャルサイトからダウンロード
- シェルコマンドatom、apmをインストール(アプリメニューから「Install Shell Commands」)
パッケージをインストール
apm install autocomplete-plus
apm install go-plus
go-plus初期設定
「Preferences > Packages > go-plus > Settings」から「GOPATH」と「Go Installation Path」を指定
- GOPATH設定例 ~/gocode
- Go Installation Path設定例
/Users/{USER}/.gvm/gos/go1.4.2/bin/go
GORTインストール
バイナリを適当な場所に置いてパスを通す
echo 'export PATH="$HOME/Works/bin:$PATH"' >> ~/.bash_profile
avrdudeをインストール
gort arduino install
gobotによるArduinoとの接続は、指定したポートを介してホストコンピュータから制御するFirmataプロトコルを使用します。そのため、予めArduinoにFirmataスケッチをアップロードしておく必要があります
以下のコマンドでアップロードを実施。ポート(/dev/tty.usbmodem1411)はホストコンピュータによって異なる値になる可能性があります
gort arduino upload firmata /dev/tty.usbmodem1411
GOBOTインストール
先にmercurialをインストール
brew install mercurial
gobotをインストール
go get -d -u github.com/hybridgroup/gobot/...
Arduinoとの接続
ソースコードはオフィシャルのサンプルを一部改修
mkdir -p github.com/fioas/gobot-example/arduino-led
vim github.com/fioas/gobot-example/arduino-led/main.go
github.com/fioas/gobot-example
package main

import (
	"time"

	"github.com/hybridgroup/gobot"
	"github.com/hybridgroup/gobot/platforms/firmata"
	"github.com/hybridgroup/gobot/platforms/gpio"
)

func main() {
	gbot := gobot.NewGobot()

	// Firmataプロトコルを使用。ポート指定はArudinoを接続しているホストコンピュータの環境に依存
	firmataAdaptor := firmata.NewFirmataAdaptor("arduino", "/dev/tty.usbmodem1411")

	// Arduinoのデジタル出力ピン番号を指定
	led := gpio.NewLedDriver(firmataAdaptor, "led", "13")

	// 1秒間隔でLEDを明滅
	work := func() {
		gobot.Every(1*time.Second, func() {
			// 指定ピンに対して交互にHIGH/LOWを出力
			led.Toggle()
		})
	}

	robot := gobot.NewRobot("bot",
		[]gobot.Connection{firmataAdaptor},
		[]gobot.Device{led},
		work,
	)

	gbot.AddRobot(robot)
	gbot.Start()
}
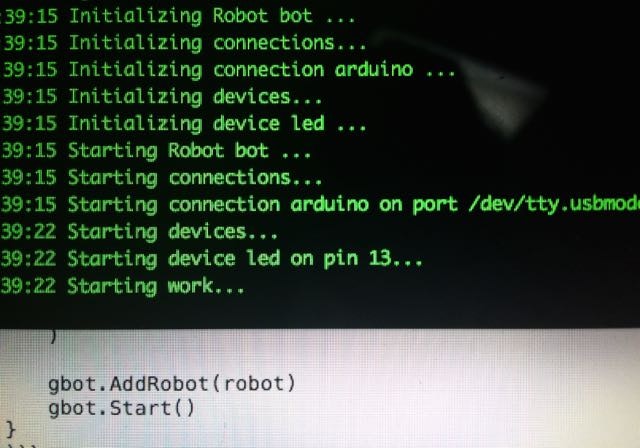
go install github.com/fioas/gobot-example/arduino-led
arduino-led
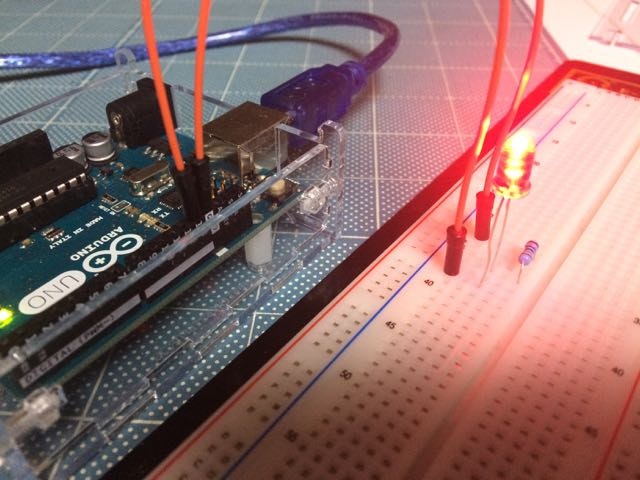
デジタル出力ピン13番から引き出してLEDに接続、抵抗を挟んでGNDに送っています
LEDの動作制御などはArduino専用というわけではないので、gobot/platforms/gpioのコードと一般的なArduino向けのコードを見比べながらオリジナルのドライバを作成するのは比較的容易な印象
(執筆中...)

