Mac上にある大量のスクリーンショットをリサイズしたい
プレビューAppを使ってのリサイズはさすがに手間です。
Automatorが使えれば良かったのですが挫折。
ポイントは大まか話に分けて以下の二点。
1.ファイルの取得と書き出し。
2.リサイズ。
Command Line Toolsアプリケーション初体験
iOSプログラマからXcodeを触り始めた私はCocoaプログラミングがわかりません。
どうやってFinder内のファイルを取得するのか。
フォルダってどう扱うの。
UIImageは使えない。->NSImageを使う。
@import AppKitしてあげないとエラーになる。
argc, argv[]ってなんだっけ。
0.ソースコード全て
main.c
# import <Foundation/Foundation.h>
@import AppKit;

int main(int argc, const char * argv[]) {
    @autoreleasepool {
        // insert code here...
        if (argc < 3) {
            NSLog(@"argment count error!");
            return -1;
        }
        //! フォルダパスの取得、
        NSString* importPath = [NSString stringWithUTF8String:argv[1]];
        NSString* exportPath = [NSString stringWithUTF8String:argv[2]];

        NSFileManager* fileManager = [NSFileManager defaultManager];
        NSArray* arrayFilePath = [fileManager contentsOfDirectoryAtPath:importPath error:nil];

        NSMutableArray* arrayfileImage = [[NSMutableArray alloc] init];
        for (NSString* fileName in arrayFilePath) {
            //! fileの拡張子を取得
            CFStringRef fileExtension = (__bridge CFStringRef) [fileName pathExtension];
            CFStringRef fileUTI = UTTypeCreatePreferredIdentifierForTag(kUTTagClassFilenameExtension, fileExtension, NULL);

            //! 画像全般を扱うならkUTTypeImage
            if (!UTTypeConformsTo(fileUTI, kUTTypeImage)) {
                NSLog(@"It's NOT an image");
                continue;
            }
            [arrayfileImage addObject:fileName];
        }

        //
        for (int i=0; i<[arrayfileImage count]; i++) {
            NSString* stringFileName = [arrayfileImage objectAtIndex:i];
            NSString* filePath = [NSString stringWithFormat:@"%@/%@", importPath, stringFileName];

            NSImage* imageOriginal;
            imageOriginal = [[NSImage alloc] initWithContentsOfFile:filePath];

            NSRect resize = NSMakeRect(0, 0, 640, 360);

            NSImage* newImage = [[NSImage alloc] initWithSize:NSMakeSize(resize.size.width, resize.size.height)];
            NSLog(@"resizeSize width = %f, height = %f", newImage.size.width, newImage.size.height);
            [newImage lockFocus];
            [imageOriginal drawInRect:resize
                             fromRect:NSMakeRect(0, 0, imageOriginal.size.width, imageOriginal.size.height)
                            operation:NSCompositingOperationSourceOver
                             fraction:1.0];
            [newImage unlockFocus];
            CGImageRef cgRef = [newImage CGImageForProposedRect:NULL
                                                        context:nil
                                                          hints:nil];
            NSBitmapImageRep *newRep = [[NSBitmapImageRep alloc] initWithCGImage:cgRef];

            [newRep setSize:[newImage size]];   // if you want the same resolution

            NSData *data = [newRep representationUsingType: NSPNGFileType
                                                properties: [NSDictionary
                                                             dictionaryWithObjectsAndKeys:[NSNumber numberWithFloat:2.0],
                                                             NSImageCompressionFactor, nil]];

            [data writeToFile:[NSString stringWithFormat:@"%@/resize%d.png",exportPath,i] atomically: NO];
        }
    }
    return 0;
}
1.フォルダ内のファイルの取得とリサイズファイルのエクスポート
Terminal.appで実行するので実行方法としては以下のようにする。
app importフォルダパス exportフォルダパス
@import AppKit; // for NSImage
        if (argc < 3) {
            NSLog(@"argment count error!");
            return -1;
        }
        //! フォルダパスの取得、
        NSString* importPath = [NSString stringWithUTF8String:argv[1]];
        NSString* exportPath = [NSString stringWithUTF8String:argv[2]];
2.フォルダ内のファイルをNSArrayに格納
        NSFileManager* fileManager = [NSFileManager defaultManager];
        NSArray* arrayFilePath = [fileManager contentsOfDirectoryAtPath:importFolderPath error:nil];
3.ファイルの拡張子がimage系のみを選別して取得
        NSMutableArray* arrayfileImage = [[NSMutableArray alloc] init];
        for (NSString* fileName in arrayFilePath) {
            //! fileの拡張子を取得
            CFStringRef fileExtension = (__bridge CFStringRef) [fileName pathExtension];
            CFStringRef fileUTI = UTTypeCreatePreferredIdentifierForTag(kUTTagClassFilenameExtension, fileExtension, NULL);

            //! 画像全般を扱うならkUTTypeImage
            if (!UTTypeConformsTo(fileUTI, kUTTypeImage)) {
                NSLog(@"It's NOT an image");
                continue;
            }
            [arrayfileImage addObject:fileName];
        }
4.画像の縮小とエクスポートフォルダへの書き込み
縮小後は640x360(retinaだと1280x720)のサイズに、ファイル名はresize1.png, resize2.pngとなるようにしてます。
        for (int i=0; i<[arrayfileImage count]; i++) {
            NSString* stringFileName = [arrayfileImage objectAtIndex:i];
            NSString* filePath = [NSString stringWithFormat:@"%@/%@", importFolderPath, stringFileName];

            NSImage* imageOriginal;
            imageOriginal = [[NSImage alloc] initWithContentsOfFile:filePath];

            NSRect resize = NSMakeRect(0, 0, 640, 360);

            NSImage* newImage = [[NSImage alloc] initWithSize:NSMakeSize(resize.size.width, resize.size.height)];
            NSLog(@"resizeSize width = %f, height = %f", newImage.size.width, newImage.size.height);
            [newImage lockFocus];
            [imageOriginal drawInRect:resize
                             fromRect:NSMakeRect(0, 0, imageOriginal.size.width, imageOriginal.size.height)
                            operation:NSCompositingOperationSourceOver
                             fraction:1.0];
            [newImage unlockFocus];
            CGImageRef cgRef = [newImage CGImageForProposedRect:NULL
                                                        context:nil
                                                          hints:nil];
            NSBitmapImageRep *newRep = [[NSBitmapImageRep alloc] initWithCGImage:cgRef];

            [newRep setSize:[newImage size]];   // if you want the same resolution

            NSData *data = [newRep representationUsingType: NSPNGFileType
                                                properties: [NSDictionary
                                                             dictionaryWithObjectsAndKeys:[NSNumber numberWithFloat:2.0],
                                                             NSImageCompressionFactor, nil]];

            [data writeToFile:[NSString stringWithFormat:@"%@/resize%d.png",exportFolderPath,i] atomically: NO];
        }
使い方
アプリをビルドします。
実体をTerminal.appにドラッグアンドドロップします。
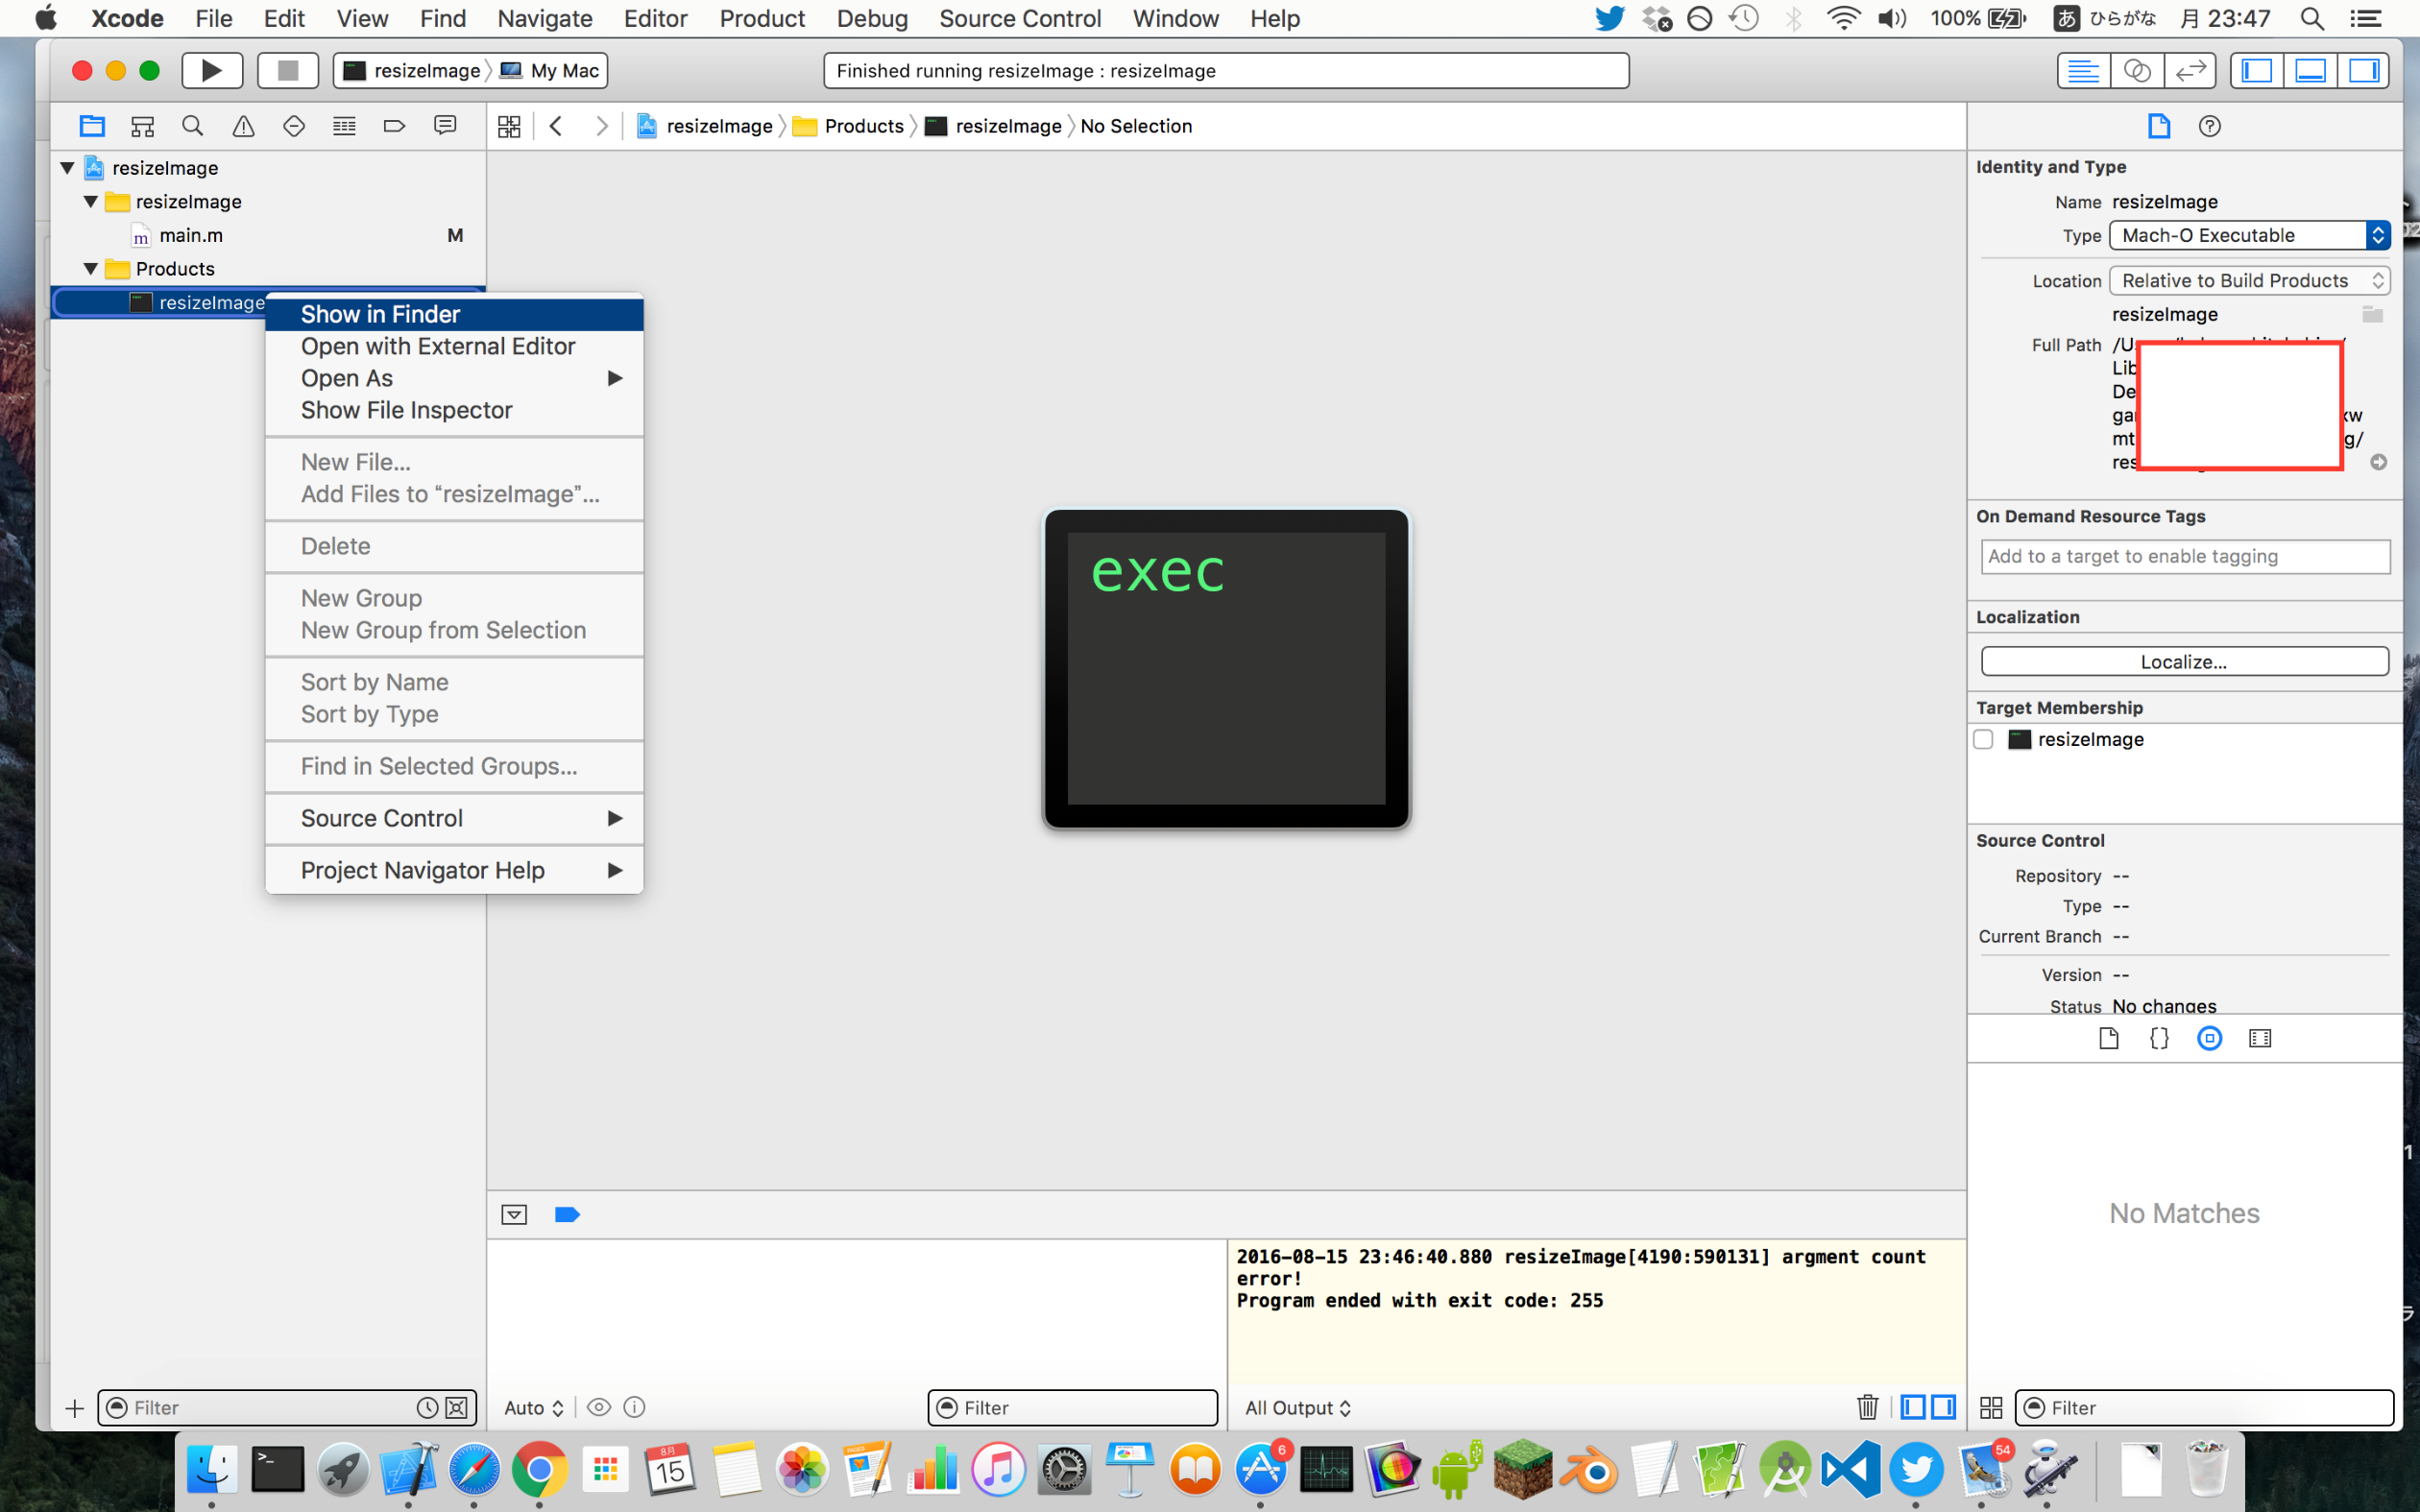
画像がたんまり入ったimportフォルダもD&Dします。
空のexportフォルダを作りおなじようにします。
実行するとexportフォルダ内にresize1.png以下が生成されるとおもいます。
PNGファイルのみテスト済みです。