Amazon EBSに保存された任意のディレクトリ構造を持つデータファイルをrsyncでOCI ブロック・ボリュームに移行する手順を紹介します。
前提条件
AWS側:LinuxのEC2、EBSの構築
OCI側:Linuxのコンピュート・インスタンス、ブロック・ボリュームの構築
移行したいサンプルワークロード

移行手順
- 移行元のEBSをEC2にアタッチ
- 任意のディレクトリ構造を持つダミーデータファイルの作成
- 移行先のブロック・ボリュームをコンピュート・インスタンスにアタッチ
- コンピュート・インスタンスでrsyncを実行し、データファイルをEBSからブロック・ボリュームに移行
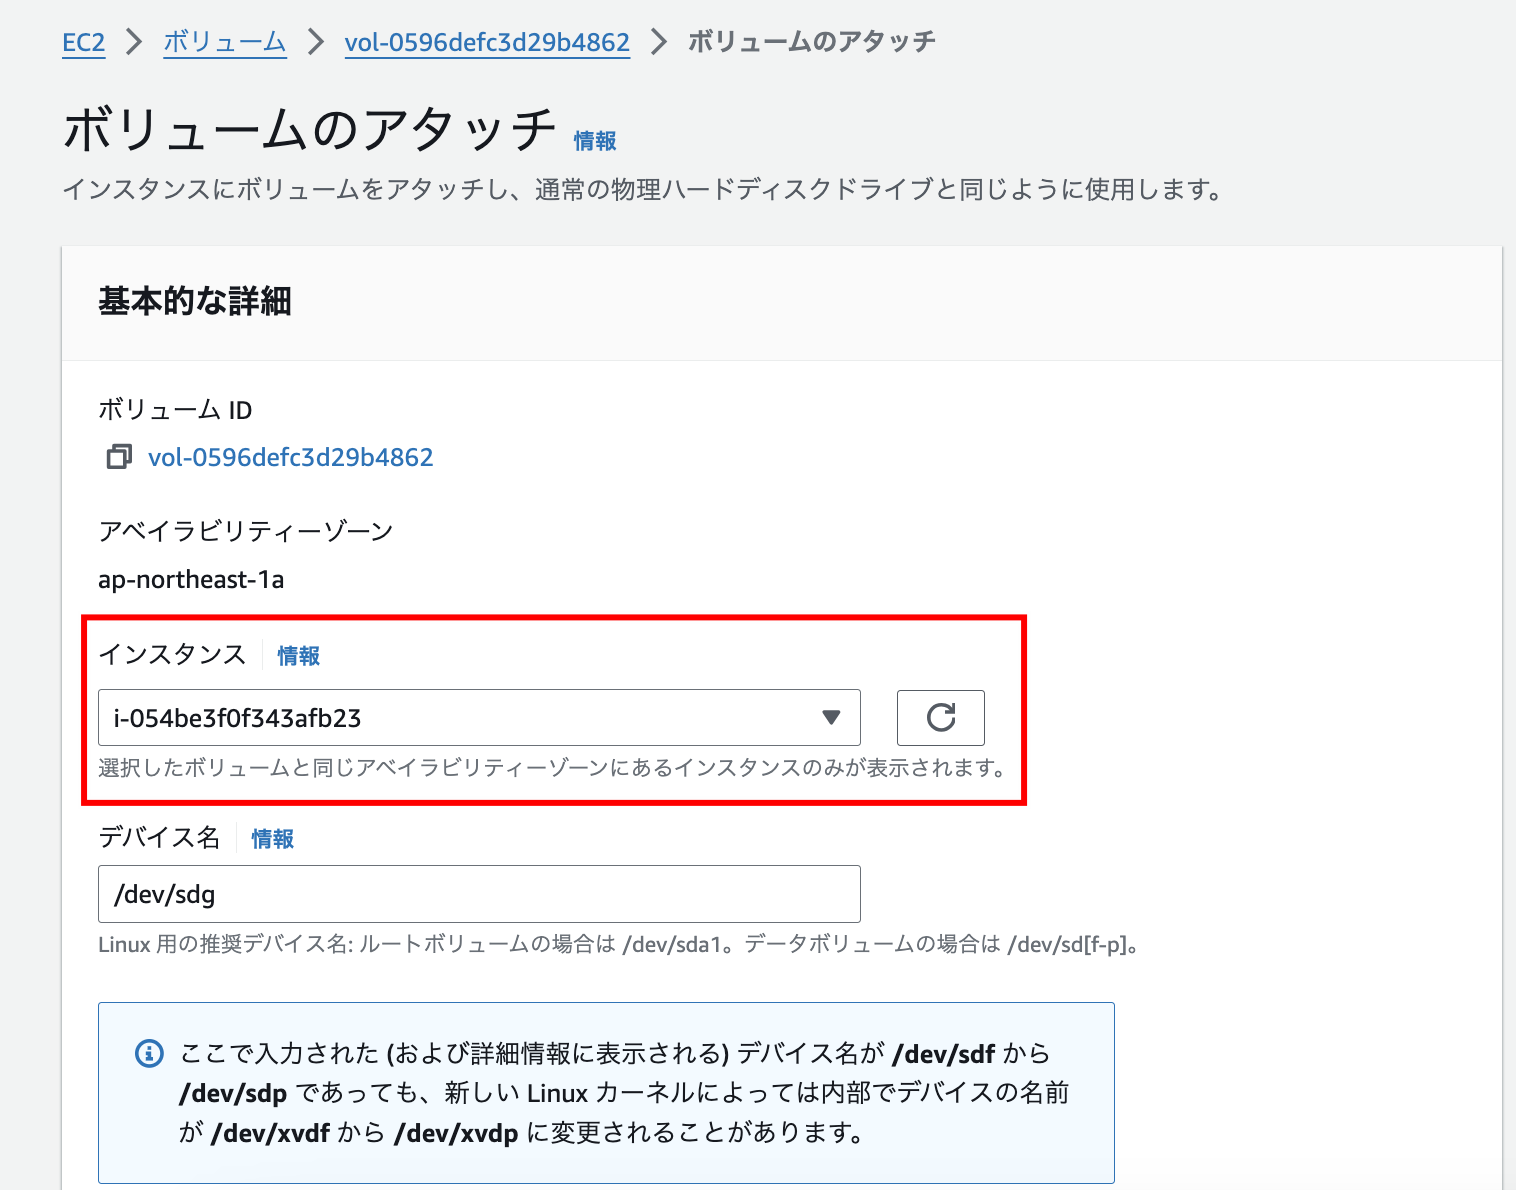
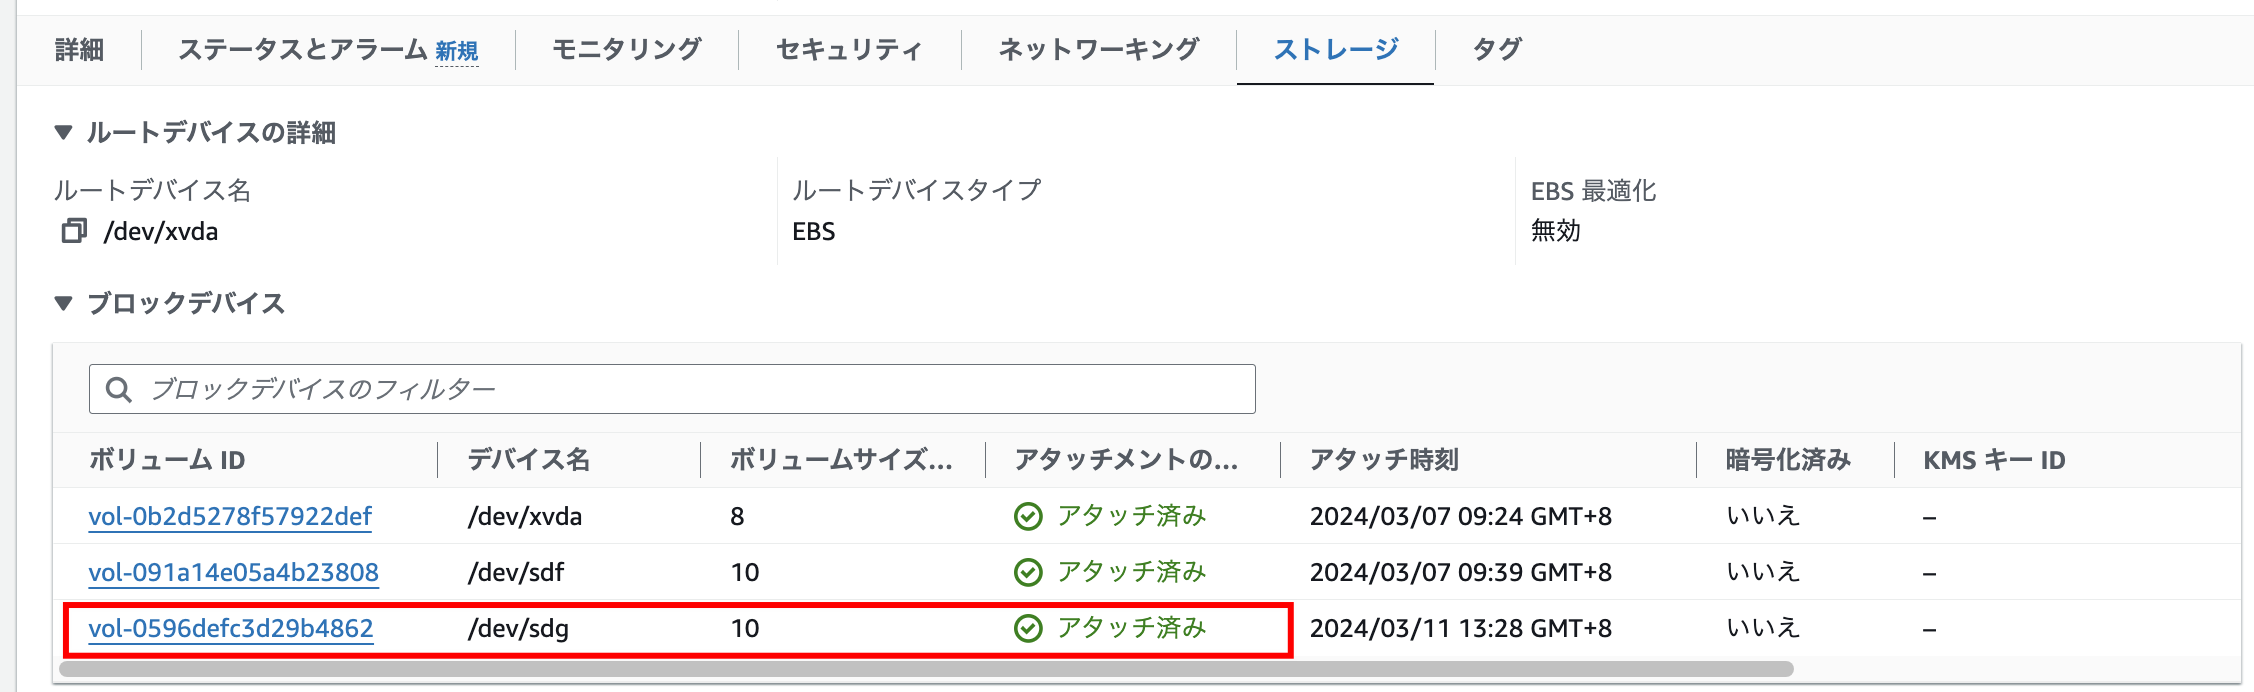
1. 移行元のEBSをEC2にアタッチ
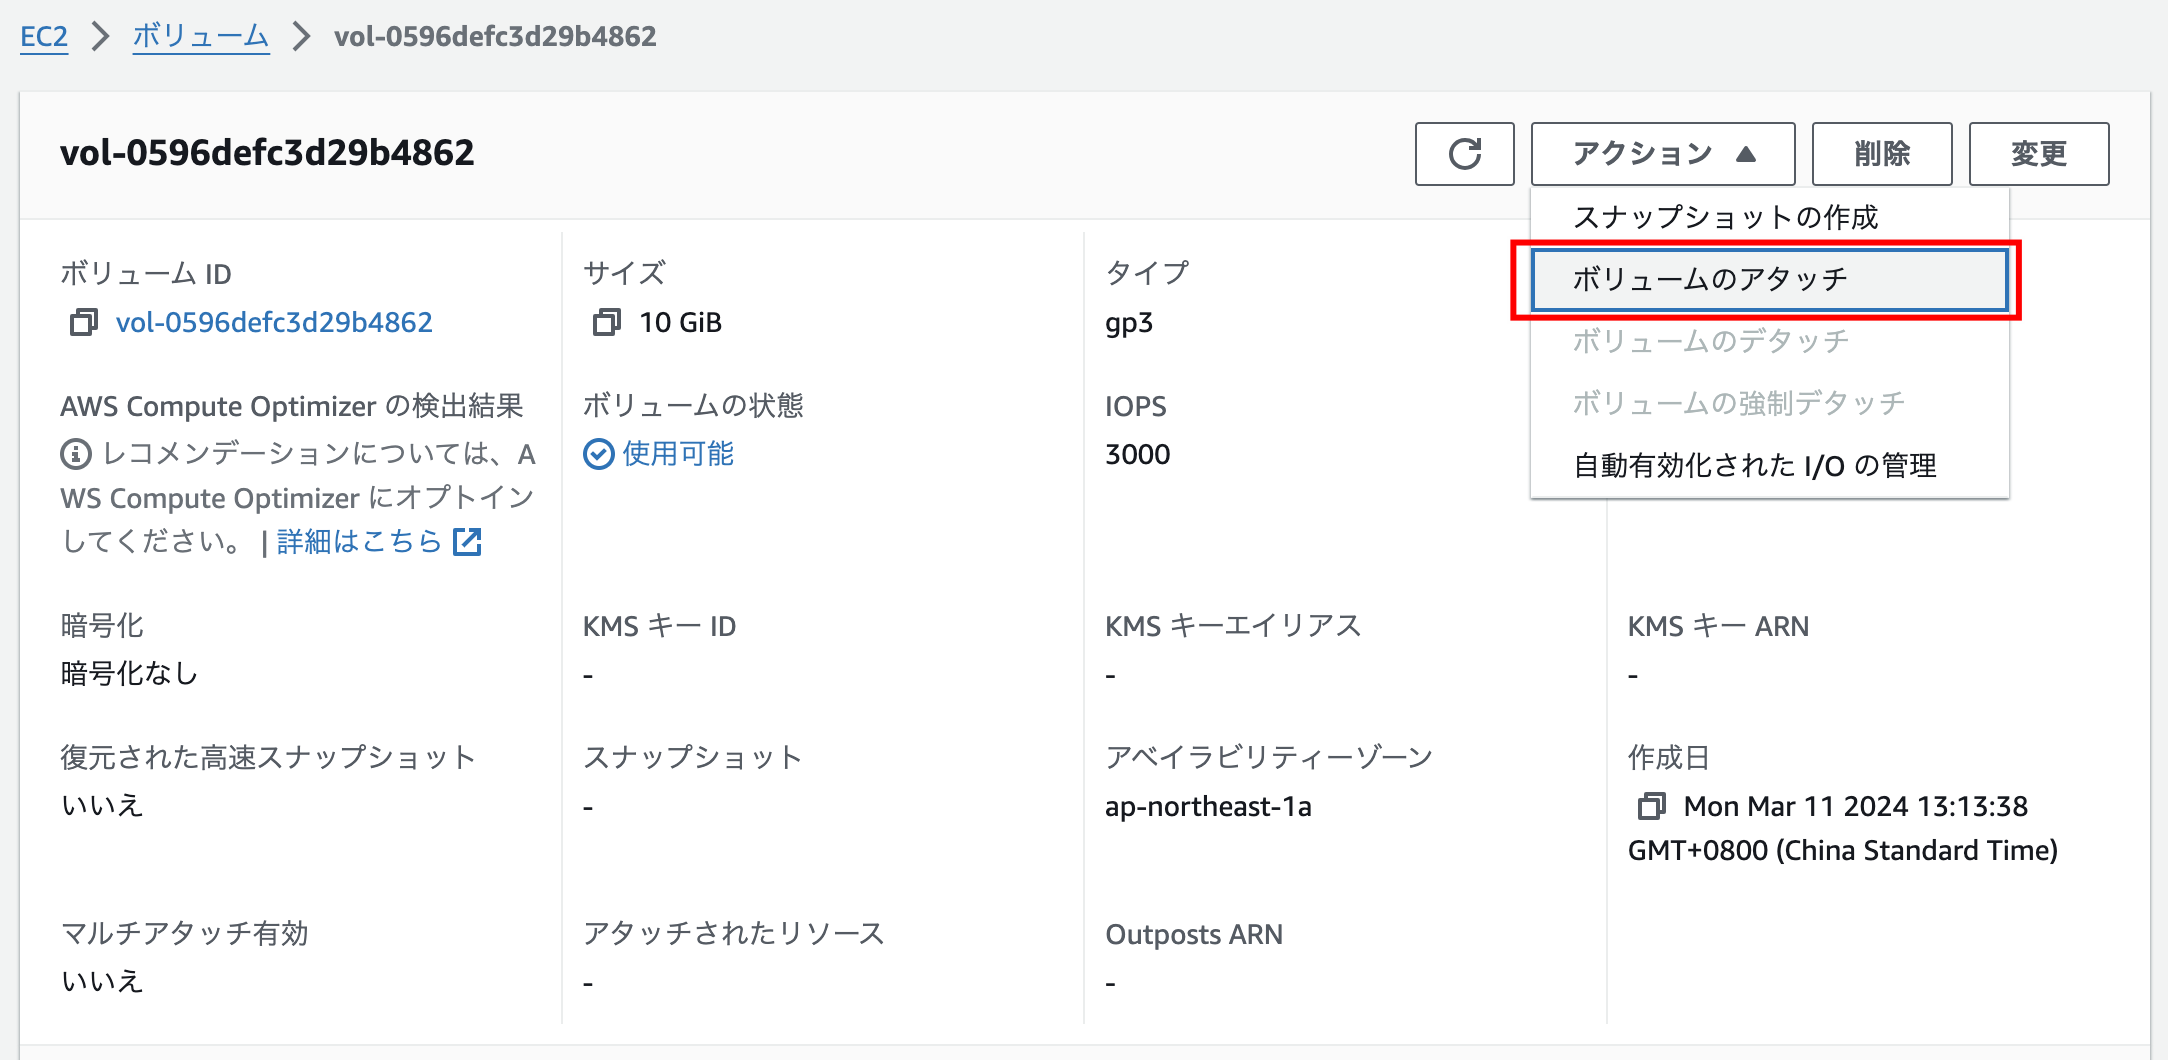
アタッチする対象のEC2を選択します。
2. 任意のディレクトリ構造を含めたダミーデータファイルの作成
SSHでEC2にログインし、rootユーザーでfdisk -lコマンドを使用して、新しいEBSが正常にアタッチされたかどうかを確認します。
ディスク/dev/xvdgが表示されます。
[root@ip-10-1-3-177 ec2-user]# fdisk -l
Disk /dev/xvda: 8 GiB, 8589934592 bytes, 16777216 sectors
Units: sectors of 1 * 512 = 512 bytes
Sector size (logical/physical): 512 bytes / 512 bytes
I/O size (minimum/optimal): 512 bytes / 512 bytes
Disklabel type: gpt
Disk identifier: 44112016-36E3-4A7E-9EDC-BD3A1CE32D7B

Device       Start      End  Sectors Size Type
/dev/xvda127 22528    24575     2048   1M BIOS boot
/dev/xvda128  2048    22527    20480  10M EFI System

Partition table entries are not in disk order.

Disk /dev/xvdg: 10 GiB, 10737418240 bytes, 20971520 sectors
Units: sectors of 1 * 512 = 512 bytes
Sector size (logical/physical): 512 bytes / 512 bytes
I/O size (minimum/optimal): 512 bytes / 512 bytes
fdisk /dev/xvdgコマンドを使用してEBSのパーティションを作成します。n、p、wを入力する必要があるため、下記をご参考ください。
[root@ip-10-1-3-177 ec2-user]# fdisk /dev/xvdg

Welcome to fdisk (util-linux 2.37.4).
Changes will remain in memory only, until you decide to write them.
Be careful before using the write command.

Device does not contain a recognized partition table.
Created a new DOS disklabel with disk identifier 0x52ad734c.

Command (m for help): n
Partition type
   p   primary (0 primary, 0 extended, 4 free)
   e   extended (container for logical partitions)
Select (default p): p
Partition number (1-4, default 1):
First sector (2048-20971519, default 2048):
Last sector, +/-sectors or +/-size{K,M,G,T,P} (2048-20971519, default 20971519):

Created a new partition 1 of type 'Linux' and of size 10 GiB.

Command (m for help): w
The partition table has been altered.
Calling ioctl() to re-read partition table.
Syncing disks.
fdisk -lを実行して、パーティションしたディスクの名前を特定します。
[root@ip-10-1-3-177 ec2-user]# fdisk -l
省略です。

Disk /dev/xvdg: 10 GiB, 10737418240 bytes, 20971520 sectors
Units: sectors of 1 * 512 = 512 bytes
Sector size (logical/physical): 512 bytes / 512 bytes
I/O size (minimum/optimal): 512 bytes / 512 bytes
Disklabel type: dos
Disk identifier: 0x52ad734c

Device     Boot Start      End  Sectors Size Id Type
/dev/xvdg1       2048 20971519 20969472  10G 83 Linux
mkfs -t ext4 /dev/xvdg1を実行して、ファイルシステムを構築します。
[root@ip-10-1-3-177 ec2-user]# mkfs -t ext4 /dev/xvdg1
mke2fs 1.46.5 (30-Dec-2021)
Creating filesystem with 2621184 4k blocks and 655360 inodes
Filesystem UUID: 2ca13214-41a9-4ef6-a467-88531ace8fc8
Superblock backups stored on blocks:
	32768, 98304, 163840, 229376, 294912, 819200, 884736, 1605632

Allocating group tables: done
Writing inode tables: done
Creating journal (16384 blocks): done
Writing superblocks and filesystem accounting information: done
またmkdir /dev/databaseTestでディレクトリを作成し、mount /dev/xvdg1 /dev/databaseTestを実行して、構築したファイルシステムをディレクトリにマウントします。
[root@ip-10-1-3-177 ec2-user]# mkdir /dev/databaseTest
[root@ip-10-1-3-177 ec2-user]# mount /dev/xvdg1 /dev/databaseTest
最後にdf -hでマウントした結果を確認し、ダミのテストデータdb.dump、db.csvを作成します。
[root@ip-10-1-3-177 ec2-user]# df -h
Filesystem      Size  Used Avail Use% Mounted on
devtmpfs        4.0M  8.0K  4.0M   1% /dev
省略です。
/dev/xvdg1      9.8G   24K  9.3G   1% /dev/databaseTest
[root@ip-10-1-3-177 dev]# cd /dev/databaseTest
[root@ip-10-1-3-177 databaseTest]# echo "これはダミーデータのダンプデータです。" > db.dump
[root@ip-10-1-3-177 databaseTest]# echo "id,name,age" > db.csv
echo "1,山田さん,30" >> db.csv
echo "2,鈴木さん,25" >> db.csv
[root@ip-10-1-3-177 databaseTest]# ll
total 24
-rw-r--r--. 1 root root    48 Mar 11 06:29 db.csv
-rw-r--r--. 1 root root    55 Mar 11 06:28 db.dump
drwx------. 2 root root 16384 Mar 11 06:17 lost+found
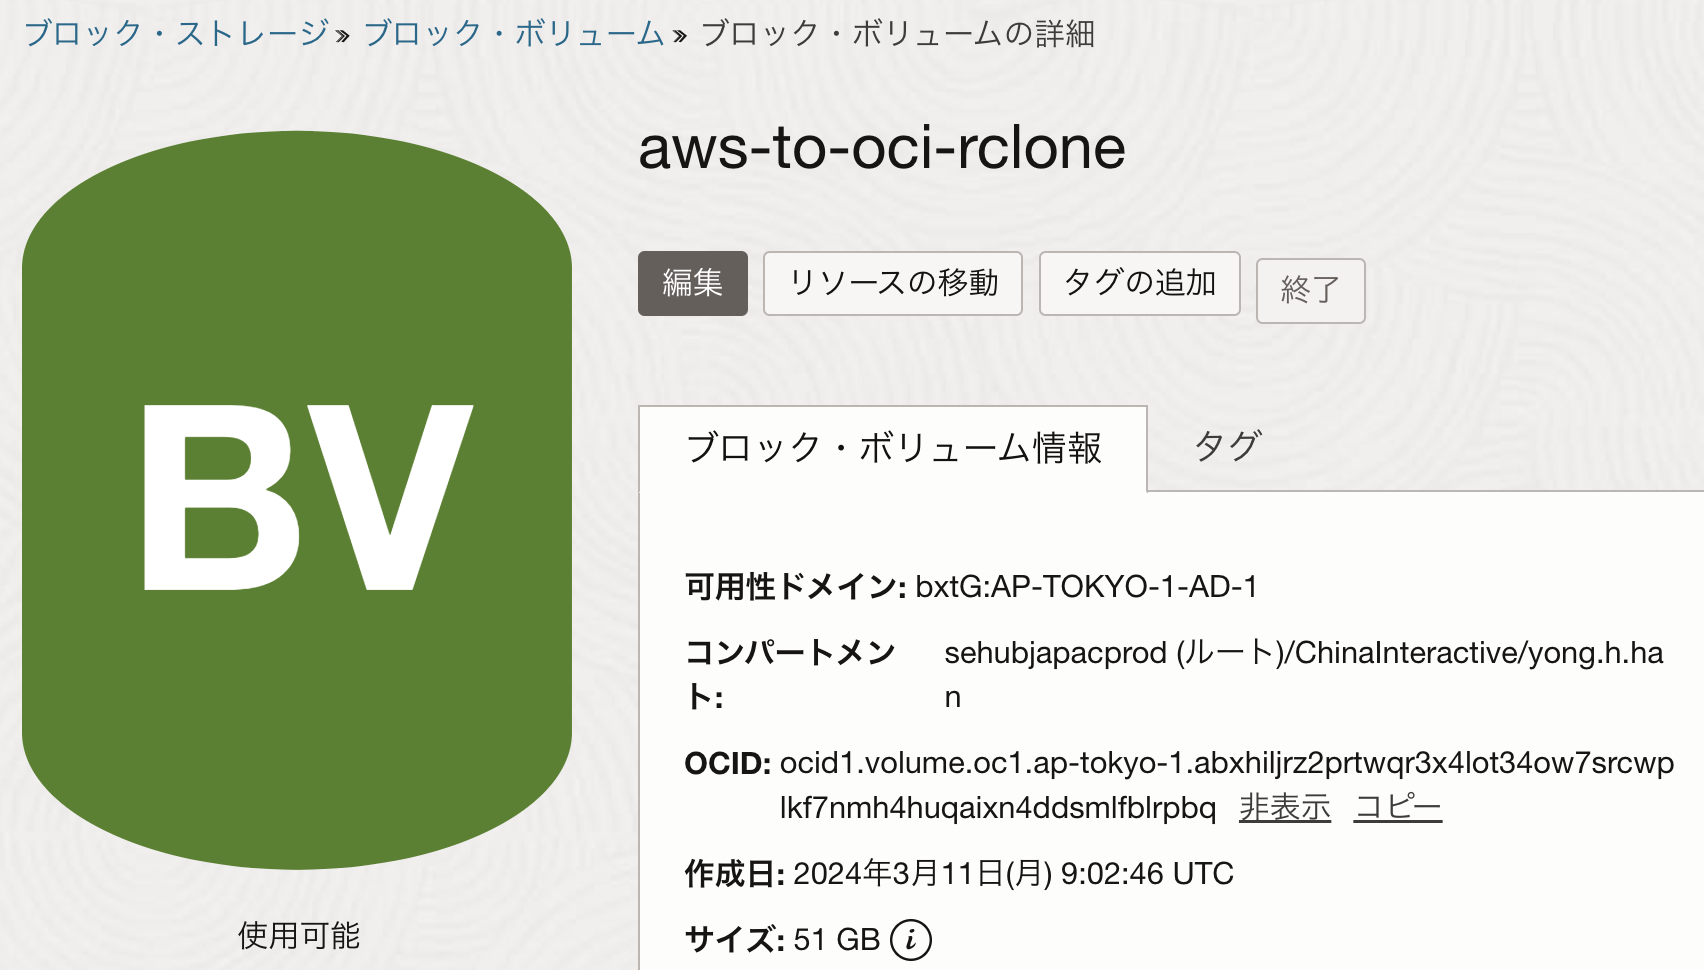
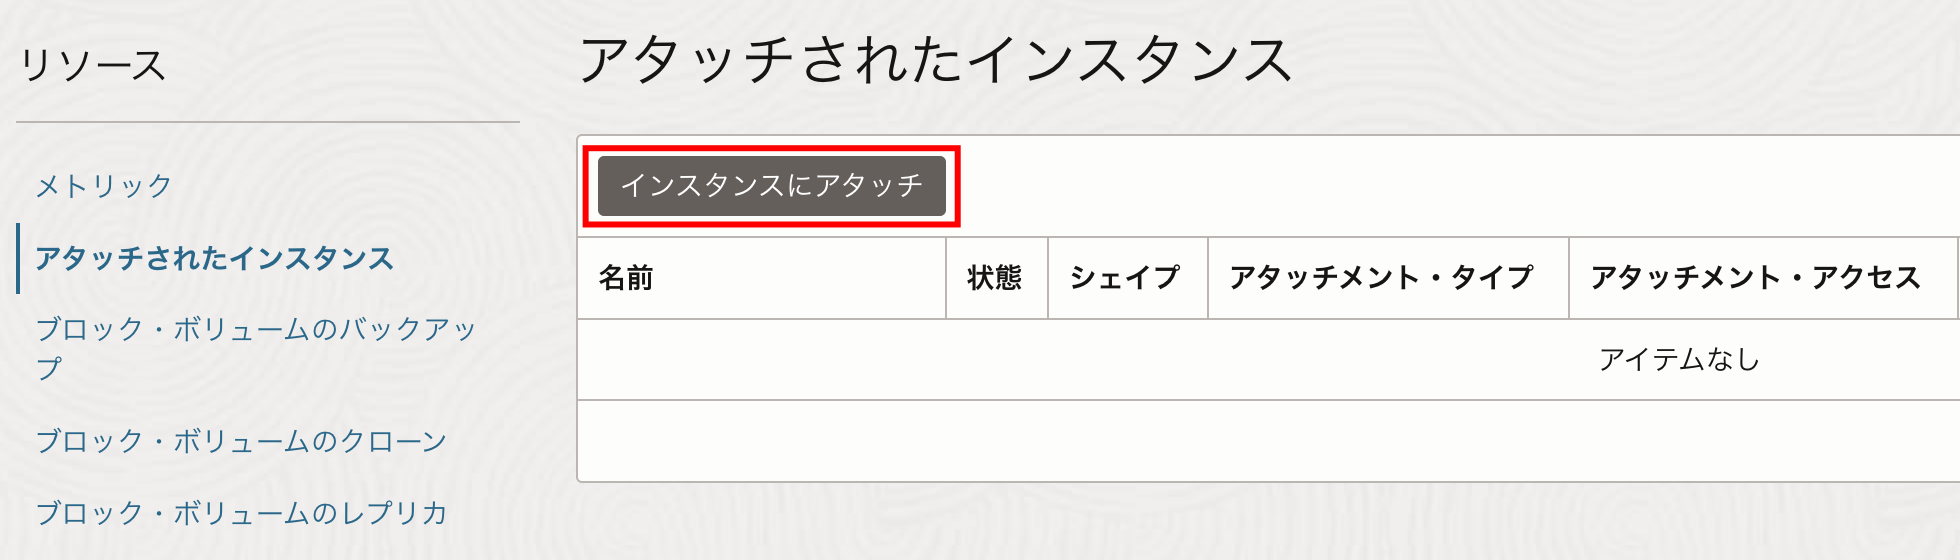
3. 移行先のブロック・ボリュームをコンピュート・インスタンスにアタッチ
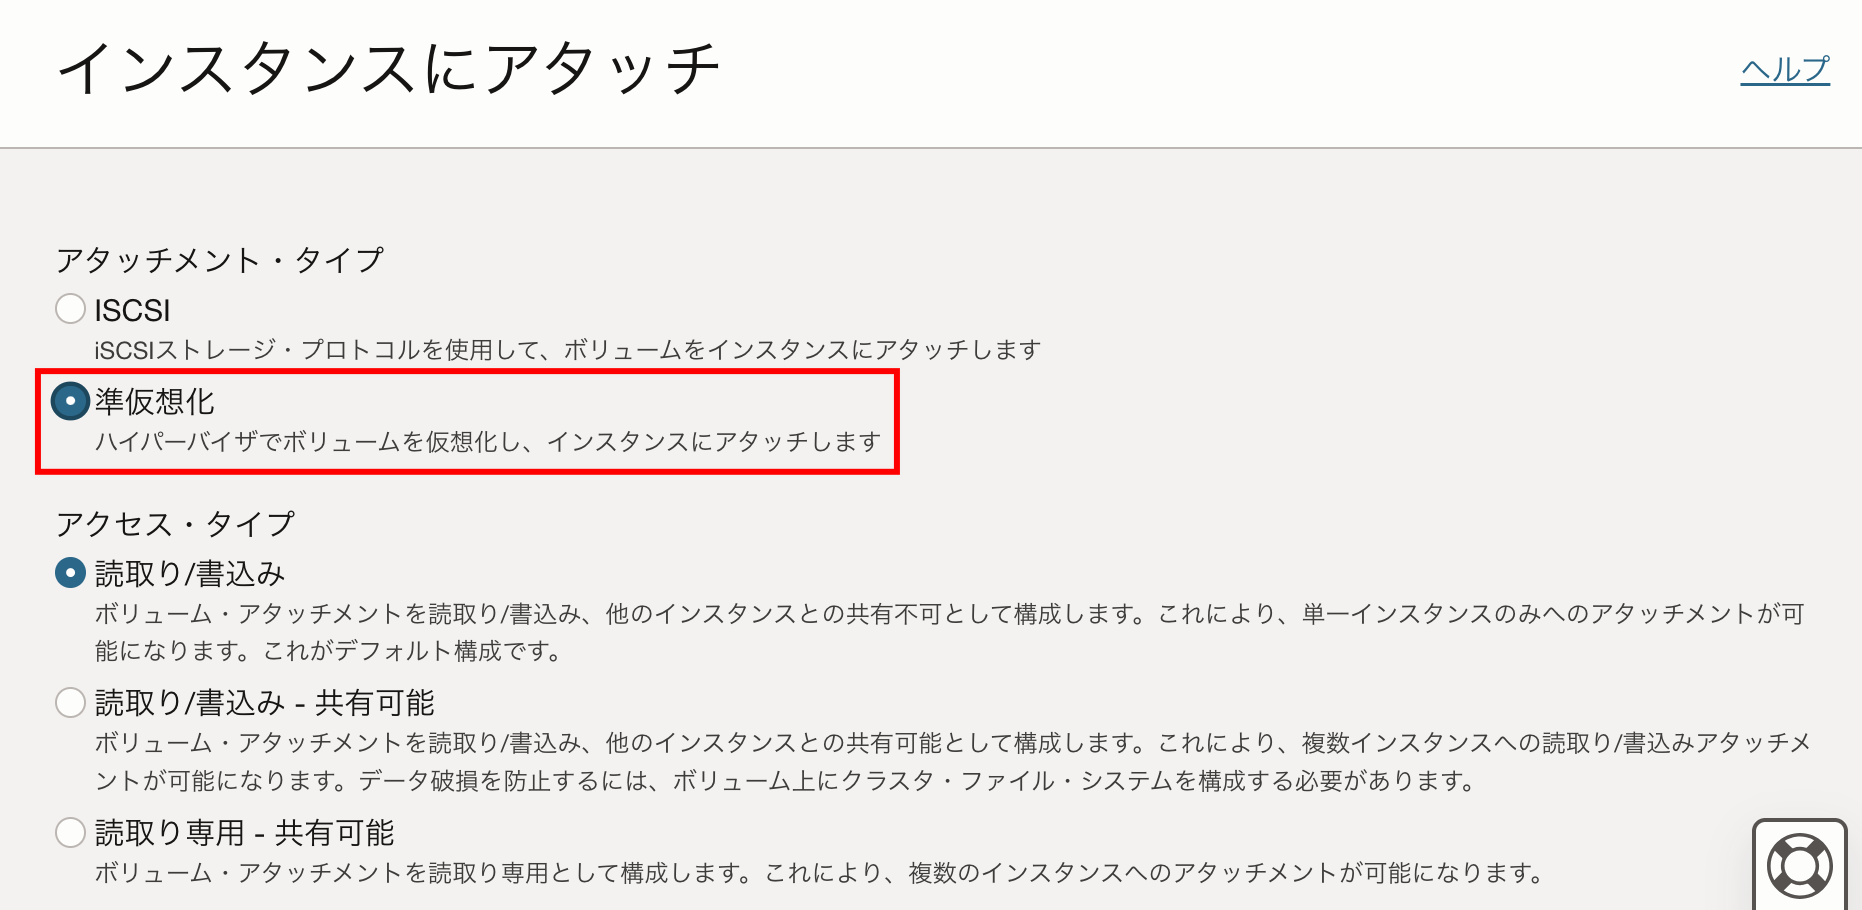
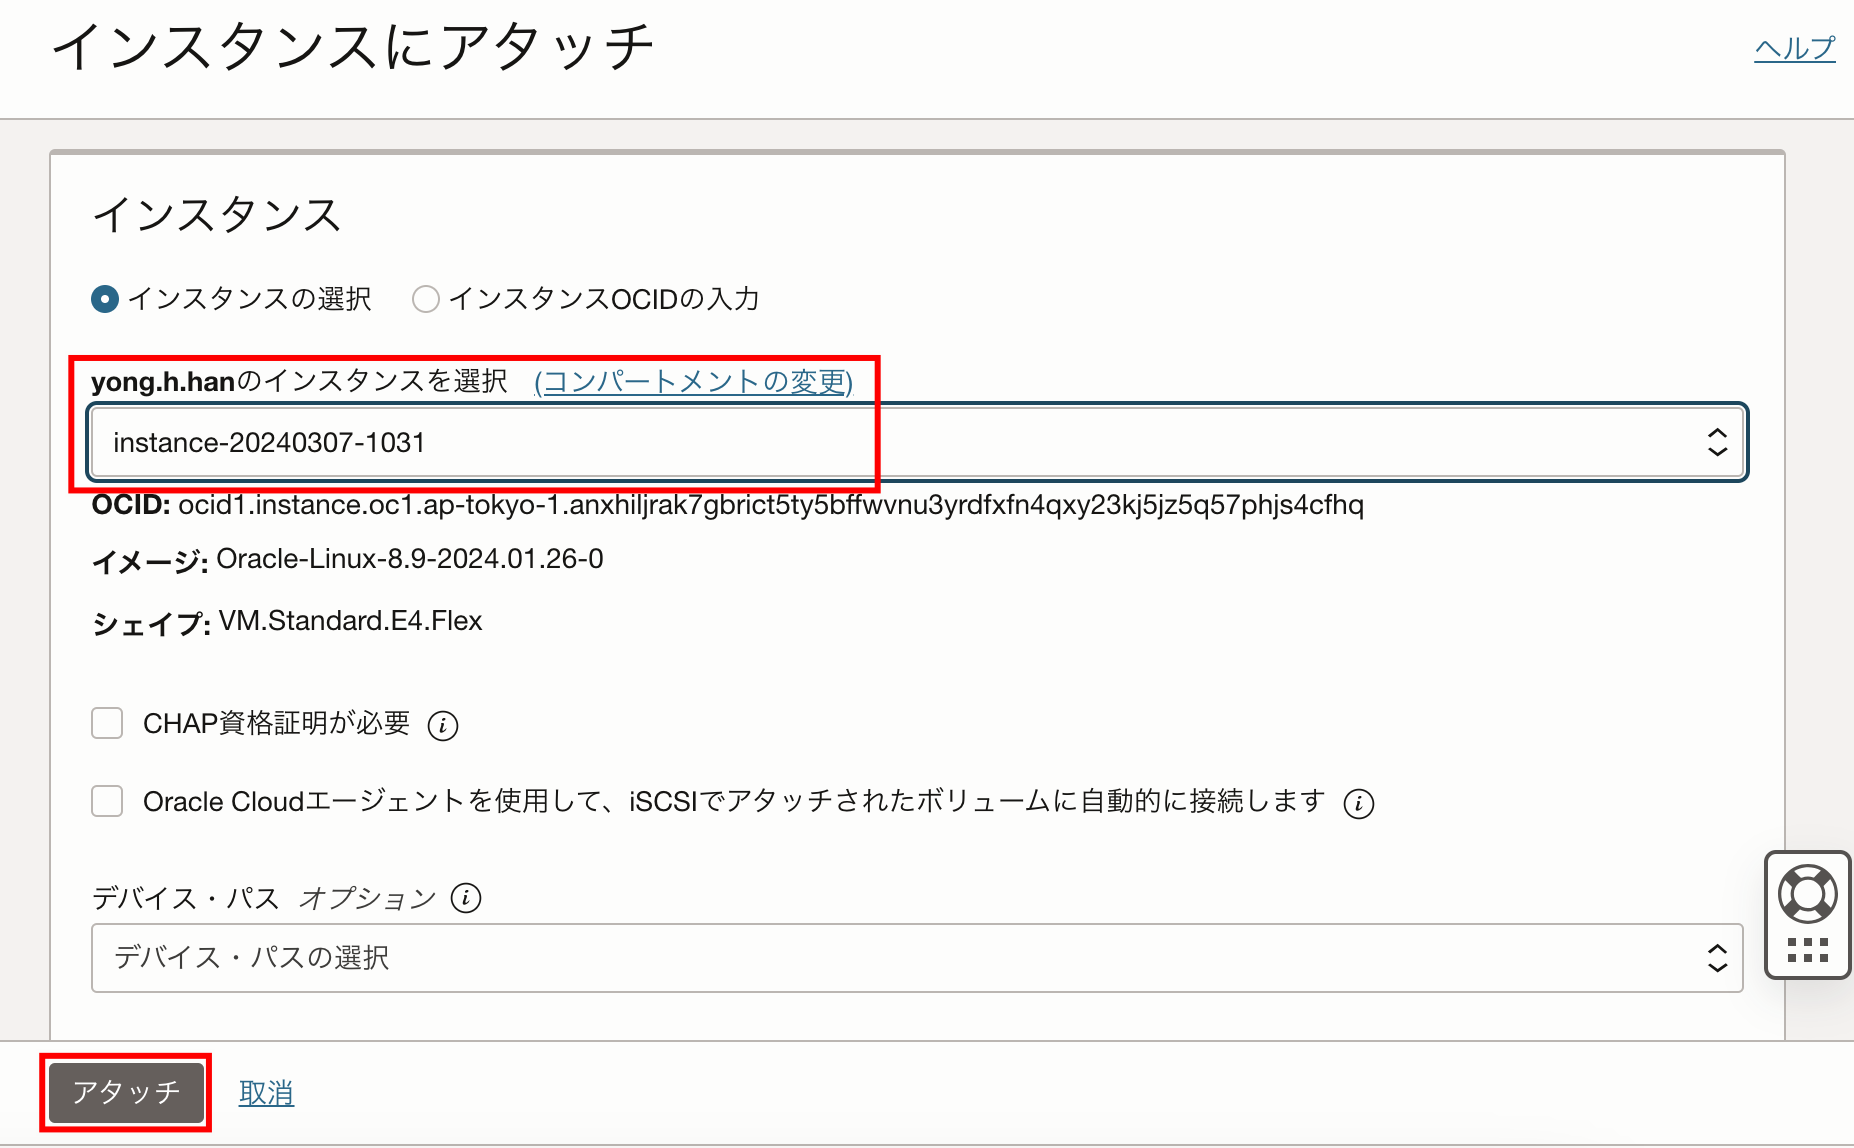
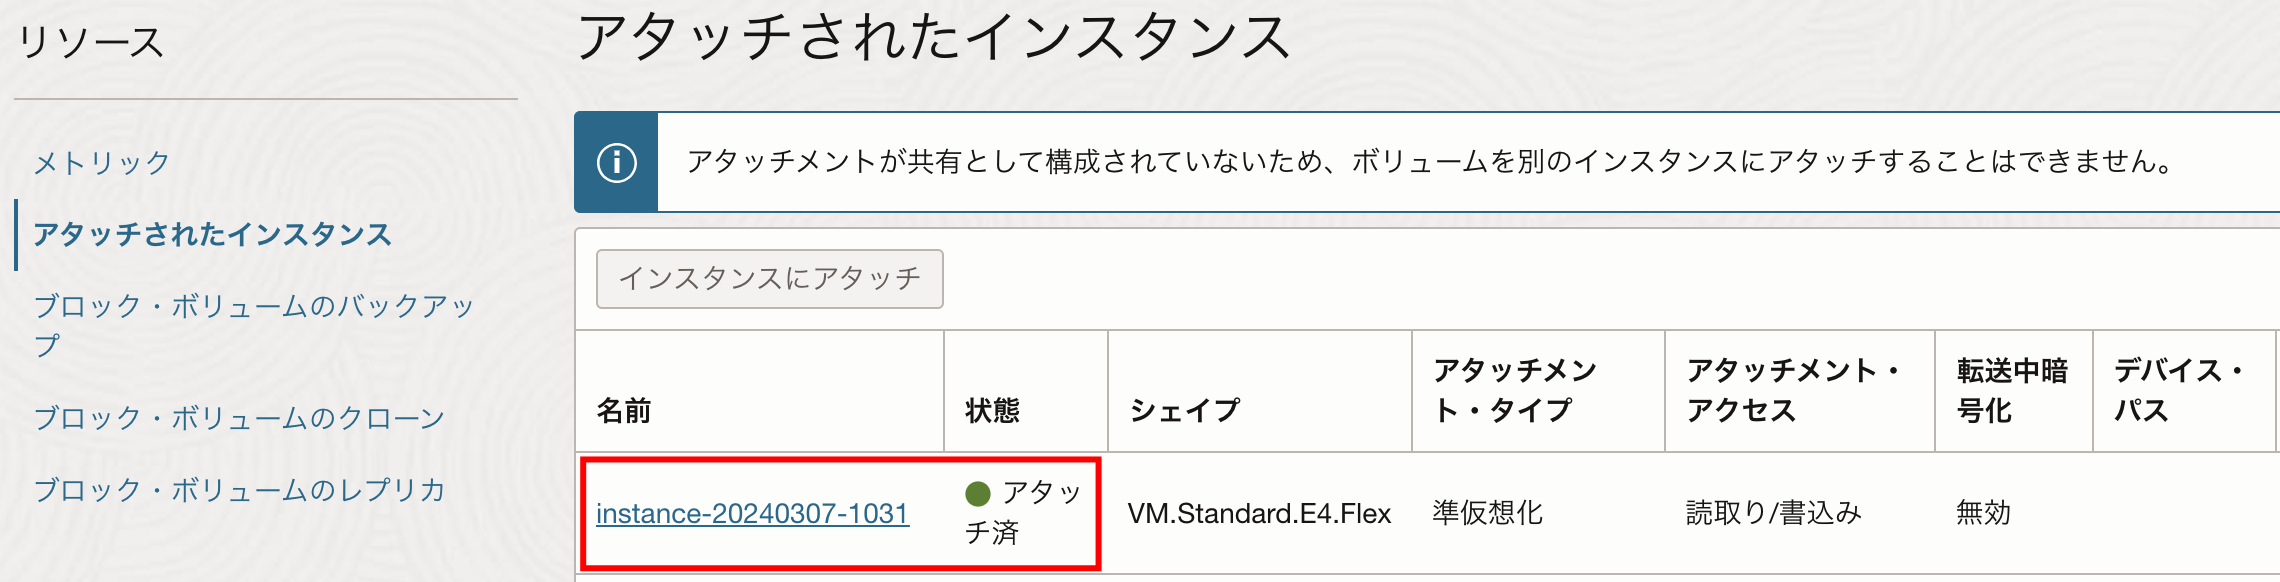
OCIコンソールにログインして、ブロック・ボリュームの設定画面を開き、コンピュート・インスタンスにアタッチします。
SSHでOCIのコンピュート・インスタンスに接続します。その後EC2と同じく、下記のコマンドを実行して、ブロック・ボリュームのファイルシステムを構築し、移行先のディレクトリ/dev/databaseTestにマウントします。
[opc@instance-20240307-1031 ~]$ sudo -s
[root@instance-20240307-1031 opc]# fdisk -l
省略です。

Disk /dev/sdc: 51 GiB, 54760833024 bytes, 106954752 sectors
Units: sectors of 1 * 512 = 512 bytes
Sector size (logical/physical): 512 bytes / 4096 bytes
I/O size (minimum/optimal): 4096 bytes / 1048576 bytes
[root@instance-20240307-1031 opc]# fdisk /dev/sdc
Welcome to fdisk (util-linux 2.32.1).
Changes will remain in memory only, until you decide to write them.
Be careful before using the write command.

Device does not contain a recognized partition table.
Created a new DOS disklabel with disk identifier 0x838d1df5.

Command (m for help): n
Partition type
   p   primary (0 primary, 0 extended, 4 free)
   e   extended (container for logical partitions)
Select (default p): p
Partition number (1-4, default 1):
First sector (2048-106954751, default 2048):
Last sector, +sectors or +size{K,M,G,T,P} (2048-106954751, default 106954751):

Created a new partition 1 of type 'Linux' and of size 51 GiB.

Command (m for help): w
The partition table has been altered.
Calling ioctl() to re-read partition table.
Syncing disks.
[root@instance-20240307-1031 opc]# fdisk -l
---省略---

Disk /dev/sdc: 51 GiB, 54760833024 bytes, 106954752 sectors
Units: sectors of 1 * 512 = 512 bytes
Sector size (logical/physical): 512 bytes / 4096 bytes
I/O size (minimum/optimal): 4096 bytes / 1048576 bytes
Disklabel type: dos
Disk identifier: 0x838d1df5

Device     Boot Start       End   Sectors Size Id Type
/dev/sdc1        2048 106954751 106952704  51G 83 Linux
[root@instance-20240307-1031 opc]# mkfs -t ext4 /dev/sdc1
mke2fs 1.46.2 (28-Feb-2021)
Discarding device blocks: done
Creating filesystem with 13369088 4k blocks and 3342336 inodes
Filesystem UUID: c9215b47-2632-4191-a81f-f6369fdedffd
Superblock backups stored on blocks:
	32768, 98304, 163840, 229376, 294912, 819200, 884736, 1605632, 2654208,
	4096000, 7962624, 11239424

Allocating group tables: done
Writing inode tables: done
Creating journal (65536 blocks): done
Writing superblocks and filesystem accounting information: done
[root@instance-20240307-1031 opc]# mkdir /dev/awsEbs
[root@instance-20240307-1031 opc]# mount /dev/sdc1 /dev/awsEbs
[root@instance-20240307-1031 awsEbs]# df -h
Filesystem                  Size  Used Avail Use% Mounted on
---省略---

/dev/sdc1                    50G   24K   48G   1% /dev/awsEbs
4. コンピュート・インスタンスでrsyncを実行し、データファイルをEBSからブロック・ボリュームに移行
rsyncをインストールします。多くのLinuxにはデフォルトでrsyncコマンドがインストールされていますが、インストールされていない場合は以下のコマンドでインストールできます。
[root@instance-20240307-1031 opc]# yum install rsync -y
This system is receiving updates from OSMS server.
Last metadata expiration check: 0:12:04 ago on Wed 27 Mar 2024 07:14:07 AM GMT.
Package rsync-3.1.3-19.el8_7.1.x86_64 is already installed.
Dependencies resolved.
Nothing to do.
Complete!
OCIコンピュート・インスタンスで下記のrsyncコマンドを実行して、AWS EBSにあるデータファイル/dev/databaseTest/db.csv、/dev/databaseTest/db.dumpを/dev/awsEbsにコピーします。
/tmp/aws.pemはAWS EC2にアクセスするSSHクライアントのキーです。
-avzPRはオプションのグループで、具体的な意味は以下の通りです:
-a:アーカイブモードで同期を行い、すべてのファイル属性を保持します。
-v:詳細な出力を表示し、実行中の操作を示します。
-z:伝送時にデータを圧縮し、伝送速度を向上させます。
-P:--partialと--progressオプションの組み合わせで、伝送の進捗を表示し、伝送に失敗したファイルの成功部分を保存して、再開の伝送をより速く終わらせます。
-R:相対パスを使用します。移行元のフィアルディレクトリがそのまま移行先で自動的に作成されます。
-e "ssh -i /tmp/aws.pem":rsyncが使用するSSHクライアントを設定します。EC2にアクセスするSSHクライアントの秘密キーファイル/tmp/aws.pemで認証を行います。
ec2-user@57.181.39.193:EC2のユーザ名ec2-userとIPアドレス13.230.82.88です。
:/dev/databaseTest/db*:EBSのファイルパスです。ここでは、dbで始まるすべてのファイルを指定します。
/dev/awsEbs/:これはOCIコンピュート・インスタンスにアタッチしたブロック・ボリュームのディレクトリです。同期後のファイルをここに保存します。
Rsyncの参考ドキュメント:
https://rsync.samba.org/documentation.html
[root@instance-20240307-1031 awsEbs]# rsync -avzPR -e "ssh -i /tmp/aws.pem" ec2-user@13.230.82.88:/dev/databaseTest/db* /dev/awsEbs/
receiving incremental file list
dev/
dev/databaseTest/
dev/databaseTest/db.csv
             48 100%   46.88kB/s    0:00:00 (xfr#1, to-chk=1/4)
dev/databaseTest/db.dump
             55 100%   53.71kB/s    0:00:00 (xfr#2, to-chk=0/4)

sent 74 bytes  received 320 bytes  262.67 bytes/sec
total size is 103  speedup is 0.26
最後に、ダウンロードした結果を確認します。AWSからのデータファイルのディレクトリ情報にもそのまま保持します。
[root@instance-20240307-1031 opc]# ls -Rl /dev/awsEbs/
/dev/awsEbs/:
total 20
drwxr-xr-x. 3 root root  4096 Mar 27 06:36 dev
drwx------. 2 root root 16384 Mar 11 09:23 lost+found

/dev/awsEbs/dev:
total 4
drwxr-xr-x. 2 root root 4096 Mar 11 06:29 databaseTest

/dev/awsEbs/dev/databaseTest:
total 8
-rw-r--r--. 1 root root 48 Mar 11 06:29 db.csv
-rw-r--r--. 1 root root 55 Mar 11 06:28 db.dump

/dev/awsEbs/lost+found:
total 0
まとめ
rsyncで任意のディレクトリ構造を持つデータファイルをAmazon EBSからOCIオブジェクト・ストレージに移行する手順を紹介しました。
rcloneでの移行より、AWS S3とOCIオブジェクトストレージを必要とせず、EC2からCompute VMへ直接データの移行を行うことができます。
データ移行の要件がある場合にご参考ください。