Amazon EBSに保存された任意のディレクトリ構造を持つデータファイルをrcloneでOCI ブロック・ボリュームに移行する手順を紹介します。
前提条件
AWS側:LinuxのEC2、EBSとS3の構築
OCI側:Linuxのコンピュート・インスタンス、ブロック・ボリュームとオブジェクト・ストレージの構築
移行したいサンプルワークロード
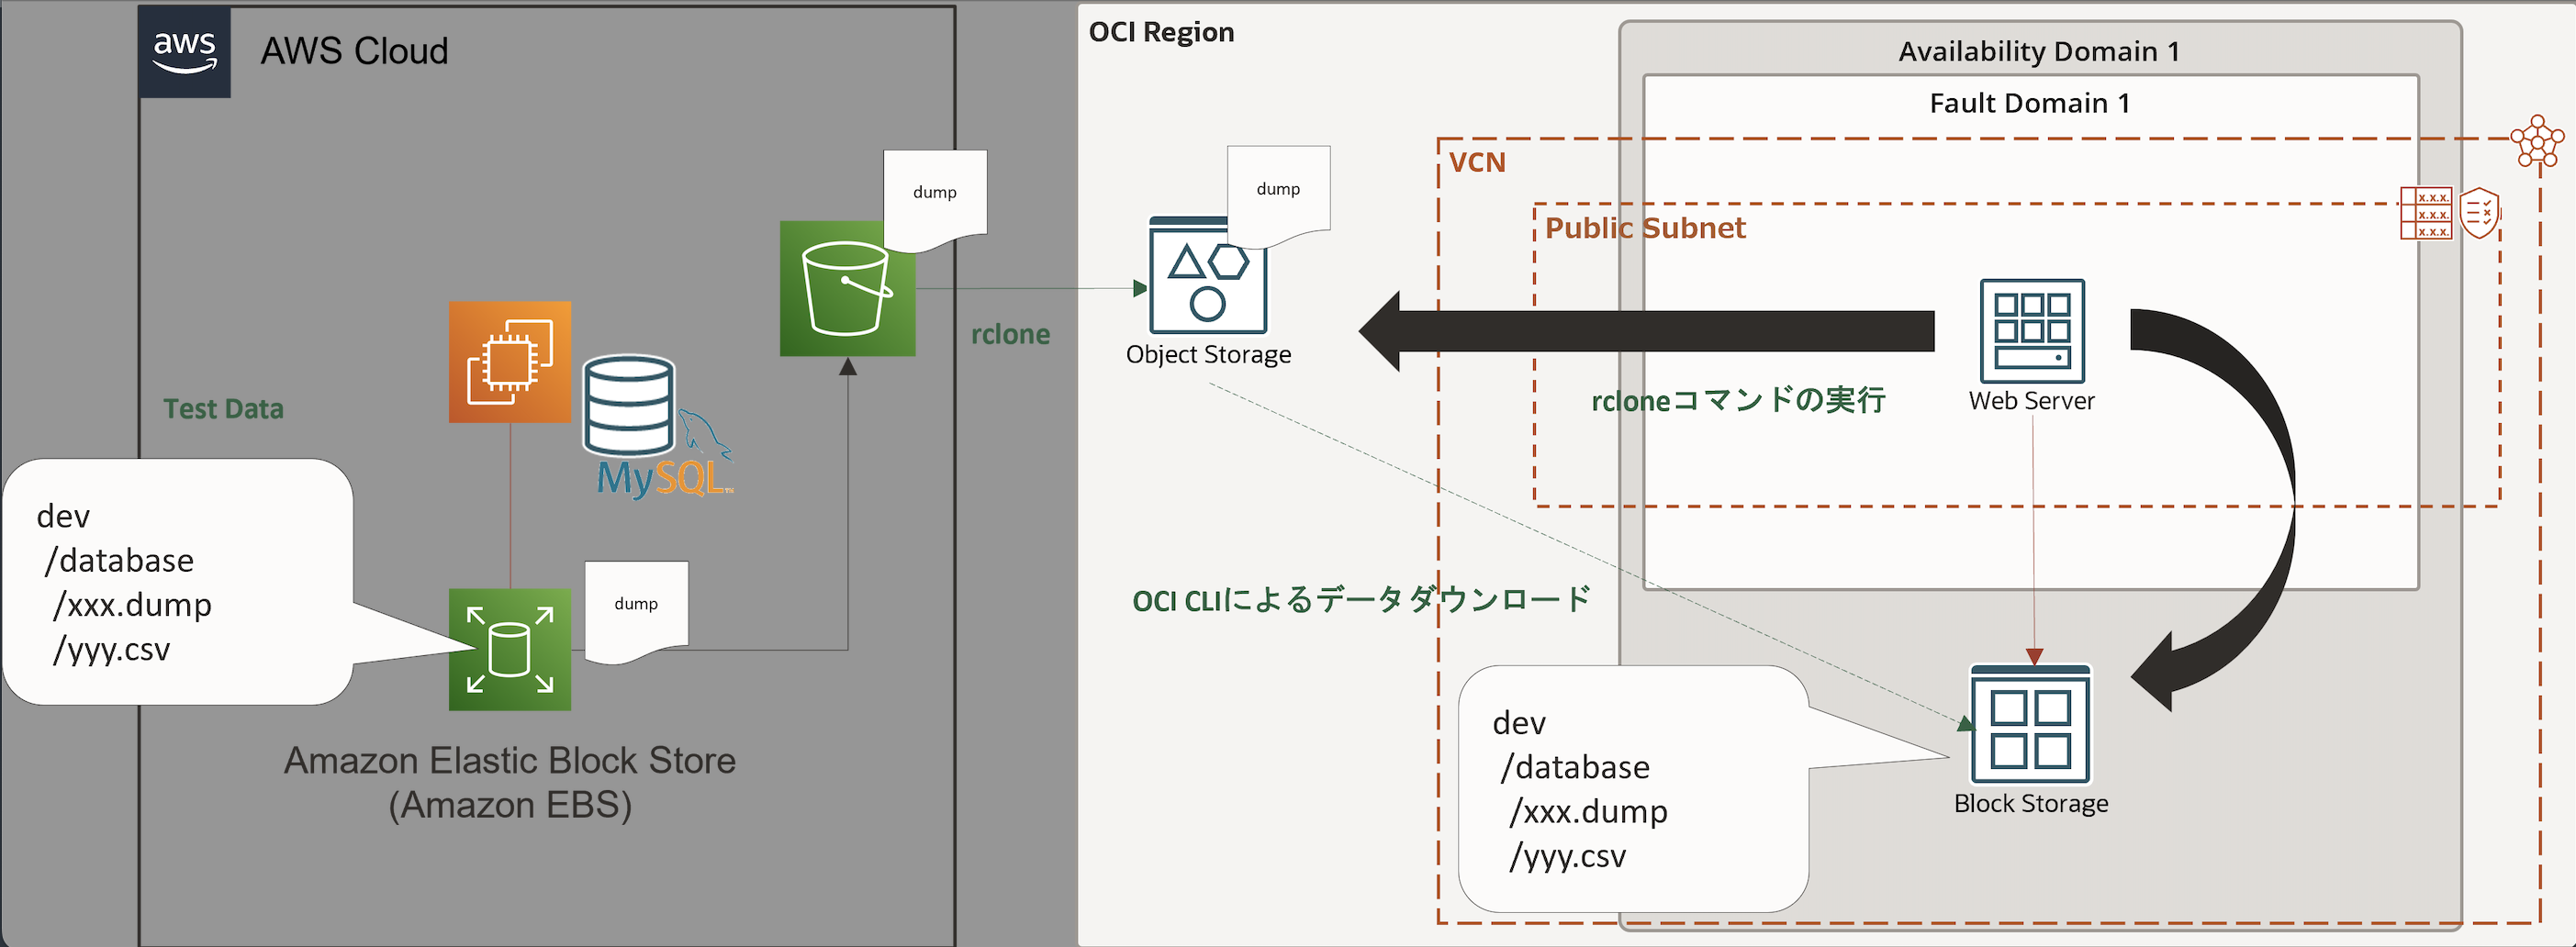
移行手順
- 移行元のEBSをEC2にアタッチ
- 任意のディレクトリ構造を持つダミデータファイルの作成
- EC2でAWS CLIコメントを実行し、EBSのデータファイルをS3へアップロード
- 移行先のブロック・ボリュームをコンピュート・インスタンスにアタッチ
- コンピュート・インスタンスでrcloneを実行し、S3からデータファイルをオブジェクト・ストレージに移動
- コンピュート・インスタンスでOCI CLIを実行し、データファイルをオブジェクト・ストレージからブロック・ボリュームにダウンロード
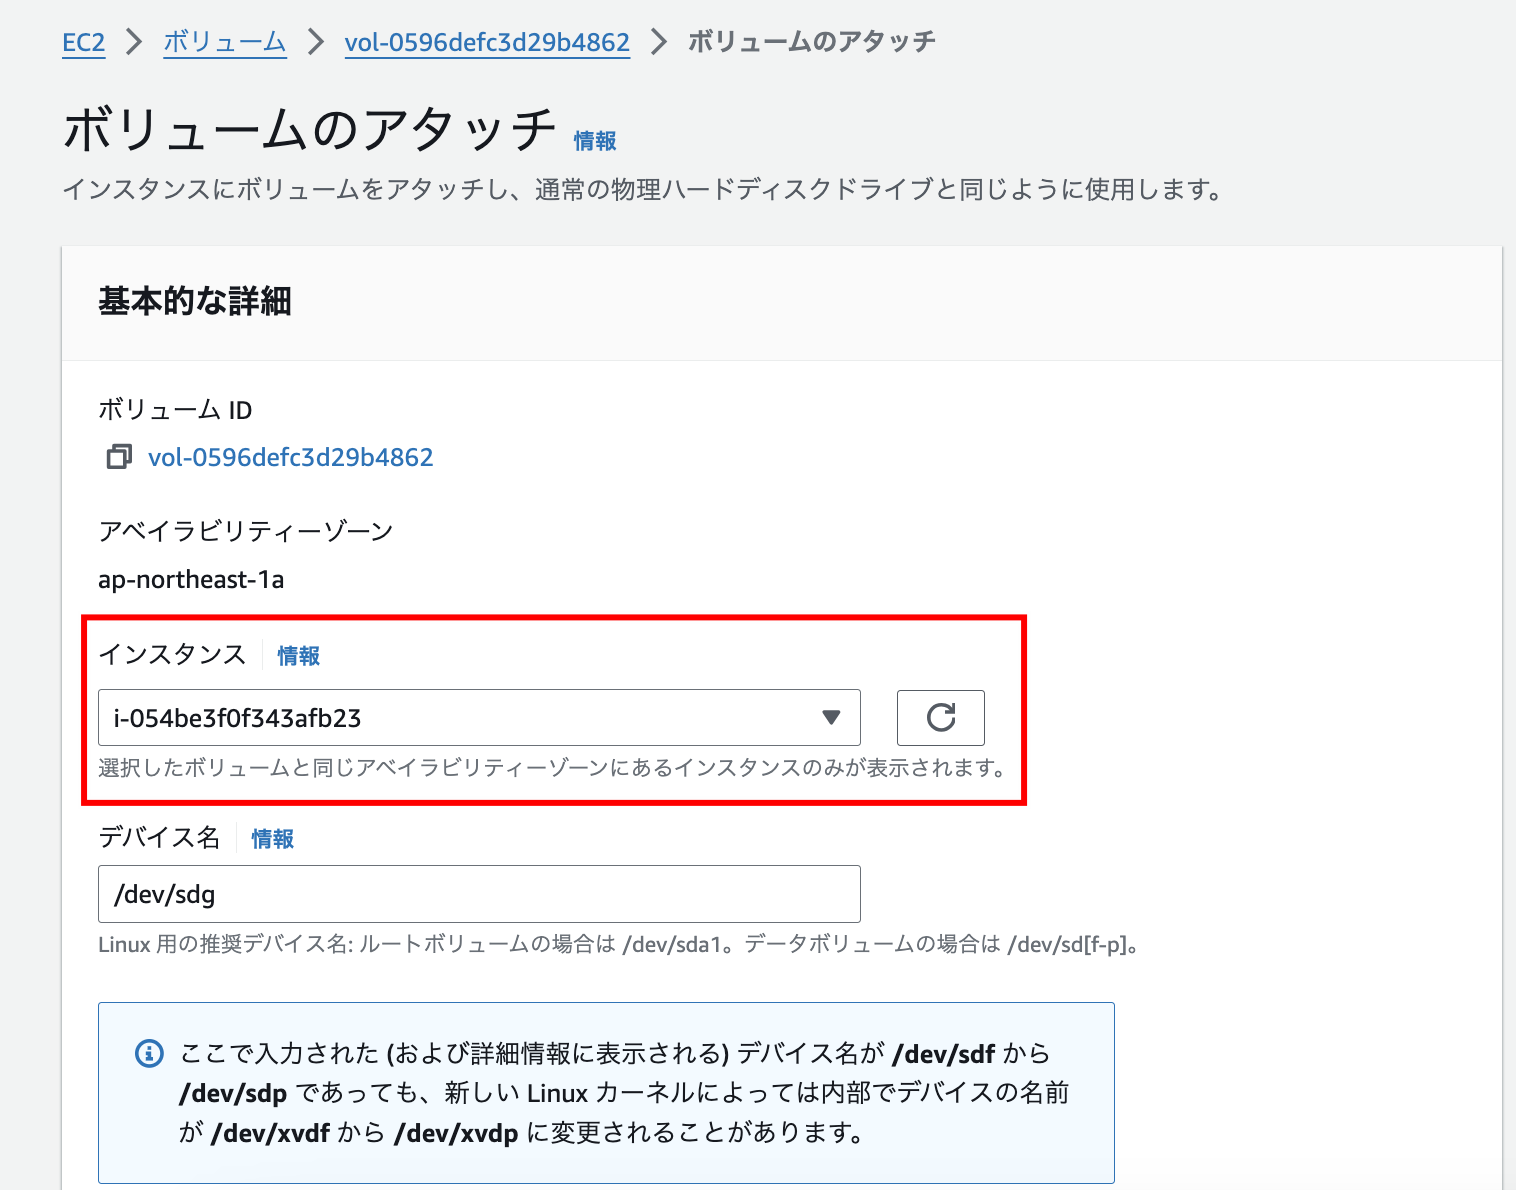
1. 移行元のEBSをEC2にアタッチ
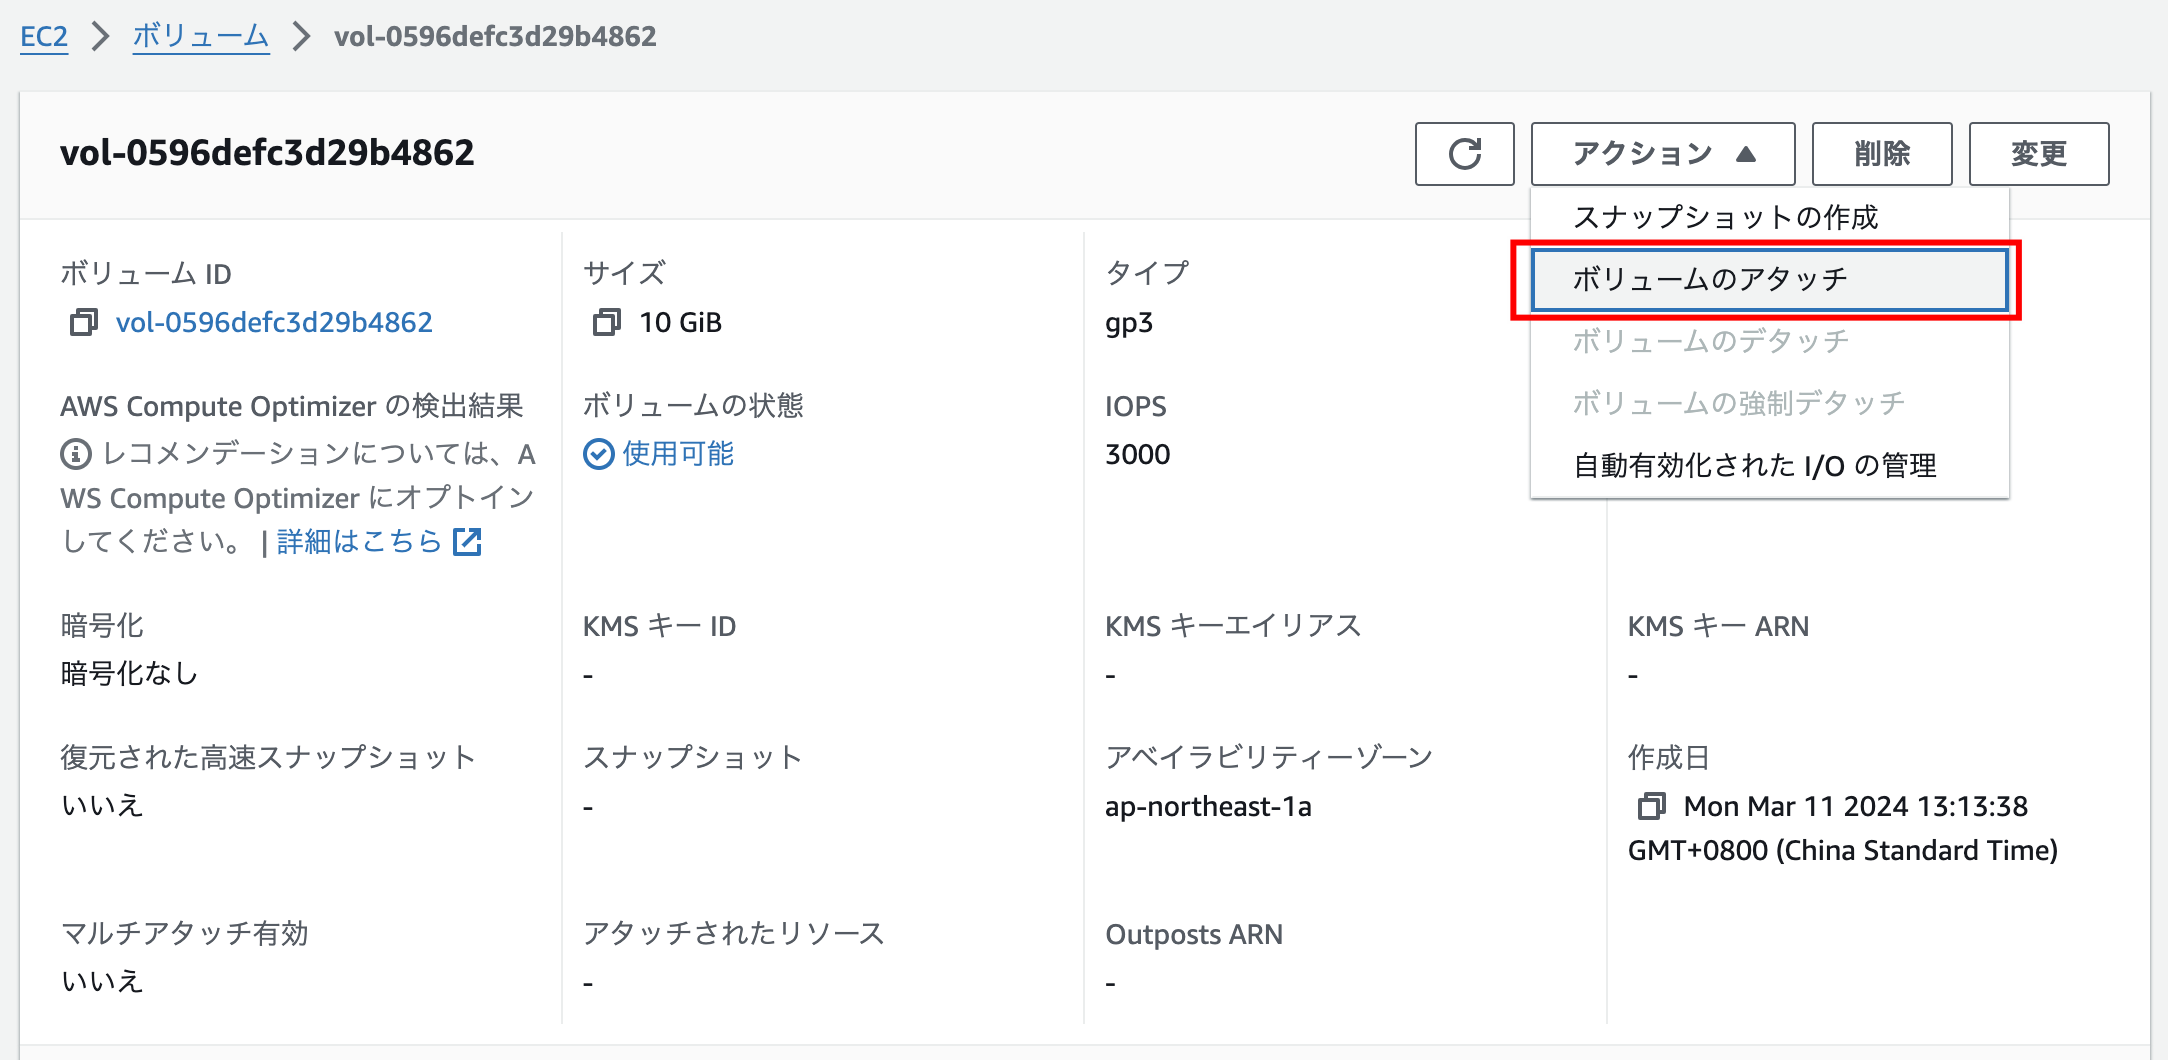
アタッチする対象のEC2を選択します。
2. 任意のディレクトリ構造を含めたダミデータファイルの作成
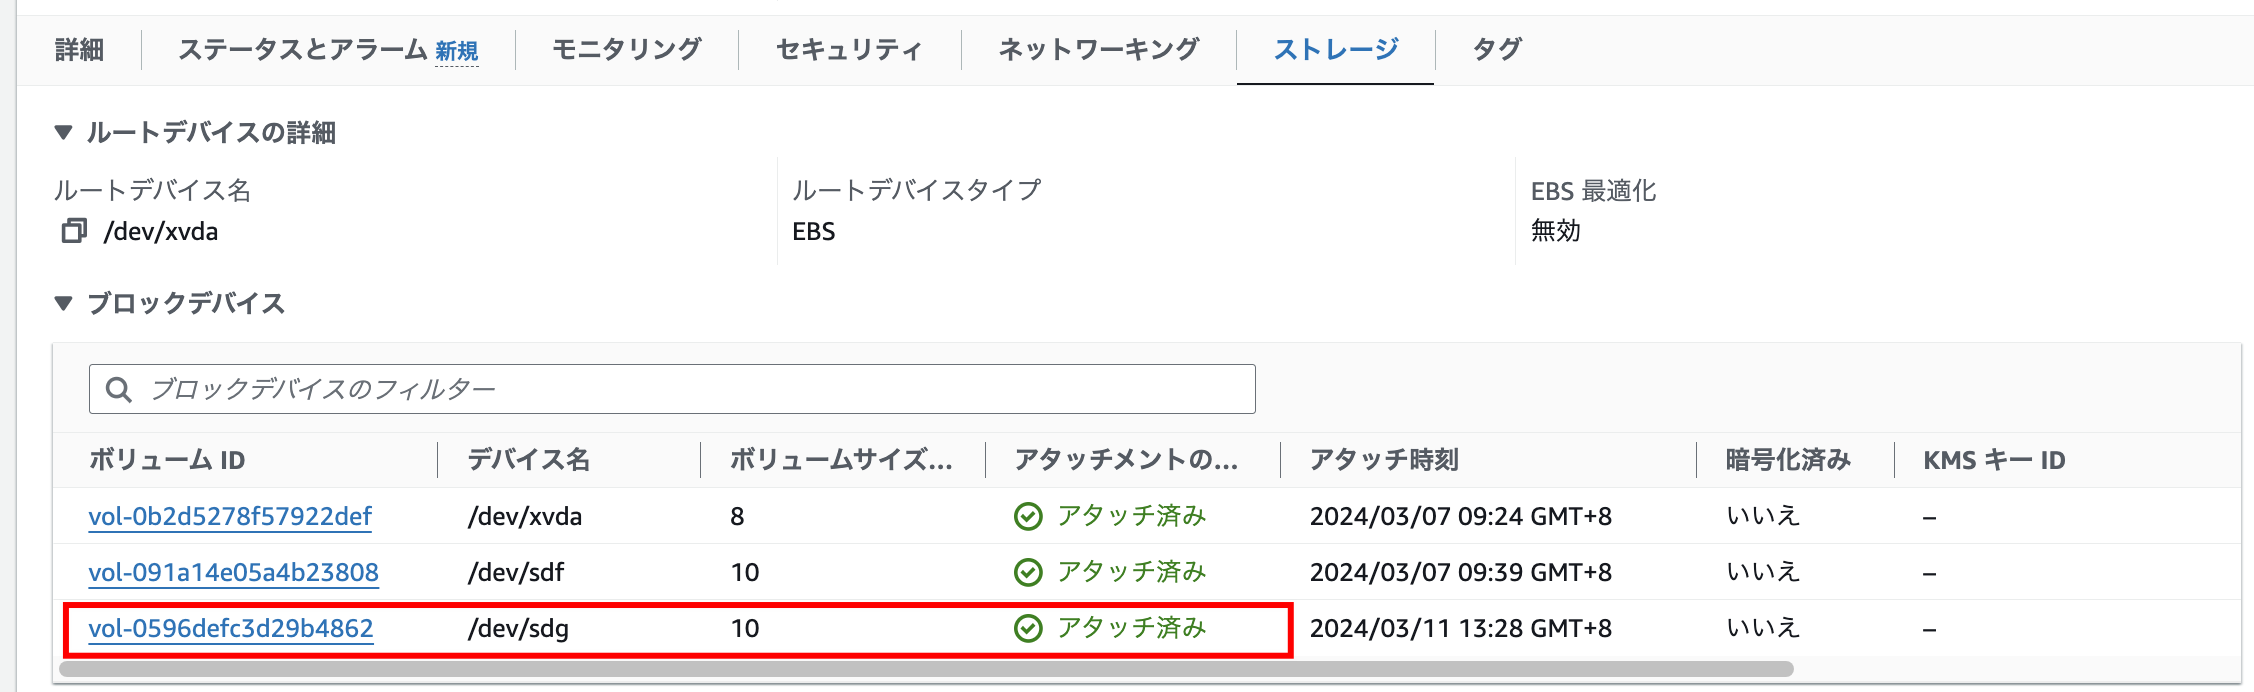
SSHでEC2にログインし、rootユーザーでfdisk -lコマンドを使用して、新しいEBSが正常にアタッチされたかどうかを確認します。
ディスク/dev/xvdgが表示されます。
[root@ip-10-1-3-177 ec2-user]# fdisk -l
Disk /dev/xvda: 8 GiB, 8589934592 bytes, 16777216 sectors
Units: sectors of 1 * 512 = 512 bytes
Sector size (logical/physical): 512 bytes / 512 bytes
I/O size (minimum/optimal): 512 bytes / 512 bytes
Disklabel type: gpt
Disk identifier: 44112016-36E3-4A7E-9EDC-BD3A1CE32D7B

Device       Start      End  Sectors Size Type
/dev/xvda127 22528    24575     2048   1M BIOS boot
/dev/xvda128  2048    22527    20480  10M EFI System

Partition table entries are not in disk order.

Disk /dev/xvdg: 10 GiB, 10737418240 bytes, 20971520 sectors
Units: sectors of 1 * 512 = 512 bytes
Sector size (logical/physical): 512 bytes / 512 bytes
I/O size (minimum/optimal): 512 bytes / 512 bytes
fdisk /dev/xvdgコマンドを使用してEBSのパーティションを作成します。n、p、wを入力する必要があるため、下記をご参考ください。
[root@ip-10-1-3-177 ec2-user]# fdisk /dev/xvdg

Welcome to fdisk (util-linux 2.37.4).
Changes will remain in memory only, until you decide to write them.
Be careful before using the write command.

Device does not contain a recognized partition table.
Created a new DOS disklabel with disk identifier 0x52ad734c.

Command (m for help): n
Partition type
   p   primary (0 primary, 0 extended, 4 free)
   e   extended (container for logical partitions)
Select (default p): p
Partition number (1-4, default 1):
First sector (2048-20971519, default 2048):
Last sector, +/-sectors or +/-size{K,M,G,T,P} (2048-20971519, default 20971519):

Created a new partition 1 of type 'Linux' and of size 10 GiB.

Command (m for help): w
The partition table has been altered.
Calling ioctl() to re-read partition table.
Syncing disks.
fdisk -lを実行して、パーティションしたディスクの名前を特定します。
[root@ip-10-1-3-177 ec2-user]# fdisk -l
省略です。

Disk /dev/xvdg: 10 GiB, 10737418240 bytes, 20971520 sectors
Units: sectors of 1 * 512 = 512 bytes
Sector size (logical/physical): 512 bytes / 512 bytes
I/O size (minimum/optimal): 512 bytes / 512 bytes
Disklabel type: dos
Disk identifier: 0x52ad734c

Device     Boot Start      End  Sectors Size Id Type
/dev/xvdg1       2048 20971519 20969472  10G 83 Linux
mkfs -t ext4 /dev/xvdg1を実行して、ファイルシステムを構築します。
[root@ip-10-1-3-177 ec2-user]# mkfs -t ext4 /dev/xvdg1
mke2fs 1.46.5 (30-Dec-2021)
Creating filesystem with 2621184 4k blocks and 655360 inodes
Filesystem UUID: 2ca13214-41a9-4ef6-a467-88531ace8fc8
Superblock backups stored on blocks:
	32768, 98304, 163840, 229376, 294912, 819200, 884736, 1605632

Allocating group tables: done
Writing inode tables: done
Creating journal (16384 blocks): done
Writing superblocks and filesystem accounting information: done
またmkdir /dev/databaseTestでディレクトリを作成し、mount /dev/xvdg1 /dev/databaseTestを実行して、構築したファイルシステムをディレクトリにマウントします。
[root@ip-10-1-3-177 ec2-user]# mkdir /dev/databaseTest
[root@ip-10-1-3-177 ec2-user]# mount /dev/xvdg1 /dev/databaseTest
最後にdf -hでマウントした結果を確認し、ダミのテストデータdb.dump、db.csvを作成します。
[root@ip-10-1-3-177 ec2-user]# df -h
Filesystem      Size  Used Avail Use% Mounted on
devtmpfs        4.0M  8.0K  4.0M   1% /dev
省略です。
/dev/xvdg1      9.8G   24K  9.3G   1% /dev/databaseTest
[root@ip-10-1-3-177 dev]# cd /dev/databaseTest
[root@ip-10-1-3-177 databaseTest]# echo "これはダミデータのダンプデータです。" > db.dump
[root@ip-10-1-3-177 databaseTest]# echo "id,name,age" > db.csv
echo "1,山田さん,30" >> db.csv
echo "2,鈴木さん,25" >> db.csv
[root@ip-10-1-3-177 databaseTest]# ll
total 24
-rw-r--r--. 1 root root    48 Mar 11 06:29 db.csv
-rw-r--r--. 1 root root    55 Mar 11 06:28 db.dump
drwx------. 2 root root 16384 Mar 11 06:17 lost+found
3. EC2でAWS CLIコメントを実行し、EBSのデータファイルをS3にアップロード
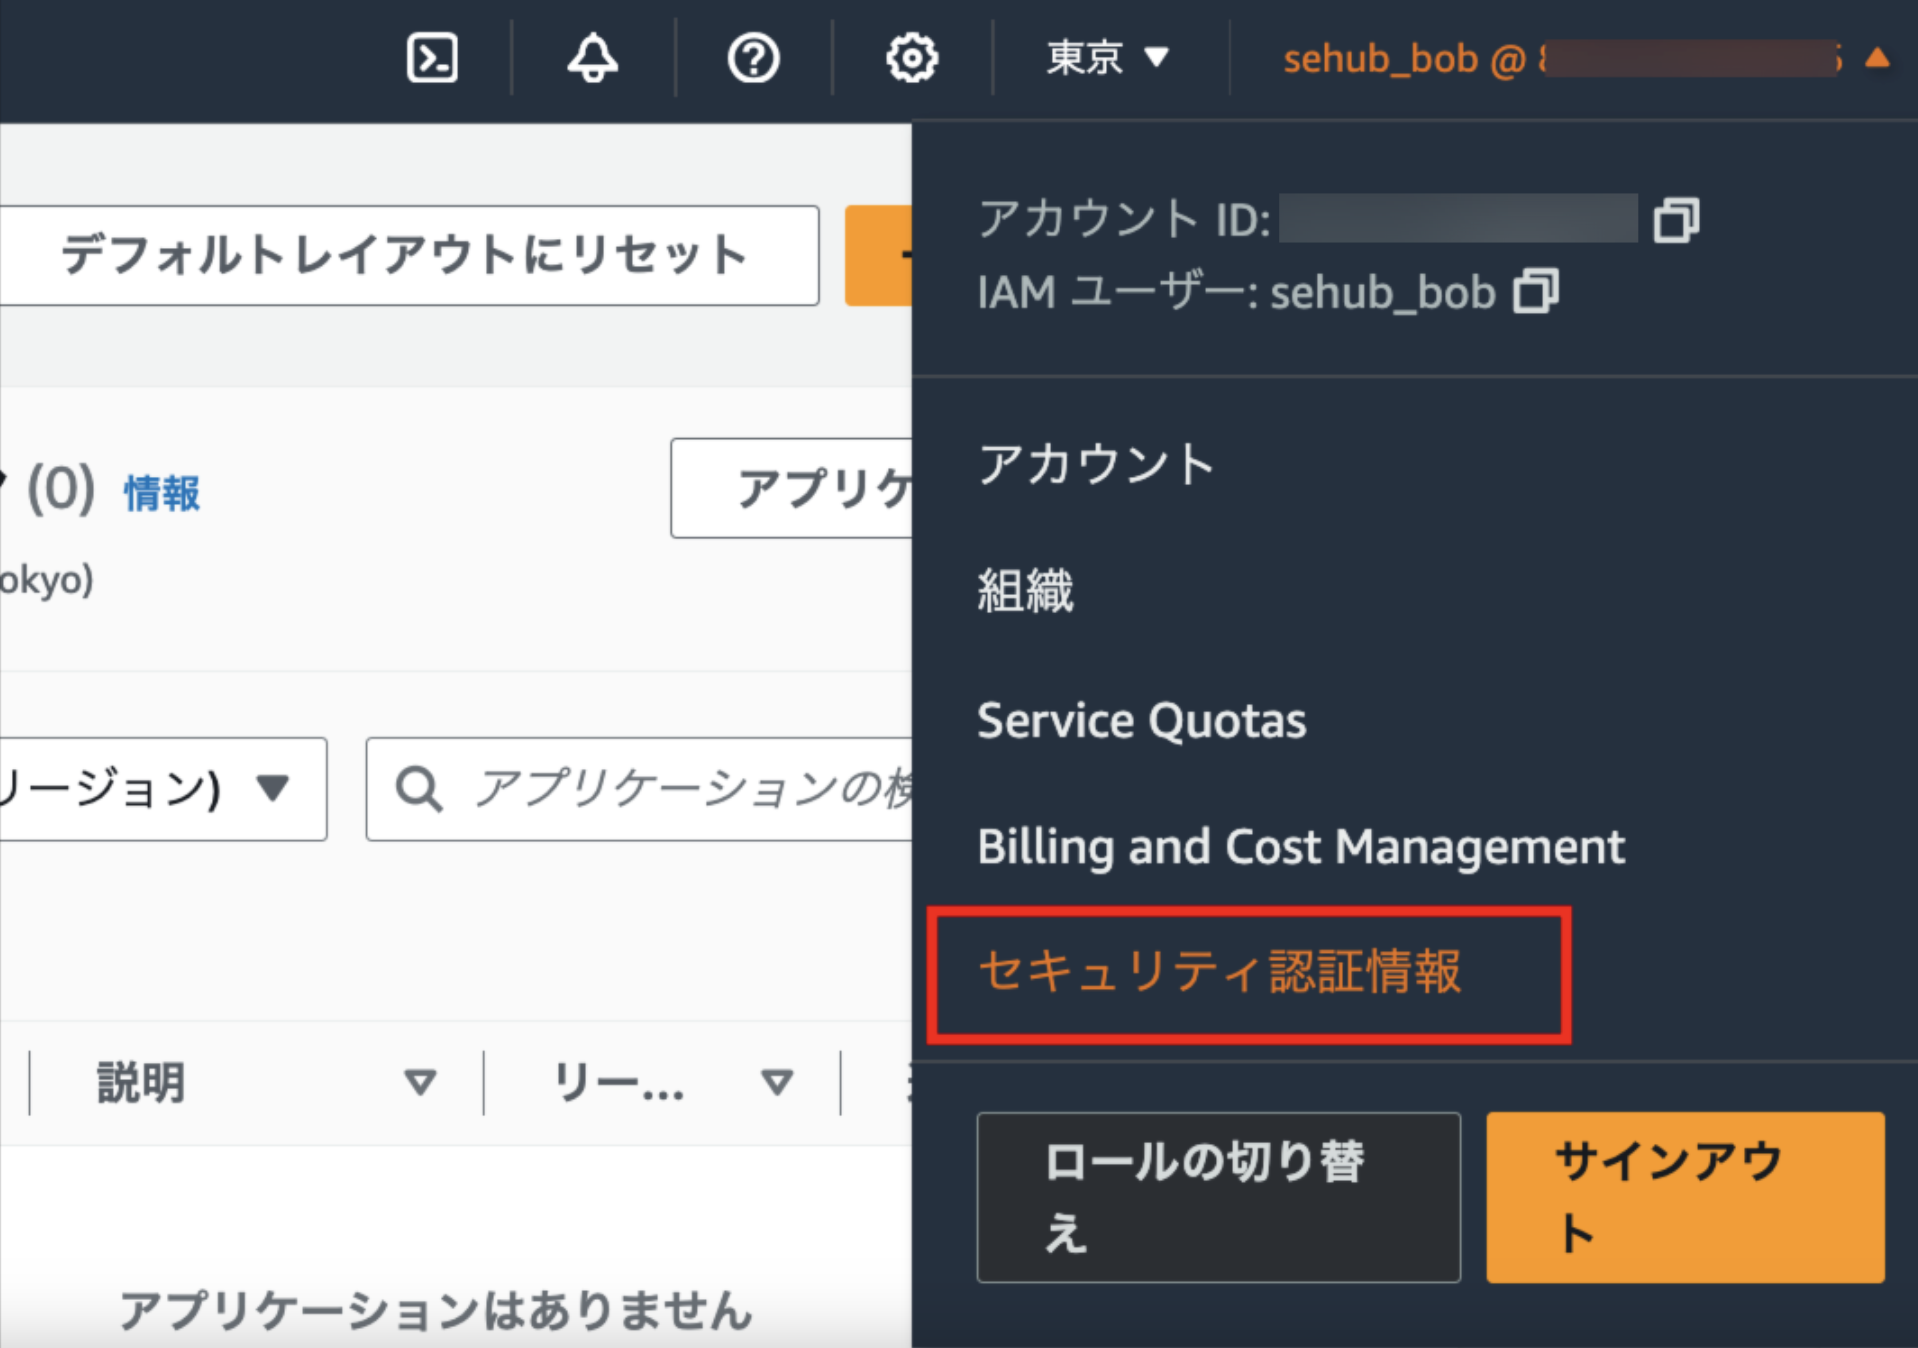
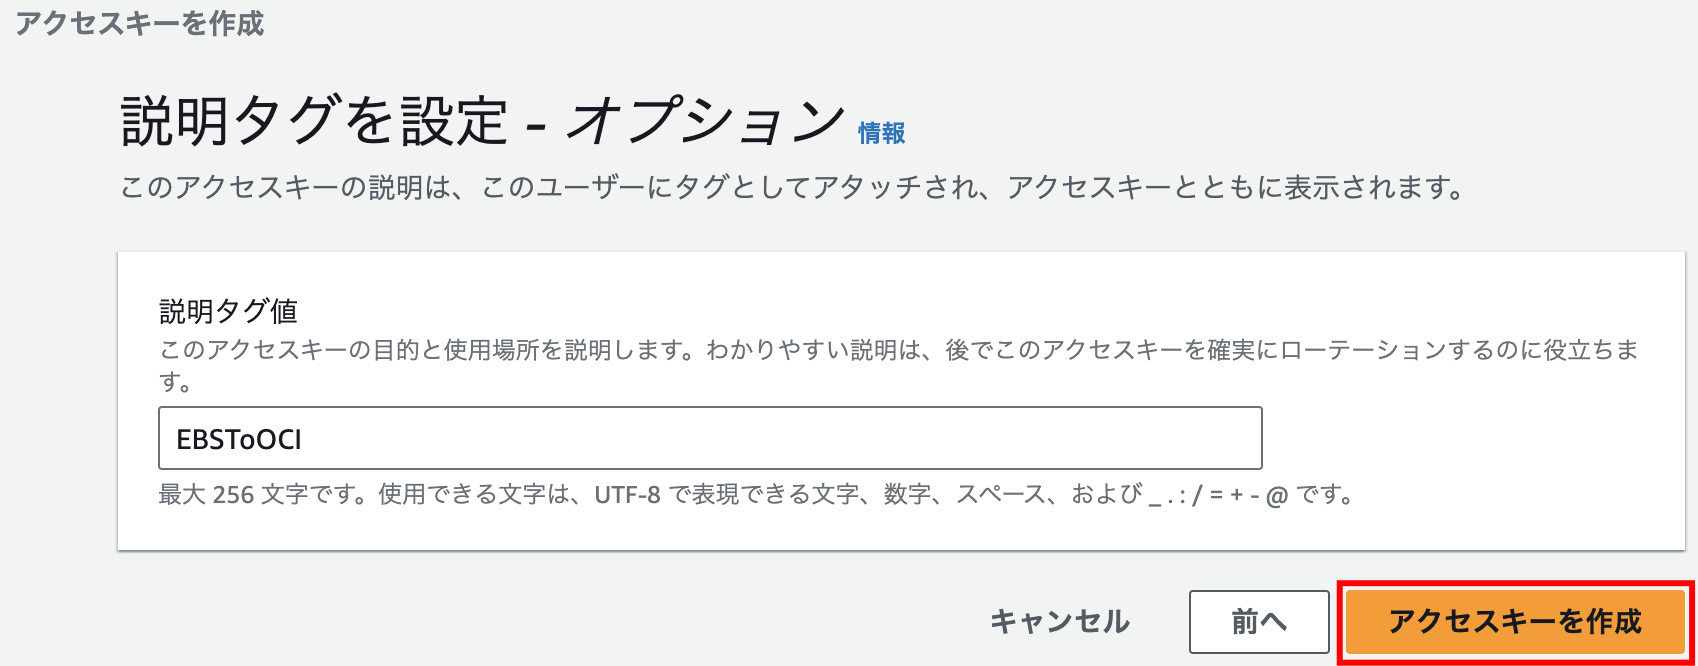
まず、AWSコンソール上でアクセスキー(AK)とシークレットキー(SK)を取得します。
例:AKIA4PN25EIKXXXXXXXX、6tyGcTSnTaO6fhsacjutm7z45XfbsVLoXXXXXXXX

下記のコマンドを実行して、AWS CLIをEC2にインストールします。
[root@ip-10-1-3-177 ec2-user]# curl "https://awscli.amazonaws.com/awscli-exe-linux-x86_64.zip" -o "awscliv2.zip"
  % Total    % Received % Xferd  Average Speed   Time    Time     Time  Current
                                 Dload  Upload   Total   Spent    Left  Speed
100 57.4M  100 57.4M    0     0   123M      0 --:--:-- --:--:-- --:--:--  123M
[root@ip-10-1-3-177 ec2-user]# unzip awscliv2.zip
省略です。

[root@ip-10-1-3-177 ec2-user]# sudo ./aws/install
省略です。
aws configureを実行します。実行中に先ほど取得したアクセスキーID(AK)、シークレットアクセスキー(SK)とリージョン情報ap-northeast-1(東京リージョン)を入力します。
[ec2-user@ip-10-1-3-177 ~]$ aws configure
AWS Access Key ID [None]: AKIA4PN25EIKXXXXXXXX
AWS Secret Access Key [None]: 6tyGcTSnTaO6fhsacjutm7z45XfbsVLoXXXXXXXX
Default region name [None]: ap-northeast-1
Default output format [None]:
下記のコマンドを実行して、データファイルをS3にアップロードします。
[ec2-user@ip-10-1-3-177 ~]$ cd /dev/databaseTest/
[ec2-user@ip-10-1-3-177 databaseTest]$ ls
db.csv db.dump lost+found
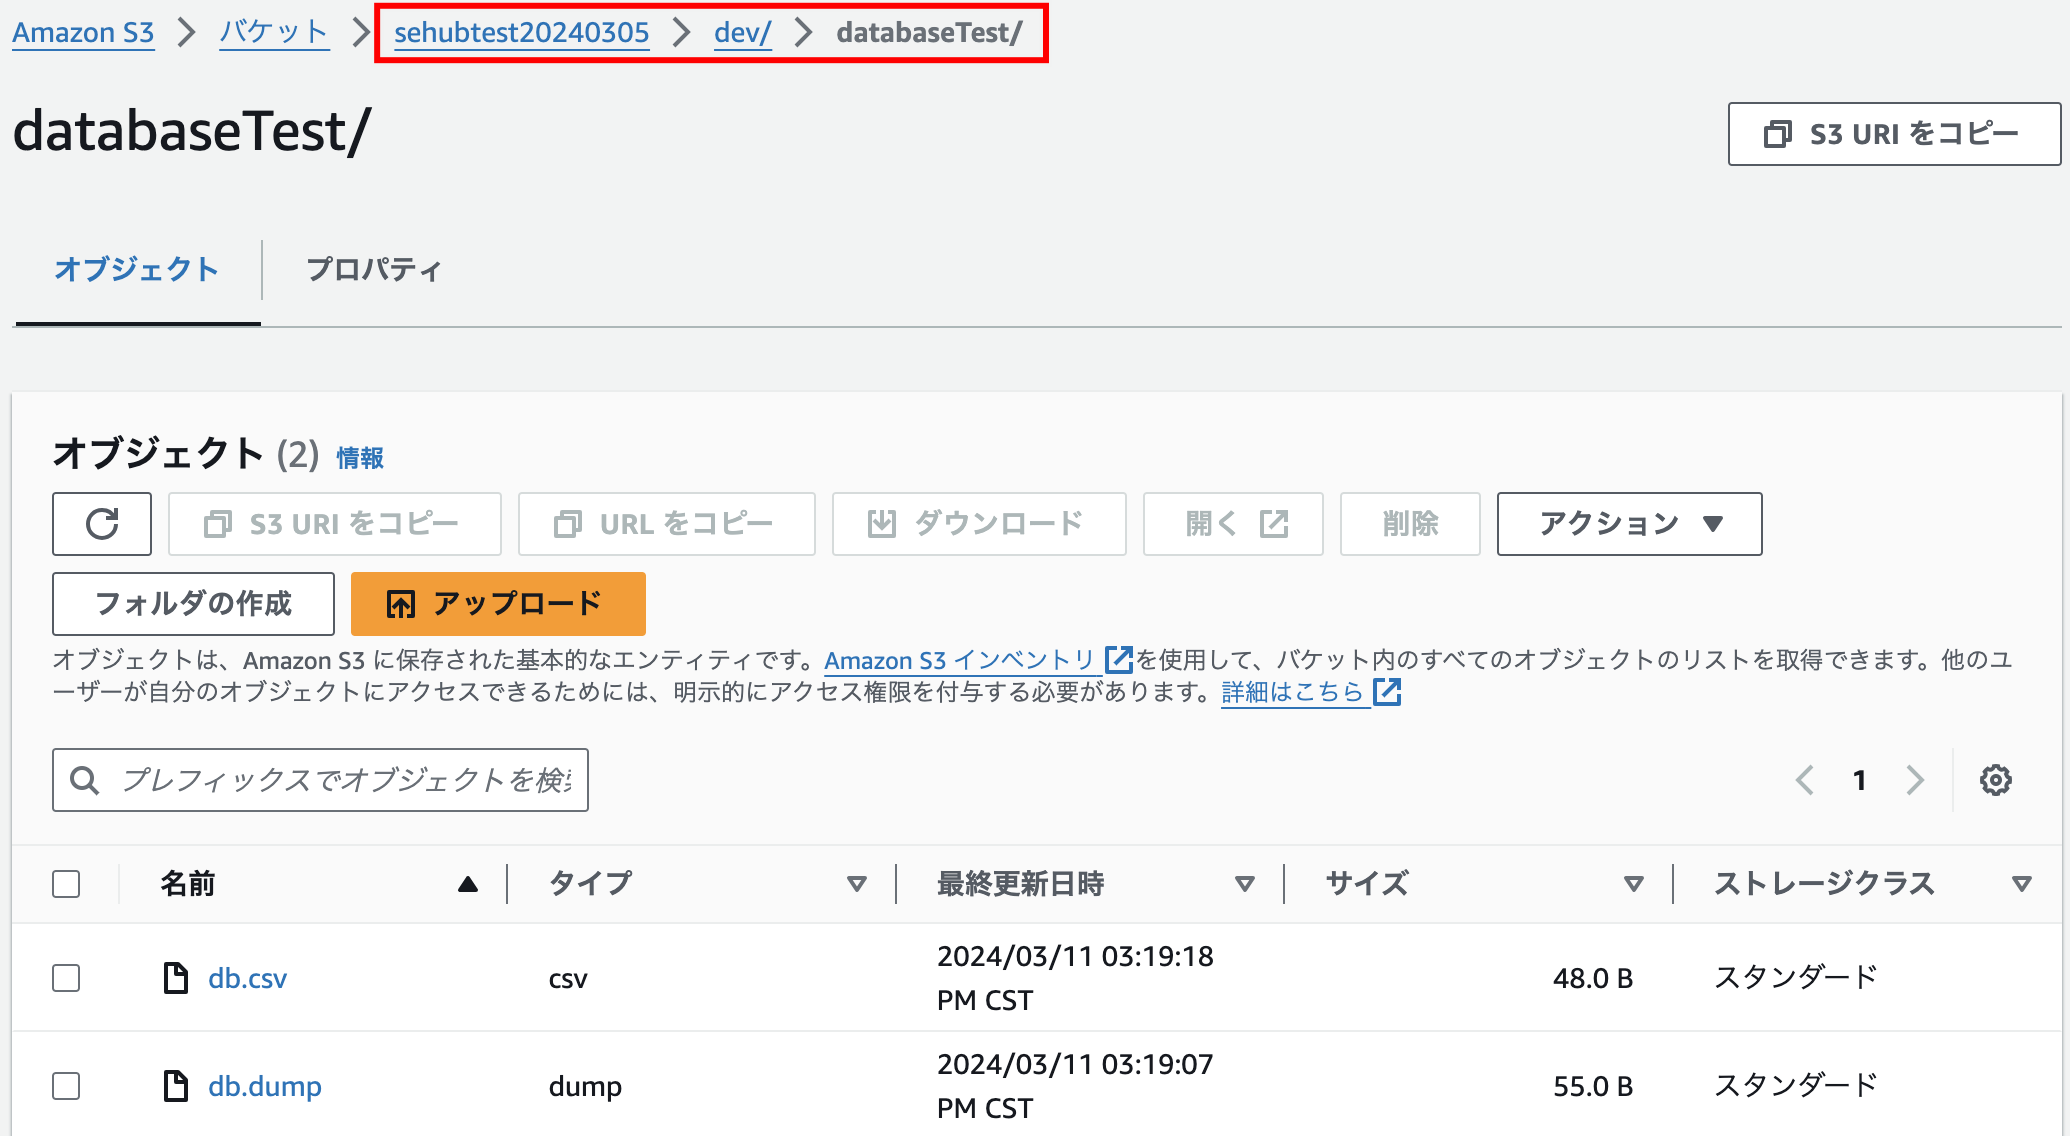
[ec2-user@ip-10-1-3-177 databaseTest]$ aws s3 cp /dev/databaseTest/db.dump s3://sehubtest20240305/dev/databaseTest/
upload: ./db.dump to s3://sehubtest20240305/dev/databaseTest/db.dump
[ec2-user@ip-10-1-3-177 databaseTest]$ aws s3 cp /dev/databaseTest/db.csv s3://sehubtest20240305/dev/databaseTest/
upload: ./db.csv to s3://sehubtest20240305/dev/databaseTest/db.csv
[ec2-user@ip-10-1-3-177 databaseTest]$
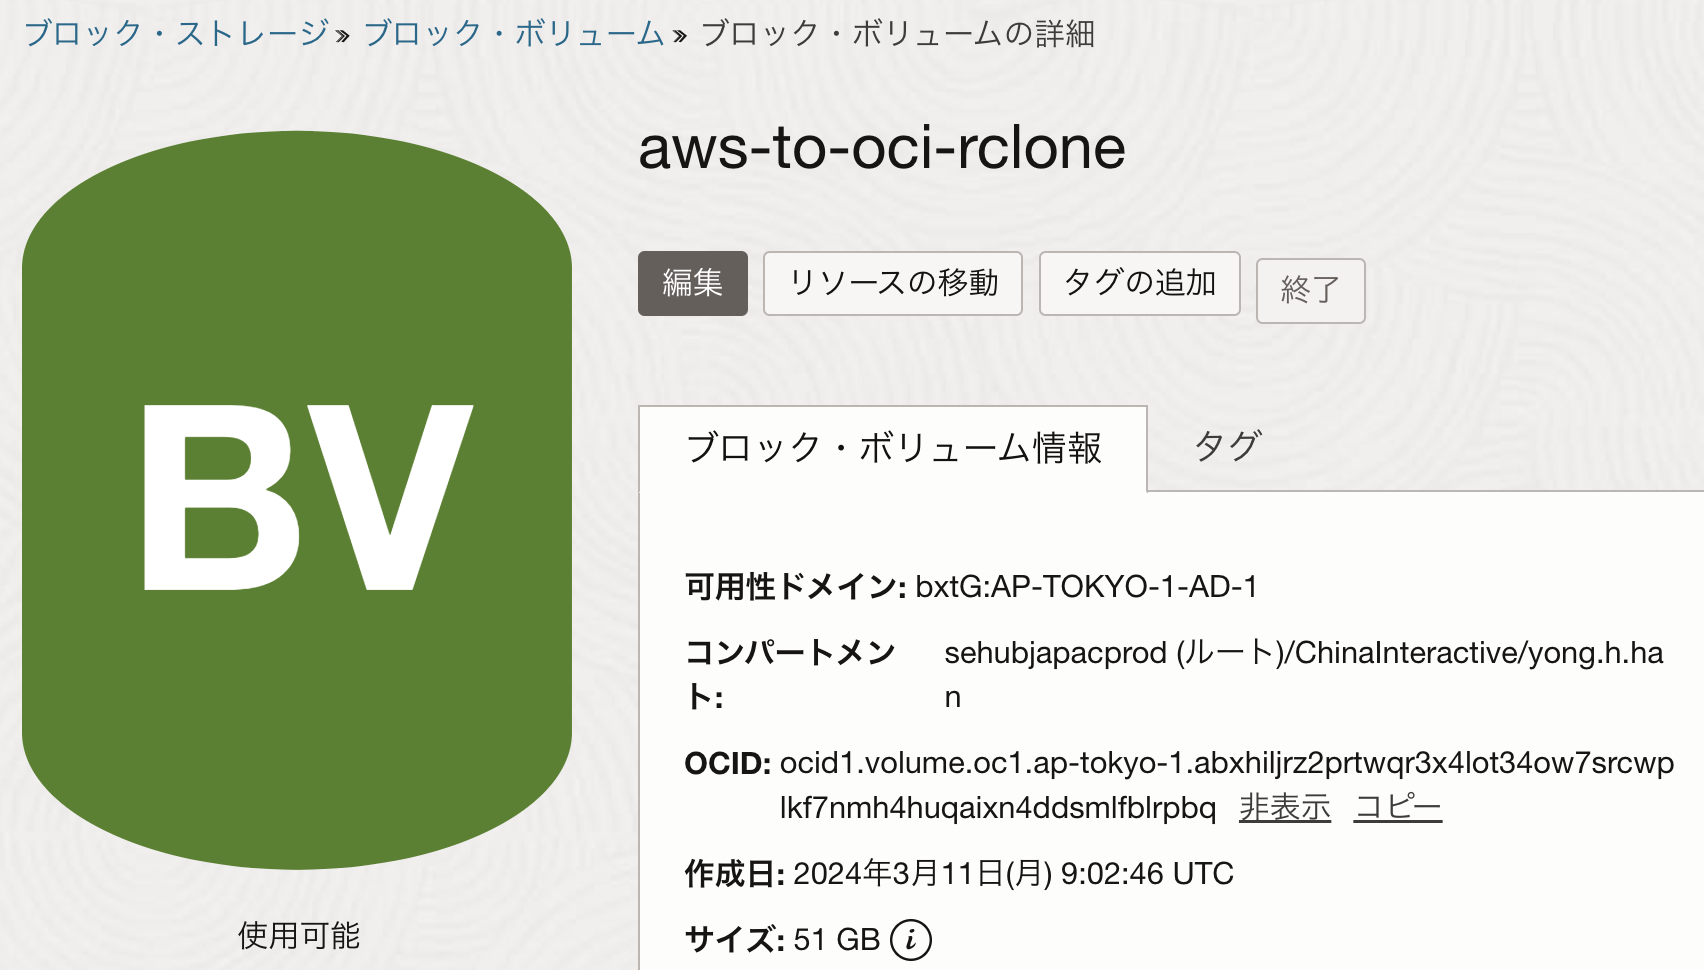
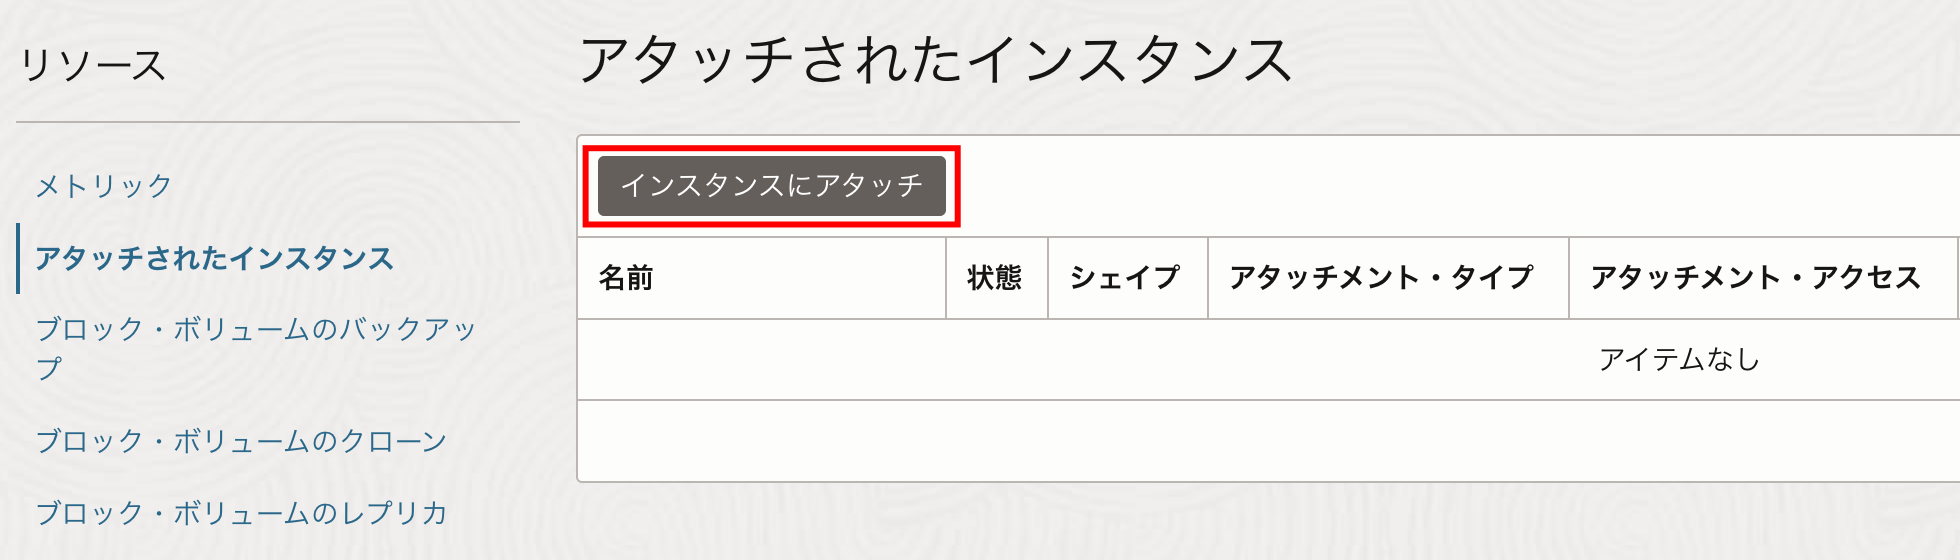
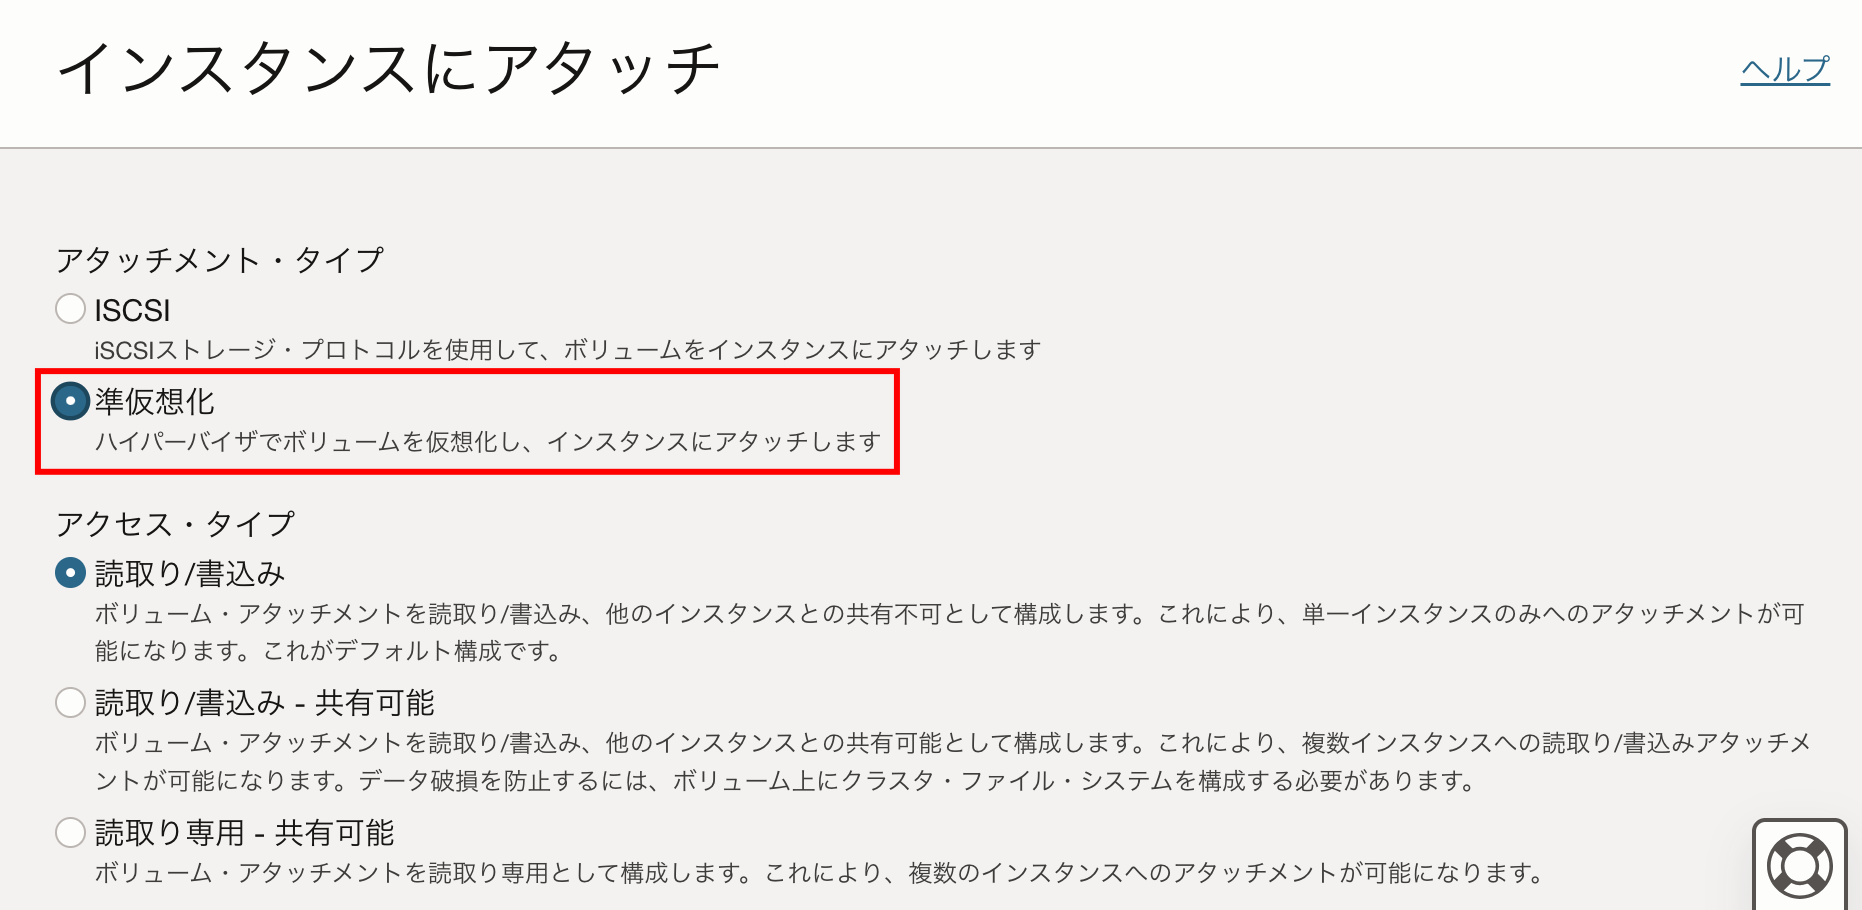
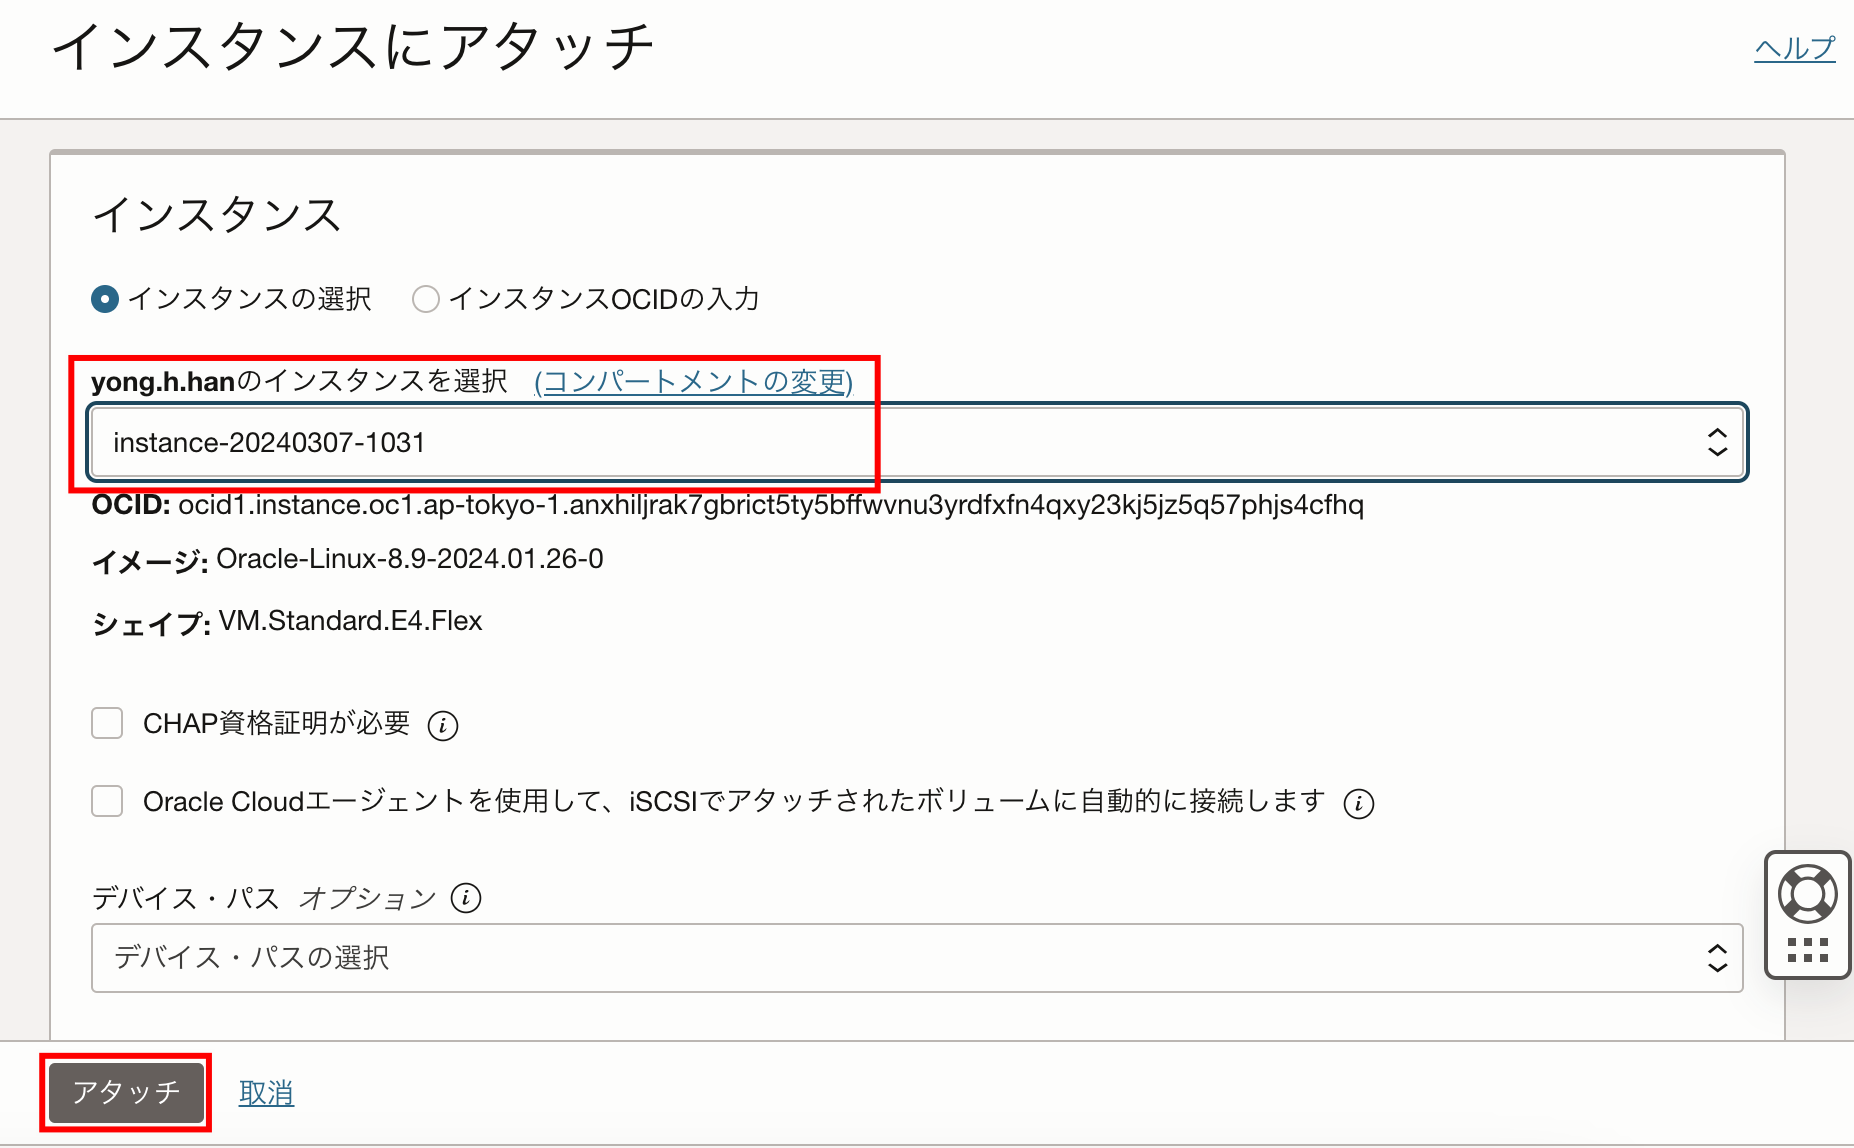
4. 移行先のブロック・ボリュームをコンピュート・インスタンスにアタッチ
OCIコンソールにログインして、ブロック・ボリュームの設定画面を開き、コンピュート・インスタンスにアタッチします。
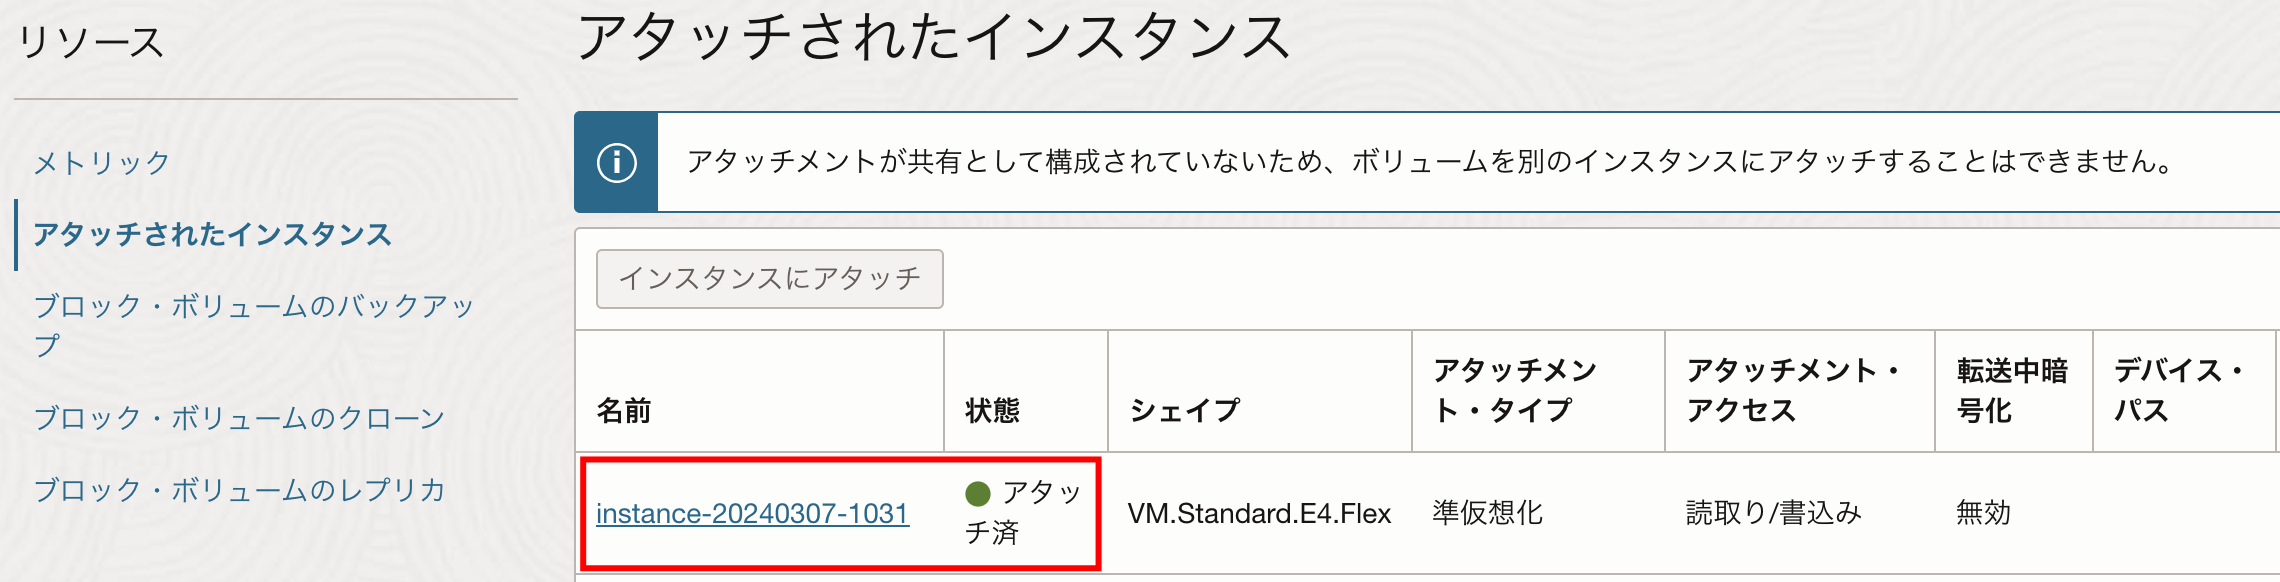
SSHでOCIのコンピュート・インスタンスに接続します。その後EC2と同じく、下記のコマンドを実行して、ブロック・ボリュームのファイルシステムを構築し、移行先のディレクトリ/dev/databaseTestにマウントします。
[opc@instance-20240307-1031 ~]$ sudo -s
[root@instance-20240307-1031 opc]# fdisk -l
省略です。

Disk /dev/sdc: 51 GiB, 54760833024 bytes, 106954752 sectors
Units: sectors of 1 * 512 = 512 bytes
Sector size (logical/physical): 512 bytes / 4096 bytes
I/O size (minimum/optimal): 4096 bytes / 1048576 bytes
[root@instance-20240307-1031 opc]# fdisk /dev/sdc
Welcome to fdisk (util-linux 2.32.1).
Changes will remain in memory only, until you decide to write them.
Be careful before using the write command.

Device does not contain a recognized partition table.
Created a new DOS disklabel with disk identifier 0x838d1df5.

Command (m for help): n
Partition type
   p   primary (0 primary, 0 extended, 4 free)
   e   extended (container for logical partitions)
Select (default p): p
Partition number (1-4, default 1):
First sector (2048-106954751, default 2048):
Last sector, +sectors or +size{K,M,G,T,P} (2048-106954751, default 106954751):

Created a new partition 1 of type 'Linux' and of size 51 GiB.

Command (m for help): w
The partition table has been altered.
Calling ioctl() to re-read partition table.
Syncing disks.
[root@instance-20240307-1031 opc]# fdisk -l
---省略---

Disk /dev/sdc: 51 GiB, 54760833024 bytes, 106954752 sectors
Units: sectors of 1 * 512 = 512 bytes
Sector size (logical/physical): 512 bytes / 4096 bytes
I/O size (minimum/optimal): 4096 bytes / 1048576 bytes
Disklabel type: dos
Disk identifier: 0x838d1df5

Device     Boot Start       End   Sectors Size Id Type
/dev/sdc1        2048 106954751 106952704  51G 83 Linux
[root@instance-20240307-1031 opc]# mkfs -t ext4 /dev/sdc1
mke2fs 1.46.2 (28-Feb-2021)
Discarding device blocks: done
Creating filesystem with 13369088 4k blocks and 3342336 inodes
Filesystem UUID: c9215b47-2632-4191-a81f-f6369fdedffd
Superblock backups stored on blocks:
	32768, 98304, 163840, 229376, 294912, 819200, 884736, 1605632, 2654208,
	4096000, 7962624, 11239424

Allocating group tables: done
Writing inode tables: done
Creating journal (65536 blocks): done
Writing superblocks and filesystem accounting information: done
[root@instance-20240307-1031 opc]# mkdir /dev/awsEbs
[root@instance-20240307-1031 opc]# mount /dev/sdc1 /dev/awsEbs
[root@instance-20240307-1031 awsEbs]# df -h
Filesystem                  Size  Used Avail Use% Mounted on
---省略---

/dev/sdc1                    50G   24K   48G   1% /dev/awsEbs
5. コンピュート・インスタンスでrcloneを実行し、S3からデータファイルをオブジェクト・ストレージに移動
下記のコマンドでrcloneをインストールします。
[root@instance-20240307-1031 opc]# curl https://rclone.org/install.sh | sudo bash
  % Total    % Received % Xferd  Average Speed   Time    Time     Time  Current
                                 Dload  Upload   Total   Spent    Left  Speed
100  4734  100  4734    0     0   5683      0 --:--:-- --:--:-- --:--:--  5683
Archive:  rclone-current-linux-amd64.zip
省略です。

rclone v1.66.0 has successfully installed.
Now run "rclone config" for setup. Check https://rclone.org/docs/ for more details.
/root/.config/rcloneディレクトリにrclone.confを作成します。
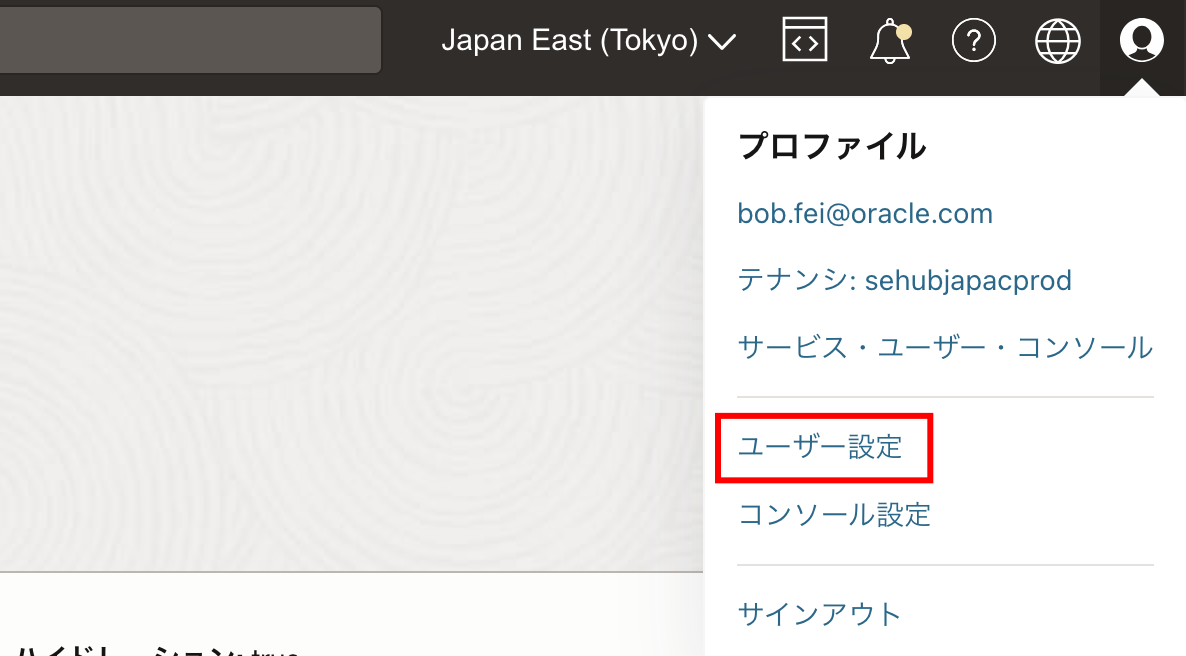
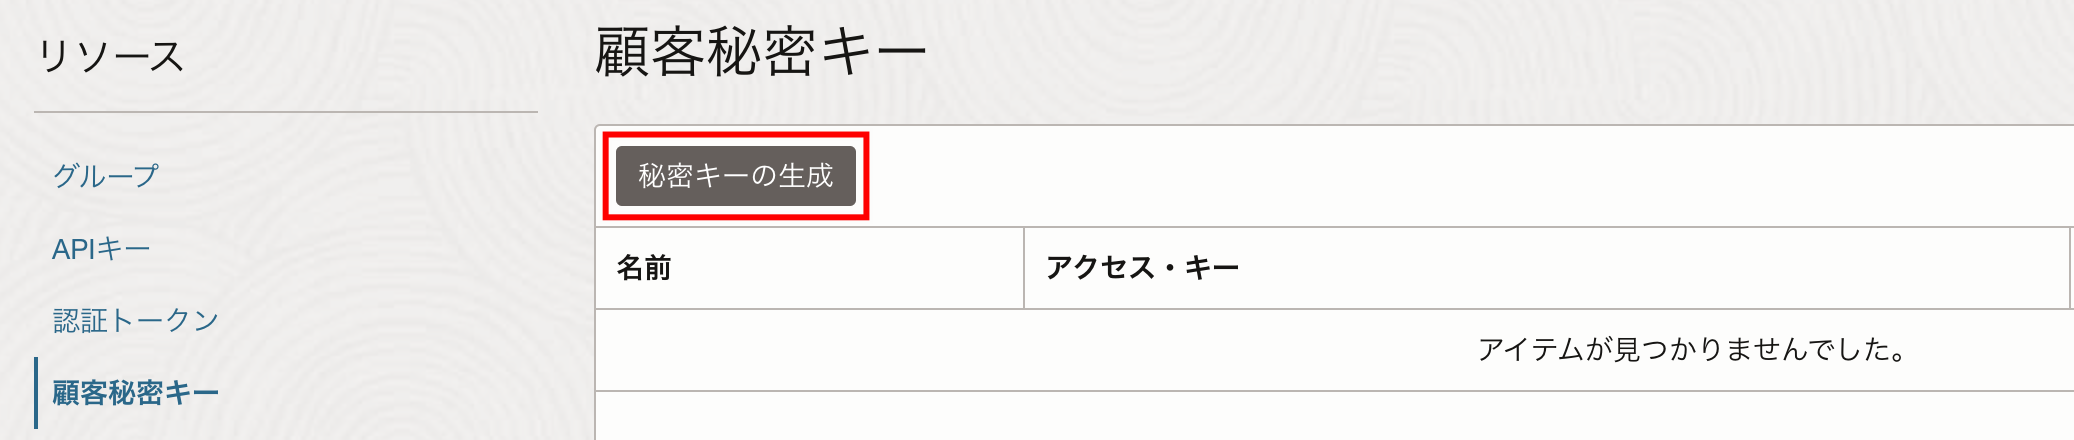
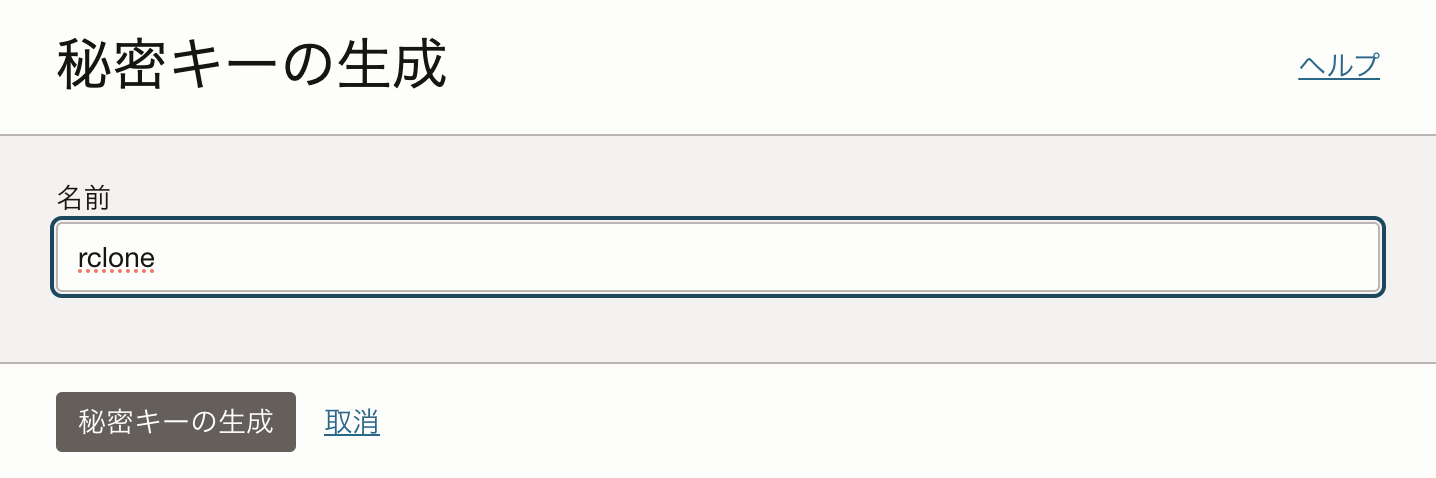
設定にはOCIとAWSのアクセスキーIDとシークレットアクセスキー情報が必要となり、OCIのaccess_key_idとsecret_access_keyは、OCIコンソールで新しく作成するか、既存のものを使用してください。
AWSに関しては、前の手順で既に生成しています。
secret_access_keyです。
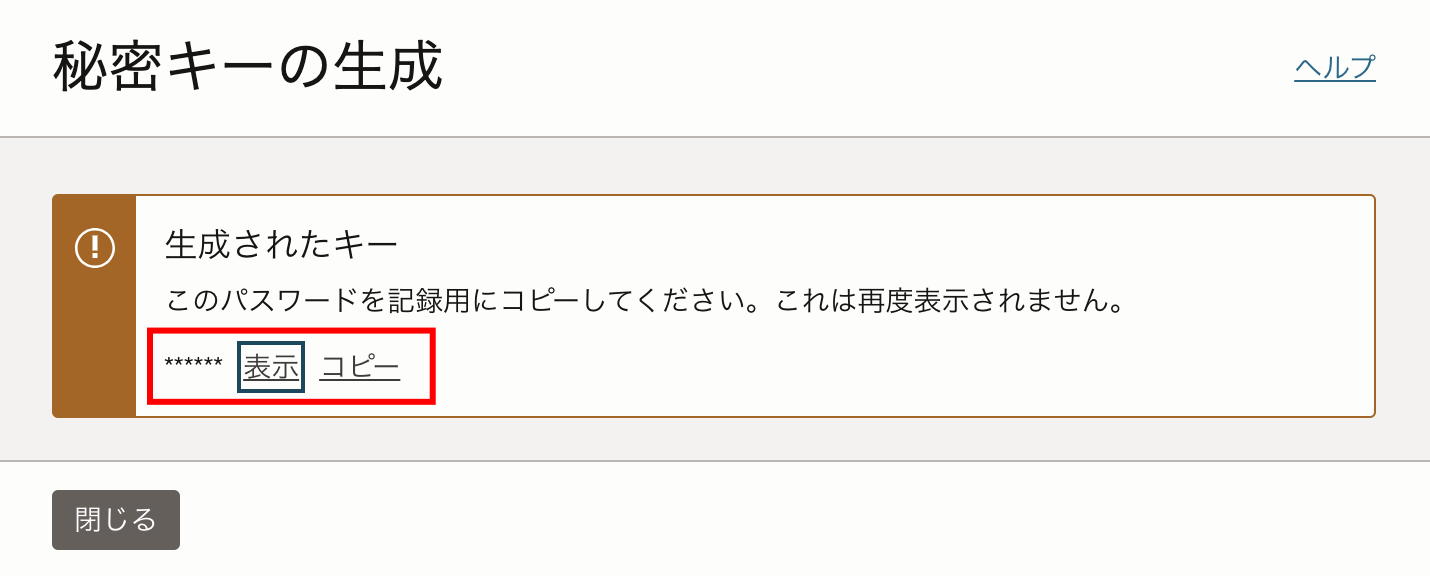
access_key_idです。
rclone.conf設定ファイルは以下の通りです。endpointの作成方法について、下記のリンクをご参考ください。
OCIオブジェクト・ストレージ専用エンドポイント
https://docs.oracle.com/ja-jp/iaas/Content/Object/Concepts/dedicatedendpoints.htm
#########aws##############
[aws]
type = s3
provider = AWS
access_key_id = XXXXXXXX
secret_access_key = XXXXXXXX
region = ap-northeast-1

#############oci################
[oci]
type = s3
provider = Other
access_key_id = XXXXXXXX
secret_access_key = XXXXXXXX
region = ap-tokyo-1
endpoint = https://sehubjapacprod.compat.objectstorage.ap-tokyo-1.oraclecloud.com
※今回はS3からのデータ移行のため、APIタイプ S3互換を選択しています。
rcloneコマンドを実行して、S3のデータをOCIのオブジェクト・ストレージに同期します。
[root@instance-20240307-1031 opc]# rclone copy aws:sehubtest20240305/dev/databaseTest/db.csv oci:sehubapac-test/dev/databaseTest -P --transfers=16
Transferred:   	         48 B / 48 B, 100%, 0 B/s, ETA -
Transferred:            1 / 1, 100%
Elapsed time:         0.2s
[root@instance-20240307-1031 opc]# rclone copy aws:sehubtest20240305/dev/databaseTest/db.dump oci:sehubapac-test/dev/databaseTest -P --transfers=16
Transferred:   	         55 B / 55 B, 100%, 0 B/s, ETA -
Transferred:            1 / 1, 100%
Elapsed time:         0.2s
[root@instance-20240307-1031 opc]#
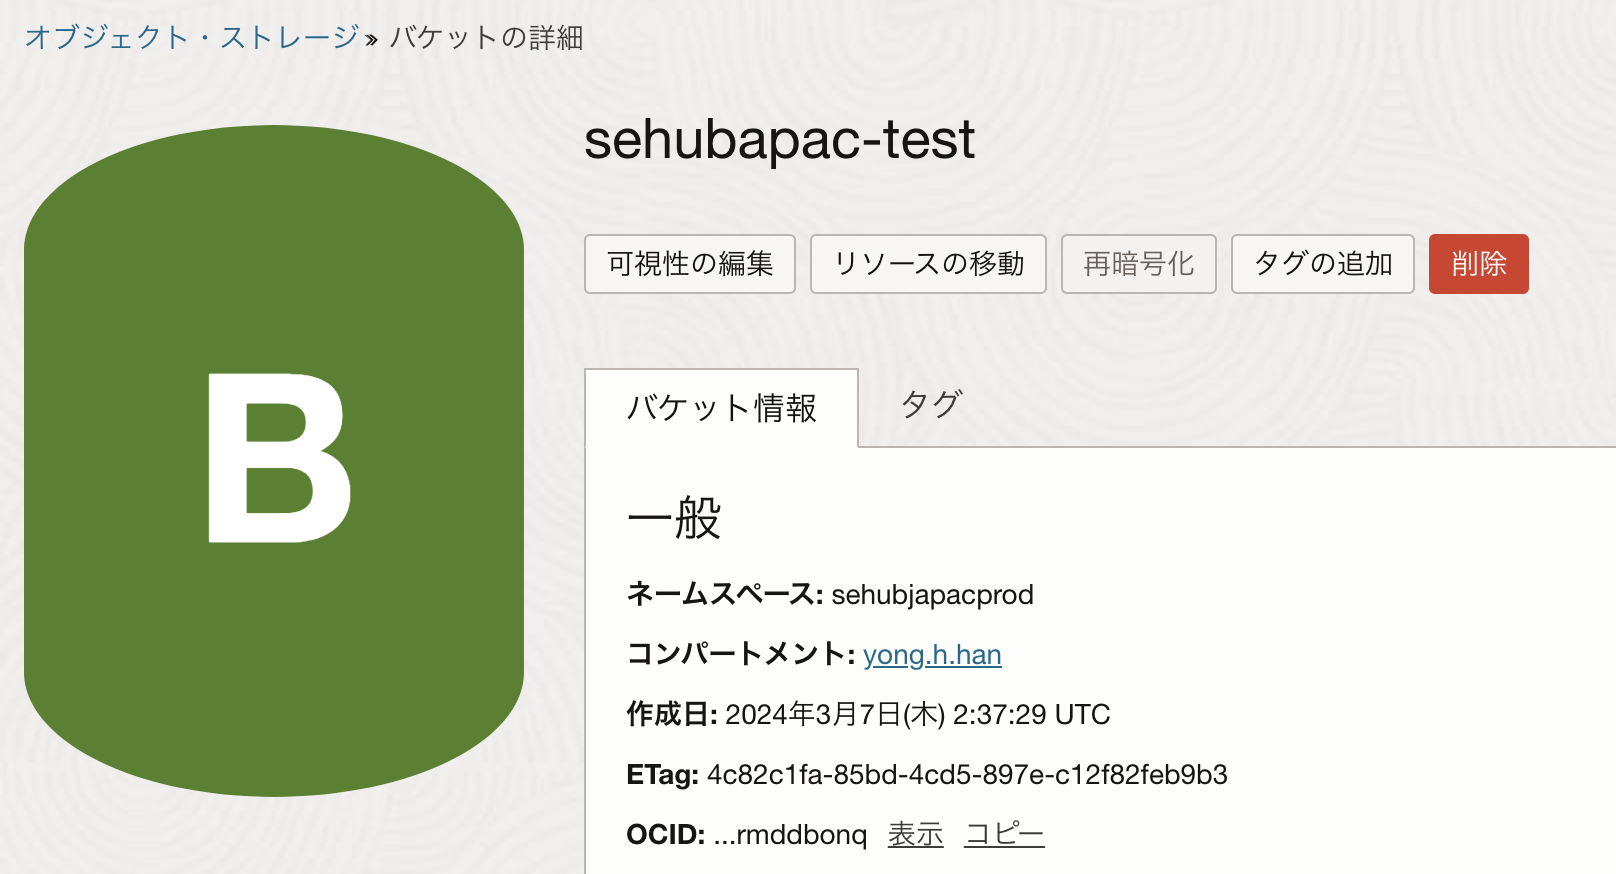
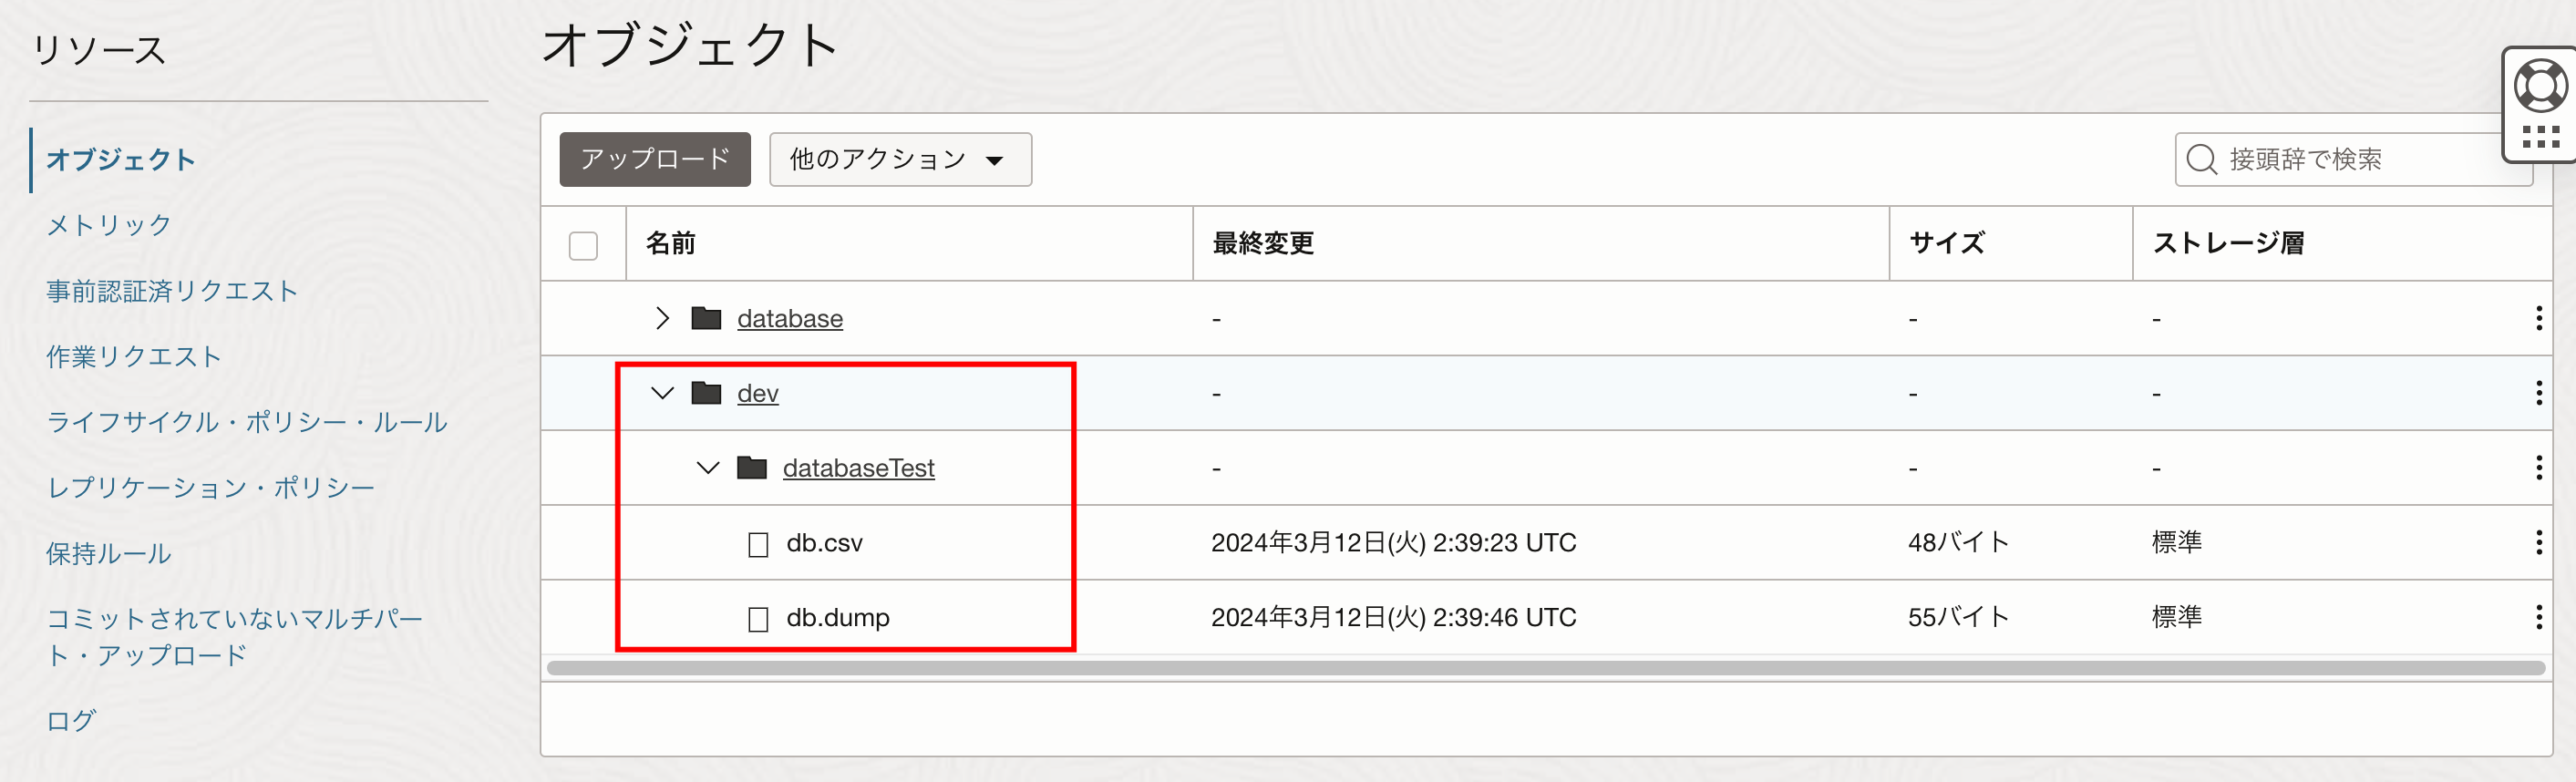
オブジェクト・ストレージの画面で階層付きの同期結果を確認します。
6. コンピュート・インスタンスでOCI CLIを実行し、データファイルをオブジェクト・ストレージからブロック・ボリュームにダウンロード
OCIコンピュート・インスタンスにOCI CLIをインストールします。
[root@instance-20240307-1031 opc]# dnf -y install oraclelinux-developer-release-el8
This system is receiving updates from OSMS server.
Waiting for process with pid 13268 to finish.
---省略---

Complete!
[root@instance-20240307-1031 opc]# dnf install python36-oci-cli
This system is receiving updates from OSMS server.
Last metadata expiration check: 0:02:33 ago on Tue 12 Mar 2024 02:59:39 AM GMT.
---省略---

Complete!
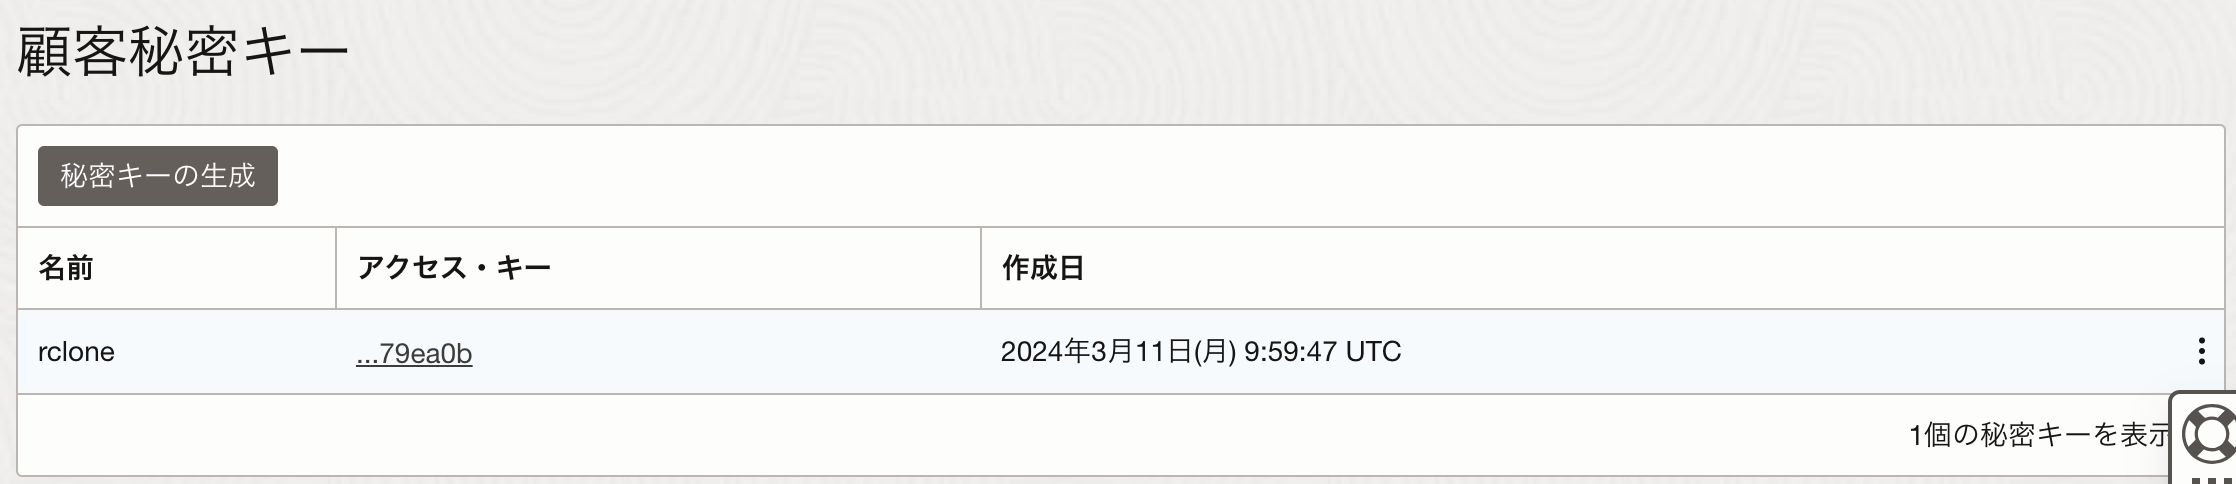
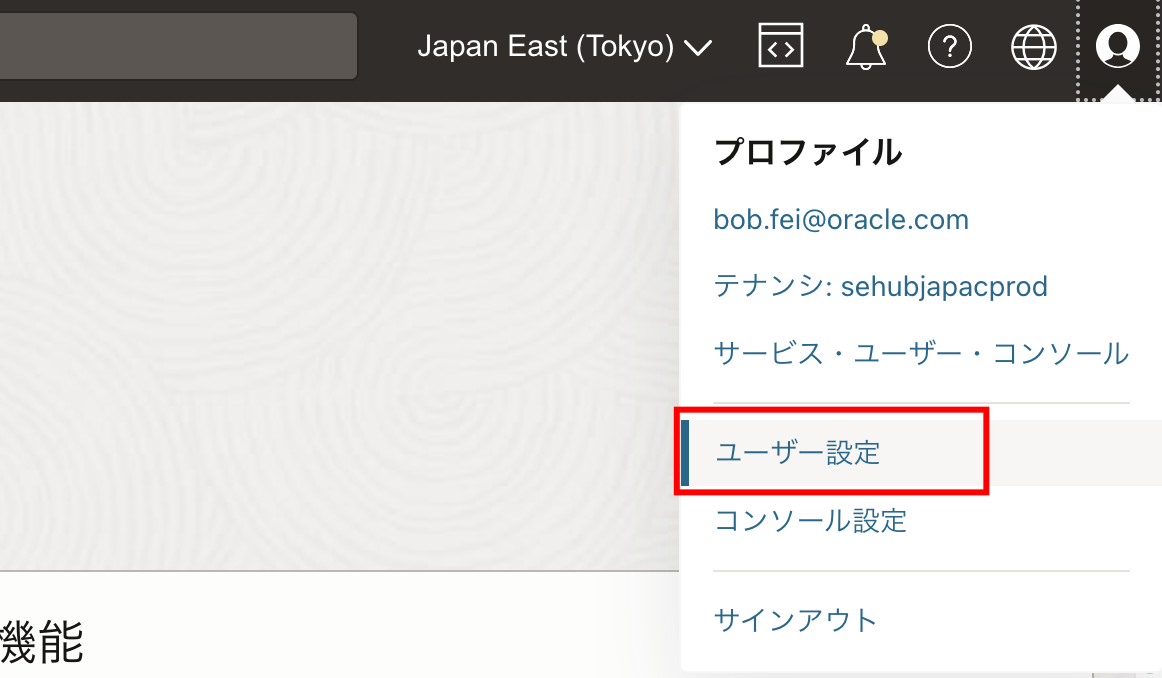
OCI CLI環境を設定し、OCIコンソール上でAPIキーを追加します。
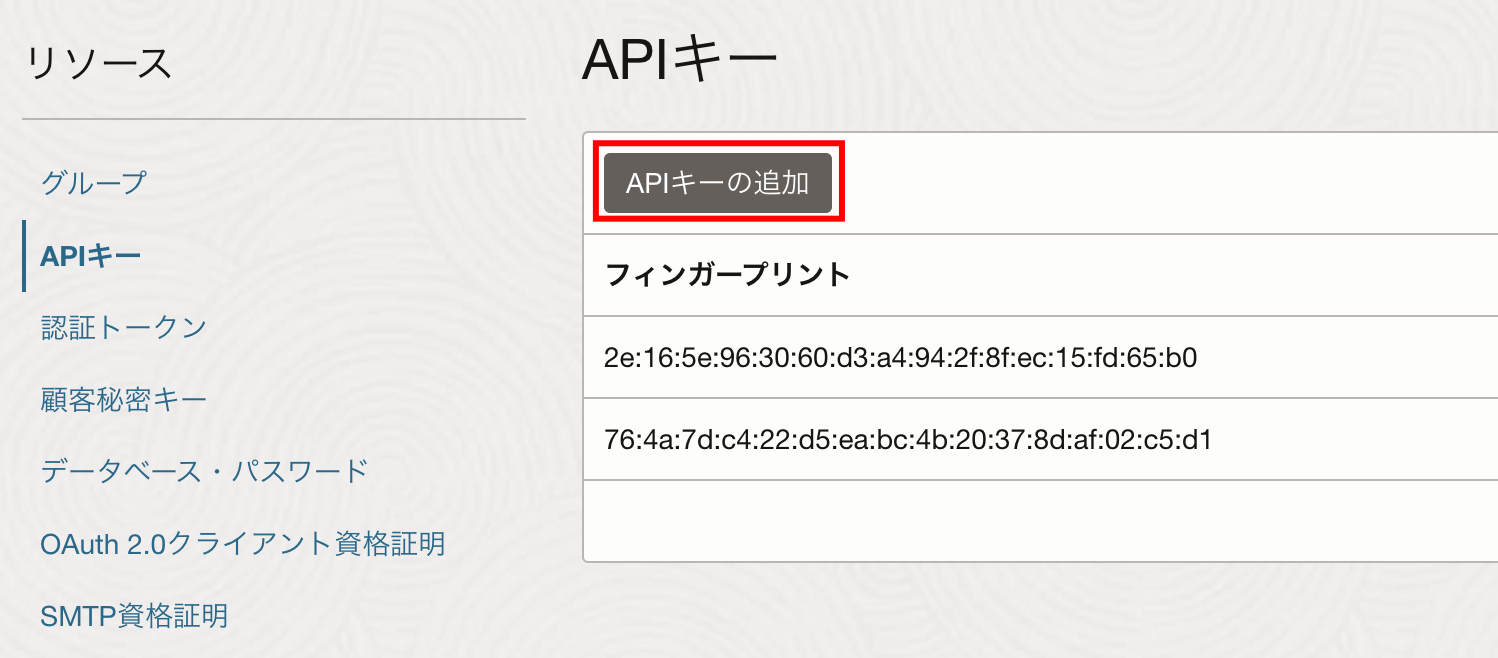
秘密キーをローカルにダウンロードし、「追加」ボタンをクリックします。

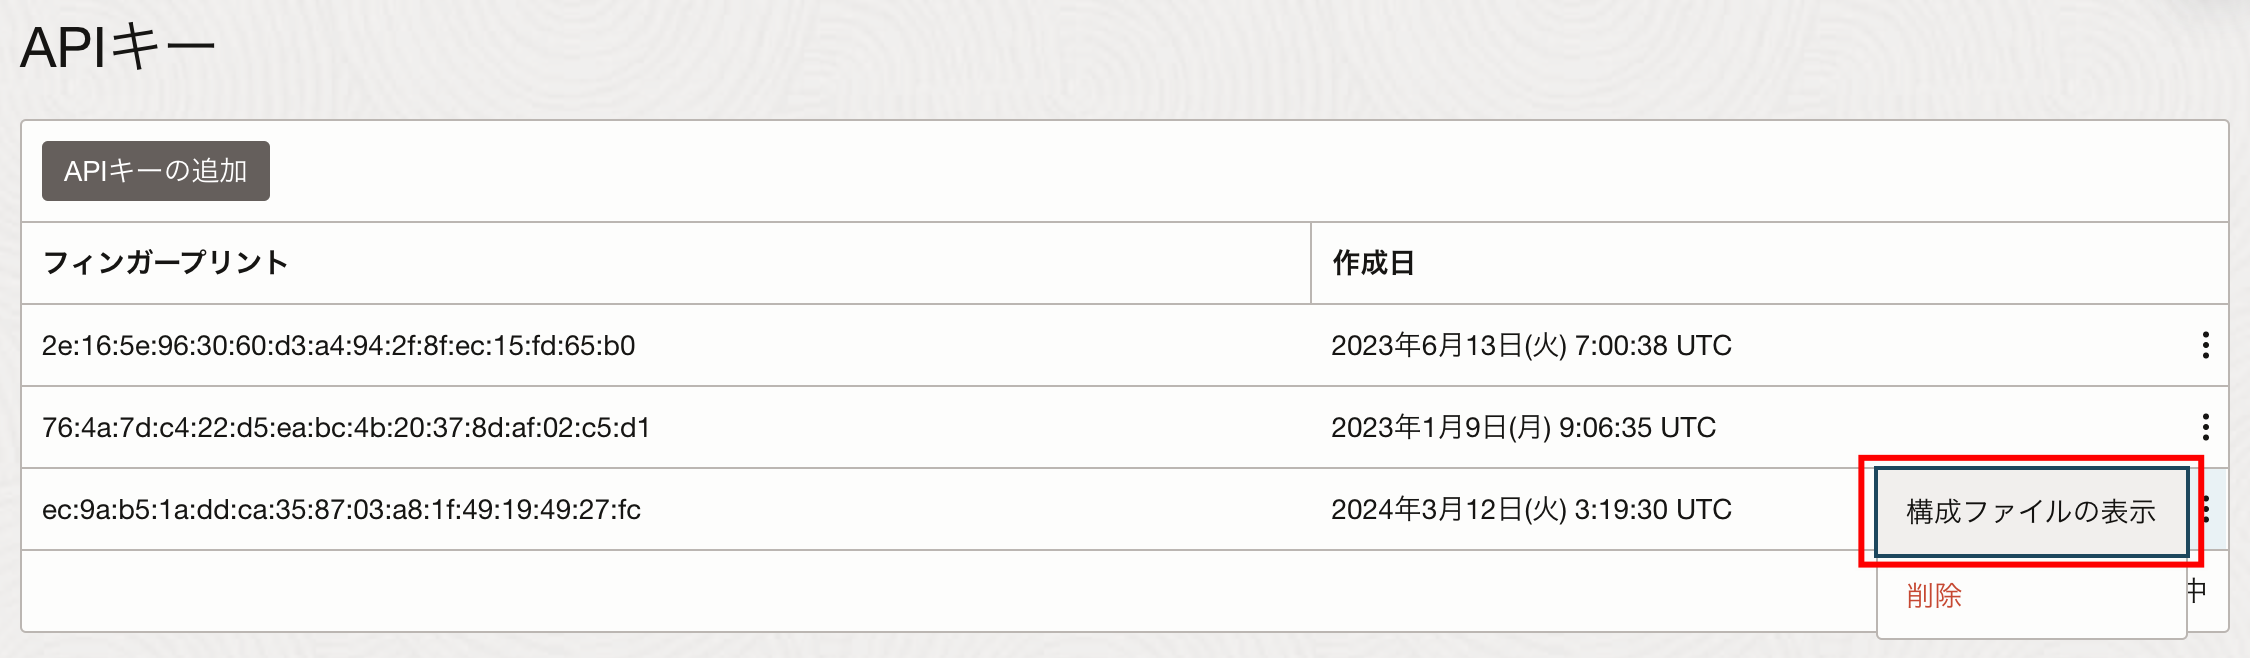
追加したAPIキーの「構成ファイルの表示」を選択し、その中の設定内容をOCIコンピュート・インスタンスの/root/.oci/configにコピーします。
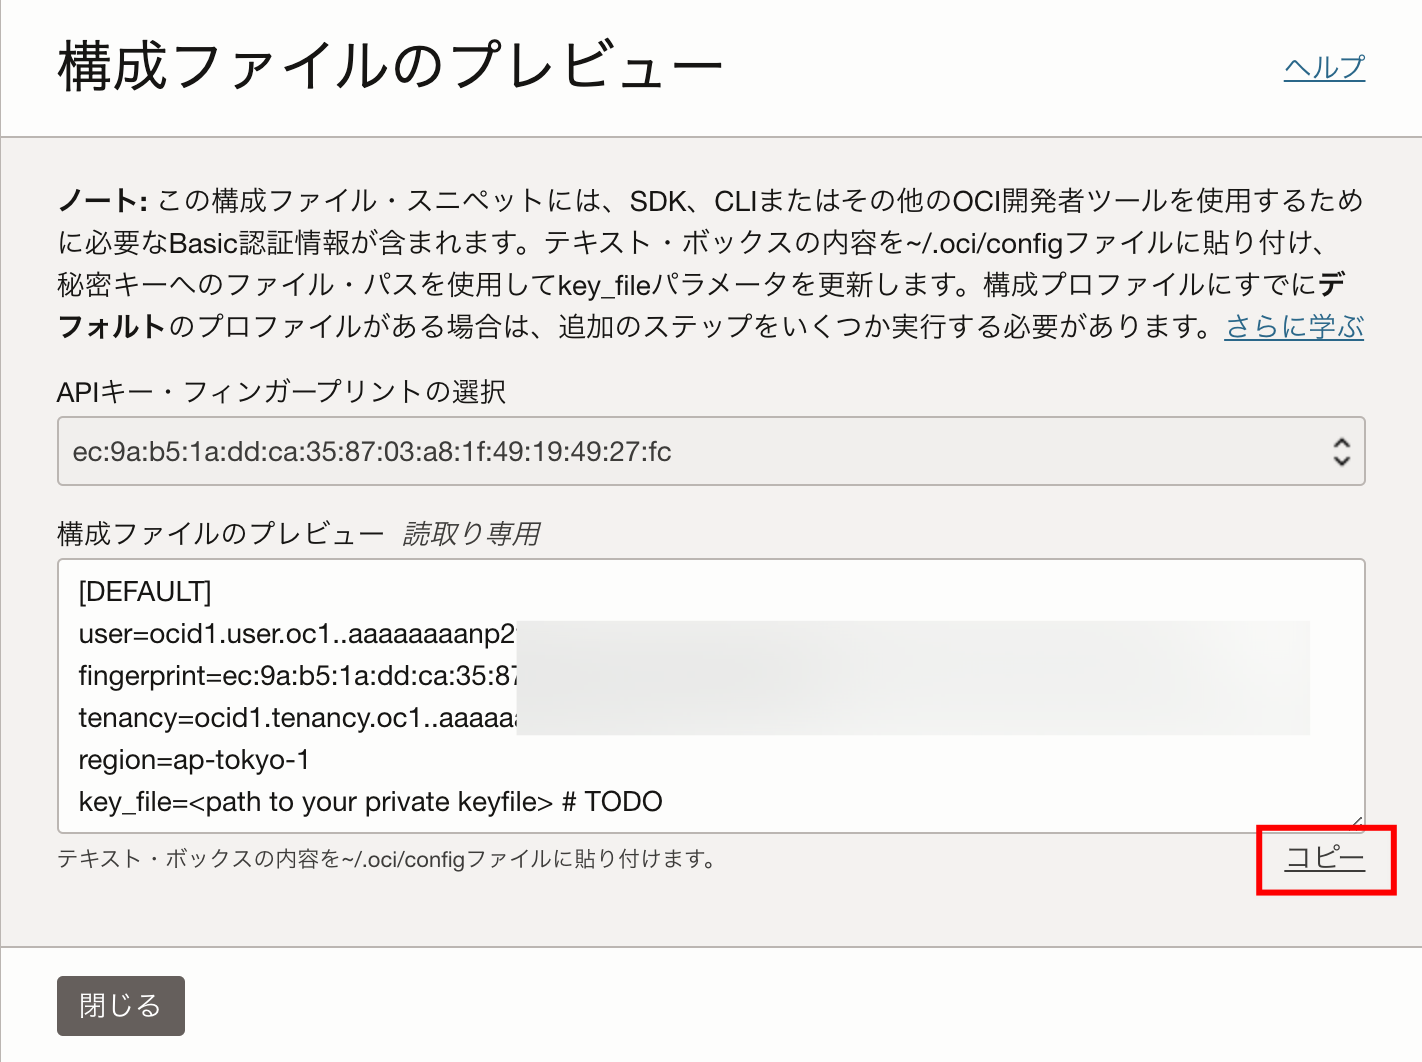
上記の設定内容にあるkey_fileのパスを指定するため、下記のコマンドでローカルにダウンロードした秘密キーをコンピュート・インスタンスにアップロードして、キーファイルの所有者と権限を設定します。
% scp -i ssh-key-2022-08-29.key key.pem  opc@150.230.197.23:/home/opc
key.pem     100% 1734    20.8KB/s   00:00
% ssh -i ssh-key-2022-08-29.key opc@150.230.197.23
Activate the web console with: systemctl enable --now cockpit.socket
Last login: Tue Mar 12 05:23:27 2024 from 202.45.129.202
[opc@instance-20240307-1031 ~]$ sudo -s
[root@instance-20240307-1031 opc]# chown root:root key.pem
[root@instance-20240307-1031 opc]# chmod 400 key.pem
[root@instance-20240307-1031 opc]# ll
-r--------. 1 root root 1734 Mar 12 05:24 key.pem
設定完了のファイルは下記となります。
[root@instance-20240307-1031 .oci]# pwd
/root/.oci
[root@instance-20240307-1031 .oci]# cat config
[DEFAULT]
user=ocid1.user.oc1..aa
fingerprint=c8:77:88:9e:a6:b8:50:97:be:5
tenancy=ocid1.tenancy.oc1..aaaaaaaa
region=ap-tokyo-1
key_file=/home/opc/key.pem
下記のコマンドを実行し、オブジェクト・ストレージからデータファイルをコンピュート・インスタンスにダウンロードします。
パラメータの利用方法について、下記をご参考ください。
[root@instance-20240307-1031 awsEbs]# oci os object bulk-download -ns sehubjapacprod -bn sehubapac-test --download-dir / --prefix dev --dest-dir /dev/awsEbs
Downloaded dev/databaseTest/db.dump  [####################################]  100%
Downloaded dev/databaseTest/db.csv  [####################################]  100%

{
  "download-failures": {},
  "downloaded-objects": [
    "dev/databaseTest/db.dump",
    "dev/databaseTest/db.csv"
  ],
  "skipped-objects": []
}
ダウンロードした結果を確認します。AWSからのデータファイルの階層情報にもそのまま保持します。
[root@instance-20240307-1031 databaseTest]# ls -Rl /dev/awsEbs/
/dev/awsEbs/:
total 20
drwxr-xr-x. 3 root root  4096 Mar 12 06:43 dev
drwx------. 2 root root 16384 Mar 11 09:23 lost+found

/dev/awsEbs/dev:
total 4
drwxr-xr-x. 2 root root 4096 Mar 12 06:43 databaseTest

/dev/awsEbs/dev/databaseTest:
total 8
-rw-r--r--. 1 root root 48 Mar 12 06:43 db.csv
-rw-r--r--. 1 root root 55 Mar 12 06:43 db.dump

/dev/awsEbs/lost+found:
total 0
まとめ
rcloneで任意のディレクトリ構造を持つデータファイルをAmazon EBSからOCIオブジェクト・ストレージに移行する手順を紹介しました。
rcloneの移行では、データを一度オブジェクトストレージに格納することで、セキュアかつ安全にデータ移行することができます。
データ移行の要件がある場合にご参考ください。