予約システムをLet'sハンズオン!
今日の目標はこんな感じ。
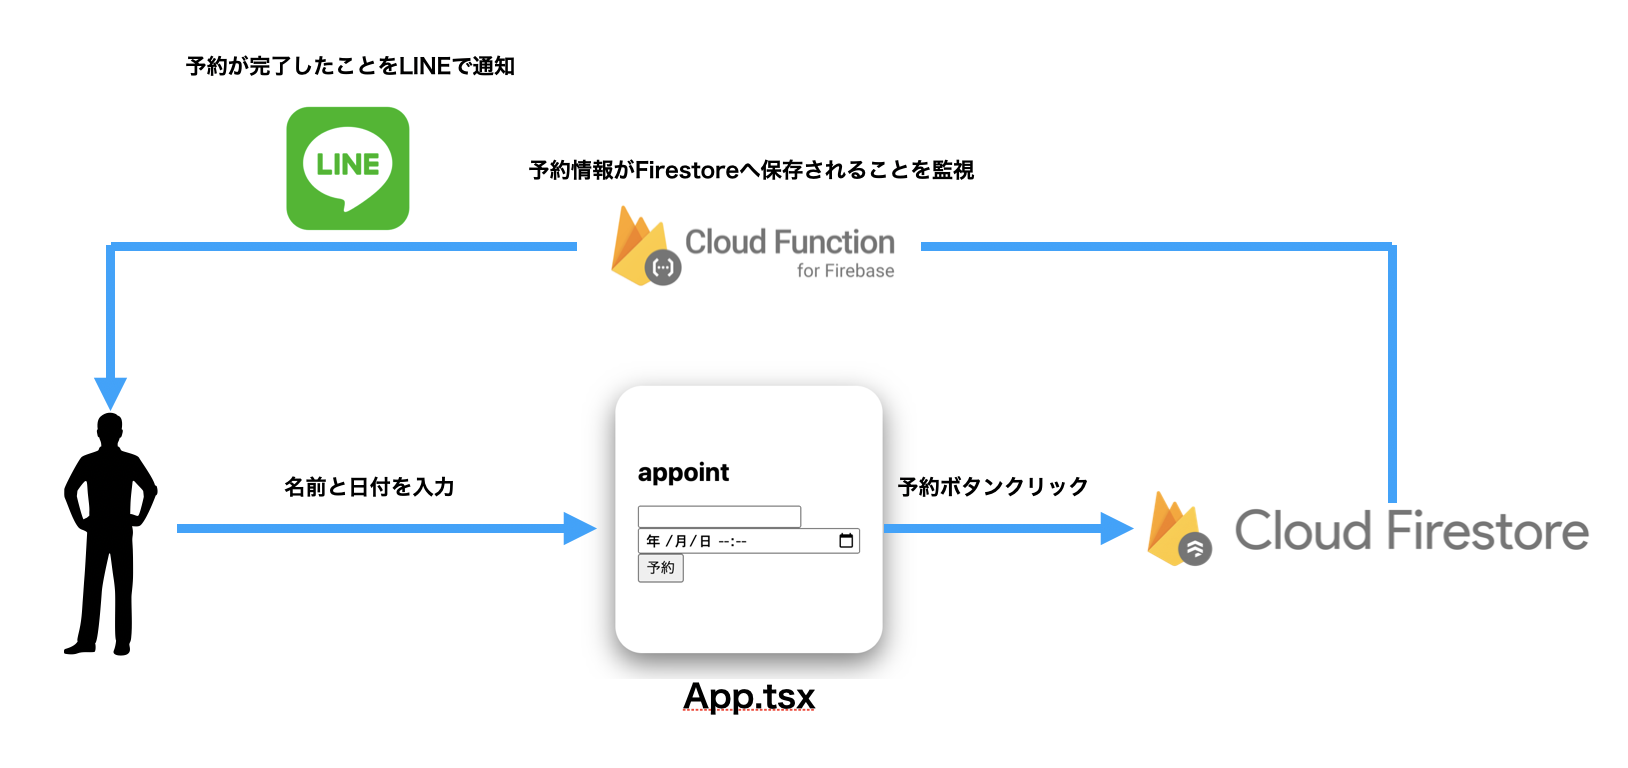
ハンズオンのタスクとしては以下3点。
- 名前と日付を入力できる appointカードをApp.tsx上へ作成
- Firestoreへ名前と日付を保存する関数を作成
- CloudFunctionsを作成し、Firestoreを監視して、Firestoreへユーザーの予約情報が保存されたらLINE通知
なかなか強敵ですが、気張ってやっていきましょう!
Next.js × Firebase × Line Messaging API 環境構築
まずはなにがともあれNext.jsのプロジェクトを立ち上げてみる。
npx create-next-app next-appointment-app --typescript
プロジェクトの作成が完了したら、とりあえず動かしてみるやで。
cd next-appointment-app
npm run dev
プロジェクトへ追加するのは以下。
- appointCard.tsx
- Card.module.css
- firebase.ts
- .env.local
appointCard.tsx
import { useState } from 'react';
import { appointmentFunc } from '../lib/firebase';
import styles from '../styles/Card.module.css';

const AppointCard = ({ name }: { name: string }) => {
  const [username, setUsername] = useState<string>('');
  const [date, setDate] = useState<string>('');
  const handleAppoint = async () => {
    await appointmentFunc(username, date);
    console.log(
      '🚀 ~ file: index.tsx ~ line 11 ~ sendLine ~ username',
      username
    );
    console.log(
      '🚀 ~ file: appointCard.tsx ~ line 7 ~ AppointCard ~ date',
      date
    );
  };
  return (
    <section className={styles.card}>
      <div className={styles.container}>
        <main className={styles.main}>
          <h1>{name}</h1>
          <br />
          <input type="text" onChange={(e) => setUsername(e.target.value)} />
          <br />
          <input
            type="datetime-local"
            onChange={(e) => setDate(e.target.value)}
          />
          <br />
          <button onClick={handleAppoint}>予約</button>
        </main>
      </div>
    </section>
  );
};

export default AppointCard;
cssはこんな感じ。
Card.module.css
.container {
  width: 100%;
  display: flex;
  justify-content: space-around;
  align-items: center;
}

.card {
  display: flex;
  justify-content: center;
  align-items: center;
  width: 250px;
  height: 250px;
  border-radius: 25px;
  box-shadow: 0 10px 25px 0 rgba(0, 0, 0, 0.5);
  cursor: pointer;
}
画面側の実装はおしまい。
みんなおつかれちゃん。
Firestoreへ名前と日付を保存する関数を作成
firebaseとの接続部分は以下。
firebase.ts
import firebase, { getApps,initializeApp } from 'firebase/app'
import { getAuth, signInWithPopup, GoogleAuthProvider, onAuthStateChanged,signOut } from "firebase/auth"
import { collection, addDoc,getFirestore,doc, setDoc,serverTimestamp  } from "firebase/firestore"
import { getStorage } from "firebase/storage"

const firebaseConfig = {
  apiKey: process.env.NEXT_PUBLIC_FIREBASE_APIKEY,
  authDomain: process.env.NEXT_PUBLIC_FIREBASE_AUTHDOMAIN,
  projectId: process.env.NEXT_PUBLIC_FIREBASE_PROJECTID,
  storageBucket: process.env.NEXT_PUBLIC_FIREBASE_STORAGEBUCKET,
  messagingSenderId: process.env.NEXT_PUBLIC_FIREBASE_MESSAGINGSENDERID,
  appId: process.env.NEXT_PUBLIC_FIREBASE_APPID,
  measurementId: process.env.NEXT_PUBLIC_MEASUREMENT_ID
};

const apps = getApps
if (!apps.length) {
  initializeApp(firebaseConfig)
}

export const db = getFirestore();
export const storage = getStorage();

export const appointmentFunc = async (name: string,date:string) => {
// Add a new document with a generated id.
const docRef = await addDoc(collection(db, "appointment"), {
  name: name,
  appointDate: date,
  timestamp: serverTimestamp()
});
console.log("Document written with ID: ", docRef.id);
}
.env.localはこんな感じ。Firebaseの設定とLINEの設定はおまかせ。
.env.local
NEXT_PUBLIC_FIREBASE_APIKEY="xxxxxxxxxxxxxxxxxxxxxxxxxxxx"
NEXT_PUBLIC_FIREBASE_AUTHDOMAIN="xxxxxxxxxxxxxxxxxxxxxxxxxxxx"
NEXT_PUBLIC_FIREBASE_PROJECTID="xxxxxxxxxxxxxxxxxxxxxxxxxxxx"
NEXT_PUBLIC_FIREBASE_STORAGEBUCKET="xxxxxxxxxxxxxxxxxxxxxxxxxxxx"
NEXT_PUBLIC_FIREBASE_MESSAGINGSENDERID="xxxxxxxxxxxxxxxxxxxxxxxxxxxx"
NEXT_PUBLIC_FIREBASE_APPID="xxxxxxxxxxxxxxxxxxxxxxxxxxxx"
NEXT_PUBLIC_MEASUREMENT_ID="xxxxxxxxxxxxxxxxxxxxxxxxxxxx"

NEXT_PUBLIC_LINE_ACCESS_TOKEN="xxxxxxxxxxxxxxxxxxxxxxxxxxxx"
NEXT_PUBLIC_LINE_CHANNEL_SECRET="xxxxxxxxxxxxxxxxxxxxxxxxxxxx"
これでFirebaseとの接続の実装は完了。
みんなおつかれちゃん。
CloudFunctionsを作成し、Firestoreを監視して、Firestoreへユーザーの予約情報が保存されたらLINE通知
まずはなにがともあれ、CloudFunctionを環境構築。(別ディレクトリ切ったけどどこでもいいよ!)
まずはFirebaseを従量制にしててね。(大丈夫。どうせ無料枠は飛び出ないから。知らんけど。)

CloudFunctionを実装するディレクトリを作成。
npmの初期化。
mkdir next-appointment-func
cd next-appointment-func
npm init -y
Functionsをインストール。
npm install firebase-functions@latest firebase-admin@latest --save
npm install -g firebase-tools
まずは、LINEのSDKを使用するので、以下をinstall
npm install --save @line/bot-sdk
functions/src/index.tsへ以下の実装をGo。
index.ts
import * as functions from "firebase-functions";
import * as line from '@line/bot-sdk';

require('dotenv').config();

// The Firebase Admin SDK to access Firestore.
const admin = require('firebase-admin');
admin.initializeApp();

const config = {
  channelAccessToken: process.env.NEXT_PUBLIC_LINE_ACCESS_TOKEN!,
  channelSecret: process.env.NEXT_PUBLIC_LINE_CHANNEL_SECRET!
};

const client = new line.Client(config);

exports.helloworld = functions.https.onRequest(async (req, res) => {
  // Send back a message that we've successfully written the message
  res.json({result: `Hello world`});
});

exports.checkFirestore = functions.firestore.document('/appointment/{documentId}')
  .onCreate((snap, context) => {
    const newValue = snap.data();
      // access a particular field as you would any JS property
    const name = newValue.name;
    const message =
      `【予約が完了致しました。】
    ${name}様
    ご予約誠にありがとうございます!
    ${newValue.appointDate}にお会いできることを楽しみにしております!
    yujiro
    `
    // lineで送信
    client.broadcast({
      type: "text",
      text: message
    }).then(data => console.log(data))
      .catch(e => console.log(e))
})
後は、src以下に.envファイルを作成
.env
NEXT_PUBLIC_LINE_ACCESS_TOKEN="xxxxxxxxxxxxxxxxxxxxxxxxxxxx"
NEXT_PUBLIC_LINE_CHANNEL_SECRET="xxxxxxxxxxxxxxxxxxxxxxxxxxxx"
.envファイル使うので、dotenvをインストール
npm install dotenv --save
ここまできたら 、ビルドしてデプロイすればOK
npm run deploy
firebase deploy --only functions
では、Let's動作確認!
動作確認
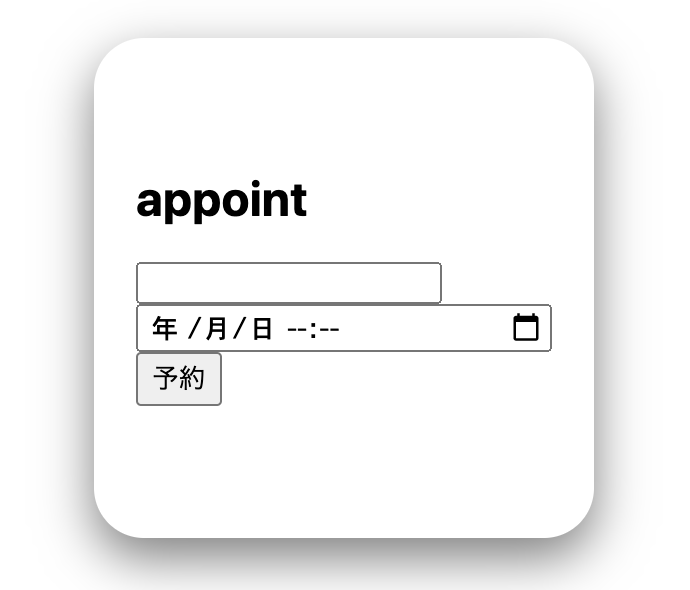
予約画面はこんな感じ。
名前と日付を入れて…
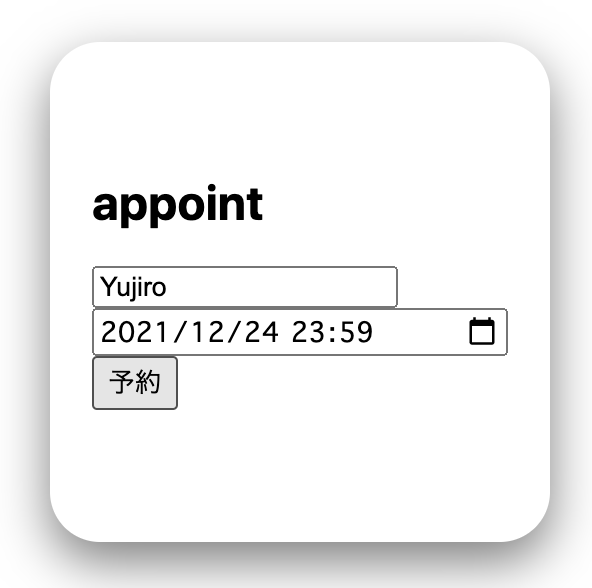
クリスマスまでに彼女ほしいなぁ…
予約ボタンをクリック!

予約完了の予約がきちゃいます。
ハンズオンは以上です!
ここまで見てくれたみんな、本当にありがとう!
最後に
ゆうじろうが運営しているプログラミングスクールです。
是非遊びにきてね。
後、Firebaseを使用する企業様へ転職を希望しております。
ゆうじろうを雇用したい企業様はお気軽にご連絡ください。
スキルスタックは以下です。
- React
- TypeScript
- Firebase
- SQLServer
- VB.NET
- ASP.NET
- Oracle
お待ちしております!