ReactとFirebaseのCloudFunctionsを使ってStripeで決済機能を作れないか気になったので、調査してきたやで。
ほな、いくやで。
本日のゴール
こんな感じになれば今日はお勉強を終わってよし。
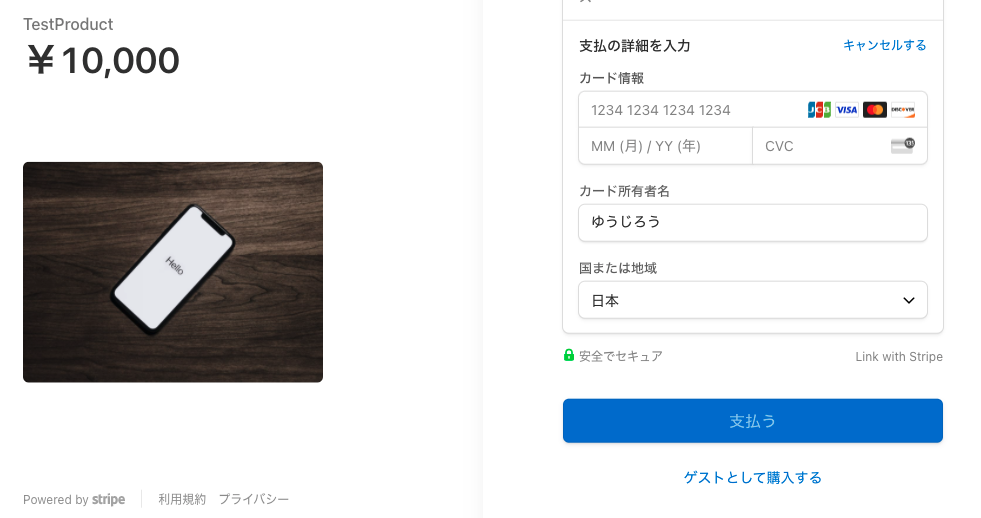
メイン画面

stripeのボタンをクリックした後
決済画面
さぁ、かるぅく実装してやろうか。
環境構築
今回は以下の構成を作っていくやで
-
client
Reactで画面側の処理を実装 -
server
FirebaseのCloudFunctionsの処理を実装
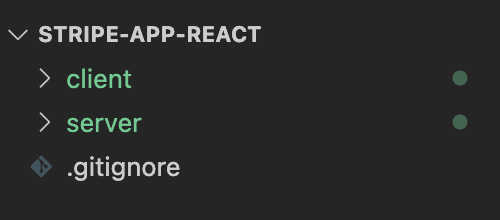
以下みたいなディレクトリ構成を作ります。
Client側(React)
まずはClient側の実装
create-react-app client --template typescript
Firebaseを使うので、以下をインストール
npm install firebase firebase-functions
後、Stripeも使うのでinstall
npm install --save stripe @stripe/stripe-js
まずはクライアントサイドからStripeを呼び出す関数を作成
lib/firebase.ts
import { initializeApp } from 'firebase/app'
import { getFunctions, httpsCallable } from 'firebase/functions'
import { loadStripe } from "@stripe/stripe-js";

const firebaseConfig = {
  apiKey: process.env.REACT_APP_API_KEY,
  authDomain: process.env.REACT_APP_AUTH_DOMAIN,
  databaseURL: process.env.REACT_APP_DATABASE_URL,
  projectId: process.env.REACT_APP_PROJECT_ID,
  storageBucket: process.env.REACT_APP_STORAGE_BUCKET,
  messagingSenderId: process.env.REACT_APP_MESSAGING_SENDER_ID,
  appId: process.env.REACT_APP_APP_ID
};

const app = initializeApp(firebaseConfig)

export const getStripeAPI = async () => {
  try {
    const functions = getFunctions(app)
    const createPaymentSession = httpsCallable(functions, 'createPaymentSession');
     // 公開可能キーをもとに、stripeオブジェクトを作成
    const stripePromise = loadStripe({{Stripeの公開キー}});
    const stripe = await stripePromise;
    createPaymentSession({name: "hoge"})
      .then((result) => {
        const data:any = result.data;
        console.log("🚀 ~ file: firebase.ts ~ line 24 ~ .then ~ data", data)
        stripe!
        .redirectToCheckout({
          sessionId: data.id,
        })
        .then((result) => {
          console.log(result);
        });
      })
      .catch((error) => {
        const message = error.message;
        console.log("🚀 ~ file: firebase.ts ~ line 30 ~ getFirebaseAPI ~ message", message)
        console.log("🚀 ~ file: firebase.ts ~ line 30 ~ getFirebaseAPI ~ err", error)
      });
  } catch (error) {
    console.log("🚀 ~ file: firebase.ts ~ line 32 ~ getFirebaseAPI ~ error", error)
  }
}
Firebaseとの接続に必要な各種キーを記載する.envファイルを作成
Firebaseのプロジェクトから取得しましょう。
.env
REACT_APP_API_KEY="xxxxxxxxxxxxxxxxxx"
REACT_APP_AUTH_DOMAIN="xxxxxxxxxxxxxxxxxx"
REACT_APP_DATABASE_URL="xxxxxxxxxxxxxxxxxx"
REACT_APP_PROJECT_ID="xxxxxxxxxxxxxxxxxx"
REACT_APP_STORAGE_BUCKET="xxxxxxxxxxxxxxxxxx"
REACT_APP_MESSAGING_SENDER_ID="xxxxxxxxxxxxxxxxxx"
REACT_APP_APP_ID="xxxxxxxxxxxxxxxxxx"
そして画面部分のApp.tsxも実装
App.tsx
import './App.css';
import { getStripeAPI } from './lib/firebase';

function App() {
  const goStripe = async () => {
    await getStripeAPI();
  };

  return (
    <div className="App">
      <h1>Stripe 実装</h1>
      <button onClick={goStripe}>stripe </button>
    </div>
  );
}

export default App;
クライアントは以上です。
Server側(CloudFunction)
clientと同階層にserverというディレクトリを作成してください。
こんな感じ。.gitignoreは無視しててね。
まずはなにがともあれnpm init。
npm init -y
CloudFunctionsを使うので、firebaseをインストール
npm install firebase-functions@latest firebase-admin@latest --save
npm install -g firebase-tools
CloudFunctionsの初期化を実行
firebase init functions
ここは時代の潮流に合わせてTypeScriptで実装しておきましょう。
そしてindex.tsに以下の関数を実装してください。
src/index.ts
import * as functions from "firebase-functions";
const admin = require('firebase-admin');
admin.initializeApp();
const Stripe = require("stripe");

const stripe = new Stripe({{StripeのSecretキー}}, {
  apiVersion: "2020-08-27",
});

exports.createPaymentSession = functions.https.onCall(async (data, context) => {
  try {
  const session = await stripe.checkout.sessions.create({
    payment_method_types: ["card"],
    line_items: [
      {
        price:"{{商品のAPIキー}}",
        quantity: 1,
      },
    ],
    mode: "payment",
    //決済が終わった後にリダイレクトするURLを設定します
    success_url: `http://localhost:3000?payment_success`,
    cancel_url: `http://localhost:3000?payment_cancel`,
  });
    const res = session;
    functions.logger.log(res);
    return res
  } catch (error) {
    functions.logger.log("=========ERROR=========");
    functions.logger.log(error);
  }
});
これだけかければ実装は完了です!
みなさま本日もお疲れ様でした!
ゆうじろう
#最後に
これでこれからバシバシ商売ができるようになるやで
みんなが大金持ちになることを祈って終わりにします。
fin