はじめに
- この記事を読むと、React-TypeScript-ReduxToolkitのSliceの作成から非同期通信まで理解することができます。
- 説明は最小限にとどめ、コードベースで進めていきます。
いざ、React-TypeScript-ReduxToolkitの環境構築
まずは何がともあれコマンドでReact-TypeScript-ReduxToolkitの環境を構築する。
create-react-app my-app --template redux-typescript
そして、以下コマンドで実行
npm run start もしくは yarn start
こんな画面がでれば、開発環境構築完了です。
かわいいですよね。Reduxのロゴ。
筆者もこんなん考えれる人になりたいとです…。
Redux-TypeScriptのtemplateの中身を見てみよう
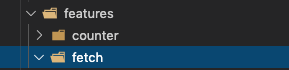
そして、src/feauturesディレクトリを見てみましょう。
Counterディレクトリが入っているはずです。
ReduxToolkitの特徴は
機能ごとにSliceという塊を作って整理していくことです。
なので、新たに機能を追加したい場合はこのtemplateと同じようにfeaturesの中にCounterのようなSliceを作ればOK。
では、非同期通信のSliceを作っていきましょう。
非同期通信のSliceを作成しよう!
お待ちかね、非同期通信のSliceを作っていきましょう。
では、名前をfetchとし、featuresディレクトリの内部に作成してください。
その中に2つTypeScriptのファイルを作成しましょう。
- Fetch.tsx
- fetchSlice.ts
こんな感じになりましたか?
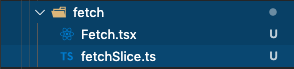
DOMをreturnするファイルは拡張子を.tsxとし、関数などしか定義しないファイルは.tsとすればいい感じになりますね。
では、fetchSlice.tsから書いていきましょう!
今回、非同期通信のAPIはJSONPlaceholderのものを使用させていただきました。
・ JSONPlaceholder
https://jsonplaceholder.typicode.com/users
そして、非同期通信なので、この子も忘れずにインストール
npm install axios もしくは yarn add axios
fetchSlice.ts
import {createSlice, createAsyncThunk } from '@reduxjs/toolkit'
import axios from 'axios'
import userData from './userData.json'
import {RootState} from '../../app/store'

type UserDataType = typeof userData

type FetchType = {
  data: UserDataType
}

export const fetchGetData = createAsyncThunk('fetch/get', async () => {
  const res = axios.get<UserDataType>('https://jsonplaceholder.typicode.com/users')
  return res
})

const initialState: FetchType = {
  data: userData
}

export const fetchSlice = createSlice({
  name: 'fetch',
  initialState: initialState,
  reducers: {},
  extraReducers: (builder) => {
    builder.addCase(fetchGetData.fulfilled, (state, action) => {
      return {
        ...state,
        data: action.payload.data
      }
    })
  }
})

export const selectData = (state: RootState) => state.fetch.data

export default fetchSlice.reducer
これで完成です!
そして、app/store.tsをちょっとだけいじりましょう。
import { configureStore, ThunkAction, Action } from '@reduxjs/toolkit';
import counterReducer from '../features/counter/counterSlice';
import fetchReducer from '../features/fetch/fetchSlice'
export const store = configureStore({
  reducer: {
    counter: counterReducer,
    fetch: fetchReducer
  },
});

export type RootState = ReturnType<typeof store.getState>;
export type AppThunk<ReturnType = void> = ThunkAction<
  ReturnType,
  RootState,
  unknown,
  Action<string>
>;
fetchReducerの部分を追加するだけですね!
これにて、Sliceの作成、およびStoreへの格納が完了です。
Fetch.tsxについて
では、最後にstoreに保存した値をコンポーネントから取り出してみましょう!
import React from 'react';
import { useSelector, useDispatch } from 'react-redux'
import { selectData, fetchGetData } from './fetchSlice'
const Fetch = () => {
    const data = useSelector(selectData)
    const dispatch = useDispatch()

    React.useEffect(() => {
        dispatch(fetchGetData())
    }, [])

    console.log(data)
    return (
        <div>
            <h1>Fetch</h1>
        </div>
    )
}

export default Fetch
useEffectでdispatchを呼び出し、useSelectorにて、値を参照しています。
これで、ReduxToolkit × TypeScriptの非同期通信の環境構築は終了です。
おつかれさまでした!