はじめに
Laravel の認証機能を作成するために用意されたパッケージ Laravel Fortify と Laravel Sanctum にはそれぞれ次のような特徴があり、併用が可能です。
-
Laravel Fortify
フロントエンドに依存しない認証バックエンドの実装が可能となる。
ログイン、ユーザ登録、パスワードのリセット、メールの検証など、認証機能を実装するために必要なルートとコントローラを作成してくれる。 -
Laravel Sanctum
APIトークンの管理とセッションCookieまたはトークンを使用したユーザの認証機能(SPA認証)の実装が可能となる。
そこで本記事では、この2つを併用して SPA のバックエンド認証を作成する実装例を示していきます。
技術構成
バックエンド
- Laravel 10.x
- Laravel Fortify
- Laravel Sanctum
フロントエンド
- Vue.js 3.3
- Vue Router 4
- TailwindCSS
実装手順
前提条件
- Laravel 10.x をインストール済み
- データベースの接続情報を
.envに設定済み
1. Laravel Fortify のインストール
Fortify のパッケージをインストールして、vendor:publish コマンドで必要なファイルを作成します。
また、データベースのテーブルを作成するため、migrate コマンドも併せて実行します。
composer require laravel/fortify
php artisan vendor:publish --provider="Laravel\Fortify\FortifyServiceProvider"
php artisan migrate
コマンドの実行が終わったら、SPAの実装に合わせて config\fortify.php を変更します。
本記事では独自の view を作成するため、以下の設定を変更して不要なルートを除外します。
-  'views' => true,
+  'views' => false,
Fortify のルートをわかりやすく区別するため、prefix を変更します。
-  'prefix' => '',
+  'prefix' => 'fortify',
SPA認証で用いるため、ルートミドルウェアを web から api に変更します。
-  'middleware' => ['web'],
+  'middleware' => ['api'],
Fortify には様々な認証機能が用意されていますが、今回は最小限の「ユーザ登録」のみ有効にします。
    'features' => [
        Features::registration(),
-       Features::resetPasswords(),
+       // Features::resetPasswords(),
        // Features::emailVerification(),
-       Features::updateProfileInformation(),
-       Features::updatePasswords(),
-       Features::twoFactorAuthentication([
-           'confirm' => true,
-           'confirmPassword' => true,
-           // 'window' => 0,
-       ]),
+       // Features::updateProfileInformation(),
+       // Features::updatePasswords(),
+       // Features::twoFactorAuthentication([
+       //     'confirm' => true,
+       //     'confirmPassword' => true,
+       //     // 'window' => 0,
+       // ]),
    ],
また、作成した FortifyServiceProvider をプロバイダとして登録しておく必要があるので、app.php も変更します。
    'providers' => ServiceProvider::defaultProviders()->merge([
        /*
         * Package Service Providers...
         */
+       App\Providers\FortifyServiceProvider::class,
2. Laravel Sanctum の初期設定
Laravel 10.x では標準で Sanctum がインストールされているため、必要な設定のみ行っていきます。
SPA認証で Sanctum を有効にするため、api ミドルウェアグループのEnsureFrontendRequestsAreStateful を有効にします。
    protected $middlewareGroups = [
        'api' => [
-           // \Laravel\Sanctum\Http\Middleware\EnsureFrontendRequestsAreStateful::class,
+           \Laravel\Sanctum\Http\Middleware\EnsureFrontendRequestsAreStateful::class,
            \Illuminate\Routing\Middleware\ThrottleRequests::class.':api',
            \Illuminate\Routing\Middleware\SubstituteBindings::class,
        ],
    ];
SPA がリクエストを行うドメインを設定する必要があるため、.env に SANCTUM_STATEFUL_DOMAINS の設定を追記します。
SANCTUM_STATEFUL_DOMAINS=localhost:8000
3. Vue.js のインストール
Vite 環境で Vue を動作させるため、@vitejs/plugin-vue をインストールします。
npm install @vitejs/plugin-vue --save-dev
vite.config.js に Vue の設定を追記します。併せて、Base URL も変更しておきます。
import { defineConfig } from 'vite';
import laravel from 'laravel-vite-plugin';
+ import vue from '@vitejs/plugin-vue';

export default defineConfig({
+   base: '/',
    plugins: [
+       vue(),
        laravel({
            input: ['resources/css/app.css', 'resources/js/app.js'],
            refresh: true,
        }),
    ],
});
初期で作成される welcome.blade.php を削除して、resources\views\app.blade.php を新規作成します。
<!DOCTYPE html>
<html lang="{{ str_replace('_', '-', app()->getLocale()) }}">

<head>
  <meta charset="UTF-8" />
  <meta name="viewport" content="width=device-width, initial-scale=1.0" />
  <title>{{ config('app.name') }}</title>
  @vite(['resources/css/app.css', 'resources/js/app.js'])
</head>

<body>
  <div id="app"></div>
</body>

</html>
メインとなる Vue ファイル resources\js\App.vue を新規作成します。
<template>
</template>
resources\js\app.js に createApp() の記述を追加して、Vueアプリケーションのインスタンスを作成します。
import './bootstrap'
+ import App from './App.vue'
+ import { createApp } from 'vue'

+ const app = createApp(App)
+ app.mount('#app')
※ Vue.js のインストール手順はこちらの記事を参考にさせて頂きました。
4. Vue Router のインストール
SPAのルートを担う役割として Vue Router を用いるため、vue-router をインストールします。
npm install vue-router@4
ログイン画面の Vue ファイル resources\js\views\Login.vue を新規作成します。
<template>
  <h1>ログイン画面</h1>
</template>
メインとなる App.vue に <router-view> の記述を追加します。
<template>
+ <router-view />
</template>
Vue Router のインスタンスを作成する index.js を新規作成します。
import { createRouter, createWebHistory } from 'vue-router'
const router = createRouter({
  history: createWebHistory(import.meta.env.BASE_URL),
  routes: [
    {
      path: '/login',
      name: 'login',
      component: () => import('../views/Login.vue')
    }
  ]
})
export default router
作成したインスタンスを Vue に読み込ませるため、app.js に以下の記述を追加します。
import './bootstrap'

import App from './App.vue'
import { createApp } from 'vue'
+ import router from './router'

const app = createApp(App)
+ app.use(router)
app.mount('#app')
Vue Router でルートを制御するため、Laravel のルートを修正します。
- Route::get('/', function () {
-   return view('welcome');
+ Route::get('/{path?}', function () {
+   return view('app');
});
ここまで正しく実装できているか、一度確認をしてみます。ビルド & 開発用サーバを立ち上げて、http://localhost:8000/login にアクセスします。"ログイン画面" という文字が表示されればOKです。
npm run build
php artisan serve
※ Vue Router のインストール手順はこちらの記事を参考にさせて頂きました。
5. ユーザ登録、ログイン、マイページ画面の作成
まず最初に、見た目を整えるための CSS フレームワークとして TailwindCSS をインストールします。
npm install -D tailwindcss postcss autoprefixer
npx tailwindcss init -p
Vue ファイルにスタイルを適用するため、tailwind.config.js を変更します。
export default {
- content: [],
+ content: ['./resources/**/*.{vue,js,blade.php}'],
CSS ファイルに TailwindCSS の記述を追加します。
@tailwind base;
@tailwind components;
@tailwind utilities;
次に、各画面の Vue ファイルを作成します。
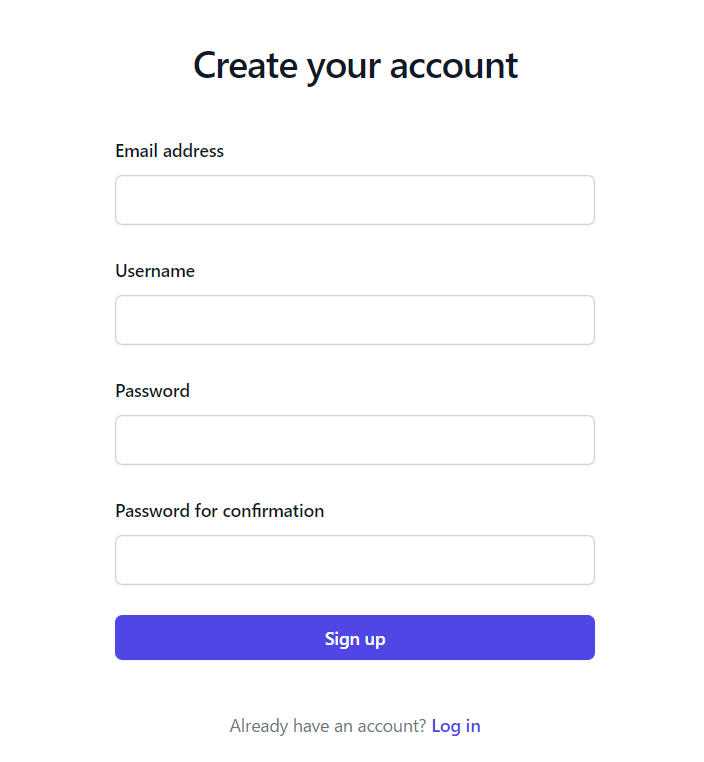
ユーザ登録画面
<script setup>
import { ref } from 'vue'
import { useRouter } from 'vue-router'
import axios from 'axios'

const router = useRouter()
const form = ref({
  email: '',
  name: '',
  password: '',
  password_confirmation: ''
})
const errors = ref([])

const signup = async () => {
  await axios.get('/sanctum/csrf-cookie')
  await axios
    .post('/fortify/register', form.value)
    .then(() => {
      router.push('/login')
    })
    .catch((reason) => {
      errors.value = reason?.response?.data?.errors ?? {}
    })
}
</script>

<template>
  <div class="flex min-h-full flex-1 flex-col justify-center px-6 py-8 lg:px-8">
    <div class="sm:mx-auto sm:w-full sm:max-w-sm">
      <h2 class="mt-6 text-center text-3xl font-bold leading-9 tracking-tight text-gray-900">
        Create your account
      </h2>
    </div>

    <div class="mt-10 sm:mx-auto sm:w-full sm:max-w-sm">
      <form class="space-y-6" @submit.prevent="signup()">
        <div>
          <label for="email" class="block text-sm font-medium leading-6 text-gray-900"
            >Email address</label
          >
          <div class="mt-2">
            <input
              v-model="form.email"
              id="email"
              name="email"
              type="email"
              autocomplete="email"
              required
              class="block w-full rounded-md border-0 p-2 text-gray-900 shadow-sm ring-1 ring-inset ring-gray-300 placeholder:text-gray-400 focus:ring-1 focus:ring-inset focus:ring-gray-600 sm:text-sm sm:leading-6"
            />
            <template v-if="errors.email">
              <div v-for="error in errors.email" class="text-sm text-red-700 m-1" role="alert">
                {{ error }}
              </div>
            </template>
          </div>
        </div>

        <div>
          <label for="username" class="block text-sm font-medium leading-6 text-gray-900"
            >Username</label
          >
          <div class="mt-2">
            <input
              v-model="form.name"
              id="username"
              name="username"
              type="text"
              autocomplete="username"
              required
              class="block w-full rounded-md border-0 p-2 text-gray-900 shadow-sm ring-1 ring-inset ring-gray-300 placeholder:text-gray-400 focus:ring-1 focus:ring-inset focus:ring-indigo-600 sm:text-sm sm:leading-6"
            />
            <template v-if="errors.name">
              <div v-for="error in errors.name" class="text-sm text-red-700 m-1" role="alert">
                {{ error }}
              </div>
            </template>
          </div>
        </div>

        <div>
          <div class="flex items-center justify-between">
            <label for="password" class="block text-sm font-medium leading-6 text-gray-900"
              >Password</label
            >
          </div>
          <div class="mt-2">
            <input
              v-model="form.password"
              id="password"
              name="password"
              type="password"
              required
              class="block w-full rounded-md border-0 p-2 text-gray-900 shadow-sm ring-1 ring-inset ring-gray-300 placeholder:text-gray-400 focus:ring-1 focus:ring-inset focus:ring-indigo-600 sm:text-sm sm:leading-6"
            />
            <template v-if="errors.password">
              <div v-for="error in errors.password" class="text-sm text-red-700 m-1" role="alert">
                {{ error }}
              </div>
            </template>
          </div>
        </div>

        <div>
          <div class="flex items-center justify-between">
            <label for="password" class="block text-sm font-medium leading-6 text-gray-900"
              >Password for confirmation</label
            >
          </div>
          <div class="mt-2">
            <input
              v-model="form.password_confirmation"
              id="password_confirmation"
              name="password_confirmation"
              type="password"
              required
              class="block w-full rounded-md border-0 p-2 text-gray-900 shadow-sm ring-1 ring-inset ring-gray-300 placeholder:text-gray-400 focus:ring-1 focus:ring-inset focus:ring-indigo-600 sm:text-sm sm:leading-6"
            />
          </div>
        </div>

        <div>
          <button
            type="submit"
            class="flex w-full justify-center rounded-md bg-indigo-600 px-3 py-1.5 text-sm font-semibold leading-6 text-white shadow-sm hover:bg-indigo-500 focus-visible:outline focus-visible:outline-2 focus-visible:outline-offset-2 focus-visible:outline-indigo-600"
          >
            Sign up
          </button>
        </div>
      </form>

      <p class="mt-10 text-center text-sm text-gray-500">
        Already have an account?
        <router-link
          to="/login"
          class="font-semibold leading-6 text-indigo-600 hover:text-indigo-500"
          >Log in</router-link
        >
      </p>
    </div>
  </div>
</template>
ログイン画面
<script setup>
import { ref } from 'vue'
import { useRouter } from 'vue-router'
import axios from 'axios'

const router = useRouter()
const form = ref({
  email: '',
  password: ''
})
const errors = ref([])

const login = async () => {
  await axios.get('/sanctum/csrf-cookie')
  await axios
    .post('/fortify/login', form.value)
    .then(() => {
      router.push('/mypage')
    })
    .catch((reason) => {
      errors.value = reason?.response?.data?.errors ?? {}
    })
}
</script>

<template>
  <div class="flex min-h-full flex-1 flex-col justify-center px-6 py-8 lg:px-8">
    <div class="sm:mx-auto sm:w-full sm:max-w-sm">
      <h2 class="mt-6 text-center text-3xl font-bold leading-9 tracking-tight text-gray-900">
        Sign in to your account
      </h2>
    </div>

    <div class="mt-10 sm:mx-auto sm:w-full sm:max-w-sm">
      <form class="space-y-6" @submit.prevent="login()">
        <div>
          <label for="email" class="block text-sm font-medium leading-6 text-gray-900"
            >Email address</label
          >
          <div class="mt-2">
            <input
              v-model="form.email"
              id="email"
              name="email"
              type="email"
              autocomplete="email"
              required
              class="block w-full rounded-md border-0 p-2 text-gray-900 shadow-sm ring-1 ring-inset ring-gray-300 placeholder:text-gray-400 focus:ring-1 focus:ring-inset focus:ring-indigo-600 sm:text-sm sm:leading-6"
            />
            <template v-if="errors.email">
              <div v-for="error in errors.email" class="text-sm text-red-700 m-1" role="alert">
                {{ error }}
              </div>
            </template>
          </div>
        </div>

        <div>
          <div class="flex items-center justify-between">
            <label for="password" class="block text-sm font-medium leading-6 text-gray-900"
              >Password</label
            >
          </div>
          <div class="mt-2">
            <input
              v-model="form.password"
              id="password"
              name="password"
              type="password"
              autocomplete="current-password"
              required
              class="block w-full rounded-md border-0 p-2 text-gray-900 shadow-sm ring-1 ring-inset ring-gray-300 placeholder:text-gray-400 focus:ring-1 focus:ring-inset focus:ring-indigo-600 sm:text-sm sm:leading-6"
            />
            <template v-if="errors.password">
              <div v-for="error in errors.password" class="text-sm text-red-700 m-1" role="alert">
                {{ error }}
              </div>
            </template>
          </div>
        </div>

        <div>
          <button
            type="submit"
            class="flex w-full justify-center rounded-md bg-indigo-600 px-3 py-1.5 text-sm font-semibold leading-6 text-white shadow-sm hover:bg-indigo-500 focus-visible:outline focus-visible:outline-2 focus-visible:outline-offset-2 focus-visible:outline-indigo-600"
          >
            Log in
          </button>
        </div>
      </form>

      <p class="mt-10 text-center text-sm text-gray-500">
        Don't have an account?
        <router-link
          to="/signup"
          class="font-semibold leading-6 text-indigo-600 hover:text-indigo-500"
          >Sign up</router-link
        >
      </p>
    </div>
  </div>
</template>
マイページ画面
<script setup>
import { useRouter } from 'vue-router'
import axios from 'axios'

const router = useRouter()

let name = ''
await axios
  .get('/api/user')
  .then((response) => {
    name = response?.data?.name
  })
  .catch((reason) => {
    if (reason?.response?.status === 401) {
      router.push('/login')
    }
  })

const logout = async () => {
  await axios.post('/fortify/logout')
  router.push('/login')
}
</script>

<template>
  <main class="grid min-h-full place-items-center bg-white px-6 py-24 sm:py-32 lg:px-8">
    <div class="text-center">
      <h1 class="mt-4 text-4xl font-bold tracking-tight text-gray-900 sm:text-5xl">
        Welcome, {{ name }}
      </h1>
      <div class="mt-16 flex items-center justify-center">
        <button
          type="button"
          class="rounded-md bg-indigo-600 px-3.5 py-2.5 text-sm font-semibold text-white shadow-sm hover:bg-indigo-500 focus-visible:outline focus-visible:outline-2 focus-visible:outline-offset-2 focus-visible:outline-indigo-600"
          @click="logout"
        >
          Log out
        </button>
      </div>
    </div>
  </main>
</template>
また、マイページ画面において setup() 内に非同期処理を記述しているため、 <Suspense> を用いてレンダリングを制御する必要があります。そこで App.vue を変更します。
+ <script setup>
+ import { RouterView } from 'vue-router'
+ </script>
+
<template>
- <router-view />
+ <RouterView v-slot="{ Component }">
+   <Suspense>
+     <div>
+       <component :is="Component" />
+     </div>
+   </Suspense>
+ </RouterView>
</template>
最後に、新たに追加した画面のルートを追記します。
  routes: [
    {
      path: '/login',
      name: 'login',
      component: () => import('../views/Login.vue')
+   },
+   {
+     path: '/mypage',
+     name: 'mypage',
+     component: () => import('../views/Mypage.vue')
+   },
+   {
+     path: '/signup',
+     name: 'signup',
+     component: () => import('../views/Signup.vue')
    }
  ]
完成イメージ
以下のコマンドでビルド & 開発用サーバを起動して確認します。
npm run build
php artisan serve
ユーザ登録画面
URL:http://localhost:8000/signup
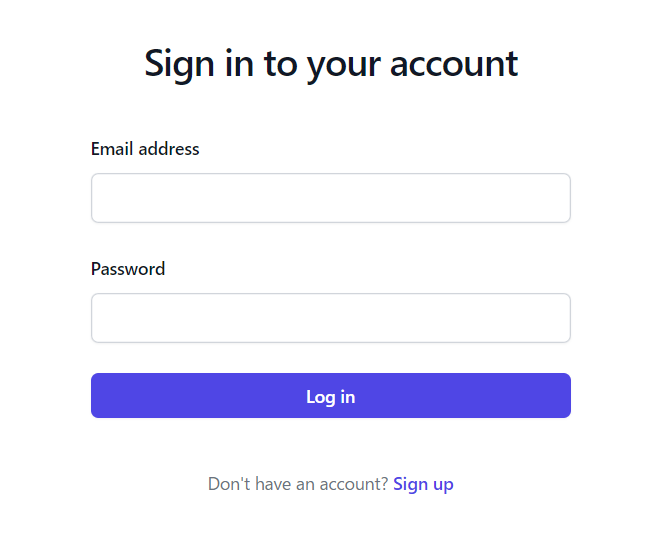
ログイン画面
URL:http://localhost:8000/login
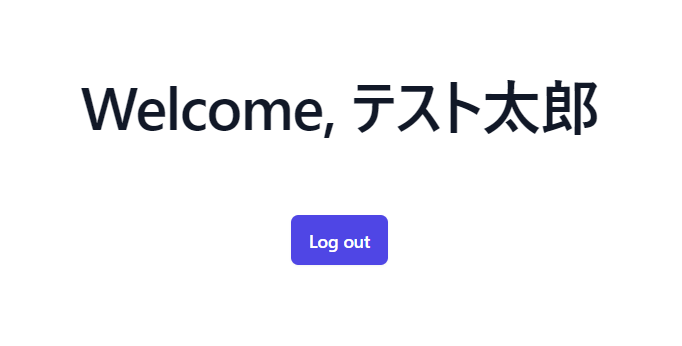
マイページ画面
URL:http://localhost:8000/mypage
GitHub
完成版の Laravel プロジェクトはこちら