はじめに
業務の中には「頻度は低いけどたまにやってくる単調で面倒な作業」というのが少なからずあります。
そういったものに限って忙しい時にやってきて、「あの時自動化しておけば良かった」と後悔させられるものです。
今回Excelでマクロを組んだ背景も同様です。
大量の画像ファイルの中から予めリストアップされた必要な画像だけを仕分ける、という単純な内容、だけど手動でファイル検索するには辛い作業です。
ファイル仕分けマクロ
movefile.xlsm
'-----------------------------------
'ファイル移動メソッド
'  A列に記載のファイルを「movefile」フォルダへ移動します
'-----------------------------------
Sub moveFileFunc()
  Dim orgFolderPath As String
  Dim newFolderPath As String
  orgFolderPath = ActiveWorkbook.Path 'Excelがあるフォルダパス
  newFolderPath = orgFolderPath & "\movefile" 'ファイル移動先のフォルダパス

  Dim ws As Excel.Worksheet
  Set ws = ActiveWorkbook.Sheets("LIST")
  ws.Activate

  '移動先のフォルダが無ければ作成
  If Dir(newFolderPath, vbDirectory) = "" Then
    MkDir newFolderPath
  End If

  Dim fso As Object
  Set fso = CreateObject("Scripting.FileSystemObject")

  '最終行
  Dim MaxRow As Long
  MaxRow = ws.Range("A1").End(xlDown).row

  Dim row As Long
  Dim fileName As String
  Dim cnt As Integer
  cnt = 0
  For row = 2 To MaxRow
    If ws.Cells(row, "A").Value <> "" Then
      fileName = ws.Cells(row, "A").Value '移動対象のファイル
      '移動対象のファイルの存在チェック
      If fso.FileExists(orgFolderPath & "\" & fileName) = True Then
        'ファイル移動
        fso.moveFile orgFolderPath & "\" & fileName, newFolderPath & "\" & fileName
        'セルの色を変更
        ws.Cells(row, "A").Interior.Color = RGB(189, 215, 238)
        cnt = cnt + 1
      End If
    End If
  Next

  'オブジェクト参照の解除
  Set fso = Nothing

  MsgBox cnt & " 個のファイルを移動しました。"
End Sub
使い方
- 上記のマクロをExcelのVBエディタにCopy&Paste。
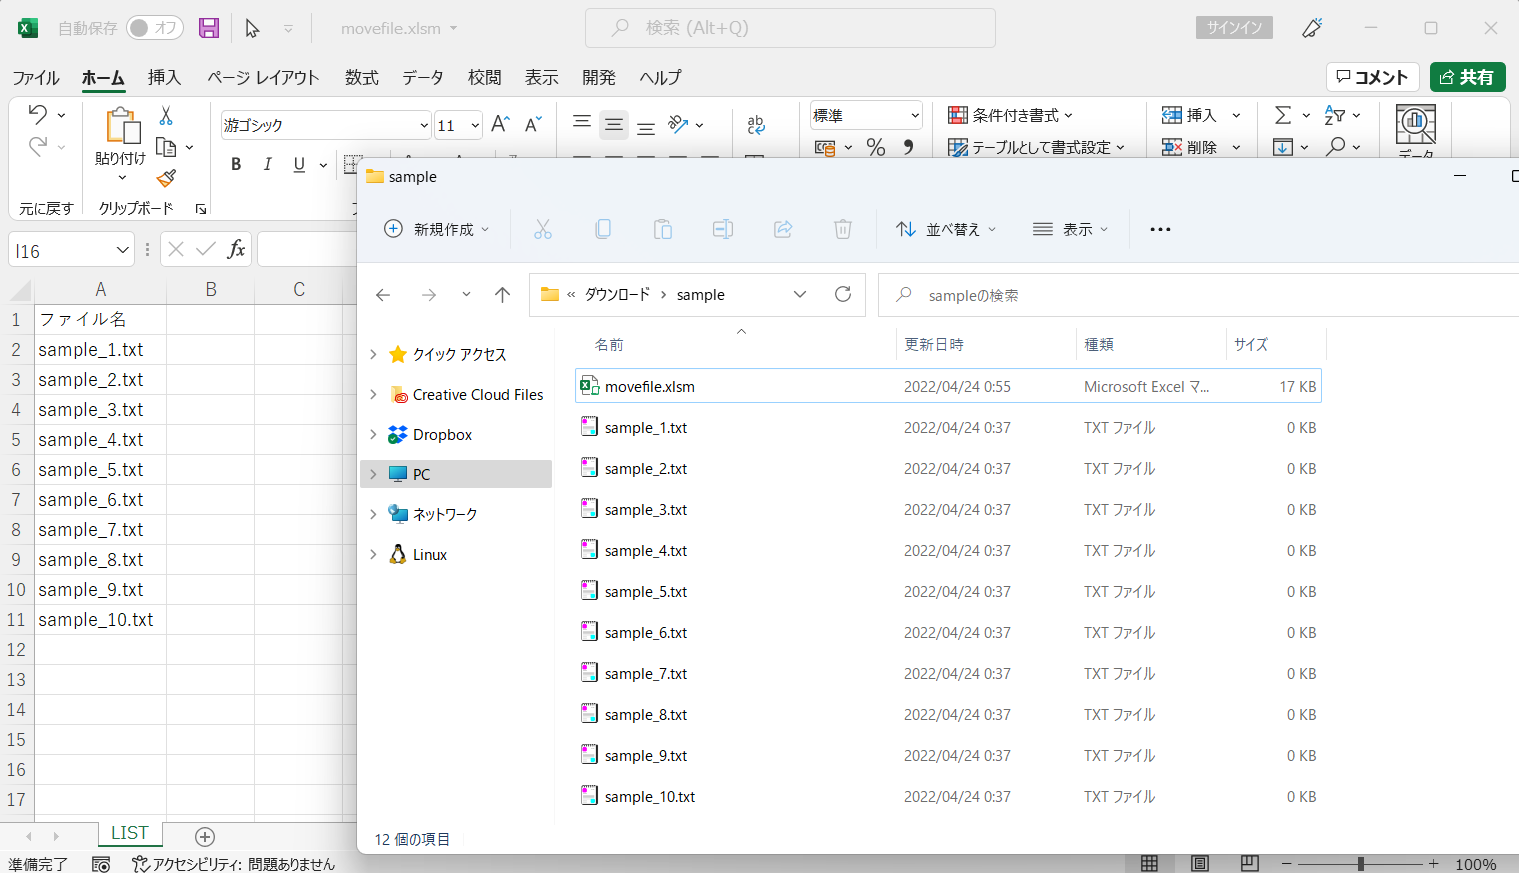
- 「LIST」シートA列の2行目から空行が無いように移動したいファイル名を拡張子込みで記載。
- 「Alt+F8」キーをクリックして「moveFileFunc」マクロを実行。
- ダイアログで移動されたファイル数が表示されたら完了。
- 移動できたファイル名のセルが青色になり、Excelの置いてあるフォルダ内に作成された「movefile」フォルダに対象のファイルが移動されている。
簡単な解説
下記でExcelが置かれたフォルダパスを取得します。
ActiveWorkbook.Path
下記で移動先のフォルダの有無を確認し、無ければ作成します。
If Dir("移動先のフォルダパス", vbDirectory) = "" Then
  MkDir "移動先のフォルダパス"
End If
LISTシートに記載されたファイル名をすべて移動させるには1行毎にループさせる必要がありますので、下記で最終行を取得します。
この方式では空行が見つかった部分を最終行と判断する点に注意です。
Dim MaxRow As Long
MaxRow = ws.Range("A1").End(xlDown).row
下記で移動対象のファイルが存在するかチェックし、あればファイルを移動します。
If fso.FileExists("移動対象のファイルパス") = True Then
  fso.moveFile "移動対象のファイルパス", "移動先のファイルパス"
End If
追記(移動先のフォルダを指定するパターン)
移動先のフォルダが複数あった場合についてコメントいただいたので追記。
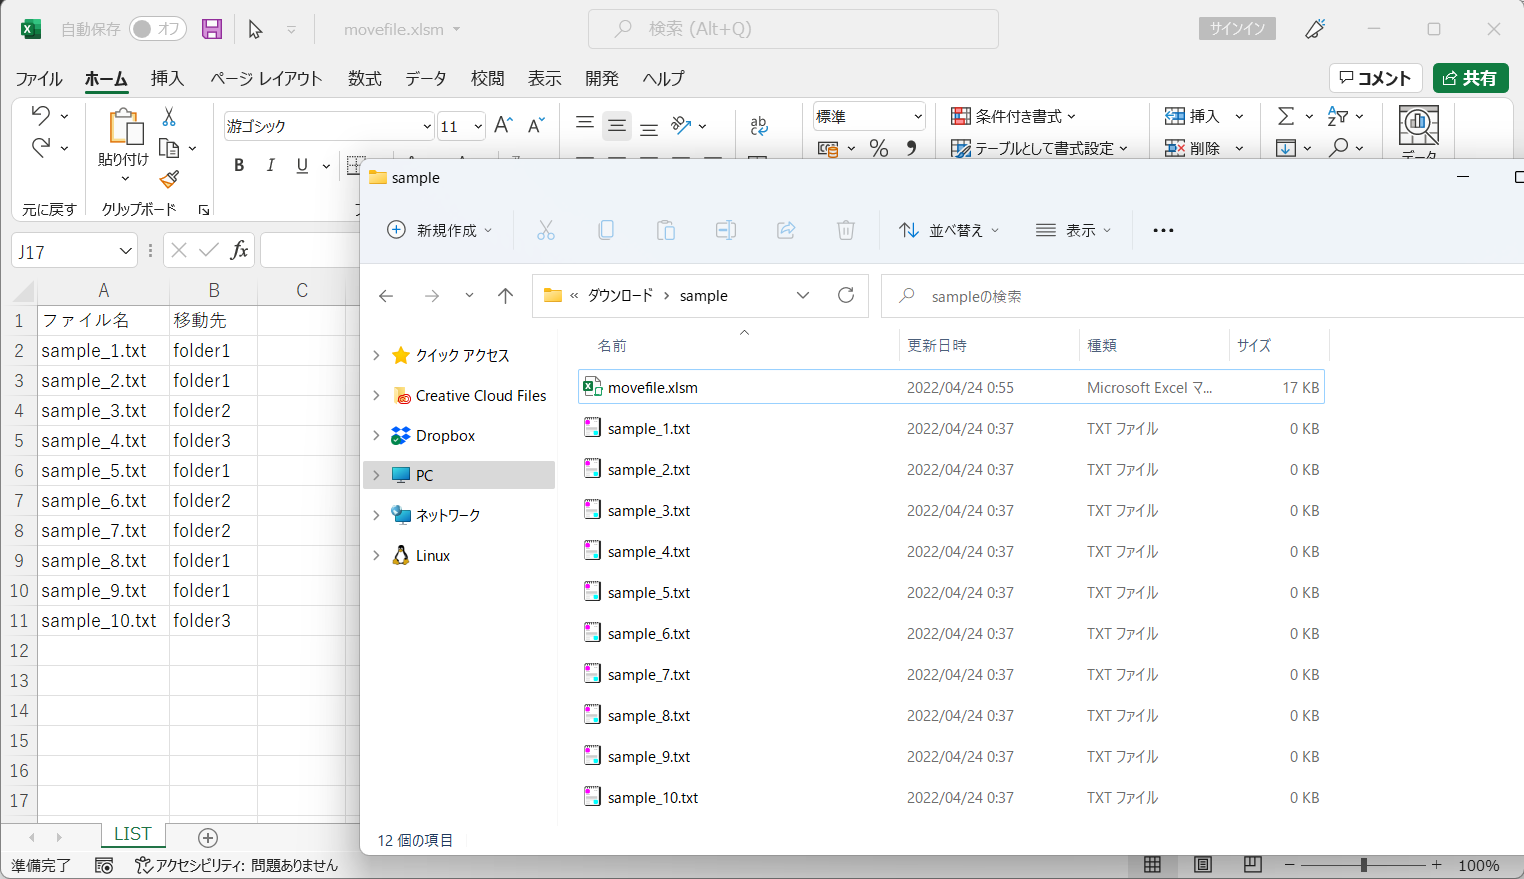
移動先が「movefile」フォルダ固定だったのを、B列に記載したフォルダ名に仕分けるように変更しました。
movefile.xlsm
'-----------------------------------
'ファイル移動メソッド
'  A列に記載のファイルをB列に記載のフォルダへ移動します
'-----------------------------------
Sub moveFileFunc()
  Dim orgFolderPath As String
  Dim newFolderPath As String
  orgFolderPath = ActiveWorkbook.Path 'Excelがあるフォルダパス

  Dim ws As Excel.Worksheet
  Set ws = ActiveWorkbook.Sheets("LIST")
  ws.Activate

  Dim fso As Object
  Set fso = CreateObject("Scripting.FileSystemObject")

  '最終行
  Dim MaxRow As Long
  MaxRow = ws.Range("A1").End(xlDown).row

  Dim row As Long
  Dim fileName As String
  Dim folderName As String
  Dim cnt As Integer
  cnt = 0
  For row = 2 To MaxRow
    If ws.Cells(row, "A").Value <> "" Then
      fileName = ws.Cells(row, "A").Value '移動対象のファイル
      folderName = ws.Cells(row, "B").Value '移動先のフォルダ

      '移動対象のファイルの存在チェック
      If fso.FileExists(orgFolderPath & "\" & fileName) = True Then
        '移動先のフォルダが無ければ作成
        newFolderPath = orgFolderPath & "\" & folderName
        If Dir(newFolderPath, vbDirectory) = "" Then
          MkDir newFolderPath
        End If
        'ファイル移動
        fso.movefile orgFolderPath & "\" & fileName, newFolderPath & "\" & fileName
        'セルの色を変更
        ws.Cells(row, "A").Interior.Color = RGB(189, 215, 238)
        cnt = cnt + 1
      End If
    End If
  Next

  'オブジェクト参照の解除
  Set fso = Nothing

  MsgBox cnt & " 個のファイルを移動しました。"
End Sub
おわりに
Mac版のExcelでは動作しないので注意してください。(権限でひっかかるようです)

