本記事は,DSL Advent Calendarの6日目の記事です.
研究テーマの引き継ぎがてら,Tensorflow Liteの使い方についてまとめます.
TensorflowLiteとは
TensorFlow Liteは,TensorFlowやKerasで学習したモデルを,モバイル・組み込み端末上で動かすために,圧縮を行うフレームワークです.
float32形式で保存されているモデルの重みを,int8やfloat16形式に圧縮することができます.
リアルタイムで予測を行いたい,小型デバイスのStand-aloneで予測を行いたい場合は,ぜひ利用してみてください.
実行環境
Ubuntu16.04
Python 3.7.4
- TensorFlow 1.15.0
- Keras 2.3.1
モデルの圧縮
圧縮するモデルは,ImageNetで学習済みのInceptionV3を使用します.
一度,InceptionV3モデルをh5ファイルに保存し,その後tfliteファイルに圧縮を行います.
from keras.applications.inception_v3 import InceptionV3

# InceptionV3モデルをロード
model = InceptionV3(include_top = True, weights = "imagenet")
# モデルの保存
model.save("hoge.h5")
h5ファイルからtfliteファイルを作成
import tensorflow as tf

converter = tf.lite.TFLiteConverter.from_keras_model_file("hoge.h5")
converter.optimizations = [tf.lite.Optimize.OPTION1]
converter.target_spec.supported_types = [tf.OPTION2]
tflite_model = converter.convert()

with open("model.tflite", "wb") as f:
    f.write(tflite_model)
OPTION1
- DEFAULT : モデルの重み,予測時の計算共に量子化
- OPTIMIZE_FOR_SIZE : モデルの重みを量子化,予測時の計算は浮動小数点演算
- OPTIMIZE_FOR_LATENCY : 調査中...
OPTION2
- int8
- float16 etc...
OPTION1では量子化を行う箇所,OPTION2では量子化の大きさを設定できます.
Tensorflow1.14.0以前のバージョンでは,OPTION2の設定は出来ないので注意が必要です.
結果,hoge.h5ファイルの容量は96.3MBでしたが,int8のファイルの容量は23.9MB,float16は47.7MBとなりました.
それぞれ,1/4, 1/2にモデルサイズを圧縮できました!
Pythonでの予測
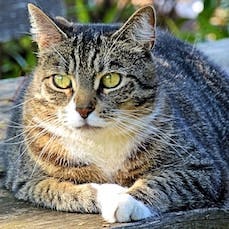
お試しで,option1 = DEFAULT, option2 = int8の量子化を行ったモデルで,猫の画像を予測してみます.
import numpy as np
from keras.applications.inception_v3 import preprocess_input
from keras.preprocessing.image import array_to_img, img_to_array, load_img

# 画像のロード & 正規化
img = img_to_array(load_img("cat.jpeg", target_size=(299, 299)))
input_img = preprocess_input(img)

# TFliteモデルのロード
interpreter = tf.lite.Interpreter(model_path = "hoge.tflite")
interpreter.allocate_tensors()

# モデルの入出力情報の取得
input_details = interpreter.get_input_details()
output_details = interpreter.get_output_details()

# 入力画像のshapeを整形
input_data = np.expand_dims(img_input, axis = 0)

# 予測
interpreter.set_tensor(input_details[0]['index'], input_data)
interpreter.invoke()
output_data = interpreter.get_tensor(output_details[0]['index'])

# 予測結果の出力
print(output_data.argmax(axis = 1))
[281]
ImageNetのラベル番号!281番はtabby cat(ぶち猫,トラ猫)なので,ちゃんと正解できています!
また,予測を行う際,デフォルトでは,バッチサイズが1となっています.
モデルを変換する際にinput_shapeを指定することでバッチ予測ができます.
converter = tf.lite.TFLiteConverter.from_keras_model_file("hoge.h5",
                                   input_shapes={'input_1': (10, 299, 299,  3)})
応用例
公式サイトに複数のサンプルコードが挙がっています.
https://www.tensorflow.org/lite/examples
モデルを差し替えることで,手軽に自分で作成したモデルを試すことができます.
まとめ
TensorflowLiteのモデルの変換,Pythonでの予測の流れをまとめました.
今回はしていませんが,実際に運用する場合は圧縮率・各パラメータごとの精度の検証等も比較する必要があります.