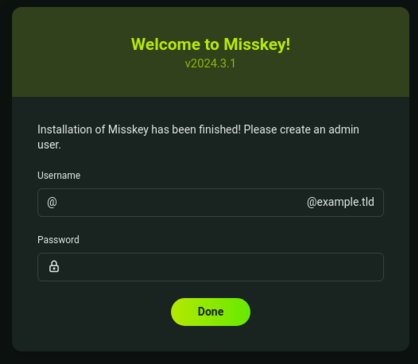
とにかくFediverseはじめてみようという趣旨です。
OSCでFediverse関連ブースが出てたので、気になっただけで何もせず放置していたMastodonをすっ飛ばして、いきなりMisskeyを使ってみようという背景です。
Fediverse?Misskey?
Fediverseは、複数の独立したサーバーが連携する分散型ソーシャルメディアです。ユーザーは異なるサーバー間でも交流できます。特にMastodonが代表的です。
Misskeyは、分散型ソーシャルメディアの一つで、Fediverseと連携可能なプラットフォームです。多様なリアクションやカスタマイズ性が特徴です。
環境について
Debian(バージョンは13 Trixie)を使います。
今回はdebootstrapでminbaseをインストールしたものに、適宜NetworkManagerやカーネルをインストール済みのイメージを使います。
仮想マシンはAArch64のKVMです。
user@localhost:~$ cat /etc/os-release
PRETTY_NAME="Debian GNU/Linux trixie/sid"
NAME="Debian GNU/Linux"
VERSION_CODENAME=trixie
ID=debian
HOME_URL="https://www.debian.org/"
SUPPORT_URL="https://www.debian.org/support"
BUG_REPORT_URL="https://bugs.debian.org/"
user@localhost:~$ sudo virt-what
kvm
着手
まずこのマークダウンを参考に適宜オリジナリティーを交えつつすすめていきたいと思います。
依存関係のインストール
早速つまづきポイントですnodejsのバージョンがDebianのtestingでもそんなに新しくないです。
あたらしいnodejs
欲しい!
せっかくDebianなのでDebianらしくunstableから前借りします。
sid(unstable)の前借り設定+nodejsのインストール
unstableのリポジトリを有効にします。
deb https://deb.debian.org/debian sid main contrib non-free non-free-firmware
unstableのリポジトリの優先順位を下げます。
これにより、全てのパッケージがsidのものに置き換えられてしまうのを防ぎます。
Package: *
Pin: release n=sid
Pin-Priority: 80
新しいnodejsのインストールします。
sudo apt-get update
sudo apt-get install -t sid nodejs npm
v20.13.1
新しいのが入りました✨
残りのインストール
sudo apt-get install redis postgresql postgresql-contrib ffmpeg build-essential git corepack
corepackを有効化します。corepackはyarnやpnpmを1つづつインストールしなくてもyarnやpnpmを使うことができるツールです。
sudo corepack enable
ユーザー作成
ユーザーはmisskeyで作りました。(が、結局このユーザーを使わなくても出来ました……)
sudo useradd -U -r -s /usr/sbin/nologin -M misskey
ビルド
さて主たる話題のビルドです!GitHubから取ってきてビルドするだけです。
git clone --recurse-submodules --depth=1 -b master https://github.com/misskey-dev/misskey
cd misskey
git submodule update --init
pnpm install --frozen-lockfile
cp .config/example.yml .config/default.yml
NODE_ENV=production pnpm run build
DB準備
sudo -u postgres psql
データベースを作って、パスワード付きのユーザーを作って、そのユーザーにそのデータベースの全部を許可します。
パスワードもデータベースもユーザー名も全部misskeyにする場合は↓こんな感じです。
CREATE DATABASE misskey WITH encoding='UTF-8';
REATE USER misskey WITH encrypted password 'misskey';
GRANT ALL PRIVILEGES ON DATABASE misskey TO misskey;
ALTER DATABASE misskey owner TO misskey;
\q
初期設定
.config/default.ymlを適宜変更します。特にdbのところにあるパスワードを変えておくのを忘れると起動しませんでした。
データベース、パスワード、ユーザー名、全部misskeyの構成ではこんな感じの変更でした。
diff --git a/.config/example.yml b/.config/default.yml
index 7fea929..e794357 100644
--- a/.config/example.yml
+++ b/.config/default.yml
@@ -102,8 +102,8 @@ db:
   db: misskey

   # Auth
-  user: example-misskey-user
-  pass: example-misskey-pass
+  user: misskey
+  pass: misskey

   # Whether disable Caching queries
   #disableCache: true
あとはコマンドを実行します。
pnpm run init
起動
あとは起動するだけです。
NODE_ENV=production pnpm run start
ポートは3000でLISTENするようです。
動いた✨
つぶやけた✨
大成功🎉

