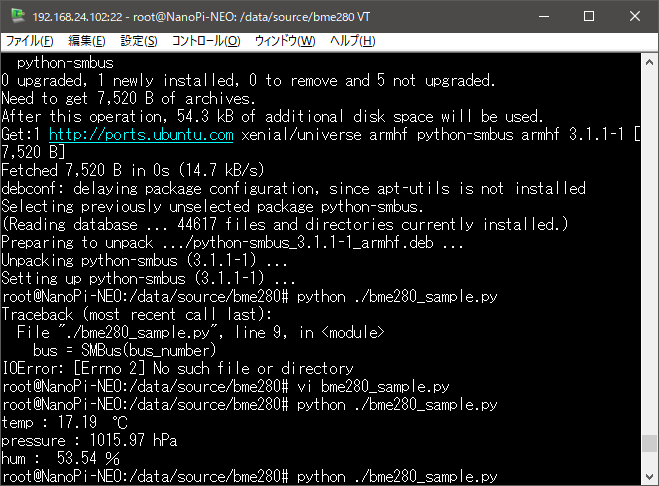
さて、サンプルプログラムは動いたのですが。
これをどうやって使っていこうかと。
ま、温度計を組んでみて。
接続。

無事データ取れました(ってこれnanopiだけどね)。
まあデータは揃ってるので、表示部分どうにかしましょうか。
作戦としては、「数秒ごとに静止画を更新表示」でいこうかと。
で、「なるべく高密度に」。
要は64x32の画像を作って、それを送ってやればいいのです。
で、まず。
bmp回りをperlで解析実装。
bmpはまあ、56バイト目から、左下→右下積み上げで、RGBの順番でデータが入っています。
なのですっごく適当に実装すると、こんな感じ。
 open (IN,$inputbitmapbackgroundfilename);
 binmode (IN);

 $buffersize = 1;
 $count = 0;
 $output = "";
 undef (@bitmapoutputbase);
 $colcount = 0;
 $rowcount = 31;
 while (){
  $count++;
  read(IN,$readdata,$buffersize);
  if ($count < 55){next;}
  if ($count > 20000){last;}
  $readdata = unpack("H2",$readdata);
  $rawcount = $rowcount * 64 * 3;
  $rawcount += $colcount;
  $bitmapoutputbase[$rawcount] = $readdata;
  $colcount++;
  if ($colcount > 191){
   $rowcount--;
   if ($rowcount < 0){last;}
   $colcount = 0;
  }
 }
 close (IN);
取り回しラクなように、バイナリから十六進に変換。
今回横幅64ドットなので、64x3な192カウント毎に縦32ライン分減算していき、左上原点な一次元配列に突っ込む感じで。
で、フォント検討。
情報なるべく表示したいので、まあ縦4の横16としますか。
すると、1つのフォントは、「8x4」になります。
ま、サックリ作製。

これを読み込ませて、フォントレンダラを作ってみます。
sub renderfont {
 my $data = $_[0];

# 0123456789.ch:p-
# RDMぶけラ
 $fontseed = "1:15";
 if ($data eq " "){$fontseed = "1:15";}
 if ($data eq "0"){$fontseed = "0:0";}
 if ($data eq "1"){$fontseed = "0:1";}
 if ($data eq "2"){$fontseed = "0:2";}
 if ($data eq "3"){$fontseed = "0:3";}
 if ($data eq "4"){$fontseed = "0:4";}
 if ($data eq "5"){$fontseed = "0:5";}
 if ($data eq "6"){$fontseed = "0:6";}
 if ($data eq "7"){$fontseed = "0:7";}
 if ($data eq "8"){$fontseed = "0:8";}
 if ($data eq "9"){$fontseed = "0:9";}
 if ($data eq "."){$fontseed = "0:10";}
 if ($data eq "c"){$fontseed = "0:11";}
 if ($data eq "h"){$fontseed = "0:12";}
 if ($data eq ":"){$fontseed = "0:13";}
 if ($data eq "p"){$fontseed = "0:14";}
 if ($data eq "-"){$fontseed = "0:15";}
 if ($data eq "R"){$fontseed = "1:0";}
 if ($data eq "D"){$fontseed = "1:1";}
 if ($data eq "M"){$fontseed = "1:2";}
 if ($data eq "W"){$fontseed = "1:3";}
 if ($data eq "w"){$fontseed = "1:4";}
 if ($data eq "X"){$fontseed = "1:5";}
 if ($data eq "x"){$fontseed = "1:6";}
 if ($data eq "Y"){$fontseed = "1:7";}
 if ($data eq "y"){$fontseed = "1:8";}
 if ($data eq "Z"){$fontseed = "1:9";}
 if ($data eq "z"){$fontseed = "1:10";}
 $fontcolcount = 0;
 $fontrowcount = 0;
 @fontdataarray = $fontdata{$fontseed} =~ /.{2}/g;
 foreach $ch (@fontdataarray) {
  $fontrow = ($outputline * 8) + $fontrowcount;
  $fontcol = ($outputcol * 4 * 3 ) + $fontcolcount;
  $injectpointer = ($fontrow * 3  * 64) + $fontcol;
  if ($ch ne "00"){
   $bitmapoutputbase[$injectpointer] = $ch;
  }
  $fontcolcount++;
  if ($fontcolcount > 11){
   $fontrowcount++;
   $fontcolcount = 0;
  }
 }
}
$outputlineと$outputcolをそれぞれ行と列を突っ込んで、データを関数呼び出しに渡してあげれば、bitmapoutputbaseな配列にレンダーする仕組みです。
RGBどれかが00の場合、元画像をそのまま出すステキ機能つき。
あとはまあ、テキストでデータ作るだけ。
こんな感じでね。
 open (FILE,$humdatafilename1);
 (@humdataarray) = (<FILE>);
 close (FILE);

 chomp($humdataarray[0]);
 if ($humdataarray[0] < 0){
  $j = abs(int ($humdataarray[0]));
  $k = abs(int ($humdataarray[0] * 10));
  $k = $k - ($j * 10);
  $j = sprintf("%03d",$j);
  $k = sprintf("%01d",$k);
  $output_it = "-$j.$k";
 }
 else {
  $j = abs(int ($humdataarray[0]));
  $k = abs(int ($humdataarray[0] * 100));
  $k = $k - ($j * 100);
  $j = sprintf("%02d",$j);
  $k = sprintf("%02d",$k);
  $output_it = "$j.$k";
 }
 chomp($humdataarray[1]);
 $j = abs(int ($humdataarray[1] / 100));
 $k = abs(int ($humdataarray[1]));
 $k = $k - ($j * 100);
 $j = sprintf("%04d",$j);
 $k = sprintf("%02d",$k);
 $output_ip = "$j.$k";
 chomp($humdataarray[2]);
 $j = abs(int ($humdataarray[2]));
 $k = abs(int ($humdataarray[2] * 100));
 $k = $k - ($j * 100);
 $j = sprintf("%02d",$j);
 $k = sprintf("%02d",$k);
 $output_ih = "$j.$k";

 open (FILE,$humdatafilename2);
 (@humdataarray) = (<FILE>);
 close (FILE);

 chomp($humdataarray[0]);
 if ($humdataarray[0] < 0){
  $j = abs(int ($humdataarray[0]));
  $k = abs(int ($humdataarray[0] * 10));
  $k = $k - ($j * 10);
  $j = sprintf("%03d",$j);
  $k = sprintf("%01d",$k);
  $output_ot = "-$j.$k";
 }
 else {
  $j = abs(int ($humdataarray[0]));
  $k = abs(int ($humdataarray[0] * 100));
  $k = $k - ($j * 100);
  $j = sprintf("%02d",$j);
  $k = sprintf("%02d",$k);
  $output_ot = "$j.$k";
 }
 chomp($humdataarray[1]);
 $j = abs(int ($humdataarray[1] / 100));
 $k = abs(int ($humdataarray[1]));
 $k = $k - ($j * 100);
 $j = sprintf("%04d",$j);
 $k = sprintf("%02d",$k);
 $output_op = "$j.$k";
 chomp($humdataarray[2]);
 $j = abs(int ($humdataarray[2]));
 $k = abs(int ($humdataarray[2] * 100));
 $k = $k - ($j * 100);
 $j = sprintf("%02d",$j);
 $k = sprintf("%02d",$k);
 $output_oh = "$j.$k";


 #tokoyami
 $timenow = time;
 $timeseed = $timenow - 1510434000;
 $timeseed = int ($timeseed / 86400);
 $timeseed %= 4;

 if ($timeseed == 0){($toko_r,$toko_d,$toko_m) = (1,3,2);}
 if ($timeseed == 1){($toko_r,$toko_d,$toko_m) = (2,4,3);}
 if ($timeseed == 2){($toko_r,$toko_d,$toko_m) = (3,1,4);}
 if ($timeseed == 3){($toko_r,$toko_d,$toko_m) = (4,2,1);}

 #boueigun
 $timenow = time;
 $timeseed = $timenow - 1510434000;
 $timeseed = int ($timeseed / 3600);
 $timeseed %= 7;

 if ($timeseed == 0){($defe_i,$defe_j) = ("Yy","Yy");}
 if ($timeseed == 1){($defe_i,$defe_j) = ("Yy","Ww");}
 if ($timeseed == 2){($defe_i,$defe_j) = ("Ww","Ww");}
 if ($timeseed == 3){($defe_i,$defe_j) = ("Ww","Xx");}
 if ($timeseed == 4){($defe_i,$defe_j) = ("Xx","Xx");}
 if ($timeseed == 5){($defe_i,$defe_j) = ("Xx","Zz");}
 if ($timeseed == 6){($defe_i,$defe_j) = ("Zz","Yy");}

 (@date) = localtime (time);
 $time_format = sprintf("%02d:%02d",$date[2],$date[1]);

 $dataone = "  " .$output_it."c  ".$output_ot."c";
 $datatwo = "  " .$output_ih."p  ".$output_oh."p";
 $datathr = $output_ip."h".$output_op."h";
 $datafou = "R".$toko_r."D".$toko_d."M".$toko_m." ".$defe_i.$defe_j.$time_format;
別途cronで回している、温度計データを2ch分取得し適当演算、上から、温度、湿度、気圧と並べてます。
1行余ったので、某ドラクエ10の、常闇だの防衛軍と、時刻を表示って感じ。
テキストベースで出力は、こんな感じになりますよ、と。
  20.67c   20.76c
  49.66p   46.20p
1018.28h 1016.46h
R3D1M4 YyZz 18:03
で、bmp出力部。
ヘッダは固定でいいやってね。
 $bitmapoutput = "424d361800000000000036000000280000004000000020000000010018000000000000180000120b0000120b00000000000000000000";
 for $i (0..31){
  for $j (0..63){
   for $k (0..2){
    $bitmappointer = (( 31 - $i ) * 64 + $j) * 3 + $k;
    $bitmapoutput .= $bitmapoutputbase[$bitmappointer];
   }
  }
 }
 $bitmapbinary = pack("H*",$bitmapoutput);
 open (OUTPUT,">$outputfilename");
 binmode(OUTPUT);
 print OUTPUT $bitmapbinary;
 close (OUTPUT);
ま、出力例1、背景黒だとこんな感じ。
フォントには影つけてます。

さ、次は、実際に表示してみますかね。
