背景
1)会社拠点間で複数ユーザーにライブ中継
※Skype、Teams会議では接続不十分であったため
2)Docker+Nginx+Rtmpモジュールが利用できなかった
※会社のPCにDockerインスートル;Hyper-Vが使用できない
3)Windows版は商用のものがあるが、セキュリティ面、コンプラ面から避けた
以上から、自前でコンパイルすることになった
活用の仕方を追記 2020/12/7
https://estima5633.hateblo.jp/entry/2020/12/07/005025
GitHubに実行ファイルを置きました リンク修正
https://github.com/czh00361/Nginx-Rtmp-for-Windows
参考にしたページ
参考1;Nginx http://nginx.org/en/docs/howto_build_on_win32.html
参考2;Rtmp https://github.com/arut/nginx-rtmp-module
参考3;インストールガイドhttp://blog.loadlimits.info/2011/12/nginx%E3%81%AEwindows%E7%89%88%E3%83%90%E3%82%A4%E3%83%8A%E3%83%AA%E3%82%92%E3%83%93%E3%83%AB%E3%83%89%E3%81%99%E3%82%8B/
大まかな流れ
手順1.参考1をベースにVisual Studio 2010 ;以下VS(+ Microsoft SDKs)
手順2.Nginx , nginx-rtmp-module-masterをダウンロード
StrawberryPerl 64bitをダウンロードとインストール
pcre、openssl、zlibをダウンロード
手順3.MinGWをインストール
手順4.Nginxのモジュールを配置.さらに下にobjs/libフォルダーを作成し、
pcre、openssl、zlibを解凍して配置
arut/nginx-rtmp-moduleをobjs/libに配置
手順5.VS コマンドプロンプトよりc:\MinGW配下のmsys.batを起動
コンパイル環境が整っているか確認 msysでwhich perl , which link.exe・・・
手順6.Nginxのconfigureのオプションを入力 auto/cofigure --with-- ・略・
続けて、ライブラリのpathを通す
手順7.nmake -f objs/Makefile 後、objフォルダー内に「nginx.exe」が完成
手順8.nginx.conf設定やhtmlの設定内容はネット検索し、適宜配置
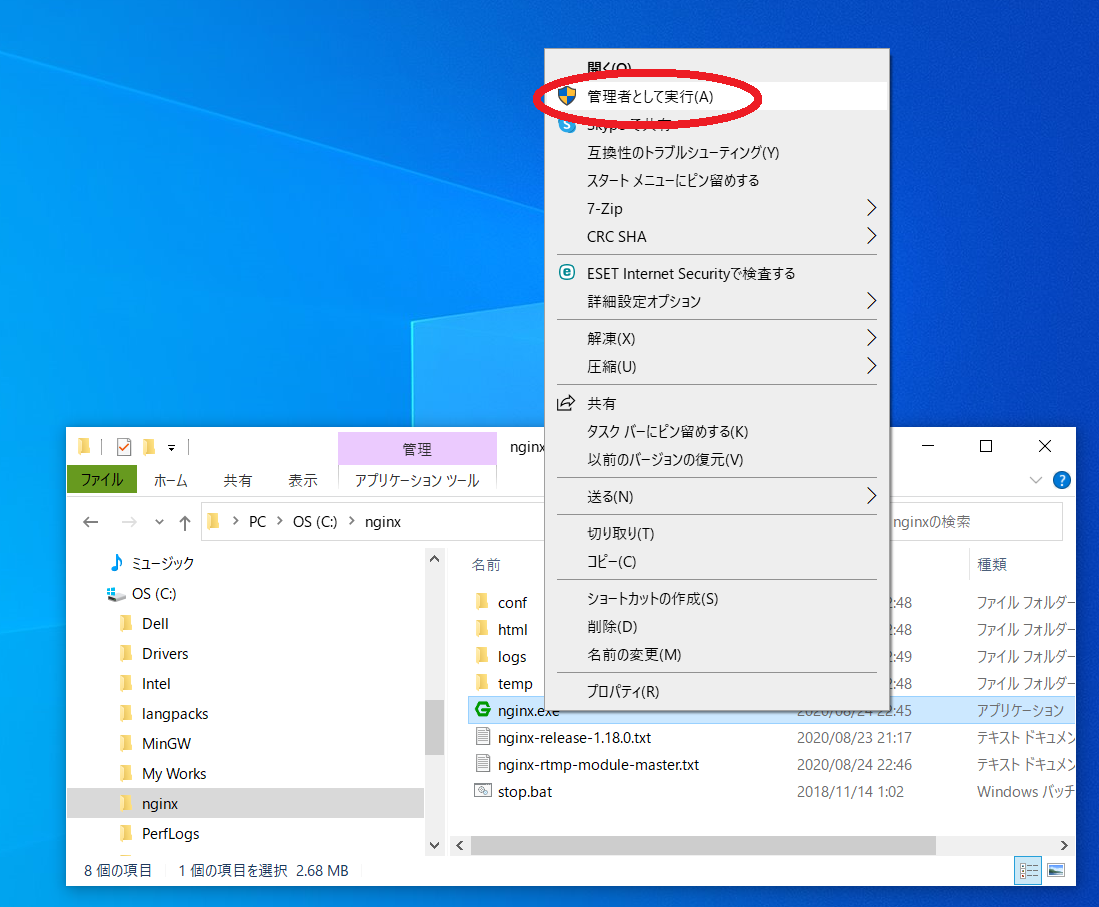
手順9.nginx.exe 管理者権限で実行
詳細手順 私の環境

手順1 Visual Studio 2010のインストール
Visual Studio 2010 Express Visual Studio 2010 SDK をダウンロードし
インストール(他記を事参照ください)

手順2 必要なモノをダウンロード
Nginx , nginx-rtmp-module-masterをダウンロード
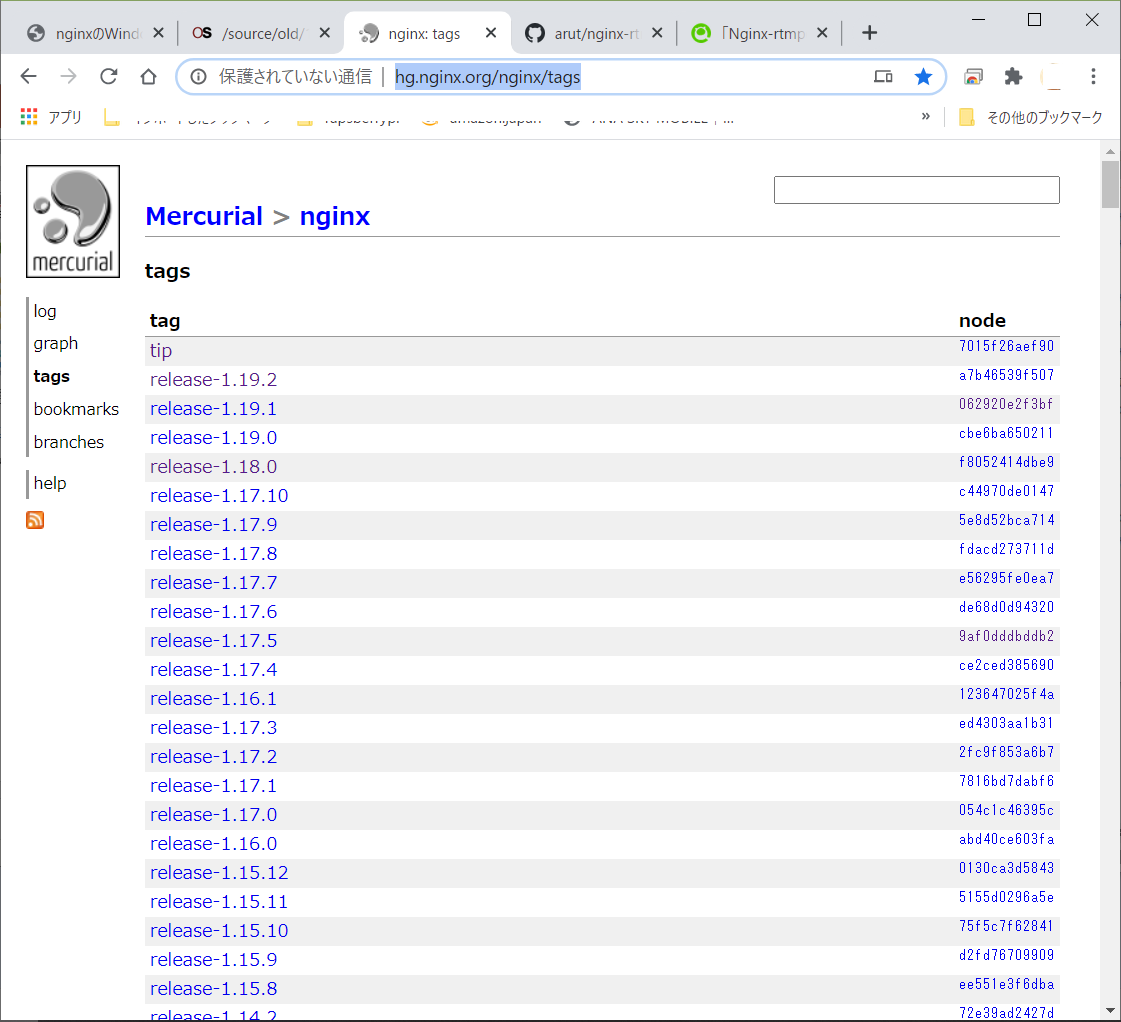
Nginxモジュール http://hg.nginx.org/nginx/tags

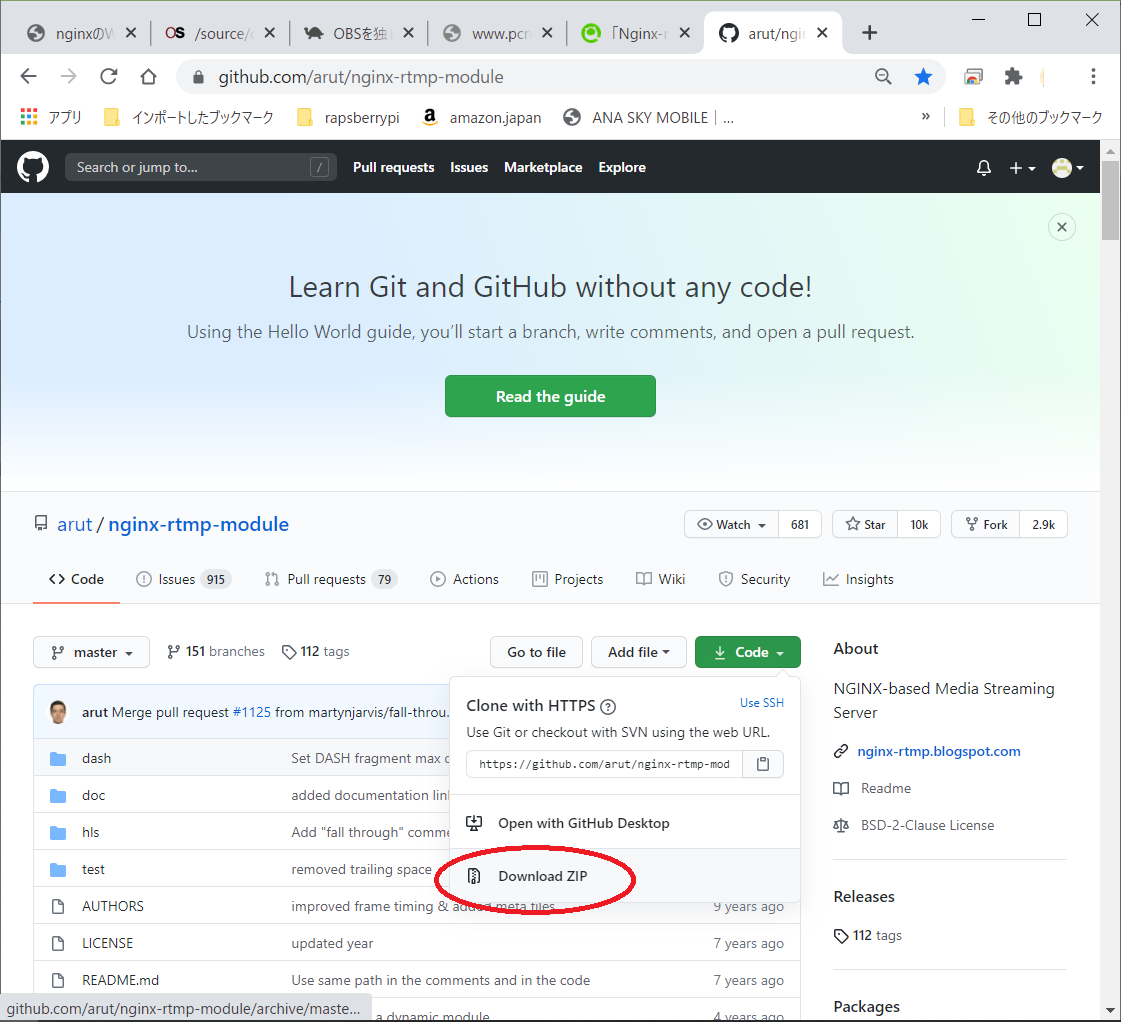
nginx-rtmp-module-master https://github.com/arut/nginx-rtmp-module
strawberry-perl-5.30.2.1-64bit.msi ダウンロードとインストール

以下をダウンロード
pcre-8.44 https://sourceforge.net/projects/pcre/postdownload

openssl-1.0.0e https://www.openssl.org/


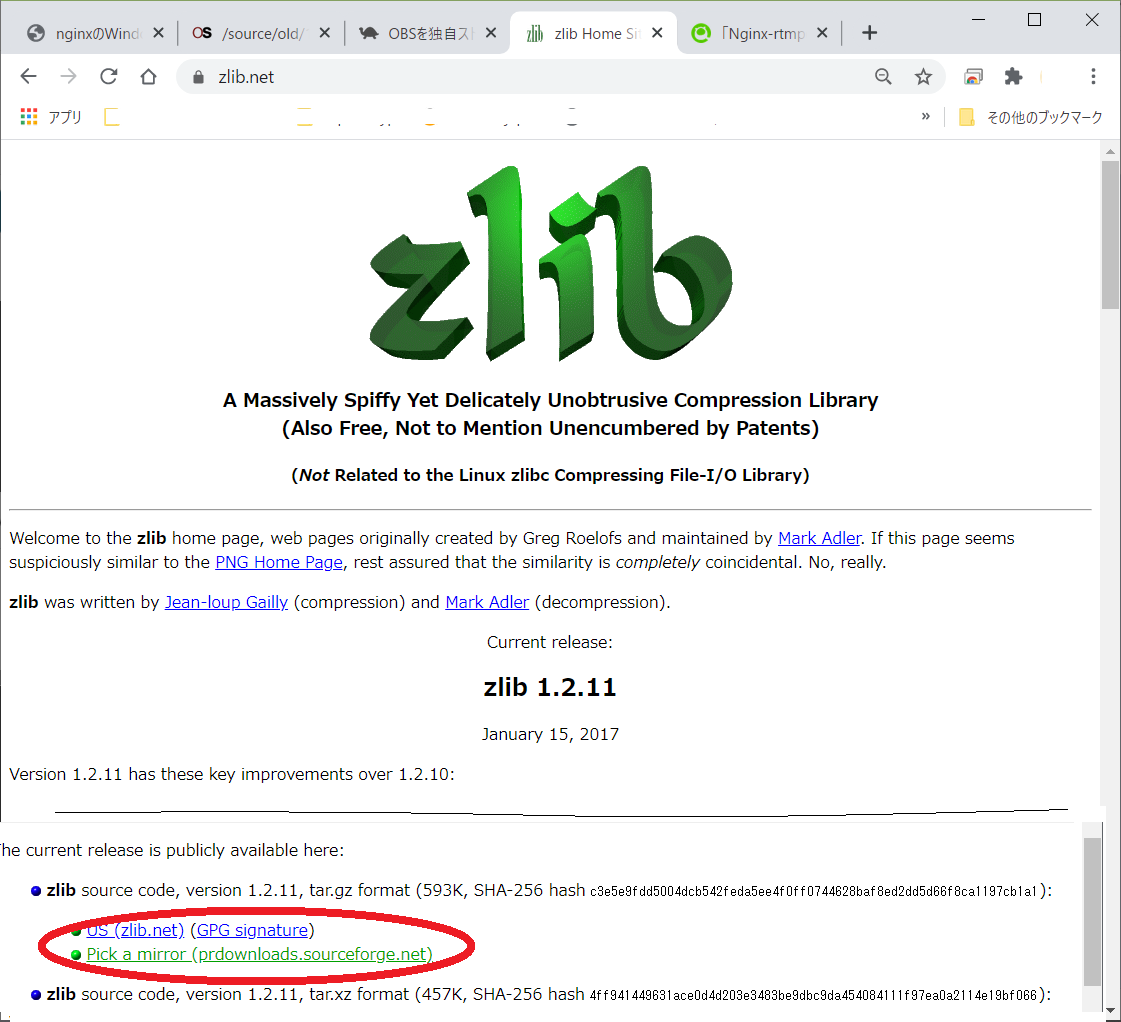
zlib-1.2.11 https://zlib.net/
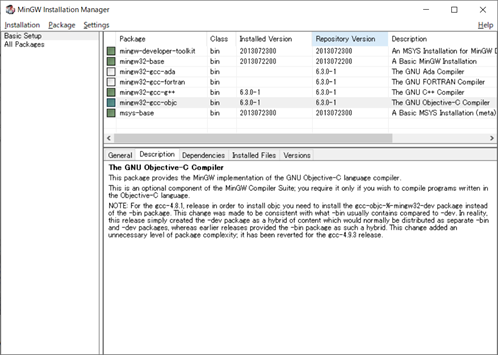
手順3 MinGWをインストール
MinGW http://www.mingw.org/ をダウンロード

画面下部の「download/install」などからmingw-get-setup.exeをダウンロード

minge-get-setup.exeを実行し、

"C:\MinGW"にインストール

以下の緑モジュールを選択
手順4 モジュールを配置
Nginxモジュールを配置 c:\MinGW\msys\1.0\home(自分のユーザー名)\Nignx
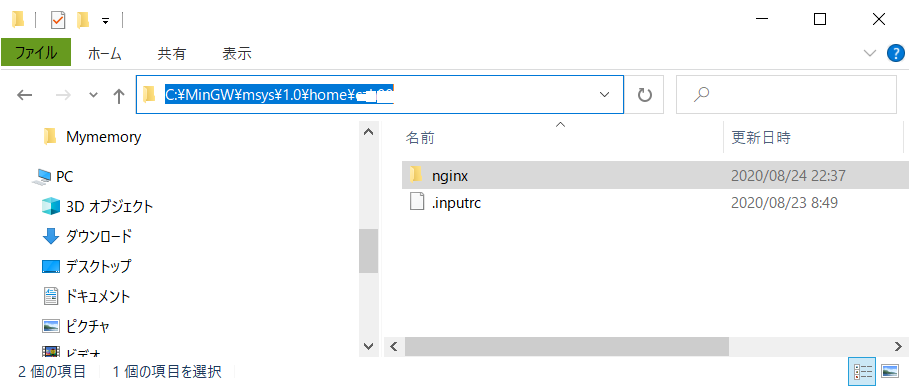
その下にobjs/libフォルダーを作成し、nginx-rtmp-module-masterと
pcre-8.44、openssl-1.0.0e、zlib-1.2.11を解凍して配置

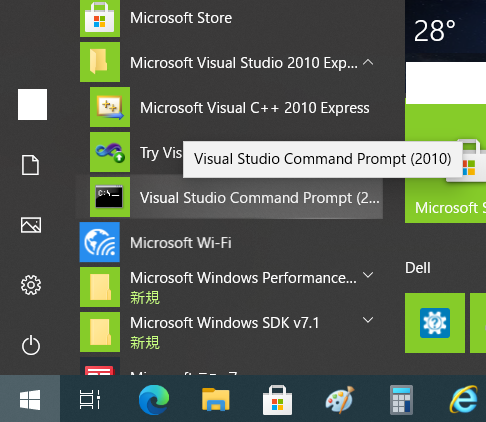
手順5 コマンドプロンプトを立ち上げ
visual studioのコマンドプロンプトを立ち上げる
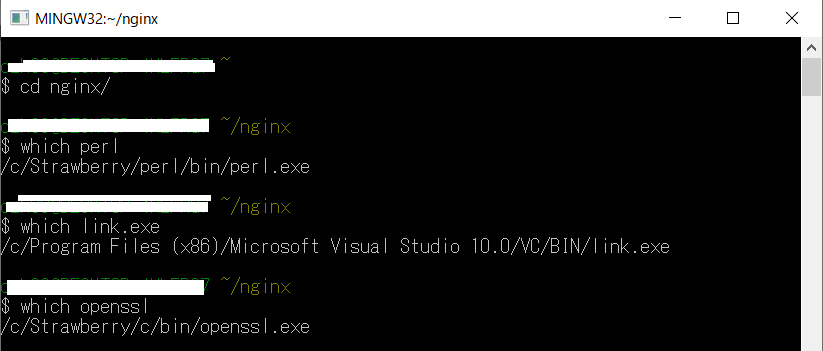
C:\MinGW\msys\1.0 へ移動し、msys.batを立ち上げ

cd nginx 移動と、コンパイル環境が整っているか確認 msysでwhich perl , which openssl which link.exe , which openssl で確認
手順6 ビルド(コンパイル前)
Nginxのconfigureのオプションを入力
auto/configure \
    --with-cc=cl \
    --with-debug \
    --builddir=objs \
    --prefix= \
    --conf-path=conf/nginx.conf \
    --pid-path=logs/nginx.pid \
    --http-log-path=logs/access.log \
    --error-log-path=logs/error.log \
    --sbin-path=nginx.exe \
    --http-client-body-temp-path=temp/client_body_temp \
    --http-proxy-temp-path=temp/proxy_temp \
    --http-fastcgi-temp-path=temp/fastcgi_temp \
    --http-scgi-temp-path=temp/scgi_temp \
    --http-uwsgi-temp-path=temp/uwsgi_temp \
    --with-cc-opt=-DFD_SETSIZE=1024 \
    --with-pcre=objs/lib/pcre-8.44 \
    --with-zlib=objs/lib/zlib-1.2.11 \
    --with-openssl=objs/lib/openssl-1.0.0e \
    --with-openssl-opt=no-asm \
    --with-http_ssl_module \
    --add-module=objs/lib/nginx-rtmp-module-master

続けて、ライブラリのpathを通す
pathは実ファイルの位置、名前を変更すること
自分の場合は、v7.1Aの名前がV7.0Aであったり、フォルダーの位置が違っていた
export LIB="C:\\Program Files (x86)\\Microsoft Visual Studio 10.0\\VC\\lib;C:\\Program Files (x86)\\Microsoft SDKs\\Windows\\v7.0A\\Lib”
export INCLUDE="C:\\Program Files (x86)\\Microsoft Visual Studio 10.0\\VC\\include;C:\\Program Files (x86)\\Microsoft SDKs\\Windows\\v7.0A\\Include”
export PATH="$PATH:/C:/Strawberry/perl/bin:/c/Program Files (x86)/Microsoft Visual Studio 10.0/VC/bin:/c:/Program Files (x86)/Microsoft Visual Studio 10.0/Common7/IDE:/c/Program Files (x86)/Microsoft SDKs/Windows/v7.0A/Bin”

手順7 コンパイル
ビルド(コンパイル)する
nmake -f objs/Makefile

後、objフォルダー内に「nginx.exe」が完成。(rtmpモジュール入りがわかるようnginx-rtmp.exeに変更しました)

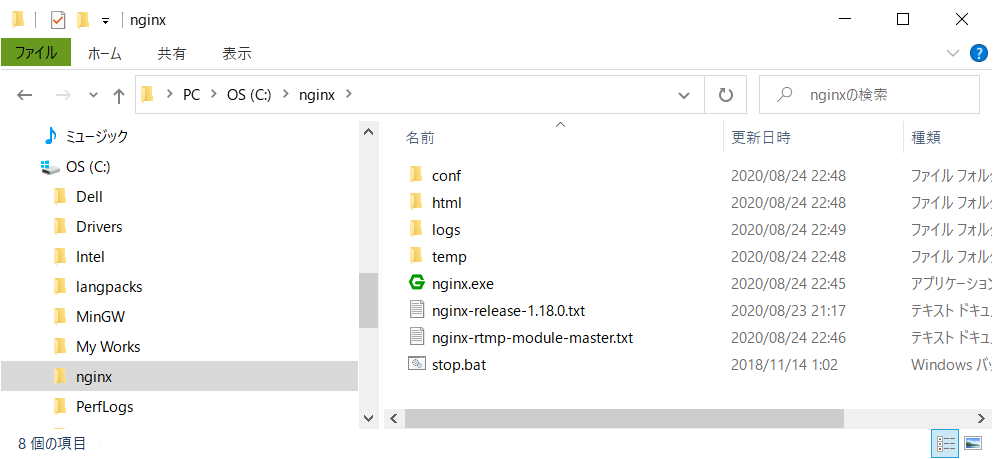
手順8 実行ファイルを配置
出来たモジュールを以下のように(例えば、Cドライブ直下)配置
nginx-1.18.0をダウンロードより、conf, html, logs, tempをコピー
nginx.conf設定やhtmlの設定内容はネット検索し、適宜配置
参考 https://www.yukkuriikouze.com/2019/03/09/2403/
手順9 実行
nginx.exe 管理者権限で実行
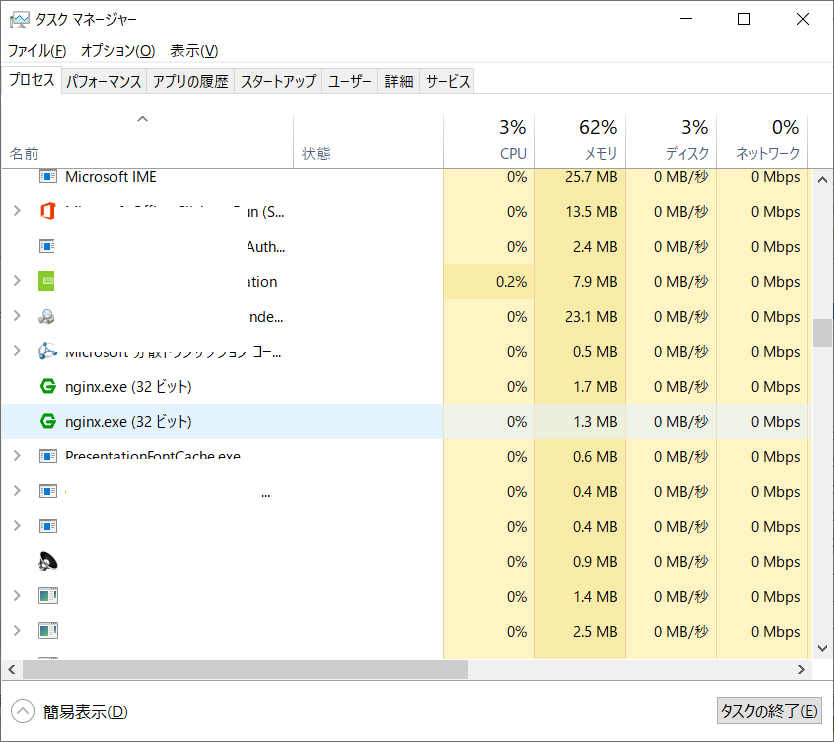
タスクマネージャーで起動できているか確認。起動できていない場合は
nginx.confファイルの記述、html内index.htmlの記述が問題あり
以上です