マイコンのESP32を使い、温度・湿度センサー(DHT20)で測定した数値をWi-Fi経由でPCに表示するデバイスを作ってみました。類似のハンズオンはウェブ上で多数紹介されていますが、DHT20を使った例はあまりなく、忘備のために残しておこうと思います。
1.Arduino IDEの設定
開発環境にはArduino IDEを使います。まずはArduinoのサイトからダウンロードしインストールしましょう。
ダウンロードURL:https://www.arduino.cc/en/software
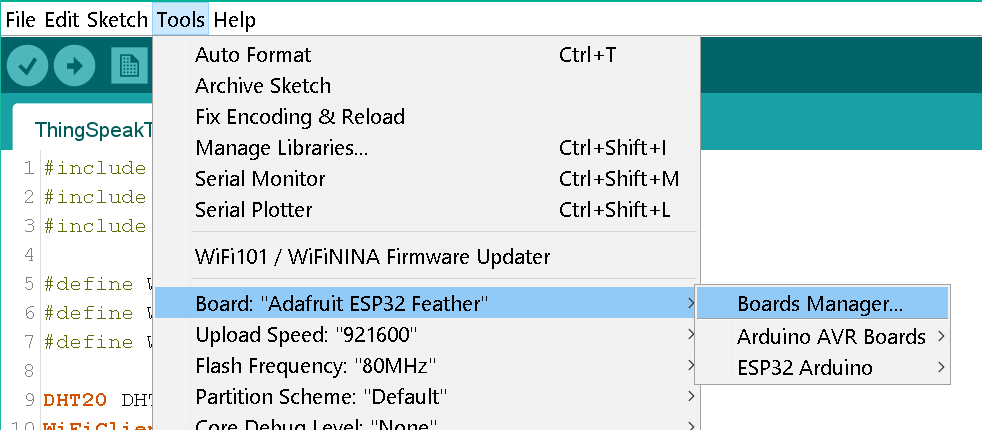
インストール後、Arduino IDEを立ち上げ、Tools→Boards ManagerからESP32をインストールします。
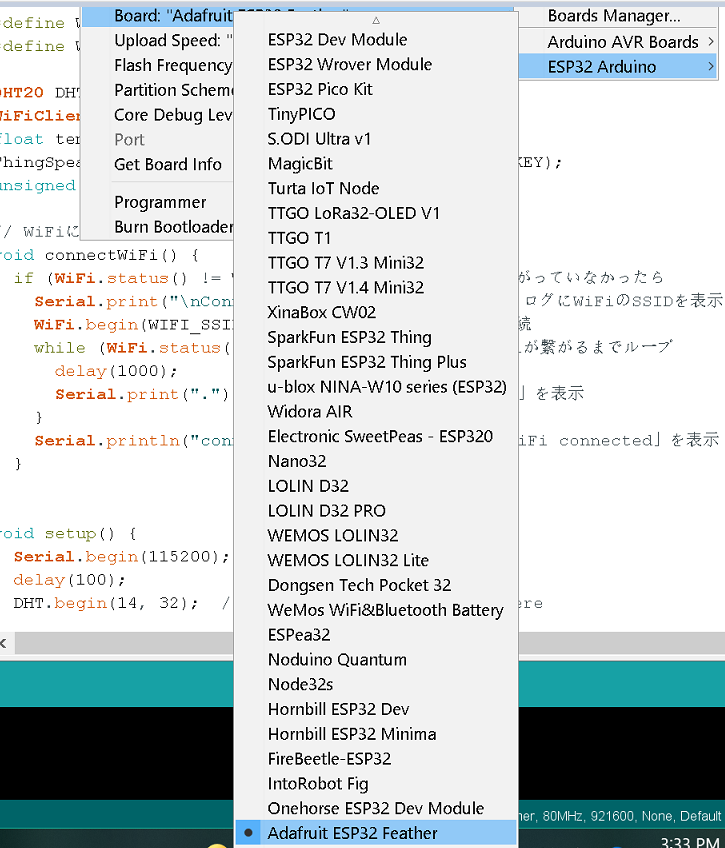
その後、Boards ManagerでAdafruit ESP 32 Featherに設定します。このほかの設定について、COMポートはCOM4に設定しています。
2.機材の接続
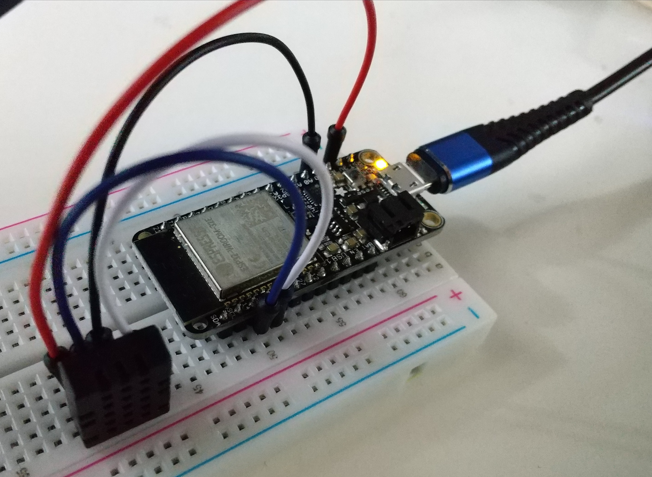
今回使用した機材は下記の通り。
・Adafruit ESP32
・DHT20
・ブレッドボード
・ジャンパワイヤ×4
・microUSBケーブル、電源アダプタ
ピンの対応は下記になります。
| DHT20側 | ESP32側 | ケーブルの色 |
|---|---|---|
| VDD | 3V | 赤 |
| GND | GND | 黒 |
| SDA | 14 | 青 |
| SCL | 32 | 白 |
3.ThingSpeakの設定
今回、センサーで測定したデータはInternet of Things (IoT) のプラットフォームであるThingSpeakへ送信し、グラフ化しました。
・ThingSpeakのURL
https://thingspeak.com
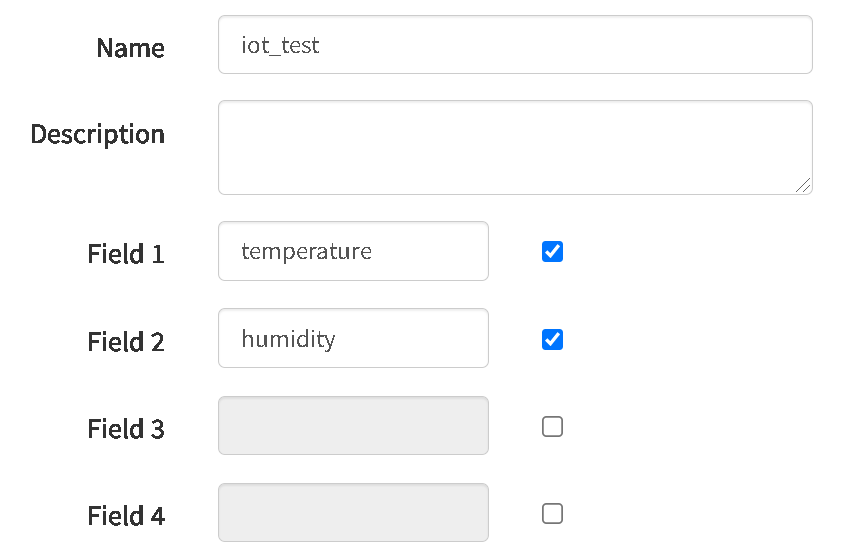
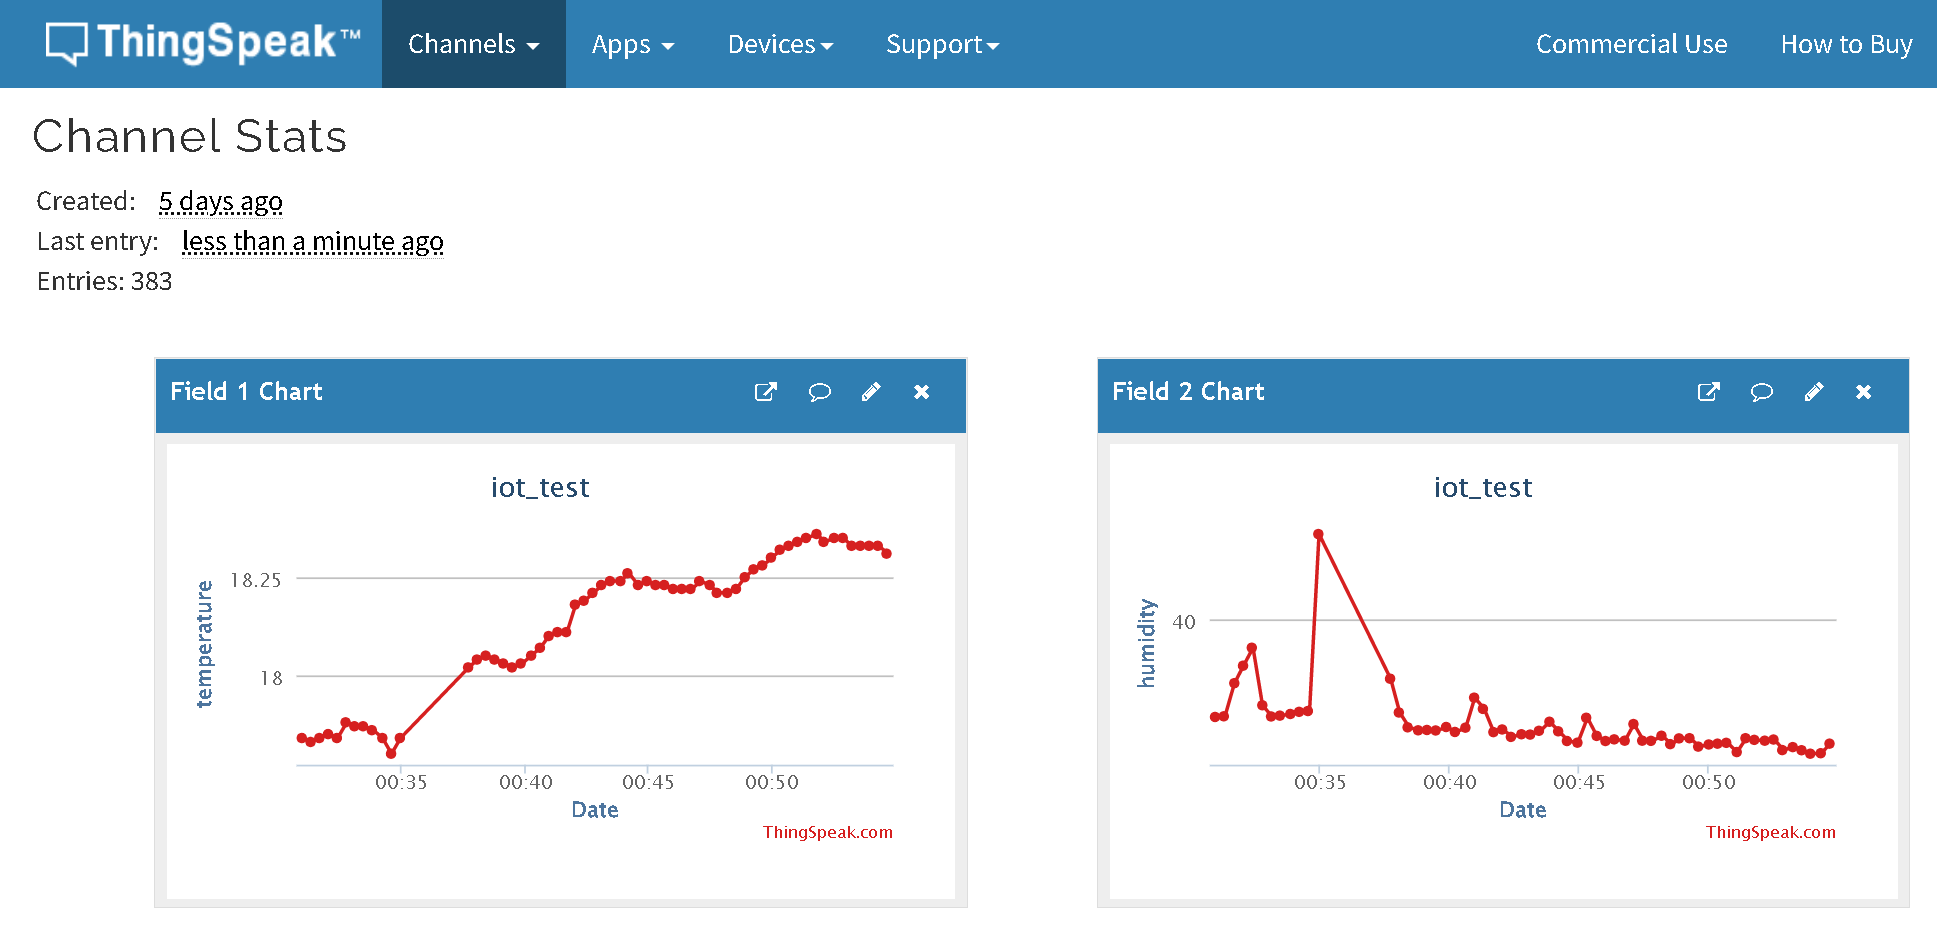
ThingSpeakのサイトで無料登録し、チャンネルを作成した後、Channel Settings→フィールド1、2にそれぞれ温度と湿度を指定。
さらにAPI Keys→Write API Keyからキーをコピーし、ソースコードのWRITE_API_KEYにペーストします(詳細は次項)。
4.ソースコードの作成
ソースコードはこちら。ThingSpeakのライブラリ「ThingSpeakWriter_asukiaaa」をインポートし、exampleコードをベースに作成しました。
// ライブラリのインポート
# include <ThingSpeakWriter_asukiaaa.h>
# include "DHT20.h"
# include <WiFi.h>

// 接続情報
# define WRITE_API_KEY "********" // ThingSpeakのAPIキー
# define WIFI_SSID     "********" // Wi-FiのID
# define WIFI_PASS     "********" // Wi-Fiのパスワード

// グローバル変数
DHT20 DHT(&Wire);
WiFiClient wclient;
ThingSpeakWriter_asukiaaa channelWriter(WRITE_API_KEY);
float temperature, humidity;  // 温度、湿度の変数
unsigned long lastSend = 0;   // 前回の送信時間

// WiFi接続
void connectWiFi() {
  if (WiFi.status() != WL_CONNECTED) {
    Serial.print("\nConnecting to " WIFI_SSID);
    WiFi.begin(WIFI_SSID, WIFI_PASS);
    while (WiFi.status() != WL_CONNECTED) {
      delay(1000);
      Serial.print(".");
    }
    Serial.println("connected");
  }
}

// 初期化
void setup() {
  Serial.begin(115200);
  delay(100);
  DHT.begin(14, 32);  // ピン番号の指定
}

// メイン処理
void loop() {
  connectWiFi();
  int status = DHT.read();
  channelWriter.setField(1, String(DHT.getTemperature()));
  channelWriter.setField(2, String(DHT.getHumidity()));
  int result = channelWriter.writeFields();
  if (result < 0) {
    Serial.println("Failed to send data");
  } else if (result != 200) {
    Serial.println("Sent data but failed at status code: " + String(result));
  } else {
    Serial.println("Succeeded in sending data.");
  }
  delay(10000);
}
コードをESP32にアップロードすれば設定完了です。室内の温度と湿度をThingSpeakへ送信しグラフ化してくれます。センサーに息を吹きかけると湿度が上がるなど、ちゃんと測定されているようです。グラフは他のサイトに埋め込むこともできます。
集めたデータはCSVでダウンロード可能なので、分析したり機械学習モデルを作ったりと、さまざまな活用方法がありそうです。
