はじめに
フロントエンド開発において、バックエンドAPIの開発待ちの状態になることもあると思います。そんなときには、Postmanのモックサーバー機能活用できそうです。本記事では、Postmanのモックサーバー機能を使って簡単にAPIをモックとして作成し、Reactで作ったフロントのUIからコールする処理を実装していきます。
環境
- React:18.3.1
- Vite:6.0.1
- tailwindcss:3.4.15
- Postman Mock Server
本記事で書かない事
- Tailwind CSSの設定手順
- Vite、React の環境構築
ゴール
Postman Mock Serverを作成しフロントからコールしてレスポンスを取得できることを確認する。
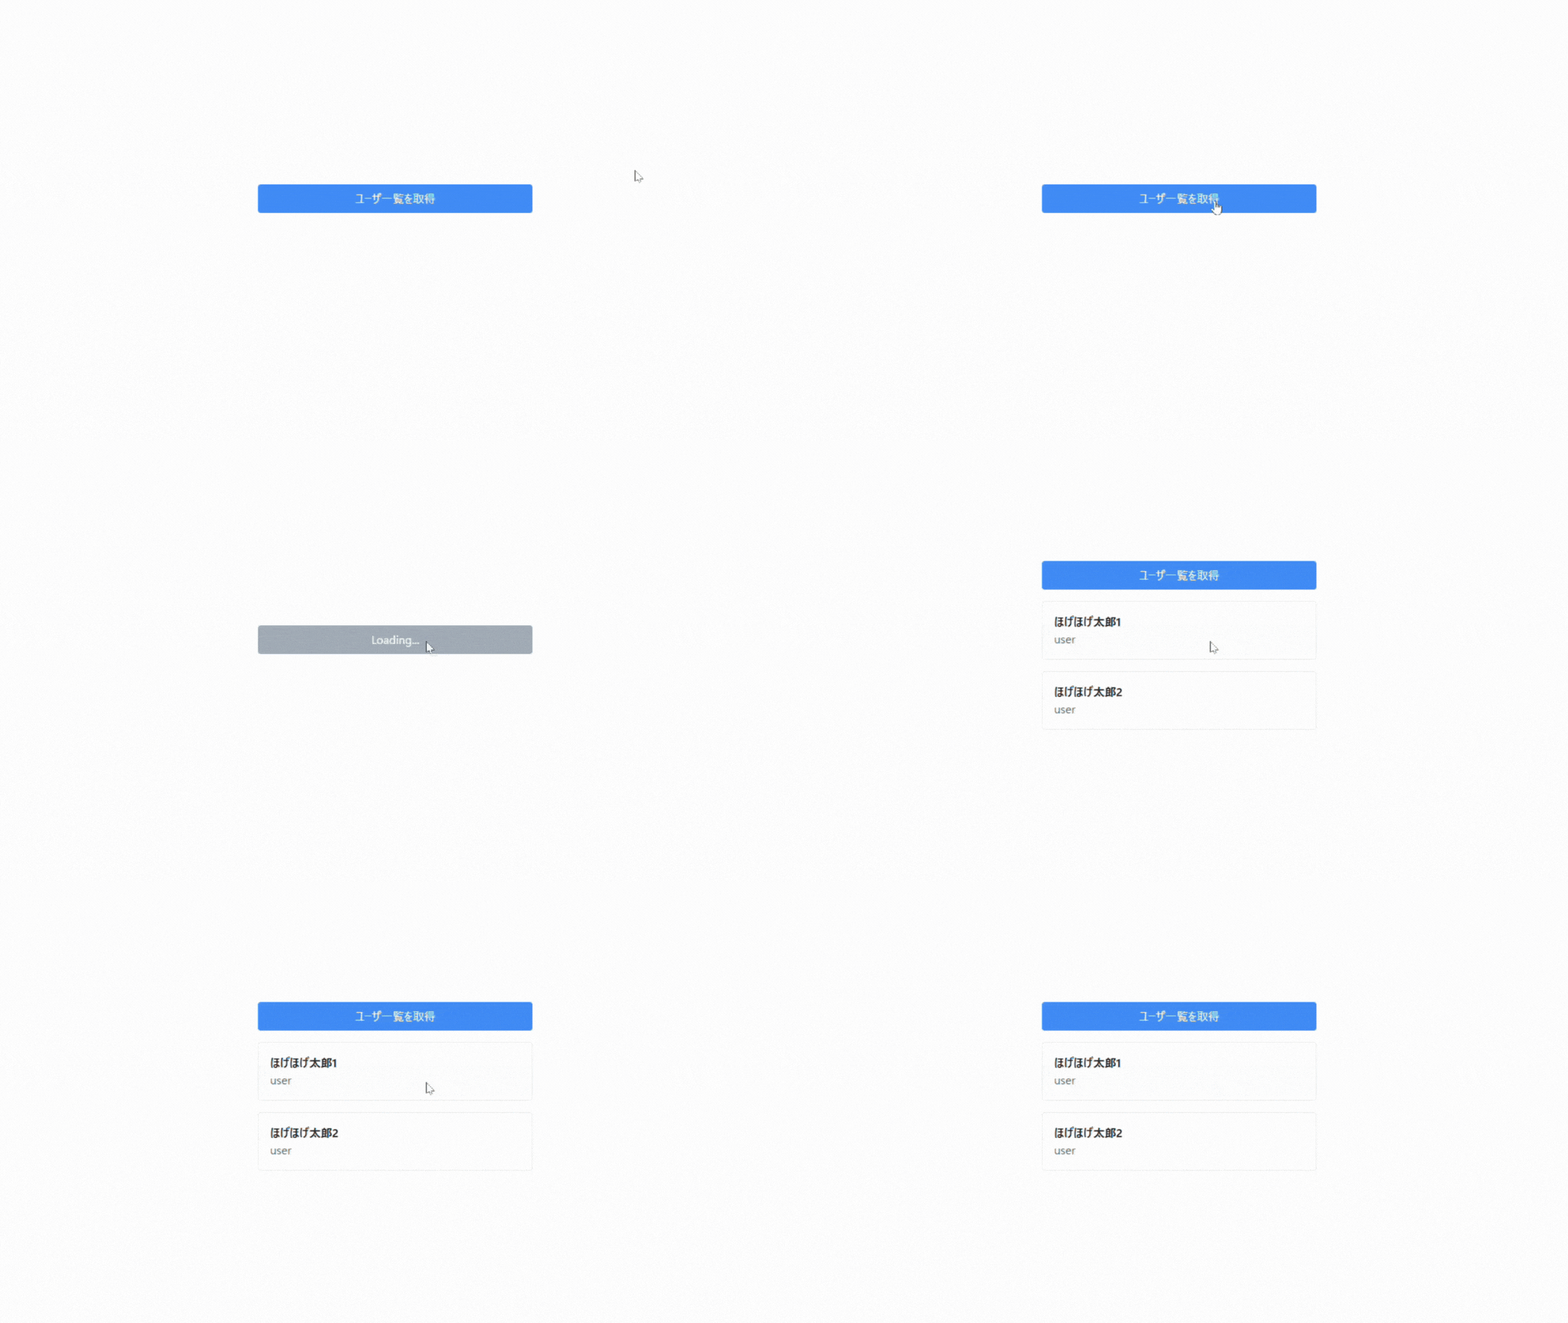
作成するUIイメージは次の通りです。
1. Postmanでモックサーバーを作成する
簡単なユーザー情報を返すAPIを想定したモックサーバーを作成します。
1. 左側メニューの「Mock Servers」→「Create Mock Server」をクリック
2. 以下の情報を入力:
- Method: GET
- URL: /api/users
{
  "users": [
    {
      "id": 1,
      "name": "ほげほげ太郎1",
      "role": "user"
    },
    {
      "id": 2,
      "name": "ほげほげ太郎2",
      "role": "user"
    }
  ]
}
3. 「Next」→「Create Mock Server」をクリック
4. 生成されたモックサーバーのURLをコピーしておきます。
モックサーバーの動作確認
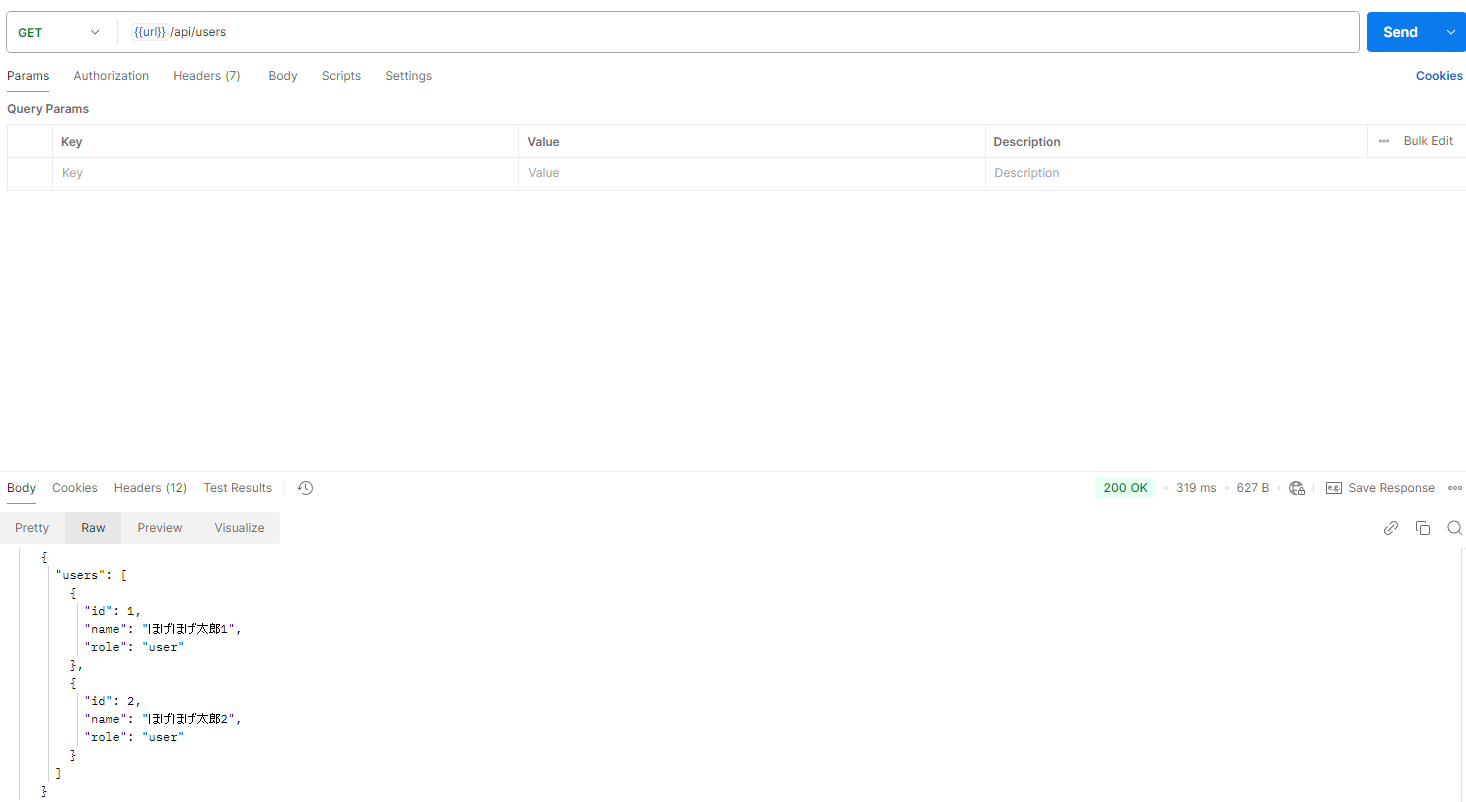
試しにPostmanからコールしていみます。
Mock servers > 作成したモックAPI > View collection Docs > Openrequest からコールしてみると、レスポンスが想定通り返ってくることを確認できました。
   {
     "users": [
       {
         "id": 1,
         "name": "ほげほげ太郎1",
         "role": "user"
       },
       {
         "id": 2,
         "name": "ほげほげ太郎2",
         "role": "user"
       }
     ]
   }
フロント部分の作成
次に、モックサーバーから取得したデータを表示するフロント部分をReactで実装します。
import { useState } from 'react'

interface User {
  id: number
  name: string
  role: string
}

function App() {
  const [users, setUsers] = useState<User[]>([])
  const [loading, setLoading] = useState(false)

  const handleClick = async () => {
    setLoading(true)
    try {
      const response = await fetch('対象のAPI')
      const data = await response.json()
      setUsers(data.users)
    } catch (error) {
      console.error('Error:', error)
    }
    setLoading(false)
  }

  return (
    <div className="min-h-screen flex items-center justify-center">
      <div className="p-8 w-full max-w-md">
        <button
          onClick={handleClick}
          disabled={loading}
          className="w-full bg-blue-500 text-white px-4 py-2 rounded disabled:bg-gray-400"
        >
          {loading ? 'Loading...' : 'ユーザ一覧を取得'}
        </button>

        <div className="mt-4 space-y-4">
          {users.map(user => (
            <div key={user.id} className="p-4 border rounded">
              <div className="font-bold">{user.name}</div>
              <div className="text-gray-600">{user.role}</div>
            </div>
          ))}
        </div>
      </div>
    </div>
  )
}

export default App
モックAPIをコールしてみる
実装したアプリケーションを起動し、実際にモックサーバーからデータを取得してみます。
npm run dev
ユーザ一覧を取得 を押下するとPostman のモックサーバで作成しておいた2つのユーザデータを取得できている事を画面上で確認できました。


