Outline
テストの種類で画像比較で検証するVisual Regression Testがある。
T-DASHは、画像比較の機能は標準でサポートされている。
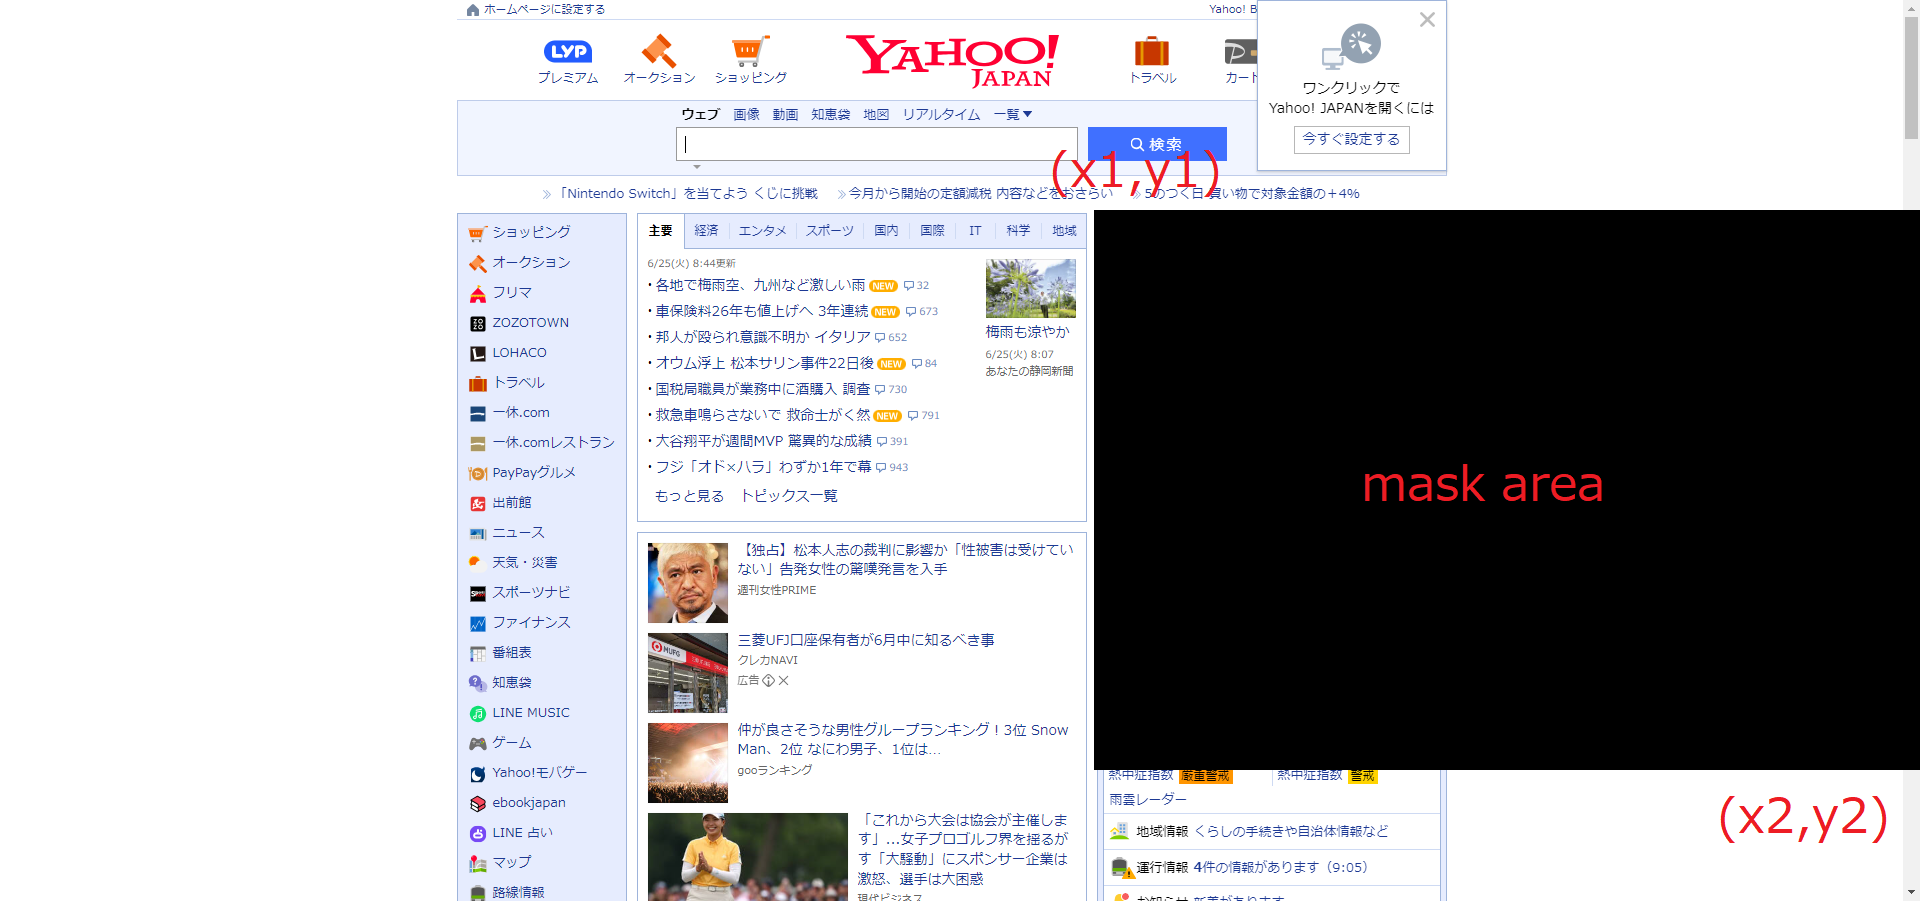
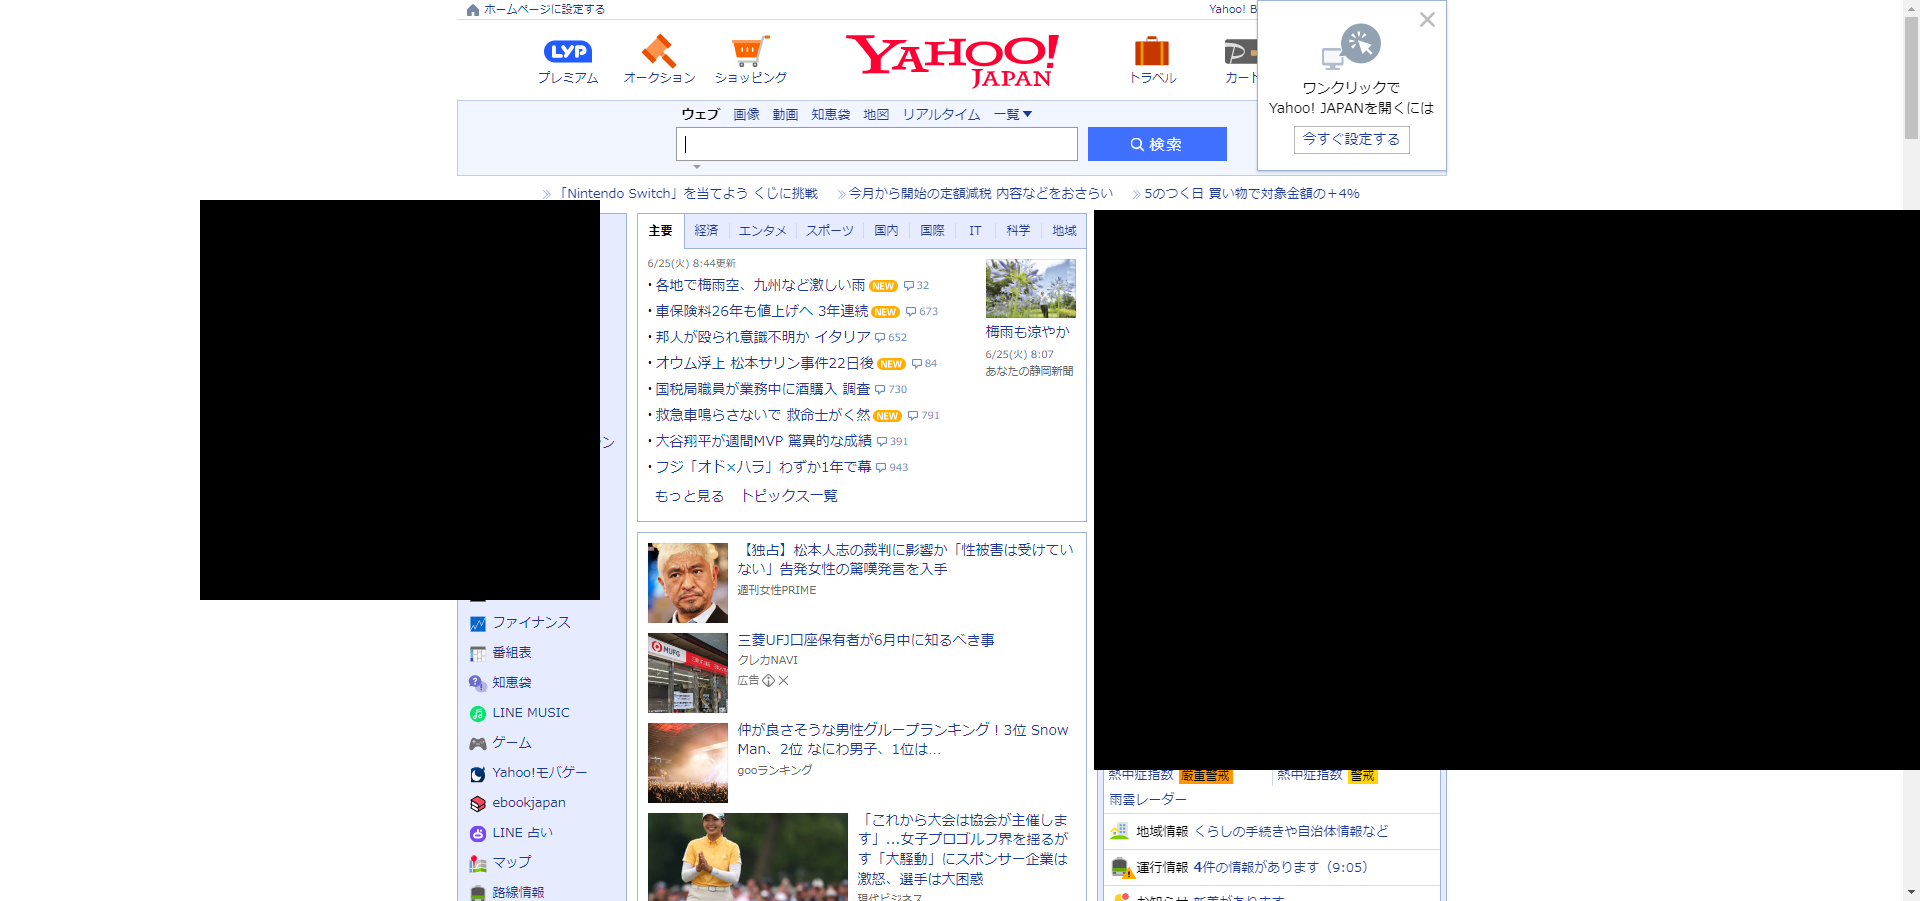
ただ、この標準的な画像比較だと、上図のように一部エリアが可変(広告で毎回表示が変わる)では、一致度が下がってしまい、検証が厳しい。
今回、このような可変のエリアをマスクして画像比較を行い、検証しやすくする方法を記載する。
技術的な情報
OpenCVとNumPyを用いる。
流れとしては以下の通りです
- スクリーンショットを取得する
- オリジナル、現在の画像を、指定した矩形のエリアでマスクする
- マスクされた2画像の差分をとる
- 差分から一致度を計算する
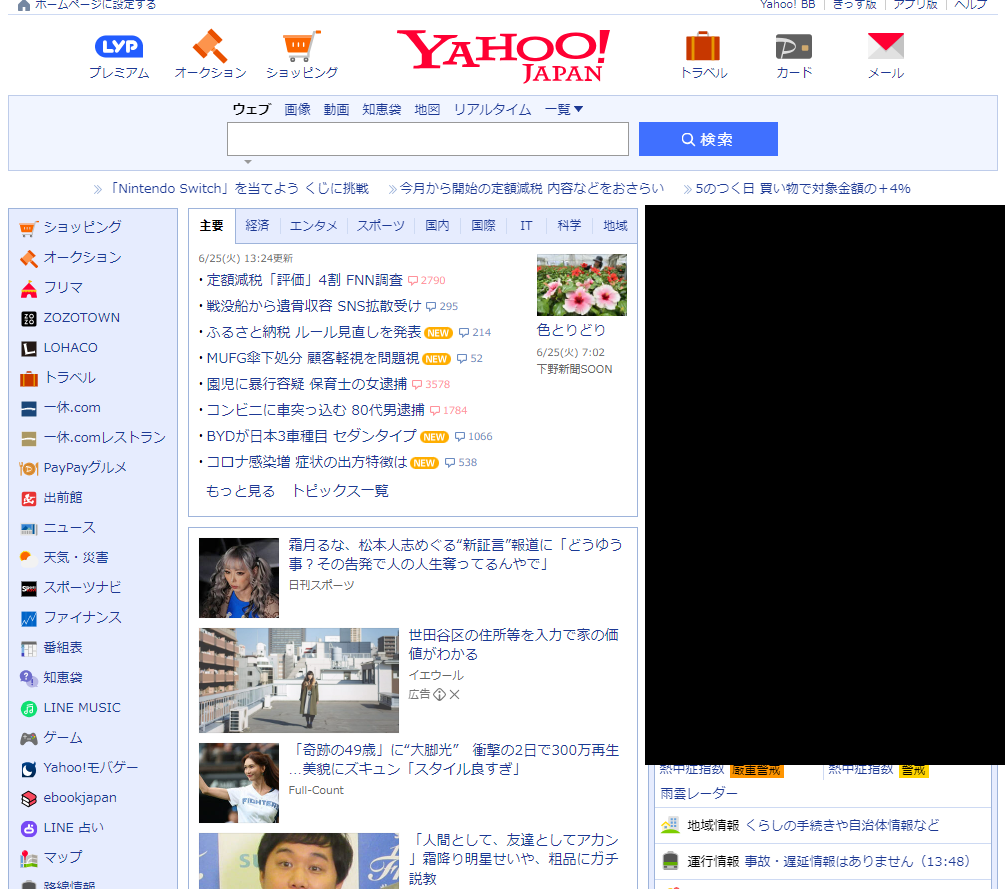
オリジナルの画像

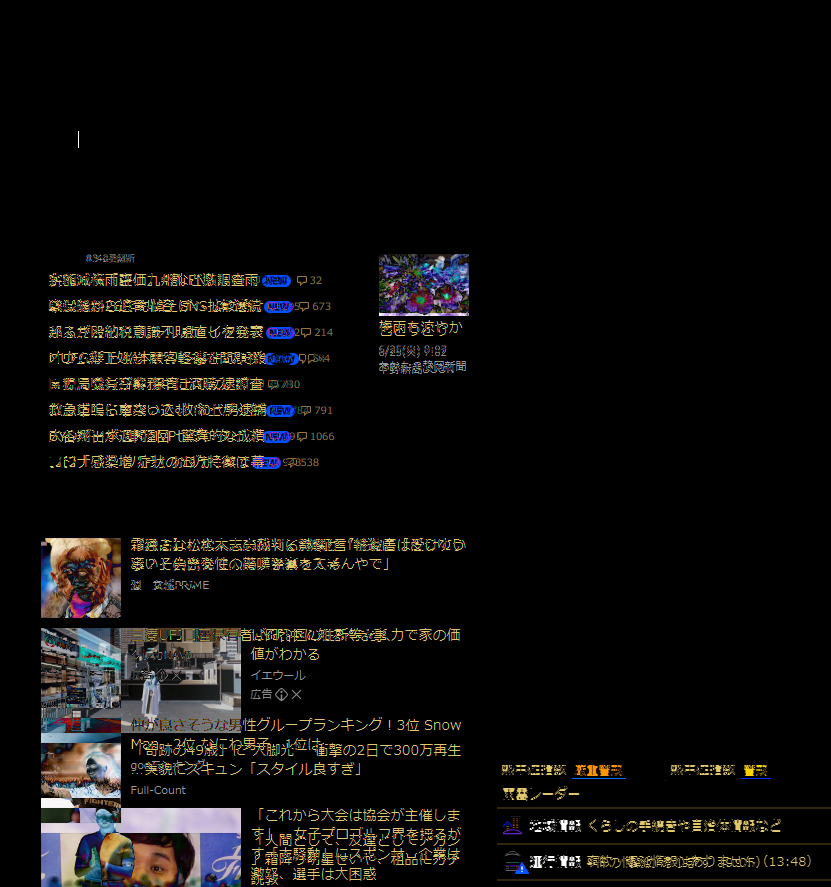
マスクした画像
このように、2つの画像にマスクをかけるため、一致度に影響しない。
比較した差分画像
T-DASH
カスタム動作
python library
以下の設定内容をlib_image.pyのファイル名で保存する
 import cv2
import numpy as np

def mask_image (inifle,outfile,recFromX,recFromY,recToX,recToY):
	img = cv2.imread(inifle)

	height = img.shape[0]
	width = img.shape[1]
	print( str(height) + ' ' + str(width)  )
	print( "mask area" + recFromX + ' ' + recFromY + ' ' + recToX + ' ' + recToY )
	cv2.rectangle(img, (int(recFromX), int(recFromY) , int(recToX), int(recToY)),(0,0,0), cv2.FILLED)
	cv2.imwrite(outfile, img)
	print("save at " + outfile)

def calculate_matching (file1,file2):
	img1 = cv2.imread(file1)
	img2 = cv2.imread(file2)
	height = img1.shape[0]
	width = img1.shape[1]
	print( "image size = " + str(height) + ' ' + str(width)  )
	img_size = (int(width), int(height))
	rate = np.count_nonzero(img1 == img2) / img1.size
	return rate

def save_diff_image (file1,file2,file3):
	img1 = cv2.imread(file1)
	img2 = cv2.imread(file2)
	im_diff = img1.astype(int) - img2.astype(int)
	im_diff_abs = np.abs(im_diff)
	im_diff_abs_norm = im_diff_abs / im_diff_abs.max() * 255
	cv2.imwrite(file3, im_diff_abs_norm)
作成したpython scriptを自作ライブラリのフォルダに格納する
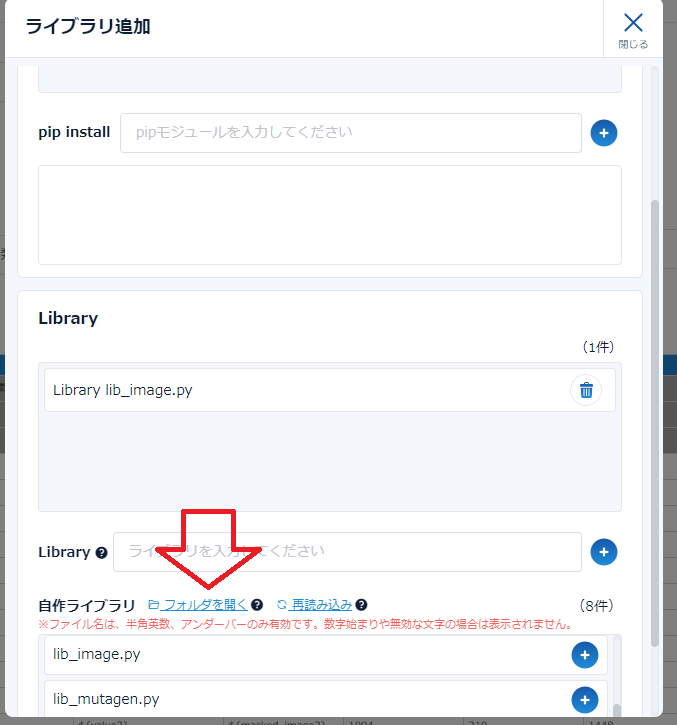
robotframework library
以下設定ファイルをImageCompa.yamlで保存する
ACT-CAT-CUSTOM-53c469f0-2a3e-4504-9e31-aa8d3da6ff99:
action_category_name: ImageCompa
icon: ''
color: '#57fe30'
custom_data:
file_name: ImageCompare
pip_list: []
library_list:
- lib_image.py
actions:
ACT-CUSTOM-604a7a17-eca6-4ced-b81f-bb6dd50985da:
action_name: 矩形マスクで画像比較
action_type: operation
action_format: 矩形マスクを用いて「設定値1」と「設定値2」の画像比較をして、類似度を変数share_diff_ratioに格納する
action_note: ''
action_args:
- value1
- value2
action_def:
- - ${vars}=
- Get Variables
- - log
- ${vars['\${OUTPUT_DIR}']}
- - Set Test Variable
- ${image1}
- \\image1_masked.png
- - Set Test Variable
- ${image2}
- \\image2_masked.png
- - Set Test Variable
- ${image3}
- \\diff_image.png
- - Set Test Variable
- ${masked_image1}
- ${vars['\${OUTPUT_DIR}']}${image1}
- - Set Test Variable
- ${masked_image2}
- ${vars['\${OUTPUT_DIR}']}${image2}
- - Set Test Variable
- ${diff_image3}
- ${vars['\${OUTPUT_DIR}']}${image3}
- - mask_image
- ${value1}
- ${masked_image1}
- '1094'
- '210'
- '1448'
- '560'
- - 'Log '
- <img src="${masked_image1}">
- html=true
- - mask_image
- ${value2}
- ${masked_image2}
- '1094'
- '210'
- '1448'
- '560'
- - 'Log '
- <img src="${masked_image2}">
- html=true
- - save_diff_image
- ${masked_image1}
- ${masked_image2}
- ${diff_image3}
- - 'Log '
- <img src="${diff_image3}">
- html=true
- - ${diff_ratio} =
- calculate_matching
- ${masked_image1}
- ${masked_image2}
- - Log
- ${diff_ratio}
- - Set Suite Variable
- ${share_diff_ratio}
- ${diff_ratio}
ACT-CUSTOM-7615a43d-6927-41ac-8296-f990eb35a879:
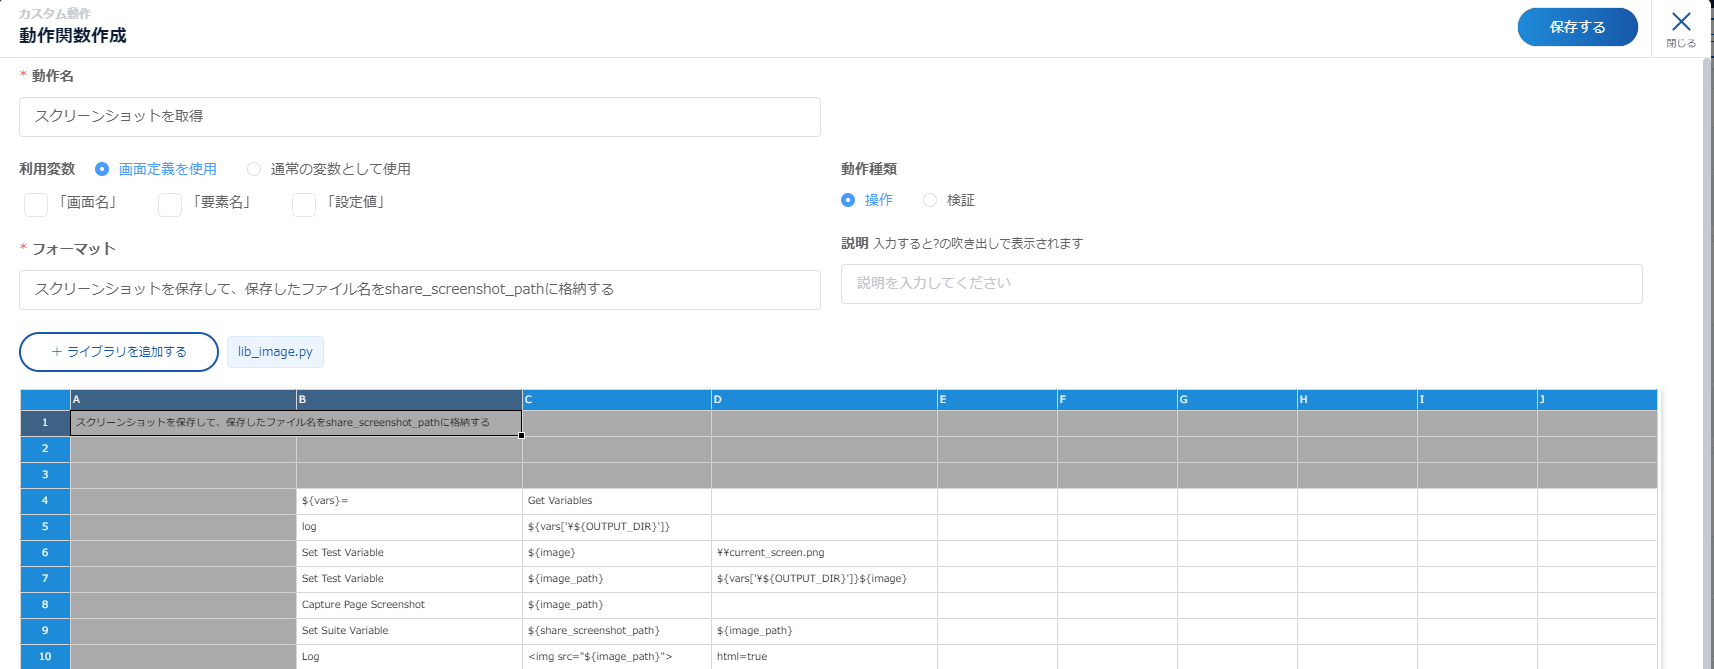
action_name: スクリーンショットを取得
action_type: operation
action_format: スクリーンショットを保存して、保存したファイル名をshare_screenshot_pathに格納する
action_note: ''
action_args: []
action_def:
- - ${vars}=
- Get Variables
- - log
- ${vars['\${OUTPUT_DIR}']}
- - Set Test Variable
- ${image}
- \\current_screen.png
- - Set Test Variable
- ${image_path}
- ${vars['\${OUTPUT_DIR}']}${image}
- - Capture Page Screenshot
- ${image_path}
- - Set Suite Variable
- ${share_screenshot_path}
- ${image_path}
- - Log
- ' <img src="${image_path}">'
- html=true
ACT-CUSTOM-bc9e7d9e-7db8-4549-bbe4-c6265f25bf92:
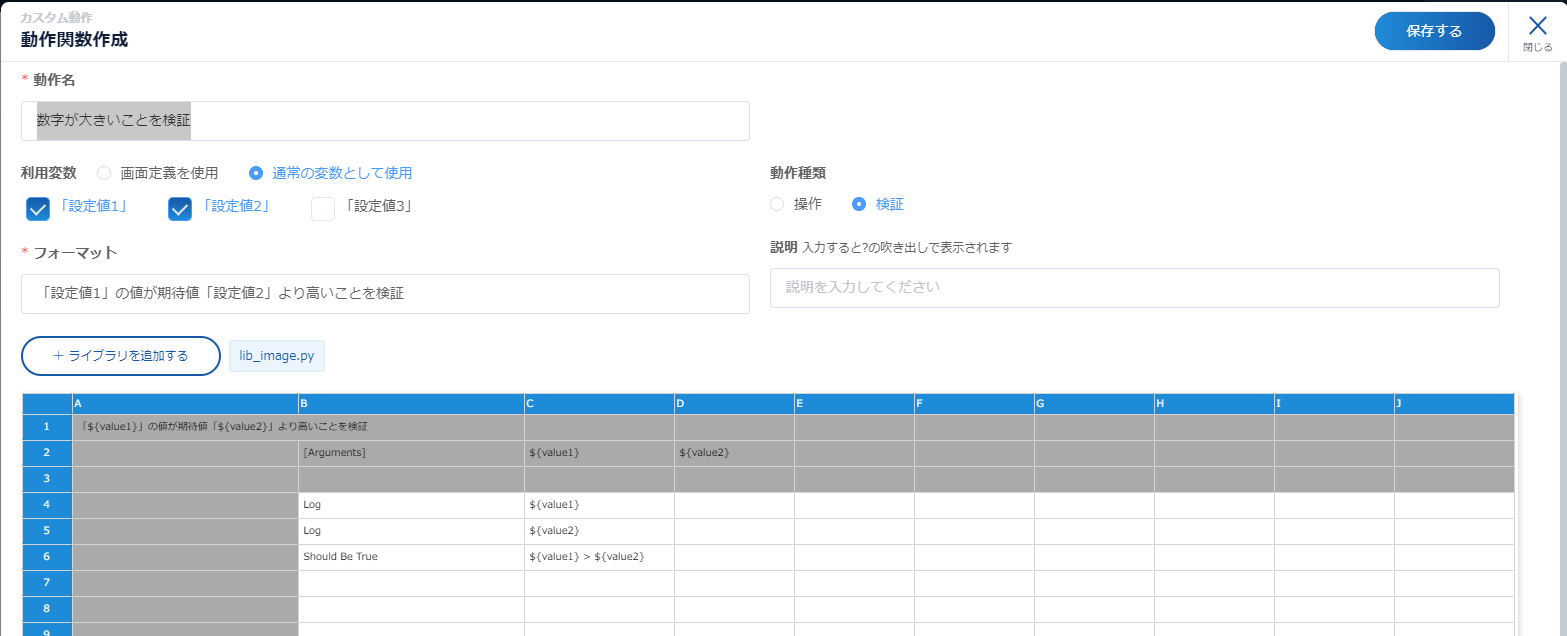
action_name: 数字が大きいことを検証
action_type: expectation
action_format: 「設定値1」の値が期待値「設定値2」より高いことを検証
action_note: ''
action_args:
- value1
- value2
action_def:
- - Log
- ${value1}
- - Log
- ${value2}
- - Should Be True
- ${value1} > ${value2}
次に、作成されたChromeOpti.yamlをT-DASHの動作定義 -> カスタム動作 -> カスタム動作をインポート にてインポートし、実際にインポートされた設定内容を開く
矩形マスクで画像比較
マスク画像を作成し、画像比較する
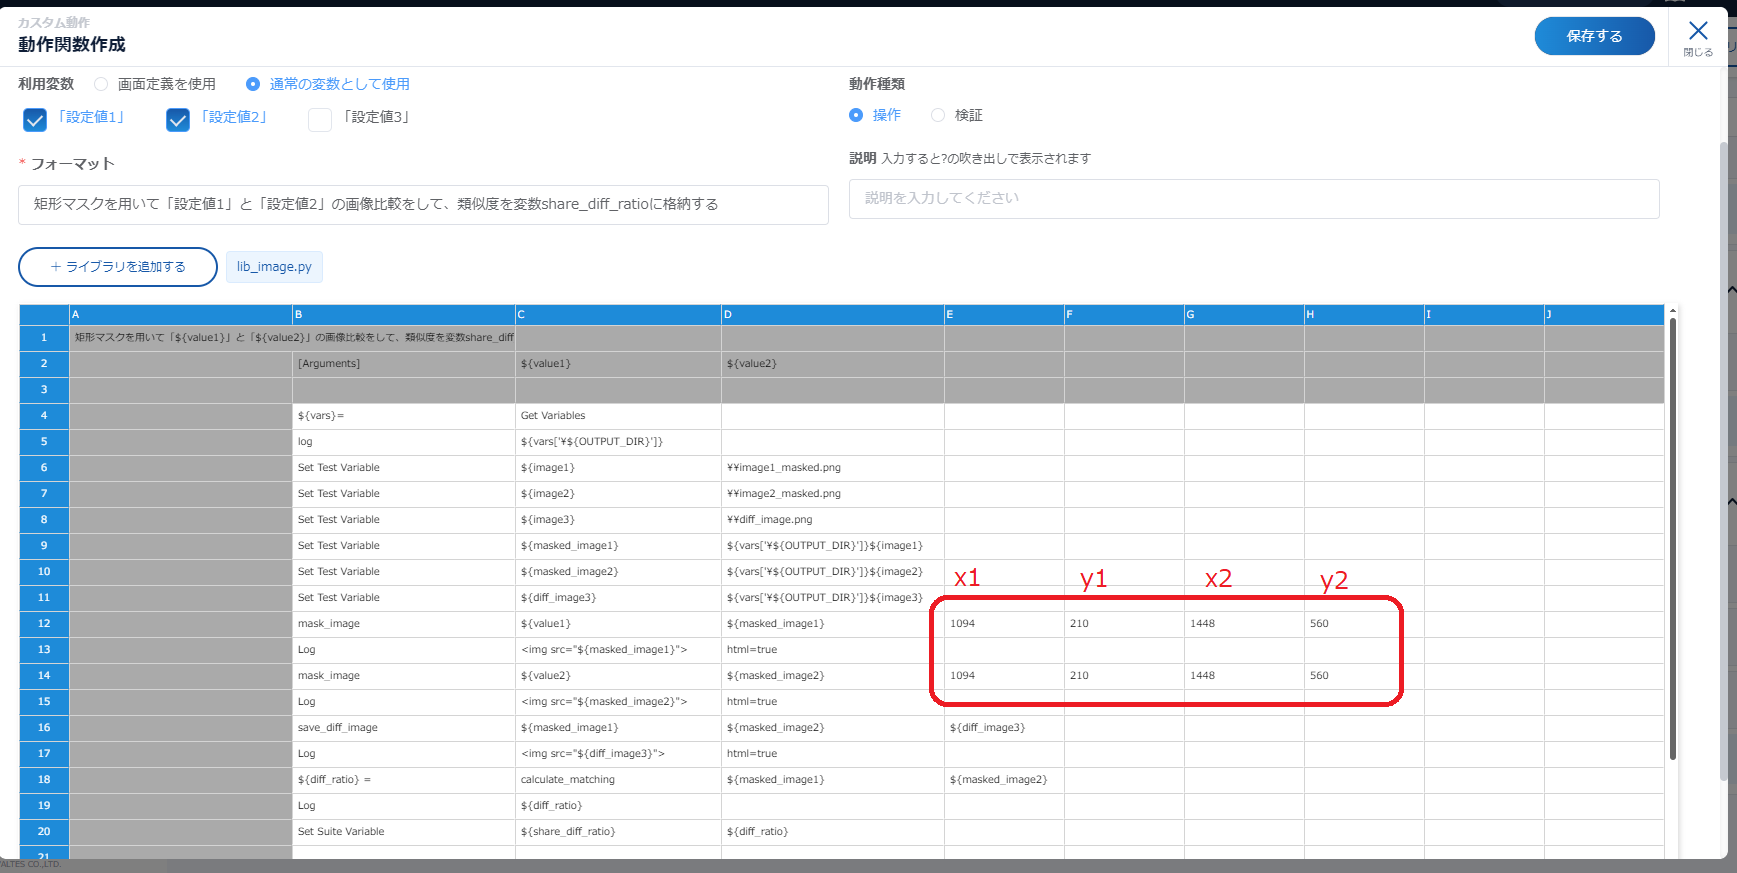
12行目、14行目は期待値の画像と、現在の画像のマスク処理です
4つのパラメータ(x1,y1,x2,y2)が必要で、これはマスクのエリアをpixelで指定します。
実際のマスクの指定エリアは下図の通りです
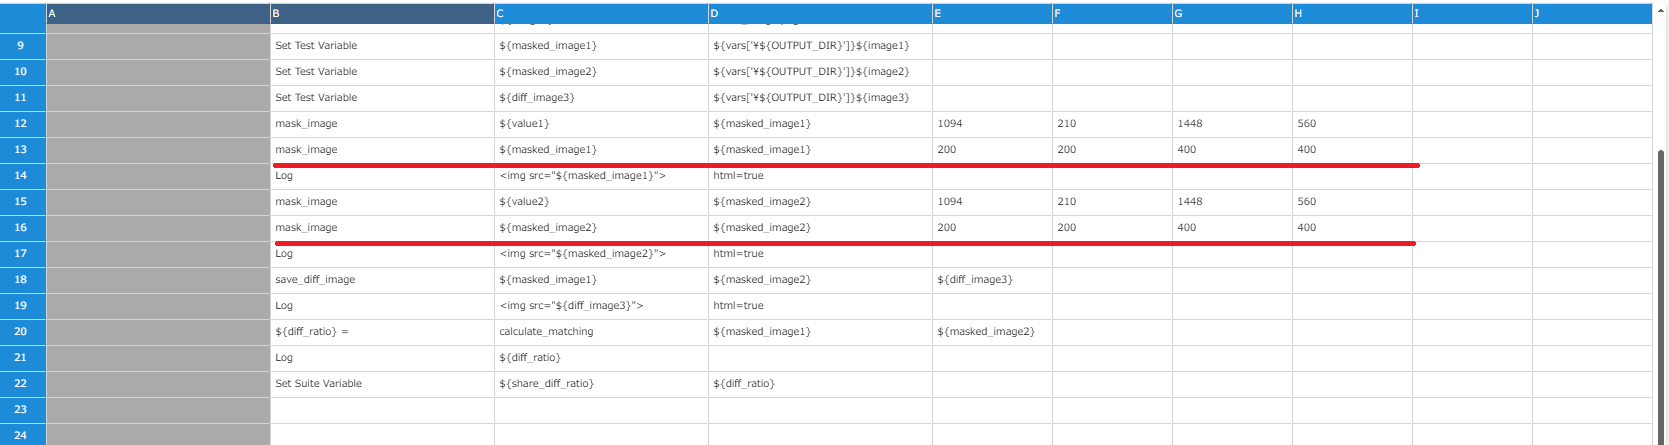
尚、複数個所マスクしたい場合 mask_imageを複数回呼び出す。
2回目以降は、引数でCの列がDの列と同じにする(マスクされた画像にさらにマスクするため)
スクリーンショットを取得
標準のスクリーンショット機能でもいいのですが、比較画像のパスを特定したいため、類似のものを実装した。
作成される画像を、動的に生成されるレポートのフォルダに配置する
数字が大きいことを検証
数字検証のライブラリ
単純な大小比較で一致度が条件を満たすかを確認する
テストケース
2行目:現在のブラウザのスクリーンショットを保存する。ファイル名はshare_screenshot_pathになる
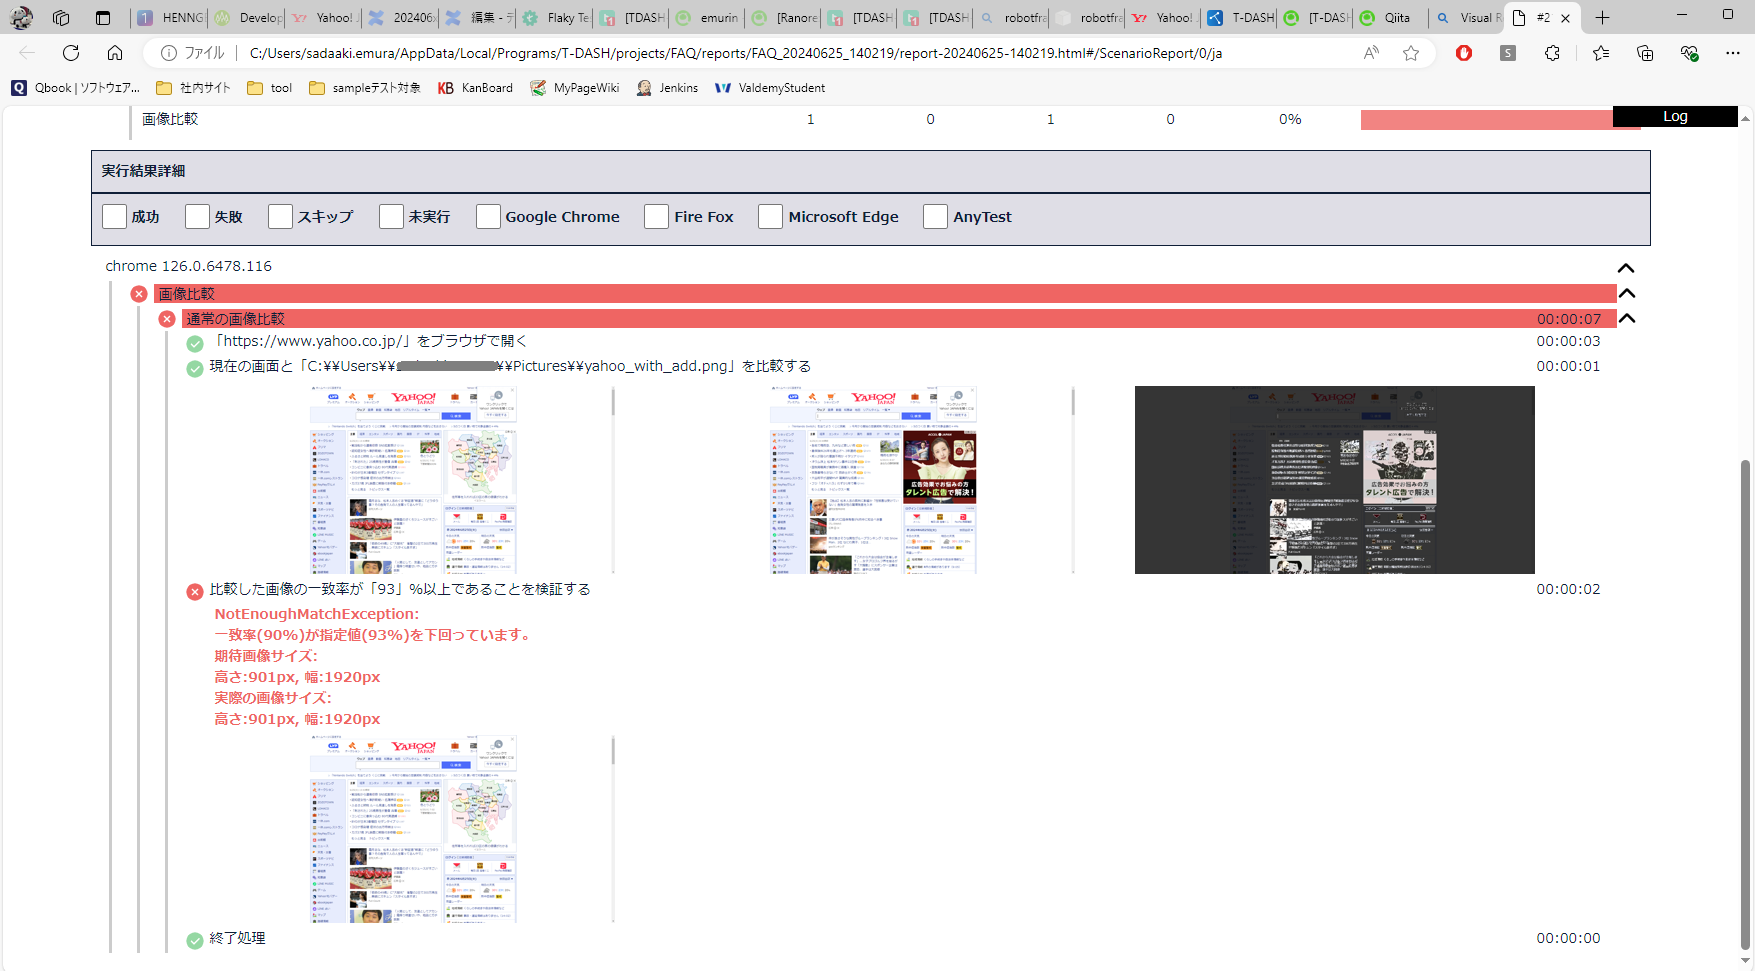
3行目:期待値画像と比較する 一致度はshare_diff_ratioになる
4行目:share_diff_ratioが0.9以上であることを検証する

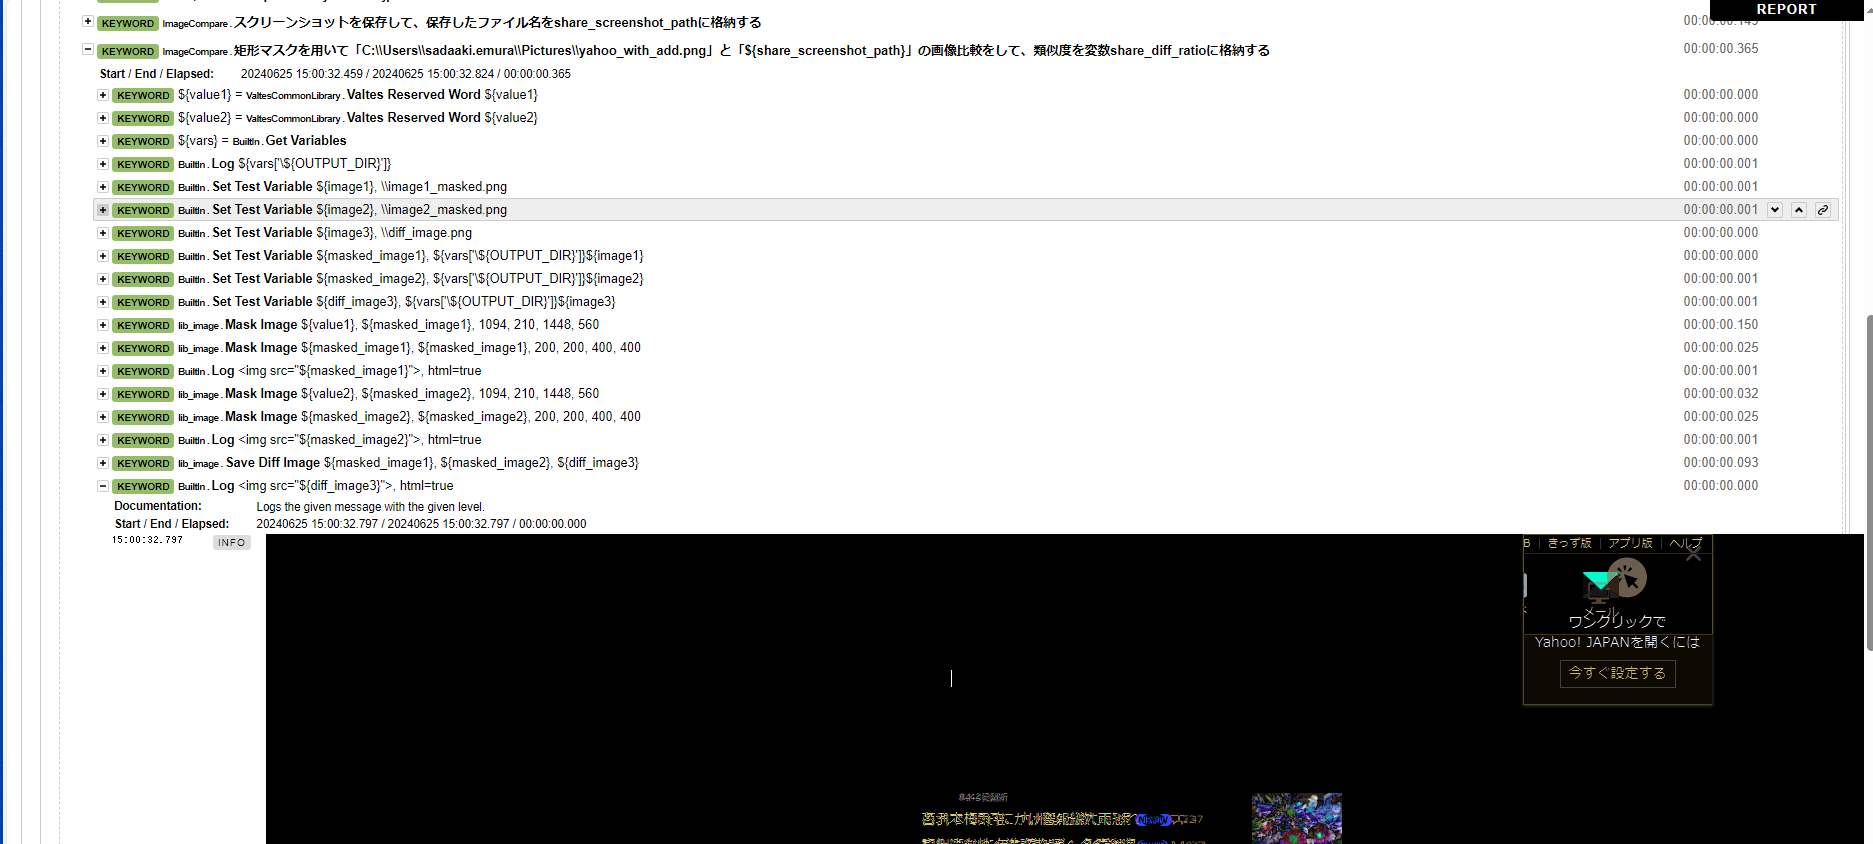
テスト結果
詳細レポートを展開すれば、マスクされた画像、差分画像を確認することができる