普段はRust使っていますが、C++環境もないと何かと不便なのでVSCodedで構築してみました。
参考資料の内容をGoogle翻訳してなぞってるだけなので、この記事読むより参考資料の方を読んだ方が良いです。
参考資料
Configure VS Code for Microsoft C++
インストールしたもの
- Visual Studio Build Tool2019
- Visual Studio Code
- C/C++
Visual Studio Build Tools のインストール
URL: https://visualstudio.microsoft.com/ja/visual-cpp-build-tools/
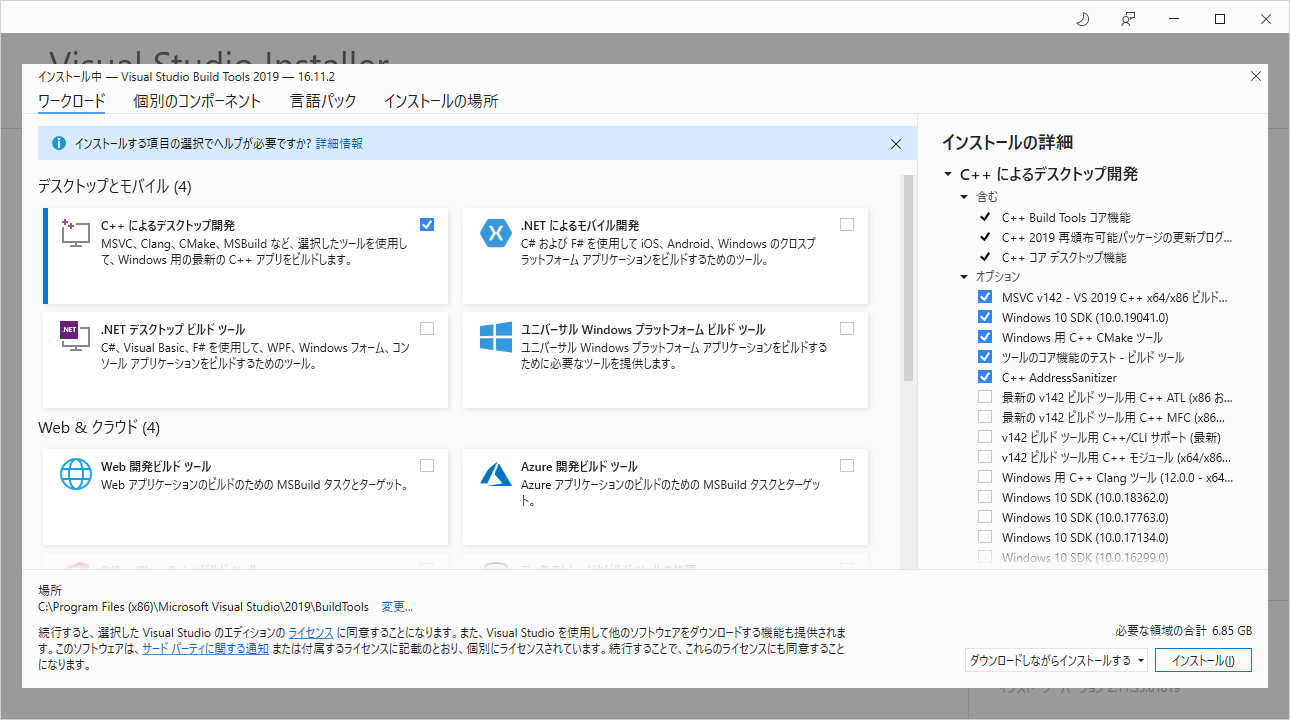
- 「Build Tool のダウンロード」をクリックしインストーラをダウンロードして実行。
- 「C++ によるディスクトップ開発」にチェックを入れて「インストール」をクリックする。
Visual Studio Build Tools のインストール確認
-
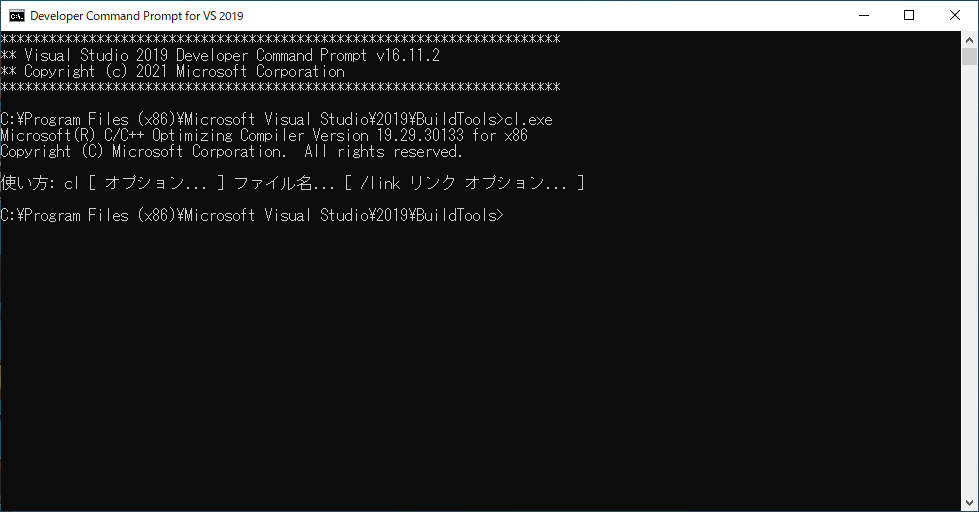
タスクバーの検索に「developer」と入力し始めると、候補リストに「Developer Command Prompt for VS 2019」が表示される。

-
「Developer Command Prompt for VS 2019」をクリックすると、cmdが起動するのでコマンドプロンプトから「cl.exe」と入力する。
-
「使い方:cl ...」と表示されていれば問題なし。
VSCode のインストールとパッケージの追加
URL: https://code.visualstudio.com/download
-
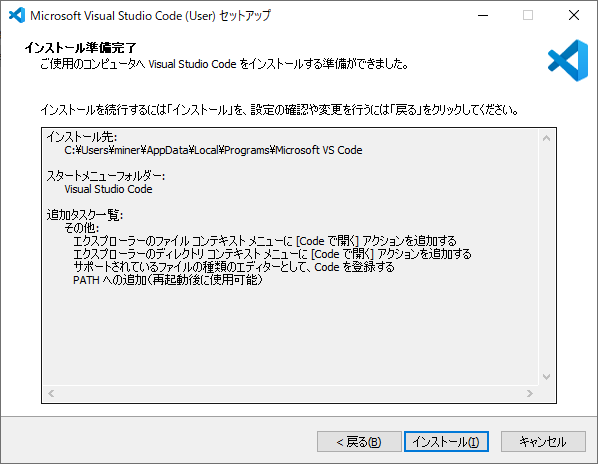
「Windows」をクリックしインストーラをダウンロードして実行。
-
「使用許諾契約書の同意」で「同意する」を選択、「追加タスクの選択」で「エクスプローラーのファイルコンテキストメニューに[Code で開く]アクションを追加する」,「エクスプローラーのディレクトリコンテキストメニューに[Code で開く]アクションを追加する」にチェックを入れる以外は、そのままの設定で「次へ」をクリックし、最後に「インストール」をクリックする。
-
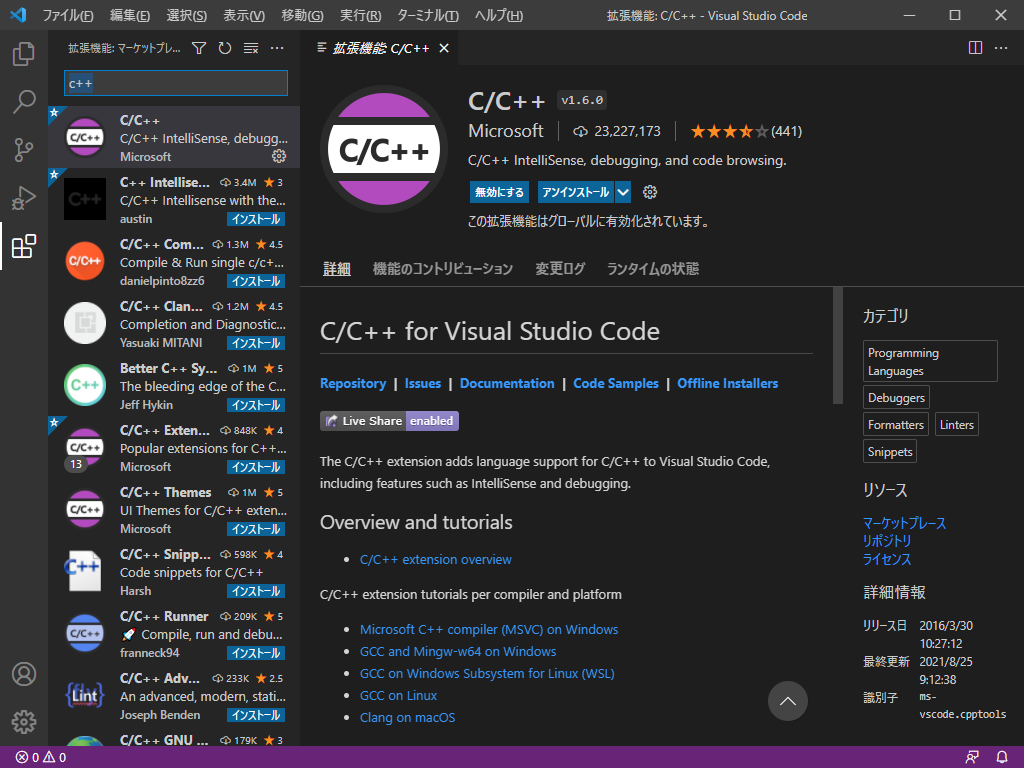
VSCodeを起動し、アクティビティバーの「拡張機能(Ctrl+Shift+X)」から、「C/C++」を追加する。
コンパイルしてみる
-
適当なフォルダーを作成、VSCodeで開いた後「helloworld.cpp」を作成する。
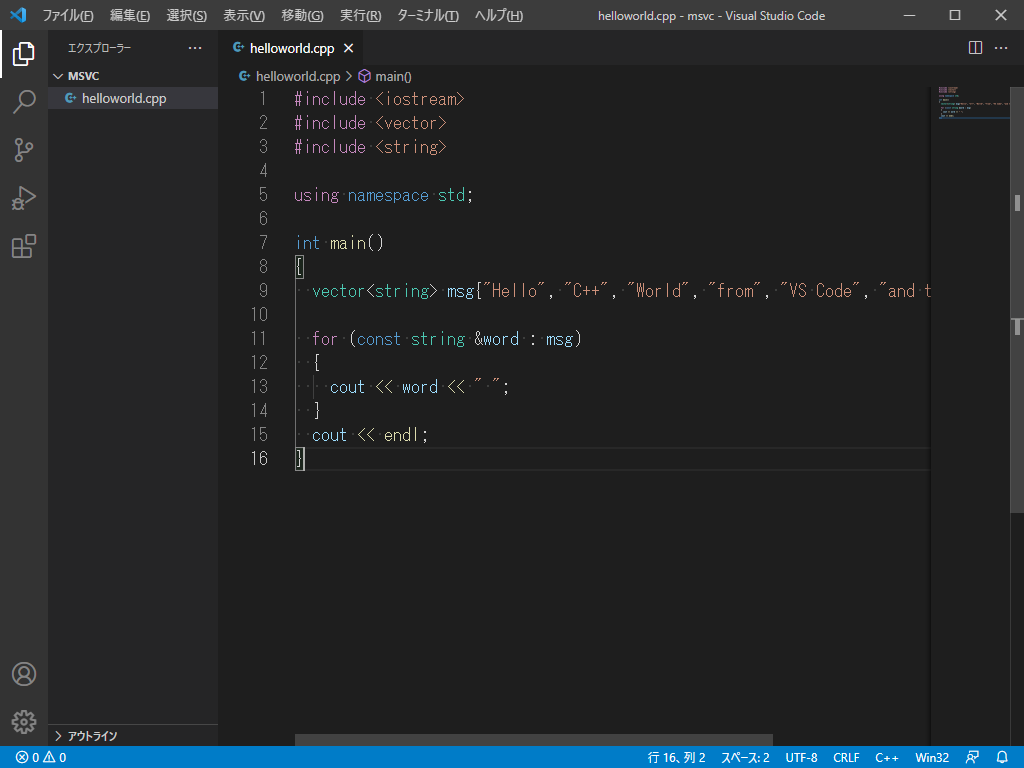 C++
C++#include <iostream> #include <vector> #include <string> using namespace std; int main() { vector<string> msg{"Hello", "C++", "World", "from", "VS Code", "and the C++ extension!"}; for (const string &word : msg) { cout << word << " "; } cout << endl; } -
「Ctrl+Shift+P」を押し、「C/C++:構成の編集」をクリックする。
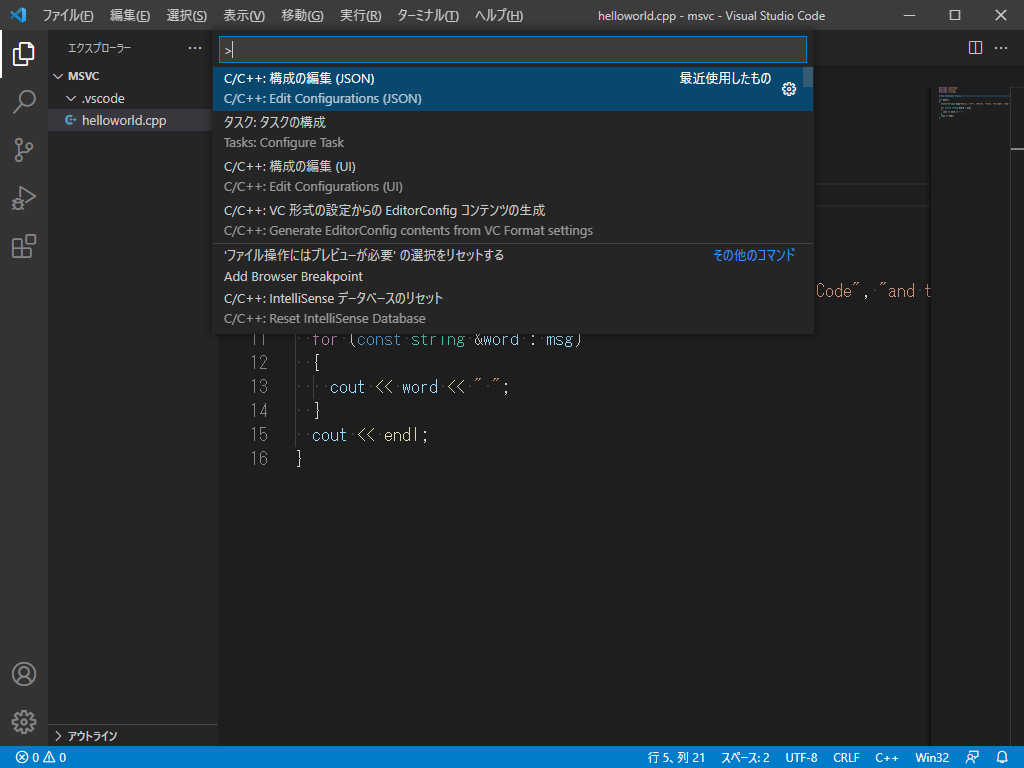
-
VSCodeで開いたフォルダの下に、「.vscode\c_cpp_properties.json」が作成される。
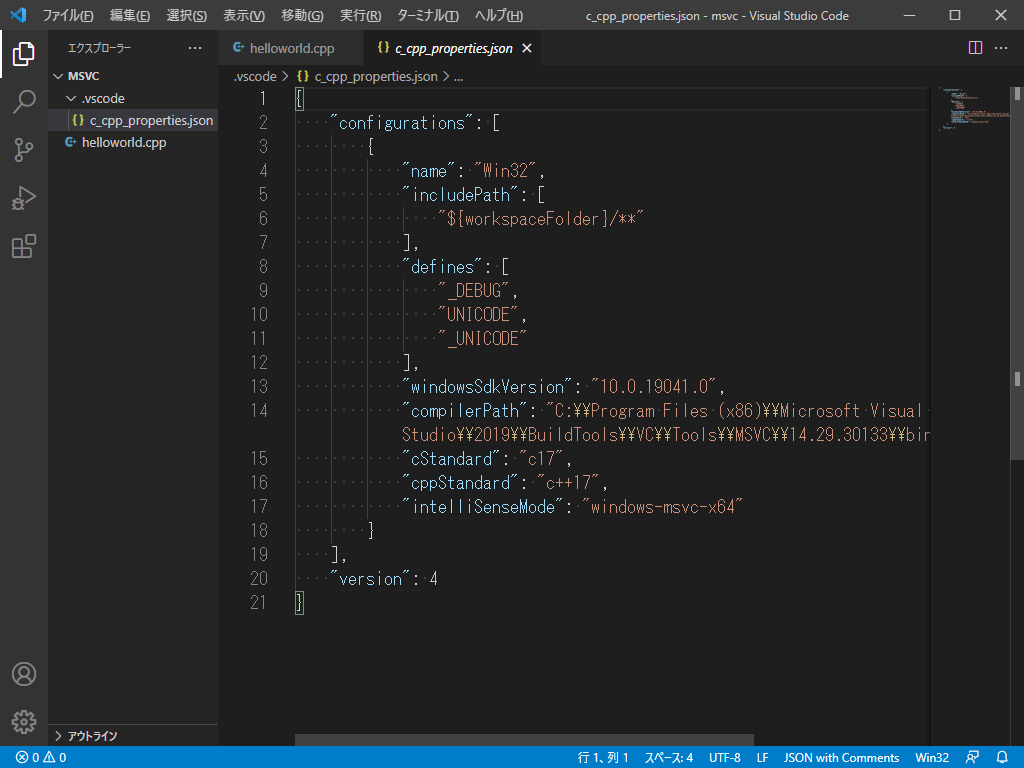
-
次に、「helloworld.cpp」を選択した状態で、「Ctrl+Shift+P」を押し、「タスク:タスクの構成」>「C/C++:cl.exe アクティブなファイルのビルド」を選択する。
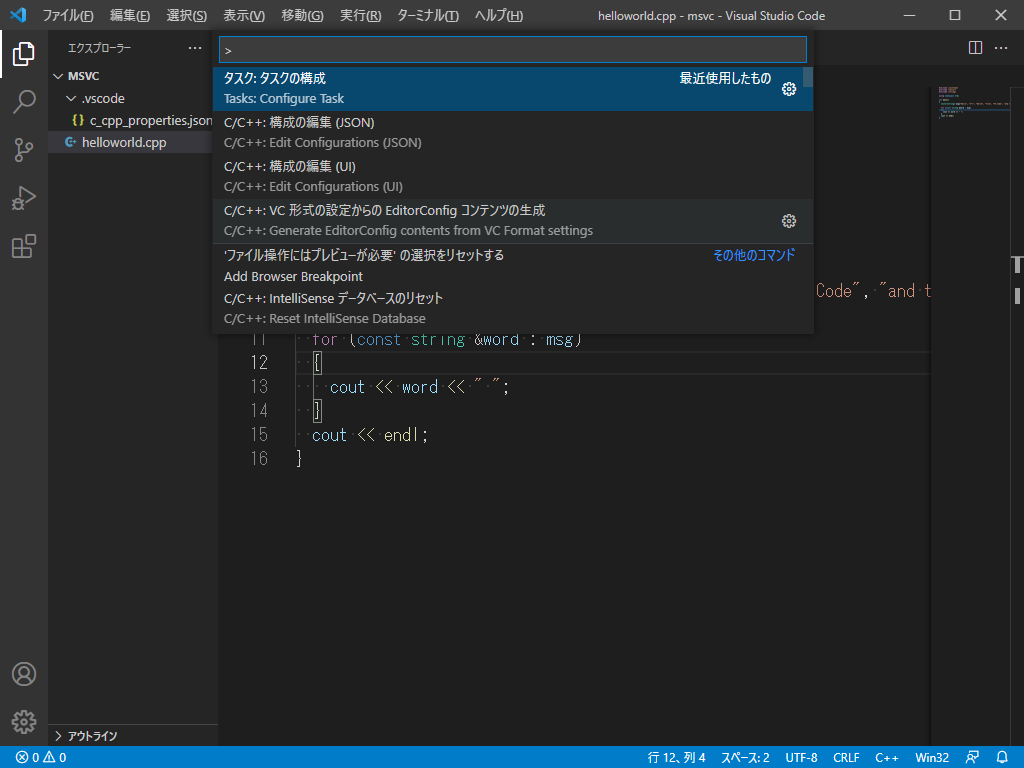
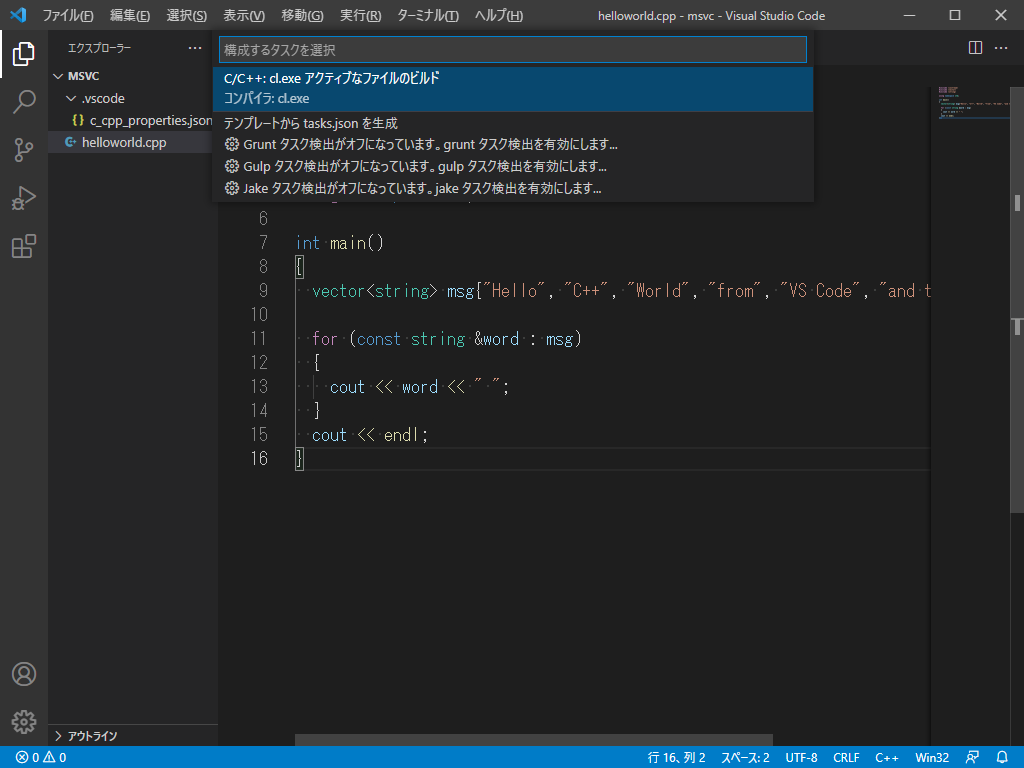
-
VSCodeで開いたフォルダの下に、「.vscode\task.json」が作成されるので、以下の内容に修正する。
Json{ "version": "2.0.0", "windows": { "options": { "shell": { "executable": "cmd.exe", "args": [ "/C", "\"C:/Program Files (x86)/Microsoft Visual Studio/2019/BuildTools/Common7/Tools/VsDevCmd.bat\"", "&&" ] } } }, "tasks": [ { "type": "shell", "label": "MS C/C++: cl.exe アクティブなファイルのビルド", "command": "cl.exe", "args": [ "/Zi", "/EHsc", "/nologo", "/Fe:", "${fileDirname}\\${fileBasenameNoExtension}.exe", "${file}" ], "options": { "cwd": "${fileDirname}" }, "problemMatcher": [ "$msCompile" ], "group": "build", "detail": "コンパイラ: cl.exe" } ] } -
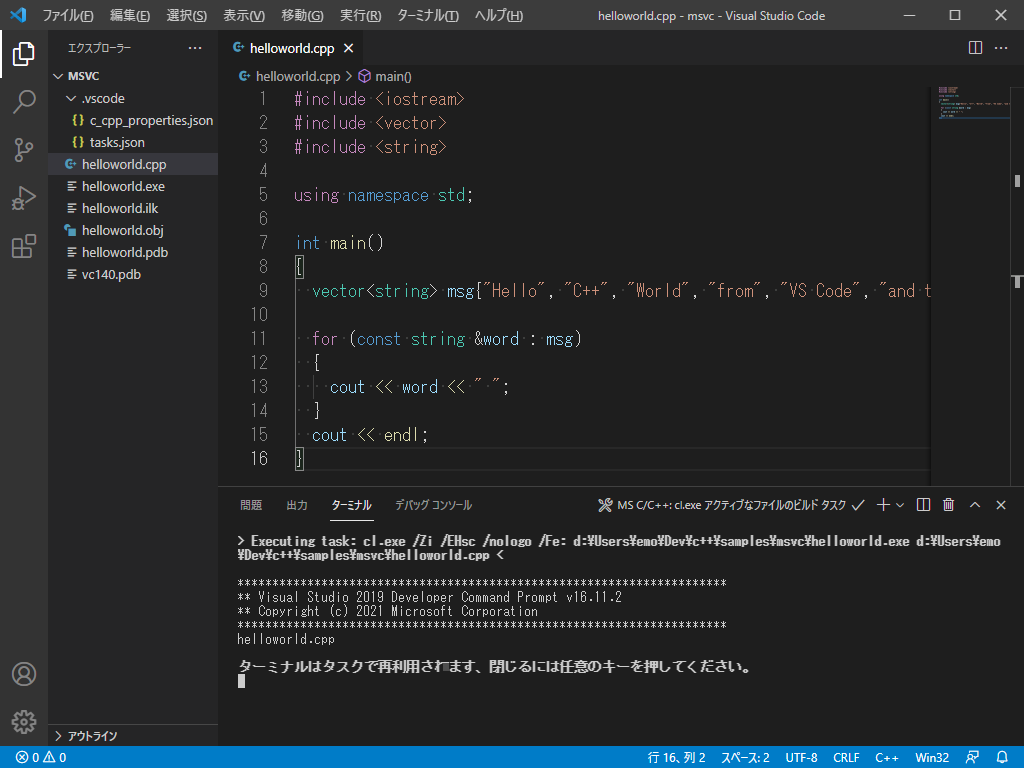
「helloworld.cpp」を選択した状態で、「Ctrl+Shift+B」を押し「MS C/C++: cl.exe アクティブなファイルのビルド」を選択する。
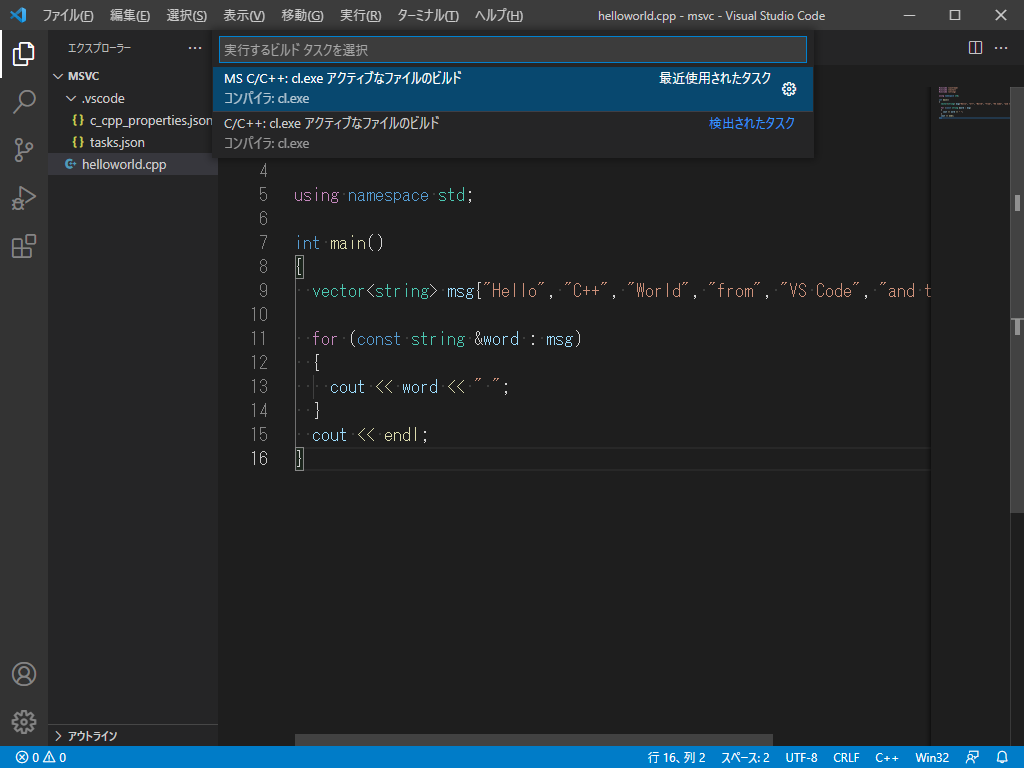
-
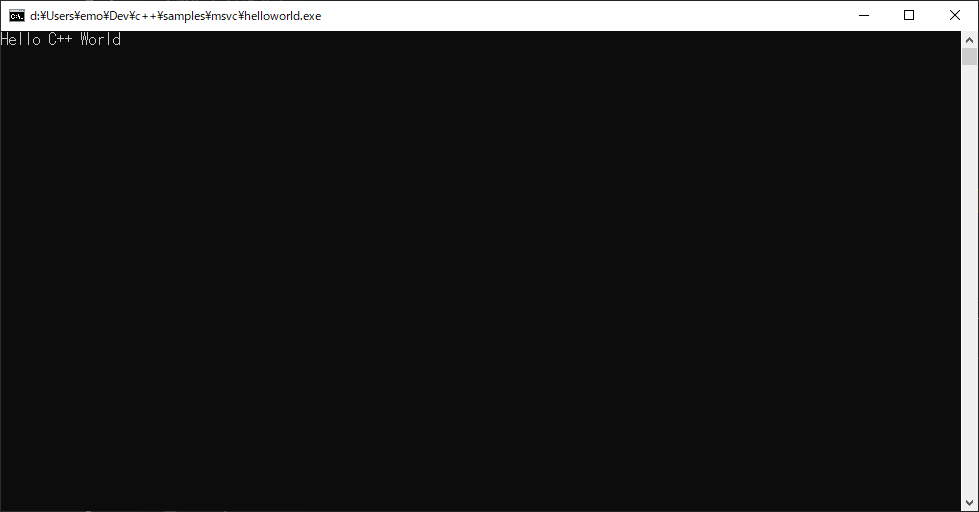
ターミナルに実行結果が表示され「helloworld.exe」が作成される。
デバッグしてみる
-
「helloworld.cpp」を選択した状態で、「F5」を押し「C++: (Windows)」>「cl.exe - アクティブファイルのビルドとデバッグ」を選択する。
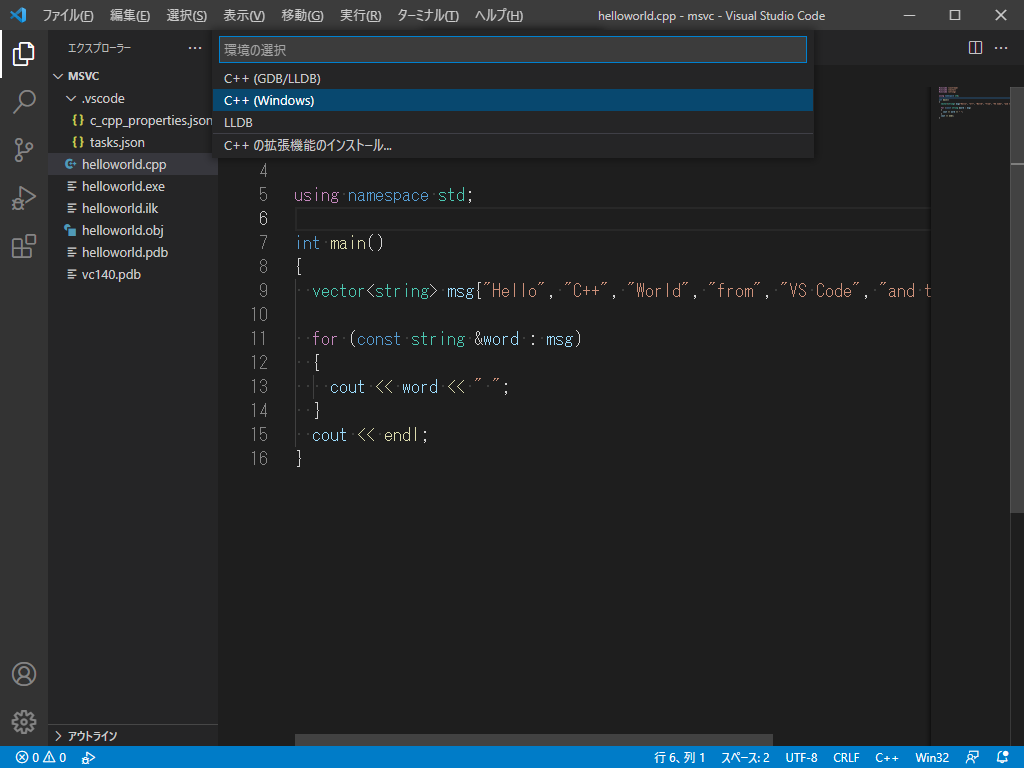
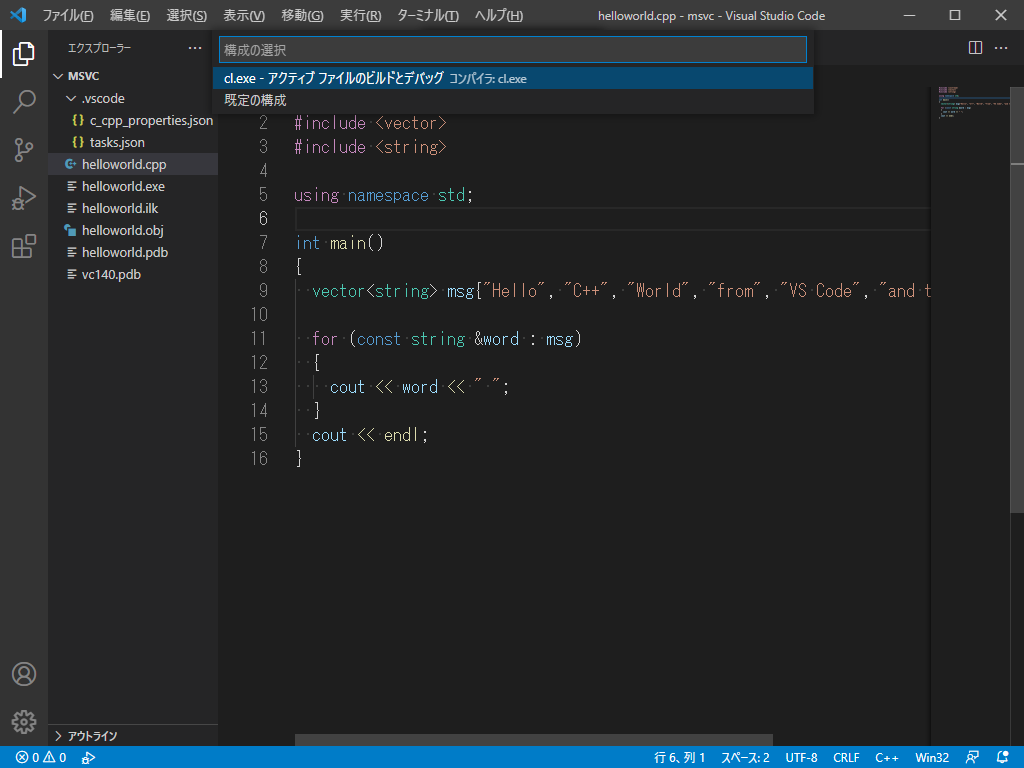
-
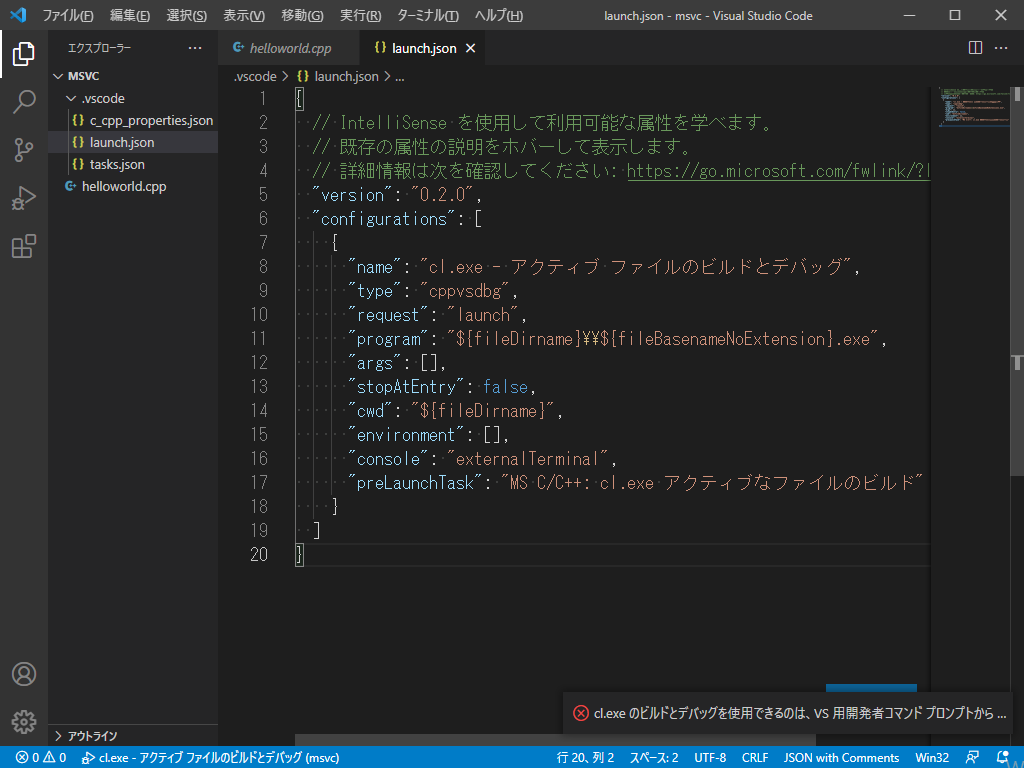
VSCodeで開いたフォルダの下に、「.vscode\launch.json」が作成されるので、「preLaunchTask:」を「.vscode\task.json」の「"tasks":」内の「"label":」の名前と同じにする。
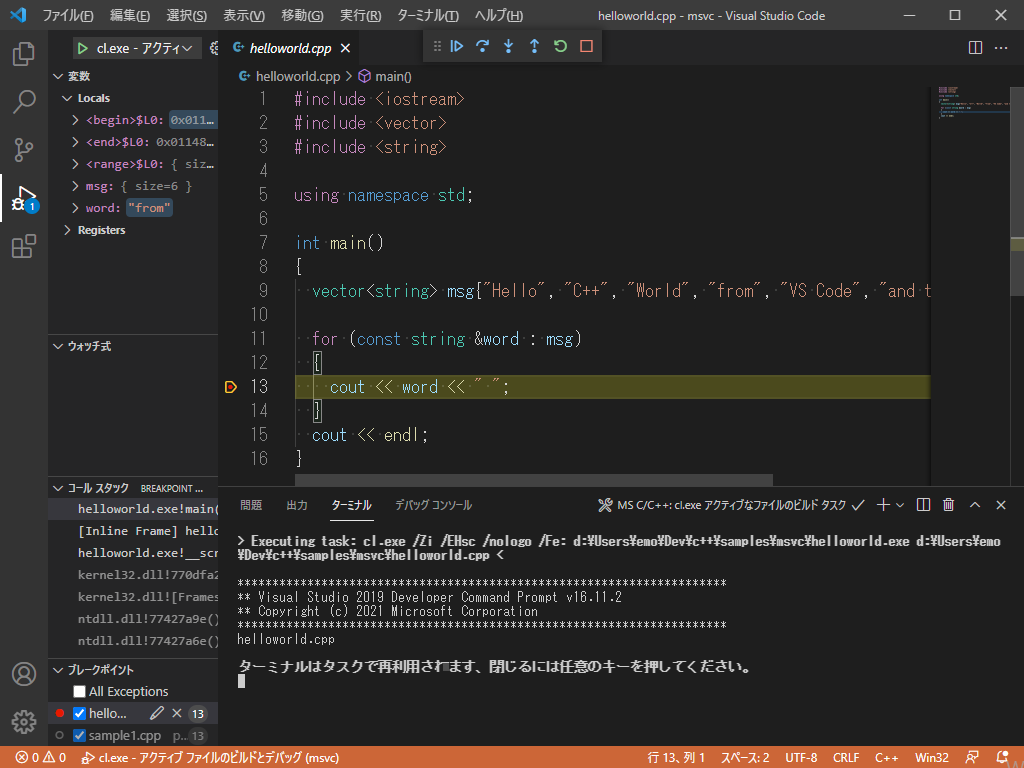
1.ブレイクポイントを設定し「F5」を押す。
まとめ
VSCodeでのC++環境の構築は初めてでしたが、「C/C++ for Visual Studio Code」のドキュメントがしっかりしているので難なく構築できました。そのうちclang環境の構築もやろうかと思います。