今回やったこと
今回作成した資源は、GitHubで公開しています。
% git clone https://github.com/electronicsdiy/tello-drone-image-motion-direction-arrow.git
% cd tello-drone-image-motion-direction-arrow/examples
% python3 motion_arrow_flight_info.py
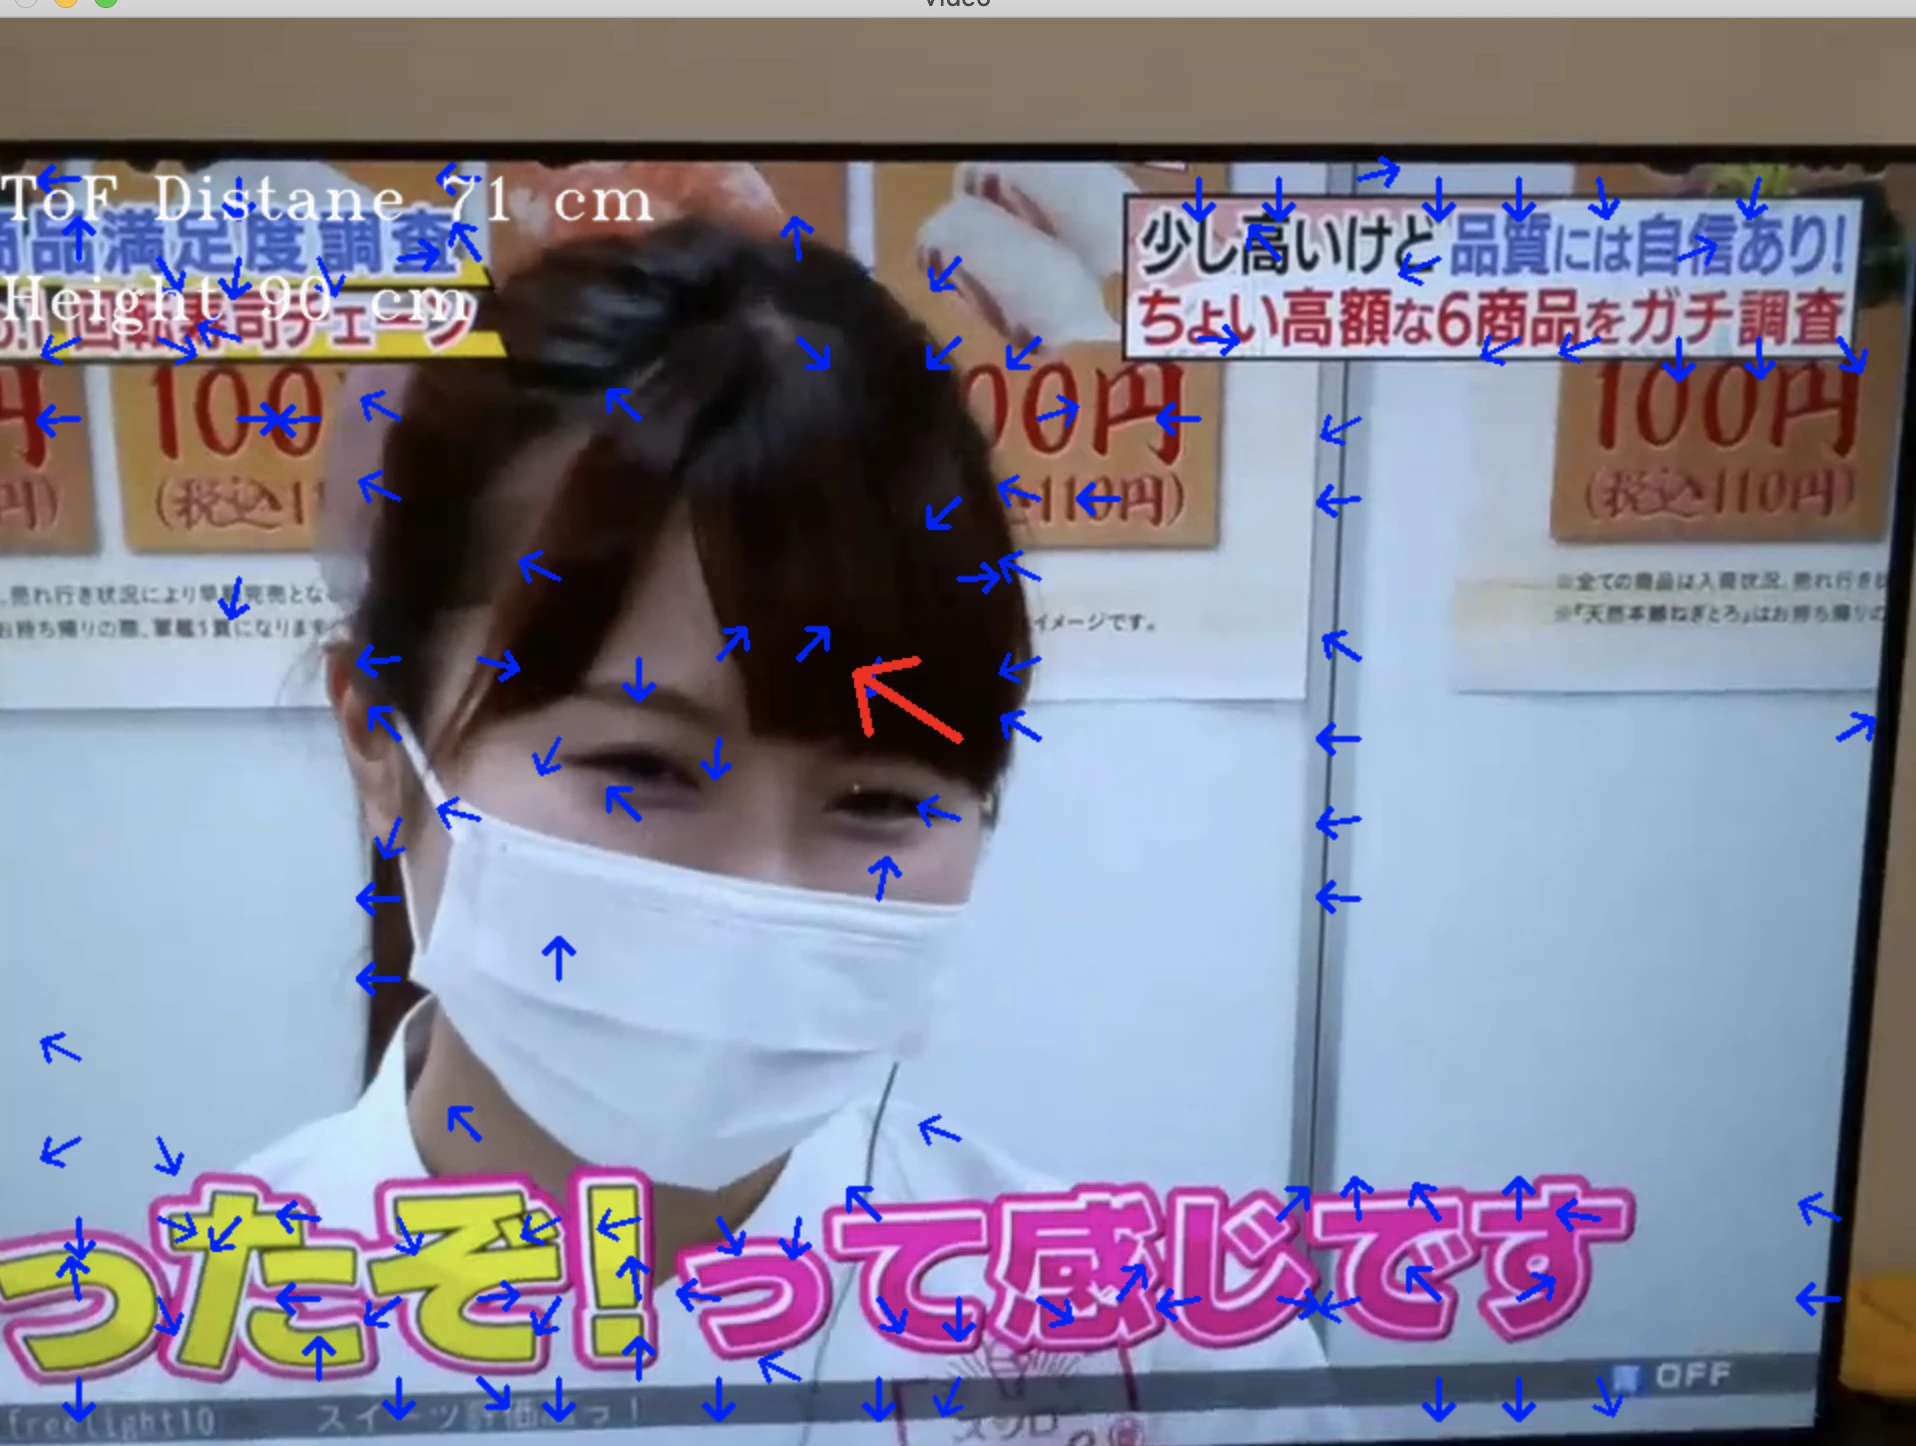
__画面の左上__に、Telloから受信した__2種類の高度計測値__が表示されています。
- $ToF Height$: Telloから送られてくるToF(ime of Flight))センサの高度計測値。地面に光を照射して、跳ね返ってくるまでの時間から、対地高度を計測した数値です。なお、ToFセンサの直下に、地面ではなく、机や台や家の屋根があると、数値はドローンの底部から、それらの物体までの推定距離を示します。地面までの距離ではなくなります。
- $Height$: Telloから送られてくる高度計測値。何のセンサで捉えた高度値なのかは、よく分かりません。
また、画面に写っている人や動物、物体の各パーツの運動方向が(青色)矢印で表示されています。赤色矢印は、画面全体の動きの方向(と速度)を示しています。
次の画像では、Telloの正面にあるTV画面の上端に沿って、「↓」がたくさん並んでいる。
これは、ホバリング中のTelloの機体がわずかに上下に揺れていた中で、このシーンを「p」ボタンで撮影した瞬間、Telloが上方向に揺れていたため、Telloから見てTV画面が(相対的に)下方向に動いて見えたからだと考えらえる。
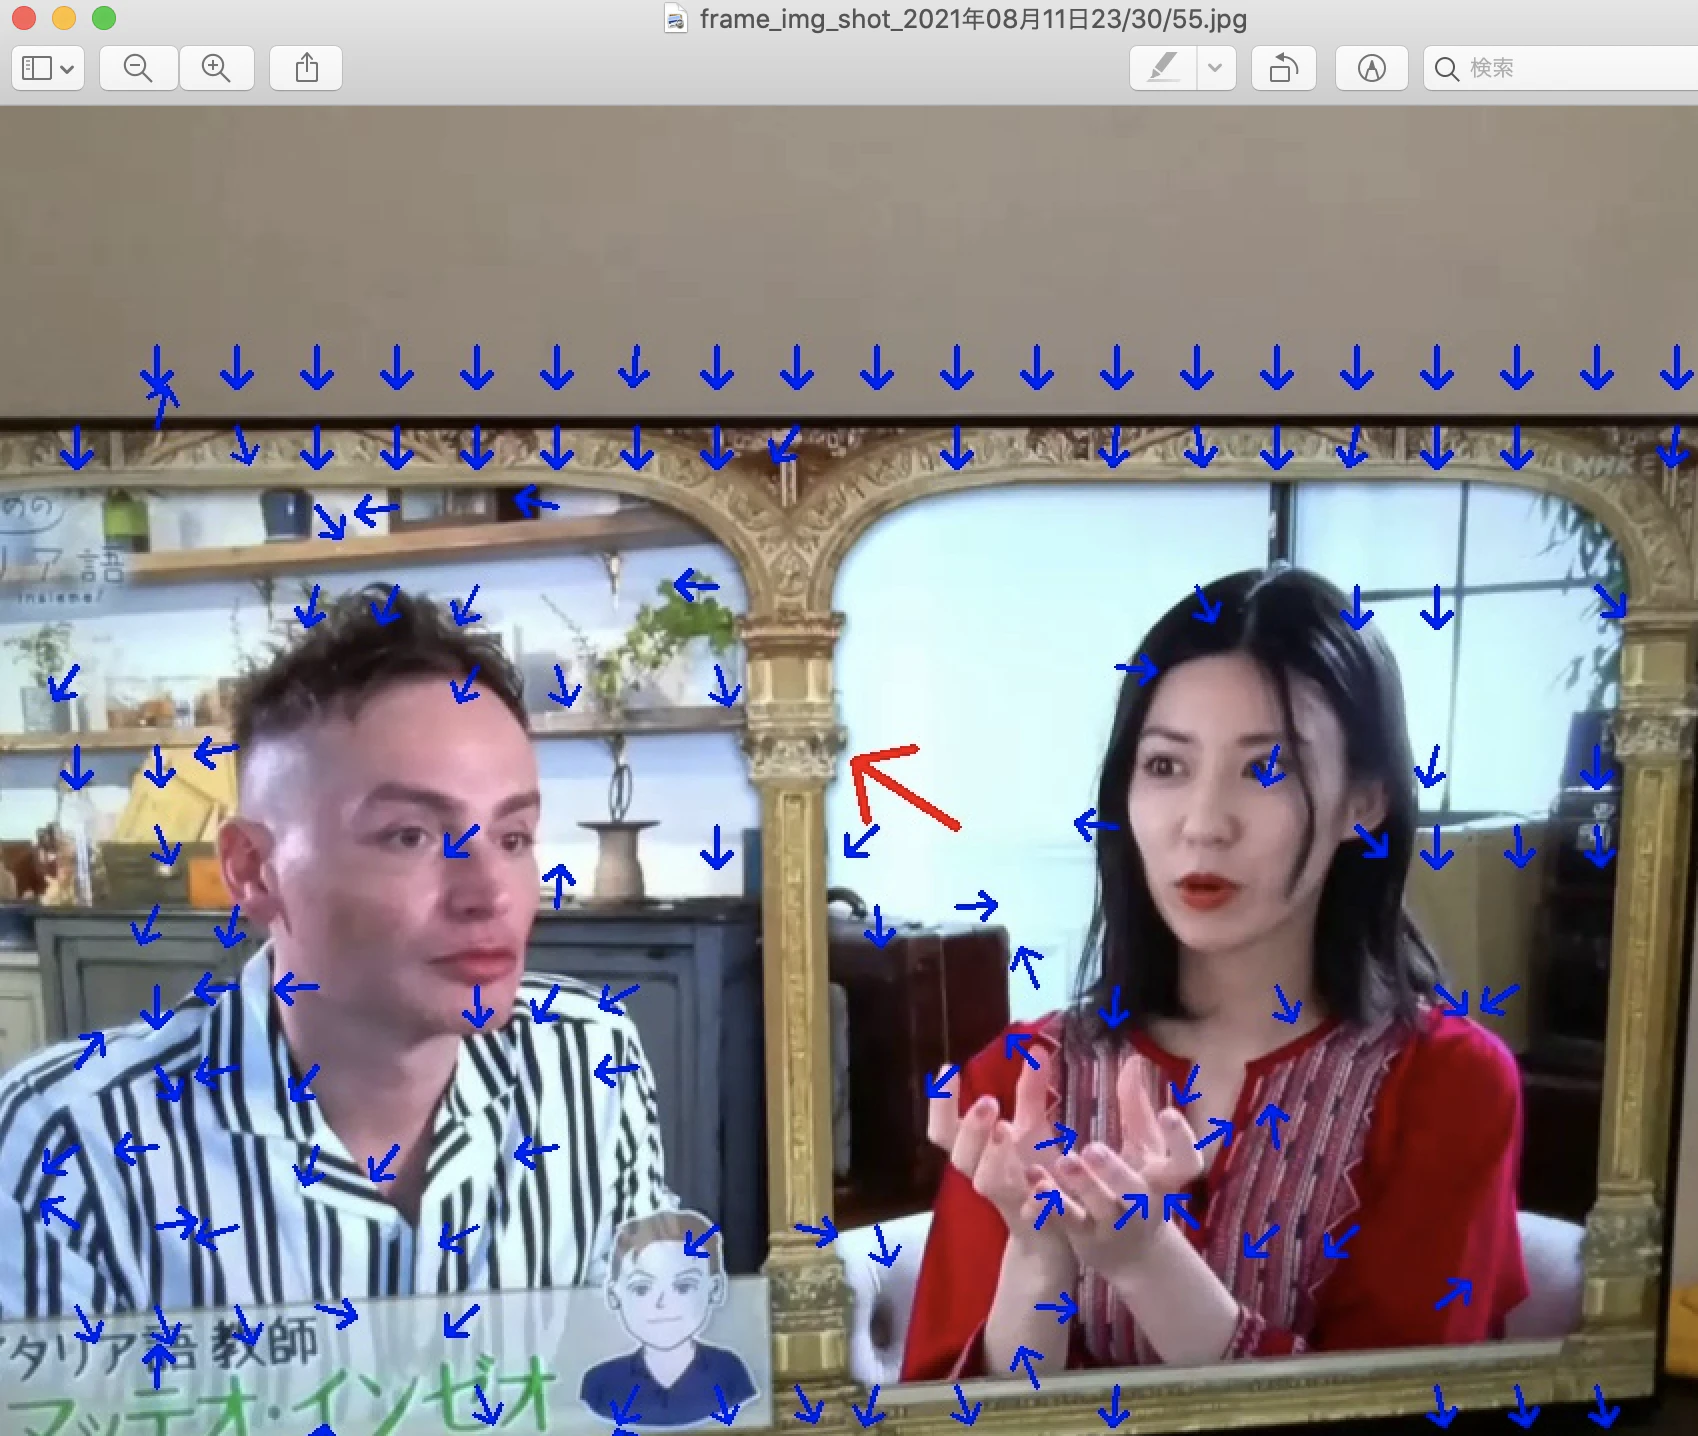
なお、上の画像は、左上にTelloの機体高度情報を埋め込む修正を行う前のスクリプトファイルを動かした結果です。
( 説明 )
Telloからの受信画像をMacbook側で画像解析して、次の内容のフレーム画像をリアルタイム表示させました。作成されたフレーム画像は、Macbook側で立ち上がるウィンドウに表示されます。
Macbookのキーボード入力によるTelloの遠隔操作と、ウィンドウへのカメラ画像の出力との間に時間の遅延は感じず、リアルタイムに画面表示されます。
ウィンドウ画面@Macbookの表示内容
1. 検出された人物や動物、物体の運動ベクトル(方角+速度)を矢印で表示(青矢印)
-> 青矢印は、対象となる物体の内部や外周の複数の座標位置に表示されます。
-> 各矢印は、それぞれの位置における対象物体(人間、動物を含む)の運動ベクトルを示しています。
2. 画面全体の移動の運動ベクトルを、赤矢印で表示。赤矢印は画面に1つだけ表示
3. 画面の左上に、Telloドローンの現在高度が表示
キーボード操作
TelloとWifi接続されたMacbookのキーボードから、Telloを操作します。
i : 離陸
w: 前進
s : 後進
a : 左移動
d : 右移動
e : 時計回り30度回転
q : 反時計回り30度回転
r : 上昇
f : 降下
g : 着地
p : フレーム画像のファイル保存(※)
※ 画像ファイルは、カレントディレクトリ(exampleディレクトリ直下)に出力されます。
※ ファイル名は、frame_img_shot_XXXX年XX月XX日XX/XX/XX.jpgです。最後はhour, minutes, ミリ秒です。
実装コード
画面の左側に表示されるTelloカメラ画像の受信と、PCのキーボード入力によるTelloの操縦は、DJITelloPyライブラリを使います。
TelloPyのGitHubリポジトリから取得した資材と、今回作成した資材を適切なフォルダ構成で格納した資源一式を、次のリポジトリで公開しました。
import sys, cv2, math, time, datetime
import numpy as np
import matplotlib.pyplot as plt
import cvlib as cvl
import time
import math
from timeout_decorator import timeout, TimeoutError
from djitellopy import Tello
from cvlib.object_detection import draw_bbox
from pprint import pprint
from create_caption_text import *

# Esc キー
ESC_KEY = 0x1b
# モーションの残存期間(sec)
DURATION = 1.0
# 全体の方向を表示するラインの長さ
LINE_LENGTH_ALL = 60
# 座標毎の方向を表示するラインの長さ
LINE_LENGTH_GRID = 20
# 座標毎の方向を計算する間隔
GRID_WIDTH = 40
# 方向を表示するラインの丸の半径
CIRCLE_RADIUS = 2
from common_2 import *

TIMEOUT_SEC = 0.1

@timeout(TIMEOUT_SEC)
def input_with_timeout(msg=None):
   return input(msg)


tello = Tello()
tello.connect()

tello.streamon()
frame_read = tello.get_frame_read()

# 表示ウィンドウの初期化
# cv2.namedWindow("motion")
# ビデオデータの読み込み
# video = cv2.VideoCapture(VIDEO_DATA)
video = tello.get_frame_read()

# 最初のフレームの読み込み
# end_flag, frame_next = video.read()
frame_next = frame_read.frame

height, width, channels = frame_next.shape
motion_history = np.zeros((height, width), np.float32)
frame_pre = frame_next.copy()

while True:
    img = frame_read.frame
    #cv2.imshow("drone", img)
    #cv2.imshow('Canny', cv2.Canny(img, 100, 200))
    #bitwised_img = cv2.bitwise_not(img)
    #cv2.imshow('Bitwised', bitwised_img)
    # 新しいフレームの読み込み
    #end_flag, frame_next = video.read()
    frame_next = img.copy()

    image = img.copy()

    #######特徴点を検出した物体の運動ベクトルを矢印表示する処理(開始)
        # フレーム間の差分計算
    color_diff = cv2.absdiff(frame_next, frame_pre)

    # グレースケール変換
    gray_diff = cv2.cvtColor(color_diff, cv2.COLOR_BGR2GRAY)

    # 2値化
    retval, black_diff = cv2.threshold(gray_diff, 30, 1, cv2.THRESH_BINARY)

    # プロセッサ処理時間(sec)を取得
    # Python 3.9系ではtime.clock()はない。
    # proc_time = time.clock()
    # https://stackoverflow.com/questions/58569361/attributeerror-module-time-has-no-attribute-clock-in-python-3-8

    proc_time = time.process_time()

    # モーション履歴画像の更新
    #https://qiita.com/hitomatagi/items/d5d475a446ec9c73261e
    #https://qiita.com/fiftystorm36/items/1a285b5fbf99f8ac82eb
    #pip install opencv-contrib-python
    cv2.motempl.updateMotionHistory(black_diff, motion_history, proc_time, DURATION)
    # 古いモーションの表示を経過時間に応じて薄くする
    hist_color = np.array(np.clip((motion_history - (proc_time - DURATION)) / DURATION, 0, 1) * 255, np.uint8)

    # グレースケール変換
    hist_gray = cv2.cvtColor(hist_color, cv2.COLOR_GRAY2BGR)

    # モーション履歴画像の変化方向の計算
    #   ※ orientationには各座標に対して変化方向の値(deg)が格納されます
    mask, orientation = cv2.motempl.calcMotionGradient(motion_history, 0.25, 0.05, apertureSize = 5)

    # 各座標の動きを緑色の線で描画
    width_i = GRID_WIDTH
    while width_i < width:
        height_i = GRID_WIDTH
        while height_i < height:
            # 座標点の描画を削除
            angle_deg = orientation[height_i - 1][width_i - 1]
            if angle_deg > 0:
                angle_rad = math.radians(angle_deg)
                cv2.arrowedLine(frame_pre, \
                pt1=(width_i, height_i), \
                pt2=(int(width_i + math.cos(angle_rad) * LINE_LENGTH_GRID), int(height_i + math.sin(angle_rad) * LINE_LENGTH_GRID)), \
                color=(255, 0, 0),
                thickness=2,
                line_type=cv2.LINE_4,
                shift=0,
                tipLength=0.5)
            else:
                #追記
                angle_rad = 10

            height_i += GRID_WIDTH

        width_i += GRID_WIDTH


    # 全体的なモーション方向を計算
    angle_deg = cv2.motempl.calcGlobalOrientation(orientation, mask, motion_history, proc_time, DURATION)

    # 全体の動きを黄色い線で描画
    # 座標点を削除する
    cv2.arrowedLine(frame_pre, \
                pt1=(int(width / 2), int(height / 2)), \
                pt2=(int(width / 2 + math.cos(angle_rad) * LINE_LENGTH_ALL), int(height / 2 + math.sin(angle_rad) * LINE_LENGTH_ALL)), \
                color=(0, 0, 255),
                thickness=3,
                line_type=cv2.LINE_4,
                shift=0,
                tipLength=0.5)

    # モーション画像を表示
    # frame_preに変更
    #cv2.imshow("motion", frame_pre)

    # Escキー押下で終了
    if cv2.waitKey(20) == ESC_KEY:
        break

    # 現在のフレームを別名で保存
    current_motion_arrow_engraved_frame = frame_pre.copy()
    #(次のフレームを読み込むときには、現在のフレームは過去のフレームとなるため)
    frame_pre = frame_next.copy()
    #######特徴点を検出した物体の運動ベクトルを矢印表示する処理(以上)

    time_of_flight_distance_senser_val = tello.get_distance_tof()
    input_text_1 = "ToF Distane {0} cm".format(time_of_flight_distance_senser_val)

    tello_height = tello.get_height()
    input_text_2 = "Height {0} cm".format(tello_height)

    frame_height = current_motion_arrow_engraved_frame.shape[0]
    frame_width = current_motion_arrow_engraved_frame.shape[1]
    # Terminal標準出力
    print(input_text_1)
    print(input_text_2)

    # カメラ画像にTelloの現在高度(ToFセンサ計測距離(cm)、高さ(cm))を埋込む
    cv2.putText(current_motion_arrow_engraved_frame, str(input_text_1), (0, 100), cv2.FONT_HERSHEY_TRIPLEX, 1, (255, 255, 255), 1, cv2.LINE_AA)
    cv2.putText(current_motion_arrow_engraved_frame, str(input_text_2), (0, 150), cv2.FONT_HERSHEY_TRIPLEX, 1, (255, 255, 255), 1, cv2.LINE_AA)

    cv2.namedWindow("Video", cv2.WINDOW_NORMAL)
    cv2.imshow("Video", current_motion_arrow_engraved_frame)

    #次の行(key = cv2.・・・)を削除すると、画像が受信できなくなる。
    key = cv2.waitKey(1) & 0xff

    try:
        msg = input_with_timeout('\n{}秒以内に操作コマンドを入力して下さい :'.format(TIMEOUT_SEC))
        print('\n操作コマンド: {} を受信しました。\n'.format(msg))
        if msg == "i":
            tello.takeoff()
        elif msg == "w":
            tello.move_forward(30)
        elif msg == "s":
            tello.move_back(30)
        elif msg == "a":
            tello.move_left(30)
        elif msg == "d":
            tello.move_right(30)
        elif msg == "e":
            tello.rotate_clockwise(30)
        elif msg == "q":
            tello.rotate_counter_clockwise(30)
        elif msg == "r":
            tello.move_up(30)
        elif msg == "f":
            tello.move_down(30)
        elif msg == "g":
            tello.land()
        elif msg == "p":
            dt_now = datetime.datetime.now()
            timestamp_str = dt_now.strftime('%Y年%m月%d日%H:%M:%S')
            file_name = "frame_img_shot_{0}.jpg".format(timestamp_str)
            cv2.imwrite(file_name, current_motion_arrow_engraved_frame)
            print("フレーム画像を保存しました。")
    except TimeoutError:
        print('\n操作コマンド入力時間切れ。次のフレーム画像を読み込みます。\n')

tello.land()