次のページを参考にしました。
Grafana+InfluxDBv2+telegrafで室内温度を可視化する
Arch Linux で Telegraf のインストール
yay -S telegraf
Ubuntu 21.04 で Telegraf のインストール
sudo apt install telegraf
起動
sudo systemctl start telegraf
設定ファイルの編集
UDP 8092 に入ってきたデータを、InfluxDB に送ります。
/etc/telegraf/telegraf.conf
(省略)
[[outputs.influxdb_v2]]
urls = ["http://127.0.0.1:8086"]
token = "1zIYs1taCm3pWQOBUNk0ssYccOF7YgJcdGyJDbiFYTBf7hcPvyl5nGyt71rNVkYtg2rB
ceUwQ1r5Xzm7Mabcde=="
organization = "ekzemplaro"
bucket = "tochigi"
(省略)
[[inputs.socket_listener]]
service_address = "udp://:8092"
(省略)
サーバーの再起動
sudo systemctl restart telegraf
データの送信
echo 'aaa temperature=30.5,humidity=50.4' | ncat -4 -u -w 1 localhost 8092
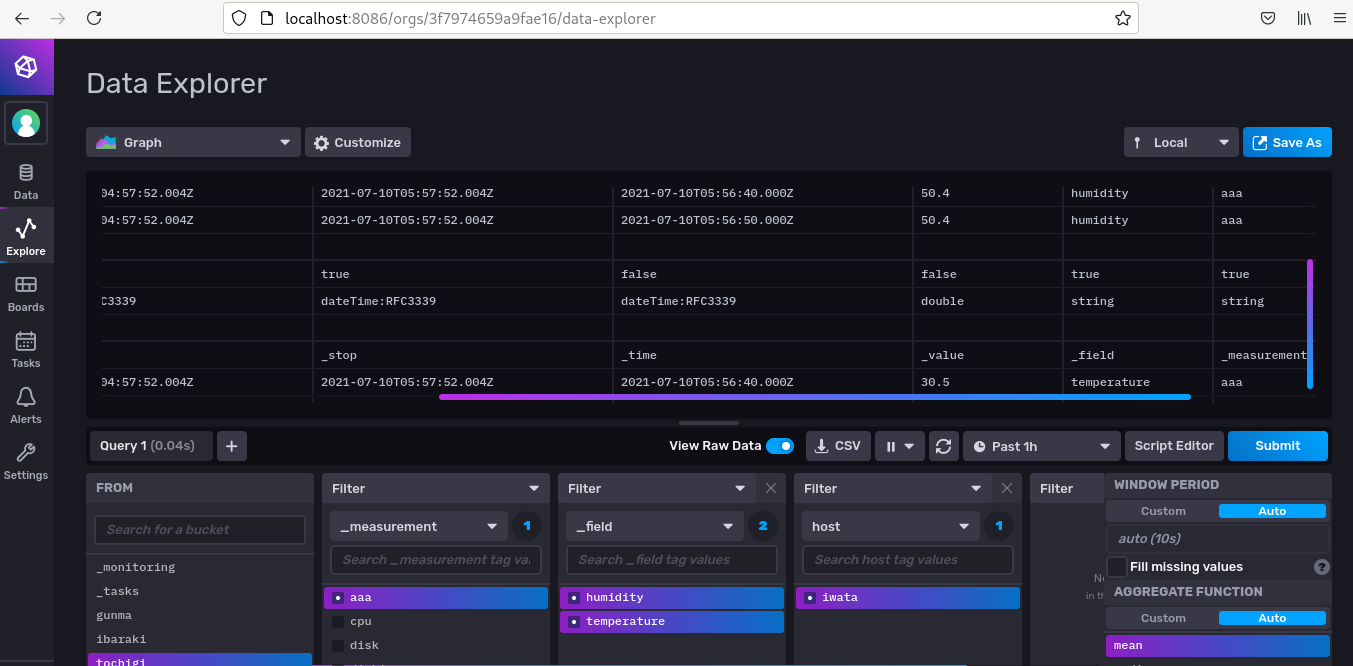
InfluxDB の Data Explorer でデータの確認
値を変えて、データを送信してみます。
echo 'aaa temperature=40.6,humidity=60.5' | ncat -4 -u -w 1 localhost 8092
sleep 10
echo 'aaa temperature=50.7,humidity=70.2' | ncat -4 -u -w 1 localhost 8092
sleep 10
echo 'aaa temperature=30.5,humidity=50.4' | ncat -4 -u -w 1 localhost 8092
InfluxDB でデータを見ると
Past 5m にすれば、最近 5分のデータが見れます。

Python で UDP 8092 に送信する例です。
to_influxdb.py
# ! /usr/bin/python
#
#	to_influxdb.py
#
#					Jul/10/2021
#
# --------------------------------------------------------------------
import socket
#
UDP_IP = "localhost"
#
UDP_PORT =  8092
MESSAGE = "aaa temperature=12.3,humidity=45.6"
print ("UDP target IP:" + UDP_IP)
print ("UDP target port:" + str(UDP_PORT))
print ("message: " + MESSAGE)
sock = socket.socket(socket.AF_INET,socket.SOCK_DGRAM) # UDP
sock.sendto(MESSAGE.encode('utf-8'), (UDP_IP, UDP_PORT))
# --------------------------------------------------------------------
Node.js で UDP 8092 に送信する例です。
udpclient.js
# ! /usr/bin/node
// ---------------------------------------------------------------
//
//	udpclient.js
//
//					Jul/11/2021
// ---------------------------------------------------------------
// UDP Sample Client

// UDP 接続先
const host = "localhost"
const c_port = 8092
var dgram = require("dgram")
var client = dgram.createSocket("udp4")

// サーバに送信するメッセージ
const message = new Buffer.from("aaa temperature=32.16,humidity=65.43")

// サーバからメッセージ受信したときの処理
client.on("message", function(msg, rinfo) {
  console.log("recieved: " + msg.toString("hex"))
  client.close()
})

// メッセージ送信でエラーが起きた時の処理
client.on("err", function(err) {
  console.log("client error: \n" + err.stack);
  console.close()
})

// Socket をクローズした時の処理
client.on("close", function() {
  console.log("closed.")
})

// メッセージ送信
send(message, host, c_port);
function send(message, host, port) {
  client.send(message, 0, message.length, port, host, function(err, bytes) {
    console.log("*** sent ***")
  })
}

// ---------------------------------------------------------------