UIButton、UILabel等はstorybord上で、位置を指定して配置できますが
コード上でもAutoLayoutを使用して位置を指定することができます。
-(void) button_autolayout:(UIButton *)button top:(int)top left:(int)left right:(int)right bottom:(int)bottom {
    //AutoLayoutを使用することを指定
    [button setTranslatesAutoresizingMaskIntoConstraints:NO];

    // 上 位置指定
    NSLayoutConstraint* topAnchor = [button.topAnchor constraintEqualToAnchor:self.view.topAnchor constant:top];
    // 左 位置指定
    NSLayoutConstraint* leftAnchor = [button.leftAnchor constraintEqualToAnchor:self.view.leftAnchor constant:left];
    // 右 位置指定
    NSLayoutConstraint* rightAnchor = [button.rightAnchor constraintEqualToAnchor:self.view.rightAnchor constant:right];
    // 下 位置指定
    NSLayoutConstraint* bottomAnchor = [button.bottomAnchor constraintEqualToAnchor:self.view.bottomAnchor constant:-bottom];

   //viewに追加
    [self.view addConstraint:topAnchor];
    [self.view addConstraint:leftAnchor];
    [self.view addConstraint:rightAnchor];
    [self.view addConstraint:bottomAnchor];
}
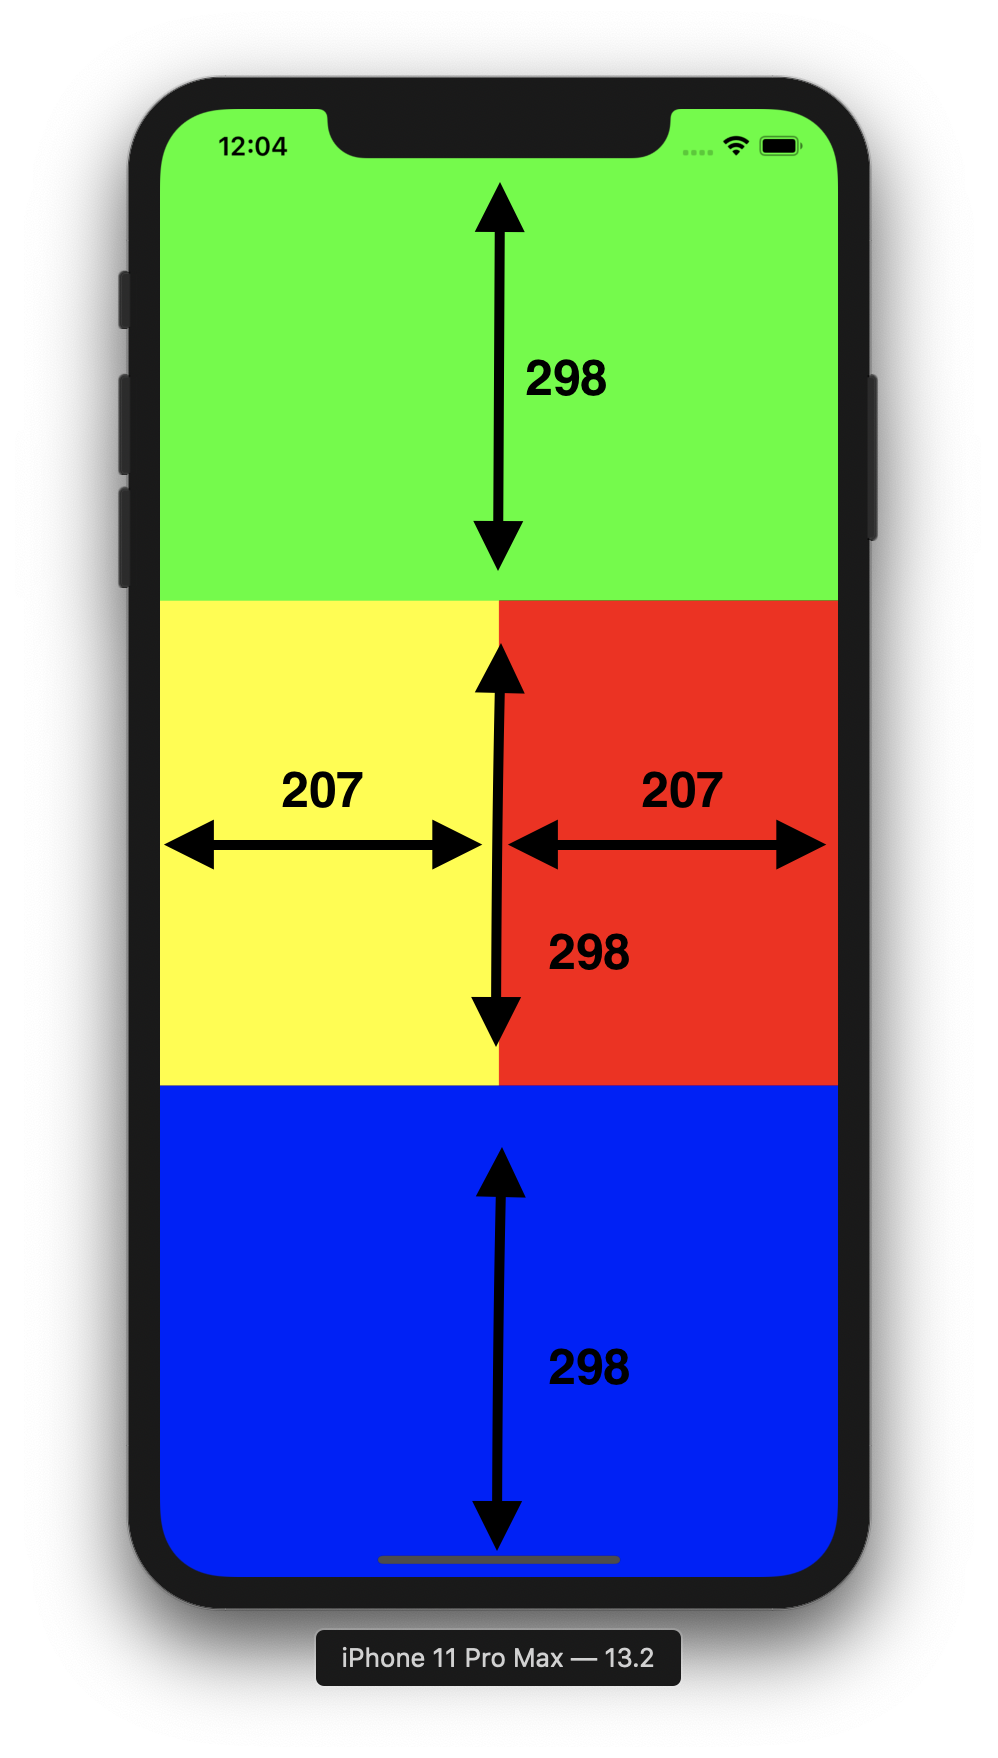
例えば上記の関数をボタンごとに指定することで、以下のように配置できます。
//上 緑色
[self button_autolayout:top_button top:0 left:0 right:0 bottom:596];

//右 赤色
[self button_autolayout:right_button top:298 left:207 right:0 bottom:298];

//左 黄色
[self button_autolayout:left_button top:298 left:0 right:207 bottom:298];

//下 青色
[self button_autolayout:bottom_button top:596 left:0 right:0 bottom:0];
参考