はじめに
今回の記事では、ShopifyのAdditional filterを全てまとめてみました。
こちらを参考にしました。
Additional filter
一般的なフィルタは、書式設定、変換、CSSクラスの適用など、さまざまな目的に対応しています。
date
タイムスタンプを別の日付形式に変換します。
{{ article.published_at | date: "%a, %b %d, %y" }}
Tue, Apr 22, 14
パラメータとしてformatを渡すこともできます。
format
dateフィルタにformatパラメータを渡すことで、固有のフォーマットで日付を表示することができます。
{{ order.created_at | date: format: 'abbreviated_date' }}
Dec 31, 2018
いくつかの異なるフォーマットオプションがあり、独自のフォーマットを定義することも可能です。
フォーマットの一覧は、【Shopify】LiquidのHTML filterを全てまとめてみた話 の方に記載しております。
default
変数のデフォルト値を設定することができます。
文字列、配列、およびハッシュで使用できます。
デフォルト値は、変数の値が nil、false、または空の文字列""になった場合に返されます。空白を含む文字列では、デフォルト値は返されません。
Dear {{ customer.name | default: "customer" }}
<!-- If customer.name is nil -->
Dear customer
<!-- If customer.name is "" -->
Dear customer
<!-- If customer.name is " " -->
Dear
allow_false パラメータを使用することで、変数にデフォルト値の代わりに false を返すことができます。
allow_falseパラメータの値は、trueを設定します。
{{ settings.flag | default: true, allow_false: true }}
false
default_errors
form.errors 変数のデフォルト値に設定されているエラーメッセージを出力します。
出力されるメッセージは、 form.errors によって返される文字列に依存します。
{% if form.errors %}
      {{ form.errors | default_errors }}
{% endif %}
Please enter a valid email address.
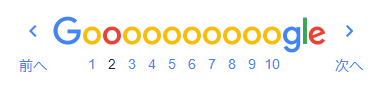
default_pagination
複数のページに分割された各ページ( pagenate )のリンクを作成します。
pagenationとは、Google検索結果などの表示数が多い場合に、分割された各Webページのリンクを並べたものです。
default_paginationフィルターは、paginate変数と一緒に使用します。
{{ paginate | default_pagination }}
<span class="page current">1</span>
<span class="page"><a href="/collections/all?page=2" title="">2</a></span>
<span class="page"><a href="/collections/all?page=3" title="">3</a></span>
<span class="deco">…</span>
<span class="page"><a href="/collections/all?page=17" title="">10</a></span>
<span class="next"><a href="/collections/all?page=2" title="">Next »</a></span>
デフォルトのpagenationでは、次のページと前のページに移動するリンクに Next >> と << Previous というラベルを使用します。
default_paginationフィルタに、nextと、previousのパラメータに表示したい単語を渡すことで、それぞれのラベルを上書きすることができます。
{{ paginate | default_pagination: next: 'Older', previous: 'Newer' }}
<span class="page current">1</span>
<span class="page"><a href="/collections/all?page=2" title="">2</a></span>
<span class="page"><a href="/collections/all?page=3" title="">3</a></span>
<span class="next"><a href="/collections/all?page=2" title="">Older</a></span>
format_address
アドレスの要素をロケール( 設定 )に応じた順に表示します。
登録された住所の部分のみを出力し、登録してない部分は出力されません。
format_addressフィルタは、ストアアカウントを持っている顧客の住所ページや、ストアの住所を出力したいときに使用します。
{{ address | format_address }}
<p>
Elizabeth Gonzalez<br>
1507 Wayside Lane<br>
San Francisco<br>
CA<br>
94103<br>
United States
</p>
{{ address | format_address }}
<p>
Feng Sun<br>
No. 2094, 1006, Hui Dong Xin Cun<br>
Nanhui District<br>
201300, Shanghai<br>
China
</p>
highlight
送信されたsearch.termsと検索範囲内の単語が一致する時、検索範囲内の一致した文字列をHTMLの<strong>タグでラップし、クラスに highlight を与えます。
search.termsは、検索欄に入力された文字列を返す search オブジェクトの属性の一つです。
{{ item.content | highlight: search.terms }}
<!-- If the search term was "Yellow" -->
<strong class="highlight">Yellow</strong> shirts are the best!
highlight_active_tag
コレクションをあるタグで絞り込みをしている場合、絞り込みをしているタグに active クラスを持った<span>タグでラップします。
<!-- collection.tags = ["Cotton", "Crew Neck", "Jersey"] -->
{% for tag in collection.tags %}
    {{ tag | highlight_active_tag | link_to_tag: tag }}
{% endfor %}
<a title="Show products matching tag Cotton" href="/collections/all/cotton"><span class="active"> Cotton </span></a>
<a title="Show products matching tag Crew Neck" href="/collections/all/crew-neck">Crew Neck</a>
<a title="Show products matching tag Jersey" href="/collections/all/jersey">Jersey</a>
json
文字列を、JSON形式に変換します。
jsonフィルタが引用符を追加してくれるので、Liquidの出力を引用符で囲む必要はありません。
また、必要に応じて出力内で引用符をなくしてくれます。
var content = {{ pages.page-handle.content | json }};
var content = "\u003Cp\u003E\u003Cstrong\u003EYou made it! Congratulations on starting your own e-commerce store!\u003C/strong\u003E\u003C/p\u003E\n\u003Cp\u003EThis is your shop\u0026#8217;s \u003Cstrong\u003Efrontpage\u003C/strong\u003E, and it\u0026#8217;s the first thing your customers will see when they arrive. You\u0026#8217;ll be able to organize and style this page however you like.\u003C/p\u003E\n\u003Cp\u003E\u003Cstrong\u003ETo get started adding products to your shop, head over to the \u003Ca href="/admin"\u003EAdmin Area\u003C/a\u003E.\u003C/strong\u003E\u003C/p\u003E\n\u003Cp\u003EEnjoy the software, \u003Cbr /\u003E\nYour Shopify Team.\u003C/p\u003E";
jsonフィルタは、Liquidオブジェクトを、JavaScriptで読めるようにするためにも使用されます。
var json_product = {{ collections.featured.products.first | json }};
var json_cart = {{ cart | json }};
商品の在庫とJSONフィルタについて
2017年12月5日以降に作成されたShopifyのストアでは、JSONフィルタはinventory_quantityとinventory_policyの値を出力できません。
これは、ボットやクローラーが、アクセスを許可されていないストアの在庫量を取得するのを防ぐためです。
JSONフィルタの代わりに、variant.inventory_quantityやvariant.inventory_poricyを使用することで在庫の情報にアクセスすることができます。
weight_with_unit
商品の重量に単位を付けます。
{{ product.variants.first.weight | weight_with_unit }}
24.0 kg
重量単位は、Shopifyストアの一般設定で設定することができます。

フィルタに異なる単位を渡すことで上書きすることができます。
それぞれの商品に独自の単位を設定したいときに使います。
{{ variant.weight | weight_with_unit: variant.weight_unit }}
52.9 lb
placeholder_svg_tag
placeholder 名を取得し、placeholder SVG イラスト( <svg>タグ )を出力します。
{{ 'collection-1' | placeholder_svg_tag }}
<svg xmlns="http://www.w3.org/2000/svg" viewBox="0 0 525.5 525.5">...omitted for brevity...</svg>
Custom class attribute
クラスパラメータを渡すことで、SVGタグにclass属性を与えることができます。
{{ 'collection-1' | placeholder_svg_tag: 'custom' }}
<svg class="custom" xmlns="http://www.w3.org/2000/svg" viewBox="0 0 525.5 525.5">...omitted for brevity...</svg>
placeholder名と画像は以下の表にまとめました。
| Placeholder name | Preview |
|---|---|
| collection-1 |  |
| collection-2 |  |
| collection-3 |  |
| collection-4 |  |
| collection-5 |  |
| collection-6 |  |
| image |  |
| lifestyle-1 |  |
| lifestyle-2 |  |
| product-1 |  |
| product-2 |  |
| product-3 |  |
| product-4 |  |
| product-5 |  |
| product-6 |  |
終わりに
今回の記事はここまでになります。
お疲れさまでした。
Shopify アプリのご紹介
Shopify アプリである、「商品ページ発売予告アプリ | リテリア Coming Soon」は、商品ページを買えない状態のまま、発売日時の予告をすることができるアプリです。Shopify で Coming Soon 機能を実現することができます。