LIFULL Advent Calendar 2019 12日目の記事になります。
フロントエンドエンジニアのえびです。
好きな寿司ネタはえんがわです。
第三次タピオカブーム到来
2019年を一言で総括すると タピオカ でした。
タピオカブームの兆しは2018年からありましたが、
日本全体を巻き込むムーブメントへ成長したのは間違いなく今年でしょう。
Qiitaでもタピオカ記事がたくさん挙がっていました。
そこでnuxt.js + firebase でtwitterにOGP共有できるタピオカクソアプリを作りました。
クソアプリ
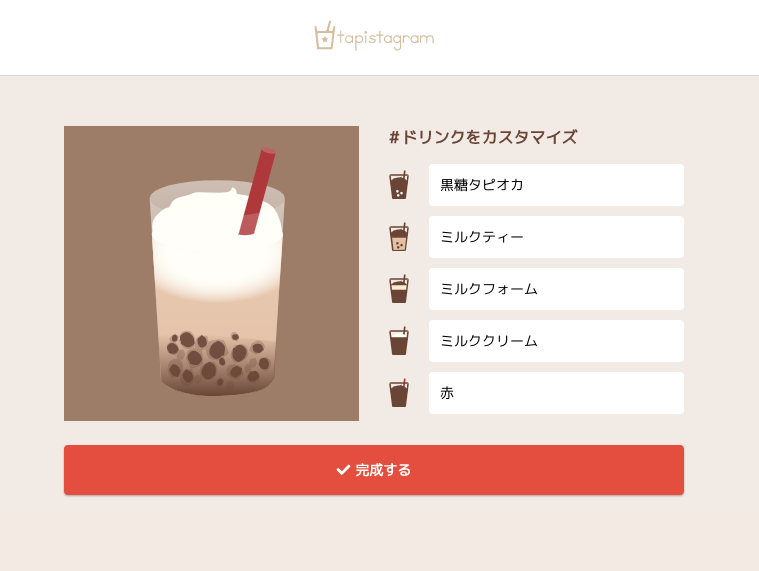
tapistagramという、どこかで聞いたような名前のwebアプリです。
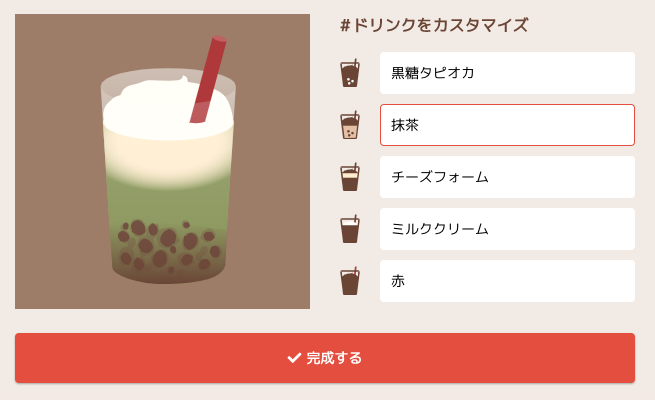
好きなタピオカドリンクの材料を組み合わせてオリジナルのタピオカ画像を生成します。
作った画像はtwitterで共有し、どのタピオカが最強かTLで楽しむことができます。
それだけです。
設計
ごく普通のnuxt+firebaseの構成です。
- nuxt.js: フロントでSVGをこねくり回す
- firestore: 作成したタピオカのidと画像URLを保存
- storage: 生成したタピオカ.pngを突っ込む
- cloud function: twitterに読ませるOGPmetaURLを生成
- hosting: デプロイ&ホスティング。特になし
実装
tapioca.svg
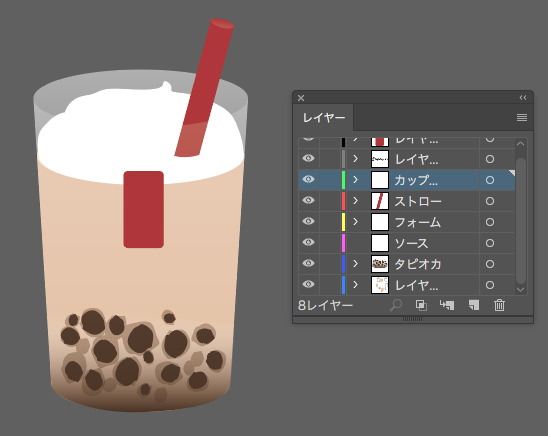
ジェネレーター用のパーツ素材を用意します。
Illustratorでタピオカドリンクを描き、パーツをレイヤーごとに分けていきます。
今回はイラレですがベクター扱えるやつならなんでもいいですし、
修羅の国の人ならpathから書けば良いと思います。
SVGで書き出すとコードで扱えるようになるので、そこから各パーツをコンポーネント化し、
:fillでカラーをバインディング出来るようにしておきます。
以下はドリンクの部分です。
<template>
	<g width="100%" height="100%">
		<path :fill="drink.color" d="M311.7,183.7c-73.1,0-132.4,16.3-132.9,36.4l0.1,1.8c3,19.5,61.3,35.1,132.8,35.1
			c71.5,0,129.8-15.6,132.8-35.1l0.1-1.8C444.1,200,384.8,183.7,311.7,183.7z"/>
		<path :fill="drink.color" d="M311.7,257c-71.5,0-129.8-15.6-132.8-35.1l18.2,291.3h0c1.1,19.9,52,36,114.6,36s113.4-16.1,114.6-36h0
			l18.2-291.3C441.5,241.4,383.2,257,311.7,257z"/>
		<path fill="#fff" style="opacity: .3" d="M311.7,183.7c-73.1,0-132.4,16.3-132.9,36.4l0.1,1.8c3,19.5,61.3,35.1,132.8,35.1
			c71.5,0,129.8-15.6,132.8-35.1l0.1-1.8C444.1,200,384.8,183.7,311.7,183.7z"/>
    </g>
</template>
ジェネレーターを作る
SVGを並べる
レイヤー順に倣ってパーツを配置します。
<svg ref="svgArea" viewBox="0 0 600 600">
    <Bg />
    <CupBack />
    <Drink />
    <Tapioca />
    <Foam />
    <Cream />
    <Straw />
    <CupFront />
</svg>
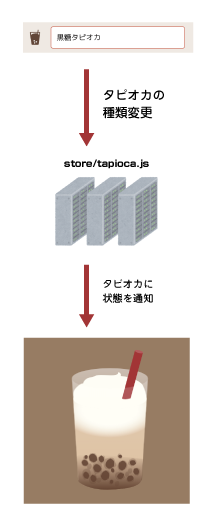
味変=パーツの色を変えられるようにしたいので、storeで各パーツの状態を管理できるようにします。
storeを使うと各コンポーネントの関係を考慮することが減るのでvuex様様です。
nuxtだとstoreのimportも自動で行ってくれるので大変楽ですね。
import Vue from 'vue'

import material from '@/apis/material'
// ex. { tapioca: [{ name_jp: '黒糖タピオカ, color: #ddd}], drink: [{...

export const state = () => ({
    tapioca: material.tapioca[0],
    drink: material.drink[0],
    foam: material.foam[0],
    cream: material.cream[0],
    straw: material.straw[0]
})
export const mutations = {
    changeParts (state, payload) {
        const category = payload.category
        const part = payload.part
        state[category] = part
    }
}
export const actions = {
    changeParts ({ commit }, payload) {
        commit('changeParts', payload)
    },
}
export const getters = {
    getTapioca (state) {
        return state.tapioca
    },
    getDrink (state) {
        return state.drink
    },
    ...
}
パーツ部分はmapGettersで該当パーツのデータを引っ張ってきます。
<script>
import { mapGetters } from 'vuex'
export default {
    data() {
        return {}
    },
    computed: {
        ...mapGetters ({
            drink: 'tapioca/getDrink'
        })
    }
}
</script>
状態を変更するセレクトボックスです。
※親コンポーネントからv-forで値を受け取っている前提
v-modelで値をバインディングして、storeへcommitします。
<template>
    <label class="selectBox">
        <select v-model="part" @change="changeParts">
            <option v-for="(parts, index) in arr" :key="index" :value="parts">{{ parts.name_jp }}</option>
        </select>
    </label>
</template>

<script>
import { mapGetters } from 'vuex'

export default {
    props: {
        category: {
            type: String,
            default: 'tapioca'
        },
        arr: {
            type: Array,
            default: null
        }
    },
    data() {
        return {
            part: this.arr[0]
        }
    },
    methods: {
        changeParts () {
            const category = this.category
            const part = this.part
            const payload = { category, part }
            this.$store.commit('tapioca/changeParts', payload)
        }
    }
}
</script>
画像データの作成・保存
SVGをthis.$refsで参照してpngに変換後、firestore, storageへそれぞれデータを保存します。
生成系の処理はstore/generate.jsを作成し、タピオカの状態管理とは別にしておきます。
(スピード重視でstoreにガーッと書きましたが適宜componentに持たせた方がいいと思います。。)
<p class="generate">
    <button type="button" @click="generate">完成する</button>
</p>

<script>
methods: {
  async generate () {
    const refs = this.$refs.svgArea
    const name = this.tapiocaName
    this.$store.dispatch('generate/onGenerated', {
      refs, name
    })
 },
}
</script>
import firebase from '@/plugins/firebase'
import canvg from 'canvg'
import nanoid from 'nanoid'
const db = firebase.firestore()
const generated = db.collection('generated')

export const state = () => ({
    generatedImageUrl: '',
    name: '',
})

export const mutations = {
    changeGeneratedImageUrl (state, payload) {
        state.generatedImageUrl = payload.imageUrl
        state.name = payload.name
    },
}

export const actions = {
    /**
     * generateボタンが押された時のハンドラ
     * @param {*} param0
     * @param {Object} payload { refs: ? } SVGのRef
     */
    async onGenerated ({ dispatch }, payload) {
        const refs = payload.refs
        const name = payload.name

        const id = nanoid()

        // 画像生成&保存
        const image = await dispatch('createImage', refs)
        await dispatch('saveImage', { image, name, id })

        // 一連の処理が終了したら生成ページへ飛ばす
        await dispatch('toGeneratedPage', { id })
    },

    /**
     * SVG RefsからimageURLを生成するメソッド
     * @param {*} param0
     * @param {*} refs SVG Refs
     */
    async createImage ({}, refs) {
        const canvas = document.createElement('canvas')
        canvas.width = 500
        canvas.height = 500

        // SVG → Canvas 変換
        const data = new XMLSerializer().serializeToString(refs);
        canvg(canvas, data)

        // imageURLを返す
        return canvas.toDataURL('image/png').split(',')[1]
    },

    /**
     * 画像をfirestore/storageに保存するメソッド
     * @param {*} param0
     * @param {*} image 画像データ
     */
    async saveImage ({ dispatch }, payload) {
        const image = payload.image
        const name = payload.name
        const id = payload.id

        // storageへ保存
        const storageRef = firebase.storage().ref();
        const createRef = storageRef.child(`generate/${id}.png`);

        await createRef.putString(image, 'base64').then((snapshot) => {
            console.log('保存しました');
        }).catch((err) => {
            console.log('保存に失敗しました')
        })

        // storageから参照URLを取得してからfirestoreへ保存
        const imageUrl = await createRef.getDownloadURL()
        await generated.doc(id).set({
            url: imageUrl,
            name
        })
    },

    /**
     * 生成ページへ飛ばすメソッド
     * @param {*} param0
     * @param {*} payload {id: String}
     */
    async toGeneratedPage({}, payload) {
        const id = payload.id
        this.$router.push(`/generate/${id}/`)
    },
}
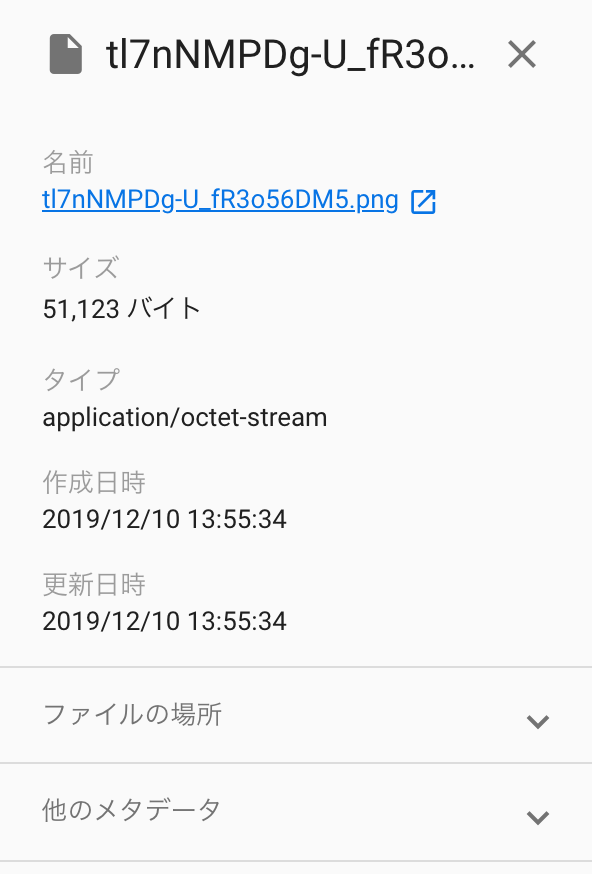
storage, firestoreを確認すると無事に保存できています。

生成した画像をブラウジングする
生成したら結果を返さなくてはいけません。リザルトページを作ります。
nuxt.jsではpagesでアンスコを付けたdirectoryを掘るとparamsに応じた動的なルーティングが行えます
参考:nuxt.js/ルーティング
pages/generate/:id/index.vueを新規作成し、
paramsから画像URLを取得してviewに反映させましょう。
<template>
  <section class="sec-container">
    <figure v-if="generatedImageUrl" class="generatedImage">
      <img :src="generatedImageUrl">
      <figcaption>#{{ name }}</figcaption>
    </figure>
  </section>
</template>

<script>
import { mapGetters } from 'vuex'
import firebase from '@/plugins/firebase'

export default {
  validate ({ params }) {
    return /^[a-zA-Z0-9]+$/.test(params.id)
  },
  components: {
  },
  data() {
    return {
        id: ''
    }
  },
  computed: {
    ...mapGetters({
      generatedImageUrl: 'generate/getGeneratedImageUrl',
      name: 'generate/getName'
    }),
  },
  mounted () {
    // id取得
    const id = this.$route.params.id
    this.id = id;
    this.$store.dispatch('generate/getImageUrl', {id: id})
  },
}
</script>

<script>
import { mapGetters } from 'vuex'
import firebase from '@/plugins/firebase'

export default {
    validate ({ params }) {
        return /^[a-zA-Z0-9]+$/.test(params.id)
    },
    components: {
    },
    data() {
        return {
            id: '',
            url: `https://tapistagram.firebaseapp.com/share/`,
            twitterUrl: "https://twitter.com/intent/tweet?",
        }
    },
    computed: {
        ...mapGetters({
            generatedImageUrl: 'generate/getGeneratedImageUrl',
            name: 'generate/getName'
        }),
        twitterLink () {
            const twitterUrl = this.twitterUrl
            const url = `url=${this.url}${this.id}`
            const text = `&text=私の推しタピオカは${this.name}`
            const hashtags = `&hashtags=tapistagram`

            return twitterUrl + url + text + hashtags
        }
    },
    mounted () {
        const id = this.$route.params.id
        this.id = id;
        this.$store.dispatch('generate/getImageUrl', {id: id})
    },
    methods: {
        init () {
            this.$store.commit('generate/changeGeneratedImageUrl', {imageUrl: '', name: ''})
        }
    }
}
</script>
storeでgetします
export const state = () => ({
    generatedImageUrl: '',
    name: '',
})
export const mutations = {
    changeGeneratedImageUrl (state, payload) {
        state.generatedImageUrl = payload.imageUrl
        state.name = payload.name
    },
}
export const actions: {
    /**
     * 画像URLをfirestoreから取得するメソッド
     * @param {*} param0
     * @param {Object} payload { id: String } リクエストされたID
     */
    async getImageUrl ({ commit }, payload) {
        let imageUrl = ''
        let name = ''
        const id = payload.id
        const doc = await generated.doc(id).get()
        if(doc.exists) {
            const data = await doc.data()

            imageUrl = data.url
            name = data.name
        }
        await commit('changeGeneratedImageUrl', {imageUrl, name})
    },
}
export const getters: {
    getGeneratedImageUrl (state ) {
        return state.generatedImageUrl
    },
    getName (state) {
        return state.name
    },
}
遷移後のページでpng画像が表示されました。

OGP設定
Cloud Function
twitterでOGPを出すにはmetaタグにdescription, imageなどを埋め込む必要があります。
しかし普通にpagesで処理しようとすると大変辛いのでcloud functionsでmeta解釈用のページを作ります。
※以下の記事をめちゃくちゃ参考にさせていただきました🙇
[Nuxt.js + FirebaseでOGPの仕組みを完全に理解した 〜俳句をSVGで描画するサービスをリリースした話〜]
(https://qiita.com/mitsudaman/items/1956b94dc8faf8fb8c59)
Vue.jsとFirebaseでOGP画像生成系のサービスを爆速で作ろう
// express初期化
const express = require('express')
const app = express()

// firebase初期化
const functions = require('firebase-functions')
const admin = require('firebase-admin')
admin.initializeApp()
const db = admin.firestore()

const SITE_NAME = 'tapistagram'
const TITLE = 'tapistagram'
const META_DESCRIPTION = 'タピオカをつくるやつ'
const META_KEYWORDS = ['タピオカ']
const OG_IMAGE_WIDTH = 500
const OG_IMAGE_HEIGHZT = 500
const TW_SITE = ''

const genHtml = (id, url, name) => `
<!DOCTYPE html>
<html>
  <head>
    <meta charset="utf-8">
    <title>${TITLE}</title>
    <meta name="description" content=${META_DESCRIPTION}>
    <meta name="keywords" content=${META_KEYWORDS.join(',')}>
    <meta property="og:locale" content="ja_JP">
    <meta property="og:type" content="website">
    <meta property="og:url" content=${url}>
    <meta property="og:title" content=${TITLE}>
    <meta property="og:SITE_NAME" content=${SITE_NAME}>
    <meta property="og:description" content=${name}>
    <meta property="og:image" content=${url}>
    <meta property="og:image:width" content=${OG_IMAGE_WIDTH}>
    <meta property="og:image:height" content=${OG_IMAGE_HEIGHZT}>
    <meta property="fb:app_id" content=${FB_APPID}>
    <meta name="twitter:card" content="summary_large_image">
    <meta name="twitter:title" content=${TITLE}>
    <meta name="twitter:description" content=${name}>
    <meta name="twitter:image" content=${url}>
    <meta name="twitter:site" content=${TW_SITE}>
  </head>
  <body>
    <script>
      // クローラーにはメタタグを解釈させて、人間は任意のページに飛ばす
      location.href = '/generate/${id}/';
    </script>
  </body>
</html>
`

app.get('/share/:id', async (req, res) => {
  const id = req.params.id

  // idからfirestoreの情報を引っ張ってくる
  const doc = await db.collection('generated').doc(id).get()
  if (!doc.exists) {
    console.log(`${id} not exist`)
    res.status(404).send('404 Not Exist')
    return
  }

 const url = doc.data().url
 const name = doc.data().name
 const html = genHtml(id, url, name)

 res.set('cache-control', 'public, max-age=3600');
 res.send(html)
})
exports.share = functions.https.onRequest(app)
{
  "database": {
    "rules": "database.rules.json"
  },
  "hosting": {
    "public": "dist",
    "ignore": [
      "firebase.json",
      "**/.*",
      "**/node_modules/**"
    ],
    "rewrites": [
      {
        "source": "/share/**", "function": "share"
      },
      {
        "source": "**",
        "destination": "/index.html"
      }
    ]
  },
  "storage": {
    "rules": "storage.rules"
  }
}
そしてbuild
$ npm run build
$ firebase deploy
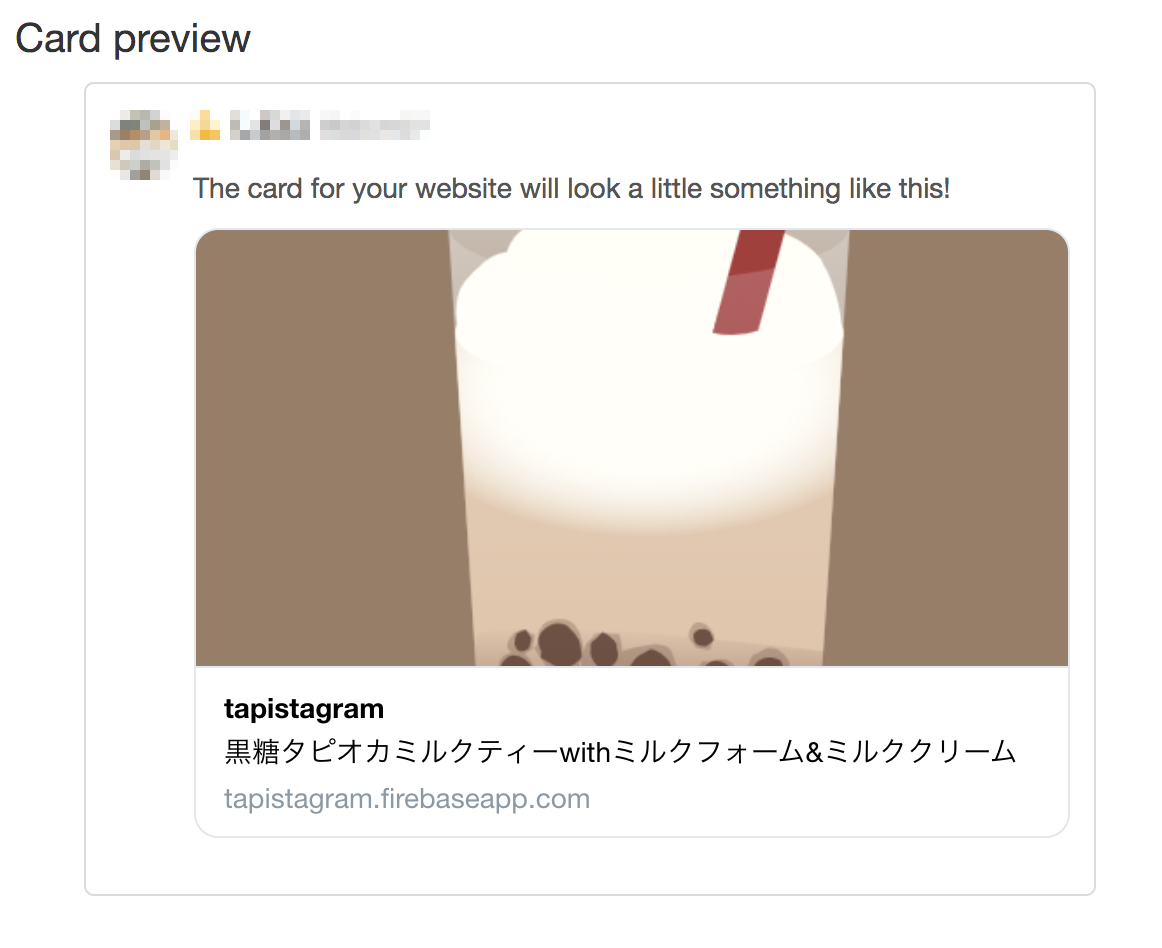
card validatorに突っ込むと画像とタイトルが読み込まれました😭
https://tapistagram.firebaseapp.com/share/natHbYfSgpQQCjuRxd6Ff
共有リンクをつくる
あとはtwitterの共有ボタンを作っておしまいです。
tweetリンクにurl,text,hashtagを渡すだけ。
<p class="share">
    <a :href="twitterLink" target="_blank"><i class="fab fa-twitter"></i>シェアする</a>
</p>
<script>
props: {
  id: {
    type: String,
    default: ''
  }
},
data () {
  return {
    url: `https://tapistagram.firebaseapp.com/share/`,
    twitterUrl: "https://twitter.com/intent/tweet?",
  }
},
computed: {
  twitterLink () {
    const twitterUrl = this.twitterUrl
    const url = `url=${this.url}${this.id}`
    const text = `&text=私の推しタピオカは${this.name}`
    const hashtags = `&hashtags=tapistagram`

    return twitterUrl + url + text + hashtags
  }
}
</script>
 完成!優勝!
完走した感想
OGP画像使ったジェネレーターは作ったことがなかったんですが、
この構成だと爆速で作れてnuxtとfirebaseサイコーってなりました(語彙力)
VueはSVG操作に強くパーツをアプリ上でこねくり易いのでジェネレーター作るのにもってこいですね。
今回は色変更のみでしたが、位置操作や細かいカスタマイズもできるようにアップデートしたいです💪( ◜ω◝ )
参考リンク
[Nuxt.js + FirebaseでOGPの仕組みを完全に理解した 〜俳句をSVGで描画するサービスをリリースした話〜]
(https://qiita.com/mitsudaman/items/1956b94dc8faf8fb8c59)
Vue.jsとFirebaseでOGP画像生成系のサービスを爆速で作ろう
ツイッターのシェアボタンにハッシュタグを設定する

